


0 of 0
About this mod
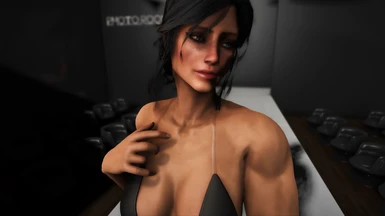
This kit is tailored specifically to address neck seams in Fallout 4, ensuring a seamless transition between the neck and body textures.
- Requirements
- Permissions and credits
- Changelogs
- Donations
Welcome to JAWN's Neck Seam Kit for Fallout 4!
This kit is tailored specifically to address neck seams in Fallout 4, ensuring a seamless transition between the neck and body textures when using skin texture mods, including matching the diffuse, normal, and specular maps. Please be aware that some neck seems issues come from the actual meshes vertex shading. So, start with this kit on default cbbe body and default Fallout 4 face models. Once you've set up your seem-less textures you can then start to add back your body mods and face mods. Here's a breakdown of how to use it effectively:
This kit is tailored specifically to address neck seams in Fallout 4, ensuring a seamless transition between the neck and body textures when using skin texture mods, including matching the diffuse, normal, and specular maps. Please be aware that some neck seems issues come from the actual meshes vertex shading. So, start with this kit on default cbbe body and default Fallout 4 face models. Once you've set up your seem-less textures you can then start to add back your body mods and face mods. Here's a breakdown of how to use it effectively:
Before making any edits, ensure you either save your version under a new name or duplicate layers for editing to preserve the original files.
Requirements:
- Software: Adobe Photoshop is recommended for full functionality. Alternatively, GIMP version 2.99.18 can be used to open the PSB file, though some features may not be fully supported.
- Intel® Texture Works Plugin for Photoshop: Download and install this plugin to save files as DDS format here.
- For users aiming for 2K or 4K face textures, please refer to this guide, as all face textures (including tints and makeup) need to be of the same resolution.
Instructions:
1. Open the PSD File:
- Launch Adobe Photoshop and open the provided PSD file from the Neck Seam Kit.
2. Import Your Face Texture:
2.1 - Locate your preferred face texture either in loose form or within a BSA archive using Bethesda Archive Extractor (Download link).
2.2 - Drag the face texture into the Photoshop workspace.
3. Place Texture Under Neck Seam Layer:
3.1 - In the Layers panel, find the "Neck Seam" layer.
3.2 - Drag your imported face texture layer directly below the Neck Seam layer. This ensures proper alignment and blending between the face and body textures. Size texture to fill canvas if needed.
4. Adjust Skin Tone (If Necessary):
4.1 - If you need to match the skin tone between the face and body textures:
4.2 - Locate the "Skin Color" layer in the Layers panel.
4.3 - Adjust the settings on this layer to match the skin tone of both the face and body textures.
4.4 - Ensure that the settings are consistent for both body and face seem diffuses to maintain a uniform appearance.
5. Exporting Textures (Continued):
Follow the steps outlined in the Neck Seam Kit guide for exporting textures:
5.1 - Set up textures in Photoshop.
5.2 - Export to PNG format without transparency, preserving details.
5.3 - Downscale textures to the desired resolution.
5.4 - Utilize GIMP to convert PNGs to DDS files, ensuring compatibility.
5.5 - Adjust export settings as necessary to maintain quality and consistency across all texture maps.
Texture Resolution:
Select the appropriate texture resolution based on your preferences:
- 1K: 1024x1024px (Base game resolution)
- 2K: 2048x2048px (HD DLC resolution)
- 4K: 4096x4096px (Best quality for 90% of players)
- 8K: 8192x8192px (Recommended only for body textures)
Exporting Textures:
- Set up textures in Photoshop.
- Export to PNG format without transparency and preserving details.
- Downscale textures to the desired resolution.
- Utilize GIMP to convert PNGs to DDS files, as GIMP natively supports this format.
Export Settings in GIMP:
- Ensure "Perceptual error metric" is checked for all textures.
- Enable "Generate mipmaps" to maintain quality during movement.
Recommended Export Settings in GIMP:
- Diffuse (compression BC3/DXT5)
- Normal, and Specular (compression BC5/ATI2 (3Dc))