Documentation
Readme
View as plain text
Name: Arwen's Realism Tweaks
Version: 8.1
Date: January 31, 2014
Category: Gameplay Effects and Changes
Requirements: Fallout 3 patched to v.1.7; FOSE (Fallout Script Extender)
Author: Arwen_Eve (Arwen)
Source: http://www.nexusmods.com/fallout3/mods/7565/?
Forum: http://arwen.freeforums.org/index.php
Website: http://arwenevecom.ipage.com/Fallout/FO-mods04.htm
*** Requires Fallout Script Extender (FOSE) [v.1.1 or later : http://fose.silverlock.org/]
- If you began a new game with version 8.0, those saves will work just fine with this update. If you were using older versions of my Realism Tweaks (or were not previously using my Tweaks) you NEED to start a new game with this version! This mod has always been intended for use in a new game, and this is especially true after v.8.0, as my Hard-Core module and Endurance modules are now integrated into my Realism Core.
Major changes in Version 8.1:
=============================
- This is a minor update, mainly to fix a number of bugs (that I missed in v.8.0), but I also made some new changes to correct some balancing issues.
- My "Realism Tweaks User Guide" (Word doc) has been expanded and updated to version 8.1.
*** Realism Core changes:
- Fixed bug where the Tagged Skill multiplier was being reset to 1X when a save was loaded.
- Fixed a bug, where my More/Less Difficult Hard-Core settings were getting reset to the default game�s values on load.
- Fixed a number of bugs in my Rookie Quest, that broke the script if certain events happened while it was running, which stopped you from receiving credit for you skill uses.
- Added a message that will display every 8 game hours to show your progress towards removing a Rookie Penalty point for each Stat (previously you only received a message after a full penalty point was removed). So now you will have confirmation every 8 hours (at most) that the Rookie Quest is still running correctly, and you'll be able to see your progress in removing your Rookie Penalties.
- Also added new global, that allows you to end the Rookie Quests (and remove all your Rookie Penalties), by entering the following in your Console: Set ArwenRookieEnd to 1
- Fixed bugs in the following perks: Adamantium Skeleton, Better Criticals, Black Widow, Bloody Mess, Chem Resistant, Commando, Concentrated Fire, Entomologist, Gunslinger, Lady Killer, Lead Belly, Ninja, Pyromaniac, Robotics Expert, Sniper, and Weapons Expert. [These perks all have Entry Point multipliers, which were apparently reset to 0 in v.8.0, when I merged two of my modules into a single module.]
- FastRun: hitting the Activate key no longer makes a crouched player stand up, when the CapsLock is on, unless the player is moving.
*** Med-Tec changes:
- Adjusted my Armor Level calculations so that it now takes roughly 50% more DR to gain the higher Armor Levels. The difference between 1DR and 16DR is now a +4 Armor Level increase, while the difference between 17DR and 44DR is only a +1 Armor Level increase.
- Your Armor Level is now calculated differently when you not wearing any body armor (such as when you have Perks that add DR, and/or when you are only wearing a helmet). When not wearing body armor, the maximum Armor Level you can now reach is 5.
- Removed my Armor Level message, as it was being displayed far too often under some conditions, and it was no longer really needed, now that a user can always check Armor Level during a full Med-Tec scan (now even when all your Needs are < 1).
- Rebalanced the healing effect of Purified Bottled Water, for all Endurance levels. Now restores HPs when your Water Need is greater than 0, AND when your Heath is lower than 50% [was less than 70HPs]. If your Water Need is at least 8 ounces, drinking Purified Bottled Water will very slowly restore your Health back to 40-50% of your Permanent HP amount [was up +35HP instant heal; new rate is only +1HP every 5 seconds]. When your Water Need is less than 8 oz, the amount of healing is still proportional to your Water Need.
- Minor change/addition made to Full Scan menu, so that users can check their Armor Level even when their Food, Water, and Sleep Needs are all less than 1.
- Minor change to Butcher Quest script now uses new ArwenButcherKnives Form List which contains accepted knives.
*** Realism Core GOTY Patch (Arwen_Realism_GOTY_Patch.esp):
- Fixed bugs in the following perks: Superior Defender, Auto Axpert, Swing For The Fences. [These perks all have Entry Point multipliers, which were apparently reset to 0 in v.8.0, when I merged the former GOTY modules into this single module.]
*** Full GOTY Patch (Arwen_Full_GOTY_Patch.esp; use when Med-Tec is also installed):
- Fixed Aqua Pura, Aqua Cura, and Holy Water; so that they correctly quench your thirst (plus they now include my drinking animation).
- Fixed improper model flag in Unique Weapon Steel Knuckles.
- Added trench knife [DLC Combat Knife] to ArwenButcherKnives Form List, so that it will work with Butcher Quest.
*** MMM/Med-Tec Patch (Arwen_MMM_Med-Tec_Patch.esp):
- Edited Butcher Quest script to use new ArwenButcherKnives Form List. Also made changes to script so that it should now work properly with all MMM's creatures.
Description and Concept:
=======================
- I created my Realism Tweaks to make my game play much more realistic, challenging, and balanced (and to compliment the other mods that I am using: http://arwenevecom.ipage.com/Fallout/FO-mods.htm).
- My goal has always been to make FO3 more immersive and more realistic within the context of Fallout's alternate reality, which is a place where radiation causes mutations as often as death, and where injuries can be healed with a stimpak injection.
- The Fallout games are RPGs, but I felt that FO3's role-playing aspects were rather weak in many areas. For me, a Role-Playing Game is more realistic when I can role-play without having to work at it. I have a great imagination, but I wanted the game itself to impose some real consequences and limitations on my character, instead of just pretending that these things existed. My goal was to do this in a way that also made the game more challenging.
- With my Tweaks installed, your Skills and Stats now become much more important in how your game will play out for you (so take your time when you distribute your SPECIAL points). Installing my optional Med-Tec and One Life modules will make this harsher game world an even more challenging place, where the Wasteland may actually feel like a harsh, unforgiving wasteland. You may also discover that the game is now a lot more fun. My Realism Tweaks is a Fallout 3 overhaul, so it makes some rather dramatic changes to the game (changes roughly 2200 records and includes over 100 custom scripts).
- Do NOT install this mod unless you want the Wasteland to be a harsher place where you will have to struggle just to survive.
- Please do no make requests that I remove my skill damage increases, as that is totally contrary to my goal of making Fallout 3 a better RPG. One of the main elements of a RPG has always been that the amount of damage you do is ALWAYS determined by your skill level. Remove that, and you pretty much negate any reason to ever advance your skills. The way my mod handles weapon skill is that you gain a weapon damage BONUS as your weapon skills increase. This is just like the way that Perks give you bonuses.
IMPORTANT: My mod is balanced for NORMAL Difficulty. Using a Hard or Very Hard difficulty setting will just make the NPCs and Creatures even more difficult to kill (it will take more bullets), and your character will even be easier to kill. My Realism Tweaks already does both (mostly in my own unique ways). My Realism Tweaks are meant to be used together, so game balancing was done with all my modules loaded (with all my default settings enabled).
My Realism Tweaks makes more changes and is way more complex, than I can possibly cover in a ReadMe (even one this long). The full details on all my changes are listed in the Realism Tweaks section my FO3 Journal: <http://arwenevecom.ipage.com/Fallout/FO-mods04.htm>. You should also take a look at my "Realism Tweaks User Guide" Word doc. If you just install my mod, without taking the time to understand how it changes the game, your character will not likely survive for very long.
CORE MASTER (Arwen_Core.esm) & REALISM CORE (Arwen_Realism_Core.esp):
=====================================================================
The Core Master and Realism Core module are required! The other modules are optional. The full details on all my changes are listed in the Realism Tweaks section my Fallout 3 Journal: <http://arwenevecom.ipage.com/Fallout/FO-mods04.htm>. My Realism Tweaks are mostly activated at the very beginning of the game (or whenever you install and activate it), but does not fully kick in until all my Quests have finished. [The Realism Core contains three initialization quests: the Realism Core Quest, Encumbrance Quest, and Hard-Core Quest.]
IMPORTANT! My Realism Tweaks were designed to be used when starting a new game. This is especially true after version 8.0 (when my Hard-Core module was integrated into my Realism Core module). If you add my Tweaks in an existing game, your skills are going to take a major hit and some of my other skill changes might cause major problems (it would depend on what perks and skill books you have used). The other thing is that the spawn loot will not be reduced with a saved game. You should never add my Realism Tweaks to your current game, if you have advanced higher than Level 2.
Unless otherwise noted, all my changes are in reference to the default game (not including any DLC).
*** REALISM CORE QUEST (and core changes):
- Begins after Amata wakes you and you leave your Vault apartment during the Escape quest (and are not flagged as being in combat). After a few game minutes, my pop-up welcome message will be displayed and my Options Menu, will be added to your inventory.
- This quest ends about 1 real minute after you exit Vault 101, when you will receive my 2nd message, and my Realism Tweaks note is added to your inventory. [Note: My Fatigue and Strain HUD meters will not be displayed unless you have followed my HUD Setup instructions exactly.]
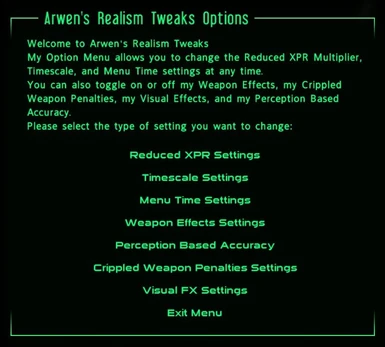
- [Arwen's Option Menu] (in PipBoy inventory, under "Aid"): in-game selection of many features and settings that enable you to customize how my mod affects your game play. Most of my optional features are enabled by default, so you need to disable the ones you do not want.
- Reduced Carrying Capacity (gender based), but armor now weighs less when you are wearing it.
- Reduced Health Points (gender based): Player has an average of 30 fewer HPs and no longer gain HPs when leveling up. Level 1 NPCs generally have more HPs (than default game), with Endurance now being a much greater factor, but only gain +3 HPs/level (default was +5/level).
- More immersive and more balanced VATS, with new Action Points formula (with Agility being a greater factor).
- Smarter AI: combat with NPCs is now much more challenging, and sneaking is now much more realistic.
- Dynamic Stealth: factors in time of day, weather conditions, interior/exterior cell type, player's Sneak skill, and the player's actions. Your Perception now increases by 1 point when you are sneaking (only when your Health is greater than 50%).
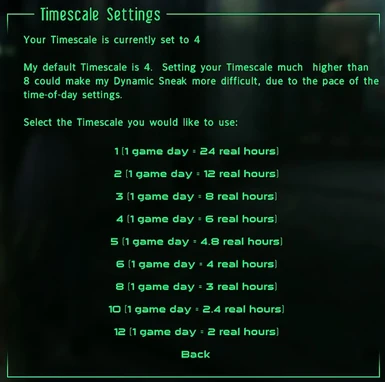
- Timescale Settings (adjustable): allows you to easily change your Timescale (my default TS is 8). This is done through a special script, so that the selected Timescale will work properly with my other Time options.
- Dynamic Timescale (optional): 50% slower Timescale in interior cells, during combat, or when your health is lower than 25%.
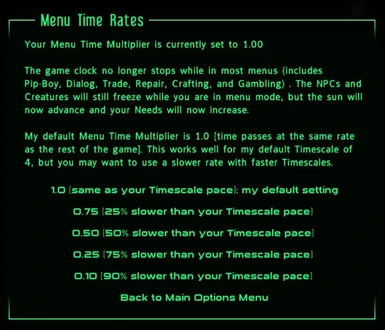
- Menu Time (adjustable): the game clock no longer stops while in menus.
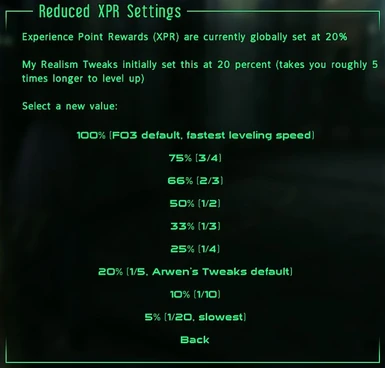
- MY XPR Multiplier (initially set at 20% default) slows down how fast you level up by globally reducing ALL experience points rewards.�
- The Wasteland is now a much less forgiving place. Your character is now weaker and much more vulnerable, and the NPCs are stronger and healthier (with better armor and weapons across all levels).
- Pain has greater effect on player, and swimming or wading in radioactive water is now 10 times more deadly. Burns continue to damage HP after the flames stop (and include my Agility penalties). Poisons do more HP damage, over a MUCH longer duration (and also include Agility penalties).
- Localized Damage: strategic hits are more effective (such as crippling shots), and head shots now do a LOT more damage. Super Mutants are now VERY hard to kill.
- Increased Weapon Skill DAM multiplier (a Bonus multiplier, not a penalty reduction, that increases weapon damage up to 3x).
- All weapons rebalanced: underpowered weapons were improved and overpowered weapons were reduced in DAM/sec. Skill and weight requirements were increased for many weapons. Condition of ranged weapons now has a more effect on how much damage it does, and damaged weapons will not fire as fast and have greater chance of jamming after reloading. Automatic Weapons take a bit longer to cool down. Removed the zoomed-in view when aiming most non-scoped pistols (and a couple of the rifles), but scopes added with mod kits will still zoom correctly.
- Weapon Ability Penalties (optional): you will be increasingly less effective when your skills are lower than a weapon's skill requirement, or when your Strength is lower than a weapon's strength requirement. If your stats are too low, you will not be able to use some weapons (less than 30% of skill requirement, or more than 3 points below strength requirement). [Note: Weapon skill requirement is based on Weapon DAM, and STR requirement is based on Weapon weight.]
- Tougher Crippled Arm Penalties (optional): Your Strength and Weapon Skills are reduced and you cannot use VATS when an arm is crippled. Penalties are greater for a crippled right arm than for a left arm, and even greater when both arms are crippled. But does not directly prevent you from using any weapon.
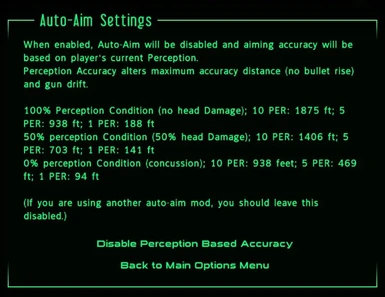
- Skill Based Accuracy (optional): aiming accuracy is based on your skill for that type of weapon (also dynamically improves Auto-Aim, as your weapon skill increase).
- Pip-Boy Locked during Combat (optional): The default Hotkeys (1-8) will still work, so you will only be able to equip a hotkeyed item. Once the "No Pip-Boy during combat" message is displayed, your Pip-Boy will be unlocked after 30 seconds, even if you are still flagged as being in combat, but your weapon must be holstered and you have to be in Sneak mode. (Going out of Sneak or equipping a weapon will lock your Pip-Boy and reset the timer.)
- Balances armor/clothing values, weight, damage resistance, and "enchanted" effects. Most armor now weighs 50% less when worn, and equipped Power Armor weighs only 25% as much. Helmet AR now equals 25% of total armor AR.
- Enhanced repair lists for both weapons and armor.
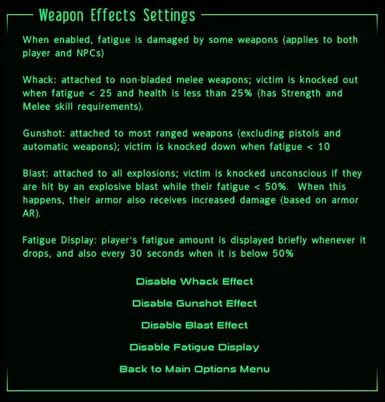
- Unique Weapon Effects (optional): Gunshot knock downs, Whack and Blast knockouts, based on Armor Rating.
- Fatigue HUD, displays fatigue as a percentage (how fatigued you are). When you reach 100% fatigue, you pass out. To move Fatigue display, hold down crouch key, and use arrow keys.
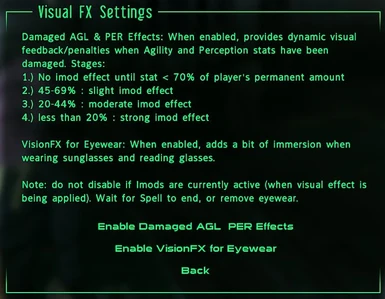
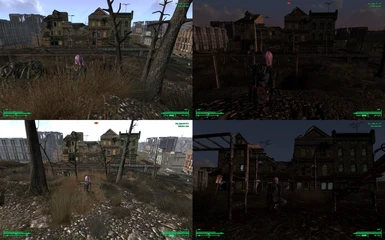
- Unique Visual FXs (optional): when wearing sunglasses and reading glasses; and for damaged AGL and PER.
- More realistic explosions, projectiles, grenade physics, and death force effects. Spent shells now last 4 game hours.
- Adjustable Dismember Chance setting.
*** ENCUMBRANCE QUEST (and changes):
- Begins about 1 minute after the Realism Core quest has finished.
- You now suffer from Strain (similar to fatigue), which increases when walking with more than 100% encumbrance, and whenever you are running.
- Includes HUD Strain display, which will only be displayed if you follow my Stain HUD Setup instructions exactly. To move Strain display, hold down the grab key, and use arrow keys.
- Strain increases faster as you become more encumbered, and is based on game time, so it increases faster with higher Timescales.
- Dynamic movement speeds: the more you are encumbered, the slower you move. You also gain a running speed bonus when your encumbrance is below 60% and your health is 50% or higher. When your Strain is greater than 75%, your running speed will progressively slow down; but the rate that your Strain increases will also slow down.
- FastRun: when your Strain is below 70%, holding down the Activate key (E by default) while running gives a 50% speed increase, but your Strain will increase 5 times as fast. If your weapon is out, your speed will be a bit slower (just like with normal running). If crouching, toggling FastRun will make you stand up and FastRun.
- How much your legs are damaged is now factored into your Running Speed (including your FastRun speed). Trying to run with a crippled leg, will result in Fatigue damage. Running with both legs crippled will rapidly damage your fatigue. You cannot FastRun if either leg is crippled. Running when wearing a Med-Tec leg brace, will increases Strain faster. And running backward when wearing a Med-Tec brace, will result in Fatigue damage.
- Strain also increases faster when your health drops below 50%. Jumping and swinging a melee weapon increases your Strain (so do NOT hold down your jump or attack key/button).
- If your Strain exceeds 100%, you will collapse, injure yourself, and your equipped weapon will return to your inventory.
- Use Jet or Ultra Jet to immediately clear your Strain (reset to 0), which can be a lifesaver during combat.
- Strain decreases when you rest (when you stop running, or when you stop walking with over 100% encumbrance), and while you are in menus. How fast your Strain decreases depends on how encumbered you are. Plus your Strain will decrease 33% faster when you are sitting or crouching (non-moving sneak mode).
- During combat your Strain will only be reduced when you are not moving. And will not be reduced during combat when in menu mode.
- Dynamic Jump: How high/far you can jump is now based on your Agility and Encumbrance. You will not be able to jump at all when your AGL is really low, when you are over-encumbered, or when a leg is crippled.
- My Encumbrance notes are also added to your inventory, for easy reference.
- Note: Once the Encumbrance Quest has finished, you will be able to disable (or enable) Strain in the Options Menu (under Other Settings).
*** HARD-CORE QUEST (and changes):
- Begins about 1 minute after the Med-Tec quest has finished (or about 1 minute after the Encumbrance quest has finished, if my Med-Tec module is not installed).
- Initial Skill Points: 5 less points to distribute in your SPECIALs, with about half as many skill points at beginning, which will increase roughly half as fast. Tagged Skills only gain 5 bonus points over other skills (default was 15).
- Levelling up: You will only receive 6 Skill points to distribute (default is 11 points). But your Tagged Skills receive my 2X multiplier with odd level ups. Taking the Swift Learner Perk will now give you 2 additional skill points (for a total of 8 skill points at level up). This Perk requires 6 or more INT, which is the only effect your INT has on how many skill points you receive.
- When beginning a new game, or when first loading a saved game in which you are still at level 1 or 2, this quest will reset your number of SPECIAL points to 35; plus you will have to select your tagged skills again. This may be a bit of a pain in a new game, but this is the only way that I can make this work with older saved games, and with alternate start mods that skip the tutorial.
- Next, you can now pick one of my character Traits (or not select any). I selected some from Fallout 2 and added some of my own unique Traits, to expand character builds in a way that will have a major effect on your game play (especially early in the game).
- At the end of my Hard-Core Quest, you can enable my optional Rookie Penalties. Warning: these penalties initially make combat (and other parts of the game) VERY difficult!
- Rookie Penalties reduce your initial SPECIALs to a minimal amount, which will very slowly increase back to their non-penalized amounts as you progress. Your character will then start out in the Wasteland MUCH less capable, until they have managed to survive on their own for a while (and actually put their skills and their muscles to use). Most Rookie skill penalties will likely last for at least a couple of game days, but could last for much longer, depending on how you progress.
- Your character's Gender now affects your Carrying Capacity, Health Points, Barter ability, and self Repair. There are now gender differences for the Strong Back and Life Giver Perks.
- Bartering Overhaul: You will now have to pay a LOT more for supplies (and you'll receive a LOT less in trade). Your Bartering skill now plays a MUCH larger factor. And your gender now has an impact (females receive a 10% selling bonus; males receive a 5% buying bonus).
- Repair Overhaul: items used for repairs will now improve the weapon or armor a bit less, your repair limit is now gender-based (male bonus), but Intelligence now also has a greater impact. Merchant repair costs were significantly reduced, and are based on your Barter skill. This should make paying for repairs a more viable option.
- Skill Books have been rebalanced: now you can only gain a single skill point for each different type of skill book. The Educated perk gives +1 skill point for 9 additional skill books (for a maximum of 10 books/skill), and the Comprehension perk gives +1 skill point for 10 additional skill books (for a maximum of 20 books/skill). When you read a skill book, it is replaced by a 'Read' version, which is less valuable.
- Overhauls Bobbleheads, changes Skill Books, modifies 95% of the default Perks and adds a few of my own unique perks.
- Caps, food, weapons, and ammo are now MUCH less abundant in the Wasteland.
- Decreased spawned loot, with the amount of loot now based on your Permanent Luck stat. Fortune Finder perk also adjusts the amount of caps you find, based on your Luck stat.
- Dynamic Respawn Rate: is set at the beginning of the game at a random amount, between 4 and 8 days (default was 3 days), and is reset whenever you level up.
- Note: Once the Hard-Core Quest has finished, you will be able to toggle the More/Less Difficult Hard-Core settings. The Less Difficult setting removes most of my Gender Differences, and increases your Carrying Capacity, Endurance (HPs), and Barter ability. If my Med-Tec module is also installed, the Less Difficult setting will also remove the additional HP damage from my Med-Tec weapon injury hits.
OPTIONAL MODULES (Requires Core Master esm and Realism Core module):
Med-Tec module (Arwen_Med-Tec.esp):
===================================
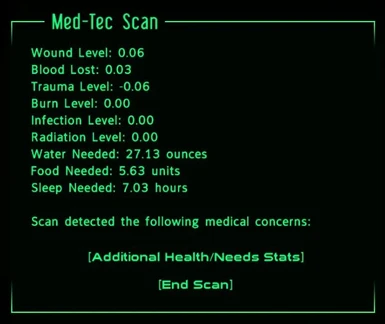
- My complete Needs/Injuries/Treatment module. Makes eating food, drinking water, and sleeping necessary. And my Med-Tec Scanner tracks 24 stats and expands self-treatment.
- IMPORTANT! This is my most complex module, so you really should read my "Realism Tweaks User Guide.doc" (in Fallout 3\Data) and/or the Realism Tweaks section of my website (http://arwenevecom.ipage.com/Fallout/FO-mods04.htm), which explains all the details.
- Med-Tec Quest starts about 1 minute after Encumbrance quest has finished and takes about 3 minutes to complete (paused during combat or in an interior cell). Once it begins, just follow the quest instructions.
- The following is added to your inventory: a Medical Brace, 2 Bandages, an Antibiotic Injection, a Stimpak, a 16 ounce Bottle of Purified Water, and my Fire Starter (for making campfires).
- Your initial Needs are then calculated (based on how much time has passed since 6 am), and your initial Wound Level and Blood Lost are calculated (based on your HP damage).
- Quick Scan Hotkey [M] monitors your most vital stats during game play, automatic scan whenever you are injured, and Full Scan Hotkey [Rt Ctrl] for diagnosis & treatment of injuries (while not in combat). Full Scan also shows when you Needs require attention.
- No Fast Travel when very tired, thirsty, or hungry, or when your Health is less than 40%.
*** The Injuries Part:
- Adds Wounds, Burns, Blood Loss, Trauma, Infections, and their treatment.
- Injuries are based directly on degree of injury, type of weapon, and Armor Level.
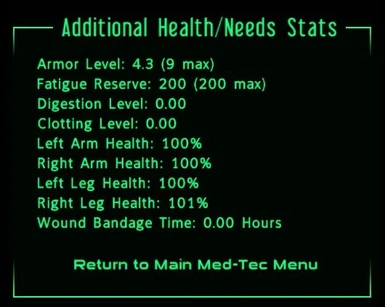
- Your Armor Level is a new stat that is based on your Damage Resistance [DR], but is much less linear, and includes a bonus for Power Armor, and a penalty when you are not wearing any body armor. Your Armor Level is shown when you do a Full Scan [under the Needs Menu]. The difference between 1DR and 16DR is a +4 Armor Level increase, while the difference between 17DR and 44DR is only a +1 Armor Level increase.
- Moderate injuries slowly heal (based on your Endurance), but Severe injuries require medical treatment (self-treatments are based on your Medicine skill).
- Bandages, Tourniquets, and Splints all have penalties while they are equipped, and are automatically removed when they are no longer needed.
- Dynamic Health Regeneration: based on your current Endurance and limited by your condition. Slower Regeneration when sleeping.
- Damaged limbs slowly heal, but only if the limb is not crippled (a Medical Brace is then require to heal).
- Doctors no longer fully heal moderate or severe injuries. What you get for your caps is treatment, not instant health restoration.
- Your Personal Infirmary can still be used to treat the game's default injuries.
- Stimpaks have been totally overhauled and include my Stimpak Animation Effect (with Hotkey). You can still give yourself an injection during combat, but this now happens in real time, while you will be incapacitated for a few seconds, while 30 HPs are slowly restored. Each injection also damages your Fatigue, messes up your vision, and reduces your Strength. Your fatigue is also damaged if you try to run while an injection is still active (lasts 1 real minute).
- A Stimpak injection also immediately reduces most Med-Tec injuries by 10%, and slowly reduces your your Wound Level, through my Clotting Effect. You cannot inject another Stimpak until your Clotting Level drops back to 0 (takes 15 to 30 game minutes), and Stimpaks will not restore your Health higher than 75% (this is balanced by my Health Regen).
- Morphine and Antibiotic injections also use the injection animation (but no hotkeys). Morphine injections also include a visual penalty and damage Intelligence.
- Most other chems were also rebalanced.
- Med-Tec supplies are available from doctors, main merchants, and caravans (and are restocked daily). [Note: not every Med-Tec supply will be restocked every day.]
- Poison from DeathClaws and RadScorpions now remains in your system for 1 game hour, slowly damaging your health and fatigue. If you Wait, Sleep, or Fast Travel while you have poison in your system, when you return to normal game play, any poison damages for that time period will still be applied (and this can happen fairly fast).
*** The Needs Part:
- Water Need is Dynamic: basic requirement is 2 ounces/game hour, but increases when outdoors in the heat of the day, and decreases when sleeping. But you require 25% less Water/hour when your Encumbrance is less than 70%.
- Most Beverages and fruit give you some water benefit, with the greatest amounts coming from the purest types of bottled water.
- With the exception of Purified Bottled Water, beverages no longer have any Healing effect, contain Rads, and will damage your health a bit (a Sanitizer will reduce the Rads).
- Purified Bottled Water restores some Health, but only when your Water Need is greater than 0, AND when your Heath is lower than 50% (the lower your health, the more healing affect you gain). If your Water Need is at least 8 ounces, drinking Purified Bottled Water will very slowly restore your Health back to 40-50% of your Permanent HP amount [rate is only +1HP every 5 seconds]. When your Water Need is less than 8 oz, the amount of healing is proportional to your Water Need.
- Any empty water bottle can be refilled at Purified or Good water sources. A Pure or Good water bottle both yields a bottle of Good water, at either source (since the bottle is used). A Dirty water bottle always yields a bottle of Dirty water (from any source, since the bottle is dirty). Only Dirty Water bottles can be filled at Dirty water sources (yields a bottle of Dirty water). You also have the option to drink directly from these water sources. And you can drink from surface water, but cannot fill your water bottles from it.
- Liquor now dehydrates you, but also restores your Fatigue.
- Nuka Colas use my Jolt effect to reduce your Sleep Need, but your Need jumps back up when my Jolt effect wears off.
- Food Need is Dynamic: your personal Food Need is based on your Permanent Strength and Endurance. An average PC (5 STR, 5 END) requires 9.6 Food Units every 24 game hours (0.4 unit/hour). [A 4 STR, 4 END character requires 8.4 Food/day; a 6 STR, 6 END character requires 10.8 Food/day.]
- 4 Food Levels: Food1 (Snack Food, 0.6 Food Units); Food2 (Light Meal, 2 Units); Food3 (Normal Meal, 3 Units); Food4 (Heavy Meal, 4 Units).
- Food no longer has any healing effect and most contains Rads (Sanitizer will reduce the Rads a bit).
- Eating fresh fruit and vegetables will reduce your Rad Damage, and some types of Red Meat will reduce your Blood Loss.
- Meat taken from dead animals is now Raw Meat (high in bacteria and RADS). Raw Meat and some of the packaged food will be less nourishing unless it is cooked.
- You can only butcher an animal (access their inventory) if you equip one of the following specific knives: Knife, Ant's Sting (unique Knife), Combat Knife, or Occam's Razor (unique Combat Knife).
- Dead animals will now only have usable meat for 6 game hours after they are killed (does not affect ones that were dead before you entered that cell)
- Raw Meat Limit: You can only remove meat from animals if you have less than 4 chunks of raw meat in your inventory; plus you only have room to carry 4 chunks of raw meat (you will drop any additional raw meat).
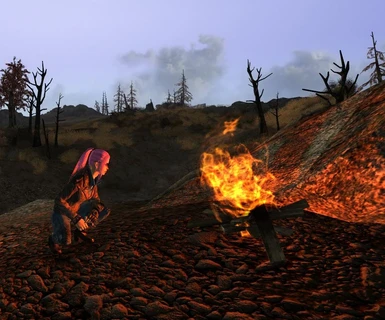
- Fire Starter: used to create a campfire, which can be used to cook food, purify water, and to craft sterile bandages (once you have purchased a Mess Kit). [Refer to my Fire Starter Instructions for the full details on using your Fire Starter.
- Eating causes your Digestion Level to increase (will slowly decrease when you are not eating).
- Eating when you are not hungry will make you sick, and you will gain no benefit from the food.
- Most food and water contains Bacteria, which causes Food Poisoning if your Bacteria Level gets too high. Cooking your food and having a Mess Kit in your inventory when you eat will greatly reduce the amount of Bacteria.
- When your RADS are 100 or higher, your Radiation Level (displayed in Med-Tec Scan) will increase while you are digesting food, and will slowly decrease once your Digestive Level returns to 0, or whenever your RADS drop below 100. You get Radiation Sickness when your Radiation Level reaches 5, and it lasts until your Radiation Level drops back down below 5.
- You will not gain any benefit from eating food or drinking water when you have Radiation Sickness or Food Poisoning (you will just get sick).
- Needs Menu (in Med-Tec Full Scan menu): Similar to my Bottle Water menu, where your Bacteria, Digestion, and Radiation Levels are shown (along with 6 other stats). This will lessen the chances of getting Food Poisoning, by showing your Bacteria Level before you drink. You can drink any of your bottled water, from within the Needs Menu (or by equipping them in your PipBoy).
- The Needs menu also gives the maximum Food Units you can safely eat (based on your current Bacteria, Radiation, and Digestion Levels). If you pay attention to this and never eat food that has more Food Units than your current safe maximum amount, you should never get sick from eating too much. You must leave the Needs Menu to eat anything, but you have the option of opening your PipBoy directly from the menu. The menu also warns you when your Mess Kit is not currently in your inventory.
- Added drinking animations to all bottled water (similar to my stimpak and bandage animations, where you'll not be able to use a weapon until the animation ends). The standing animation only lasts a few seconds (and you can still walk and run). The sitting animations last quite a bit longer and may be a bit off when sitting in some chair types (as these are the unaltered default animations).
- You require 1 hour of Sleep for every 2 hours awake. When your Sleep Need is 0, it takes 16 hours to becoming Sleepy (when penalties begin); after 20 hours you'll be Very Tired; after 24 hours you'll be Exhausted; after 32 hours you'll become Delirious. You heal while you are sleeping (or waiting), but at a slower rate than when you are awake, and with the same restrictions. [Removes sleep/wait cheat, where an hour completely healed most injuries.] You cannot sleep when you have excessive bleeding. You cannot sleep longer than your Sleep Need.
***[Med-Tec Options menu]:
- Pause/Resume the injuries and needs (before and after entering simulators).
- Also includes: Prepare to uninstall; Restart the Med-Tec Quest; Change the Med-Tec Scan hotkey; change the Stimpak Injection hotkey.
One Life (Arwen_OneLife.esp):
=============================
- This optional module was balanced to be used with my Full Realism Tweaks. It does not require my Med-Tec module, but was coded to work with my Med-Tec Injuries and Needs.
- One Life Quest starts about 3 minutes after Med-Tec quest is completed [or after Hard-Core quest, if Med-Tec is not active].
- Important! Auto-Saves MUST be disabled when this module is active, and please do not use Quick-Saves or Quick-Loads (or any mod that alters the default saves or adds automatic saves).
- You no longer die. Instead you now pass out and are left for dead. When you come to again, you discover that you have been looted and left for dead. This is my own unique concept, where your character's death becomes a major penalty, instead of just an inconvenient reload.
- There are now two different ways that will result in your 'death':
- 1.) Normal Death happens when your HPs are reduced to zero faster than Near Death can save you. This should result in an automatic reload of my OneLife_Death save, along with my added penalties for 'dying.'
- 2.) Near Death kicks in just before your HPs bottom out. You immediately pass out and are revived, usually without an automatic reload (the penalties are mostly identical to Normal Death).
- Your Stats are saved in a special One Life scripted save. Timed saves happen about every 6 real minutes (as long as your health is greater than 15%). Plus changing armor, equipping a different weapon, and significant inventory changes will all trigger a One Life save.
- Your character is generally revived at your last Revival Point, which are updated after a One Life save is made or when you move between interior and exterior cells.
- You are looted of 40% to 90% of your caps (Luck based) and half your Stimpaks. If you have more than 16 ammo for your equipped weapon, half this ammo will be looted. There is a 33% chance that your equipped Weapon will be looted (if it is not looted, it is damaged, unequipped, and returned to your inventory). Your equipped body armor receives 10% damage on each Near Death, to simulate the damage it took when you were injured (it is looted on Normal Death, but you can buy it back from the merchant who ended up with it).
- Time has passed while you were unconscious (1.8 to 6 game hours), based mostly on your character's Endurance, but with Strength also factored in.
- If you are wearing sunglasses when you die, they are returned to your inventory (prevents Shades effect from making it too dark to see).
- If my Med-Tec module is also active, your injuries are adjusted so that player should generally not die while unconscious. And your Stimpaks will not be looted, since your Med-Tec injuries generally increase when you 'die.'
- Rescue feature (Med-Tec module must be active): Kicks in when you trigger a One Life death (works with both Normal Death and Near Death), AND only when your injury levels are high, AND when you have no stimpaks and no bandages left. You will then revive at a safer location, where your injuries have been treated (but you may still be in pretty rough shape). Being rescued comes with even greater penalties than my other One Life revivals, so this should be something to avoid.
- One Life saves are done as a pair: the OneLife_Death save automatically revives your character after they die (Normal Death); and the OneLife_Alive saves can be loaded at anytime (without penalties), should your game crash (or as a convenient restore point). Only the last the OneLife_Death save and the last three OneLife_Alive saves are kept (the oldest save will be overwritten at the next automatic Stat save), so you may want to do an occasional manual save. (But, if you die before my scripted save is updated, the default death/reload will be triggered).
- Loading the last OneLife_Alive save will just restore your game at the last One Life backup autosave. Loading the last OneLife_Death save will initiate a Normal Death, with the normal One Life death penalties (useful if you experienced a CTD on death). But you should avoid loading a One Life save from a previous gaming session (after starting the game), as the game doesn't like loading older Revival points, after new ones have been set.
- When you are finished with a game session, you should always make a manual save before you quite the game (and you should always load your manual save when you resume your game).
- One Life can be enabled or disable at any time in my Options Menu (under "Misc Settings"). Whenever you disable One Life, you should also delete all the One Life saves (because disabling it also cleans up the revival makers).
- Some users have experienced increased CTDs when using my One Life module. I've tried my best to make to optimize my scripts, but this seems to be system specific. Starting with version 8.0, my download archive also includes a 'Lite' version of One Life, that should work for users who are having problems with my regular One Life. I have also posted how to reduce the chances of CTDs in the Fallout Journal section of my website (at the end of my One Life module's section), with instructions on how to switch between the regular and and the Lite version.
Bundled Compatibility Patches:
=============================
See my Compatibility Patches ReadMe for the details on all of these patches (Arwen_Compatibility_Patches.txt)
Select the ones you need on my Realism Tweaks Setup menu (when the mod is activated with FOMM).
1.) GOTY Compatibility Patches [requires all 5 DLC (or GOTY edition) installed]. Two versions - select only one.
2.) MMM Compatibility Patches [Requires MMM - Mart's Mutant mod]. Two versions - select only one.
3.) RH_IronSights Compatibility Patches [Requires Rh_IronSights-FOSE]. Two versions - select only one.
4.) Other Compatibility Patches: EVE - Energy Visuals Enhanced Compatibility Patch AND Brahmin Dairy Products/Med-Tec Compatibility Patch.
Note: My RiPnO Compatibility Patches are NOT compatible with my Med-Tec module and is now only available as a separate optional file.
Installing (and Updating):
=========================
IMPORTANT! If you don't uninstall correctly or reinstall correctly, you will likely severely mess up your game.
*** Version 8.0 requires that you start a new game, and I STRONGLY advise against trying to use this version with an older save (pre-version 8.0). [I left my Clean Save instructions in just for future updates.] If you have v.8.0 installed, your v.8.0 saves will work fine with v.8.1 (just uninstall v.8.0 and then immediately install v.8.1).
Part A.) Prepare your Saved Game & Uninstall Previous version:
- When you will be starting a new game, you only need to do step 7 (if it applies) and then immediately install the new version.
1.) Start the game and load the save you want to continue from.
2.) If you are using my Med-Tec module, opened the in-game Med-Tec Options menu, and click on "Prepare to Uninstall."
3.) Unequip ALL clothing, hats, helmets, & eye wear. This ensures that your stats are not being altered by "enchanted" clothing.
4.) Make sure your SPECIALs are not being reduced (-) or increased (+) by any effects (if any are, wait for the effect to wear off).
5.) Also make sure your PipBoy Light is OFF (or you'll mess up your sneak skills).
6.) Immediately save your game to a new save slot (do not overwrite an earlier save) and quit the game.
7.) Uninstall any previous version of my Realism Tweaks. [Open the FOMM, open Package Manager, select "Arwen's Realism Tweaks," and click the "Deactivate button. Then right click on "Arwen's Realism Tweaks," and pick delete.]
8.) If you are not going to immediately reinstall my Realism Tweaks (or when a Clean save is required), you MUST also remove any edits that you made to the hud_main_menu.xml file [see "HUD Setup" below].
Note: When a Clean save is required, you have make a SECOND new save AFTER uninstalling the previous version. This is the CLEAN save, since it does not include any part of my mod.
Part B.) Installation of my Realism Tweaks with FOMM:
1.) Open the Package Manager, click the "Add New" button, and select Arwen_Realism_Tweaks_8_1.7z (or current version).
2.) After the fomod is created, find and select "Arwen's Realism Tweaks" and click on the "Activate" button.
3.) The "Arwen's Realism Tweaks Setup" will appear. The Core Master and the Realism Core module will already be checked. Check any additional modules you want in your game, also make sure you check any compatibility patches that you may need. (Note: clicking on the module/patch name will give you information about it.) Then click on the "Install" button.
4.) The esps should be their correct load order (see Load Order section below).
5.) Follow my "HUD Setup" instructions, to add my Fatigue and Strain HUD displays.
6.) Start the game and load your previous saved game (or begin a new game), and continue playing from this point only.
HUD Setup (Same instructions for both DarN UI and default UI):
==============================================================
1.) You must edit your existing hud_main_menu.xml file for my Fatigue and Strain Meters to be displayed in your HUD readout (the two meters are independent of each other).
2.) The hud_main_menu.xml file is found under data\menus\main. Make a backup copy before editing (comes in handy when you uninstall my Tweaks). [If there is no hud_main_menu.xml file, you can just add my edited version, found under data\menus\prefabs\Arwen\main. Just copy and paste it into data\menus\main.]
3.) Open up the hud_main_menu.xml file in a text editor (such as Notepad++)
4.) Just above the last line, paste the following line of code: <include src="Arwen\Fatigue_HUD.xml"/>
5.) If you are using my Encumbrance module, the following line of code is also needed: <include src="Arwen\Strain_HUD.xml"/>
Note: For both Fatigue and Strain meters, the last three lines should look like:
<include src="Arwen\Strain_HUD.xml"/>
<include src="Arwen\Fatigue_HUD.xml"/>
</menu>
6.) Save and close the file.
7.) Your Fatigue stat should now appear in your HUD, below all your other stats, as: "Fatigue: xx%." Your Strain stat should now appear in your HUD as: "Strain: xx%." [Note: you will likely have to move one or both displays (see next step) and they will not work correctly until the modules have been initialized.]
8.) Move the Fatigue HUD by holding down the Sneak key (Lf-Ctrl by default) for 2 seconds, and using the arrow keys to move it. Move the Strain HUD by holding down the grab key (z by default). After you have move the displays where you want them, save your game (so that you don't have to do this again). You can move them any time.
9.) Note: If you install any mods that overwrite the hud_main_menu.xml, and my Fatigue and/or Strain HUD displays disappear, you will have to add my line(s) of code again.
Load Order:
===========
- The Load Order is extremely important! An incorrect Load Order could break some scripts, which would mess up your game play.
- In order to insure that all my Tweaks are being applied (and that other mods are not overriding any) put the esps near the end of your load order (generally after any mods that make changes to same portions of the game).
- See compatibility section (below) for load order with some specific mods.
- If you installed any of my compatibility patches, the Arwen_Compatibility_Patches.txt file gives their correct load order.
- Load order:
--> Arwen_Core.esm [required] (this should be the last esm loaded, to ensure that it is not being overwritten)
--> Arwen_Realism_Core.esp [required] (put as low as possible in your load order)
--> Arwen_Med-Tec.esp [optional]
--> Arwen_OneLife.esp OR Arwen_NV_OneLife_Lite [optional]
Other Translations:
===================
Arwen_Realism_Tweaks_RUS: version 5.9 of my Realism Tweaks, translated into Russian: http://fallout3nexus.com/downloads/file.php?id=15769
Incompatibilities (without specific compatibility patches):
==========================================================
- Do NOT include any of my modules if you create a Bashed or Merged patch. My Tweaks include over 100 custom scripts, many of which will not be Bashed or Merged correctly.
- Many of my Game Setting changes are made by my scripts, so many incompatibilities will not show in FO3Edit.
- My Realism Tweaks will overwrite any mods that make any of the changes I have listed here.
- Do NOT use my Realism Tweaks with other balancing mod that make changes to the same game elements, as this will unbalance the game play (by making some things too easy, while making others too difficult).
- My Realism Tweaks are not compatible with mods that alter the specs of default armor/clothing.
- My Realism Tweaks are not compatible with mods that alter the specs of default weapons or default projectiles.
- The Med-Tec module is not compatible with ANY mods that add injuries, treatments, or needs (or that modify food, beverages, or chemical/medicine).
- My mod is NOT compatible with FOOK or FWE (even though my earlier Smarter AI module is integrated into FWE).
- The One Life module is not compatible with ANY mods that alter the way that games are saved.
- My Reduced XPR mod should no longer be used with my Realism Tweaks, since my Tweaks (from v.4.7 on) include my new XPR multiplier, which is configurable from my Options Menu.
- My VisionFX mod should no longer be used with my Realism Tweaks, since a slightly different version is already integrated into my Tweaks (from v.4.8 on).
Compatible with the following mods:
==================================
- DLC and GOTY Edition: Fully compatible if you have the GOTY edition (or all 5 DLCs) installed, and my GOTY patches.
- UPDATED Unofficial Fallout 3 Patch [http://www.nexusmods.com/fallout3/mods/19122/?]: fully compatible, but you MUST load it BEFORE my Arwen_Core.esm.
- Marts Mutant Mod (MMM) [http://www.nexusmods.com/fallout3/mods/3211]: Fully compatible if you install one of my MMM patches.
- RH_Ironsights�FOSE [http://www.nexusmods.com/fallout3/mods/6938]: Fully compatible if you install one of my RH_IronSights patches.
- EVE - Energy Visuals Enhanced [http://www.nexusmods.com/fallout3/mods/5830]: Fully compatible, if you install my EVE Patch.
- Feminized Power Armor [http://www.nexusmods.com/fallout3/mods/5212]: Should be compatible, but you MUST load it AFTER my Arwen_Realism_Core.esp. You will, however lose my changes to any Power Armor that this mod overwrites.
- Missing Unique Armor and Clothing [http://www.nexusmods.com/fallout3/mods/2072]: Should be fully compatible, but you MUST load it BEFORE my Arwen_Realism_Core.esp.
- Achievement Remover [http://www.nexusmods.com/fallout3/mods/3813]: Should be fully compatible, but you MUST load it BEFORE my Arwen_Realism_Core.esp.
- My Gore_No_More mod(http://www.nexusmods.com/fallout3/mods/7318): Load AFTER my Arwen_Realism_Core.esp for the least amount of dismemberment. (Or load it before my Arwen_Realism_Core.esp, if you want a 5% chance of dismemberment, or have selected the default 50% Dismember Chance in my Options Menu.)
- Should be compatible with Alternate Start mods (but I have only tested this with Alternate Start - Roleplayers)
- For more mods that I have personally tested for compatibility, visit my Fallout 3 Mod List [http://arwenevecom.ipage.com/Fallout/FO-mods.htm]
Known Issues or Bugs
====================
- If you load a game which was saved while your character was unconscious, your character will likely have to endure all sorts of really weird and humiliating graphic effects (such as their body melting, stretching, falling through the game mesh, or being launched through the air). If they somehow manage to survive this ordeal, their body should return to normal. I know of no way to correct this, as it seems to be a game bug. My suggestion is simple: don't load a game that was saved while your character was unconscious.
- My Realism Tweaks adds over 100 custom scripts (some of which are quite complex), which will put an increased demand on your system. So I don't recommend installing my Tweaks if a PC that is struggling to run the default game.
Contact
=======
Arwen's Fallout 3 Journal (contains additional info & help on my mods) - http://arwenevecom.ipage.com/Fallout/FO-mods04.htm
Official Fallout Mod Forum thread - http://forums.bethsoft.com/index.php?/topic/1228871-relz-arwens-realism-tweaks-thread-no13/
Credits
=======
- Bethesda Softworks, for making Fallout 3.
- The Fallout Script Extender team for making FOSE <http://fose.silverlock.org/>
- 'DarN', for making the "DarNified UI F3" mod <http://forums.bethsoft.com/index.php?/topic/1085562-wipzbeta-darnified-ui-f3/>
- 'Imp of the Perverse', for his "HUD Counter Template" modder's resource <http://www.nexusmods.com/fallout3/mods/12977>, and for personally helping me add my Strain stat to DarN's UI.
- ALL the great guys on the Official Bethesda Fallout 3 - The G.E.C.K. forums, who freely gave of their time to guide a pretty clueless, whining, rookie script-writer.
- All the users who have given me such great feedback, and suggestions, and have helped chase down all those pesky bugs.
Other mods by Arwen:
====================
- Gore_No_More (http://www.nexusmods.com/fallout3/mods/7318)
- Less_Blood (http://www.nexusmods.com/fallout3/mods/7400)
- Arwen_NV_Realism_Tweaks (http://www.newvegasnexus.com/downloads/file.php?id=34759)
- Arwen _Reduced_XPR (http://www.nexusmods.com/fallout3/mods/7674) - no longer needed with my Realism Tweaks.
- Arwen_VisionFX (http://www.nexusmods.com/fallout3/mods/9558) - now integrated into my Realism Core module as a toggle-able option.
Licensing/Legal
===============
Whatever . . . but I'm not responsible for any bad karma that this mod may cause. So if you want to use it, you have to agree not to blame me for anything (as I just could not handle that). You do have my permission to credit me (and my mod) for any good karma that you may receive.
I hope that you enjoy my mods, as I do this solely as my gift to spread my own enjoyment of RPGs to other gamers.
~ Arwen ~


