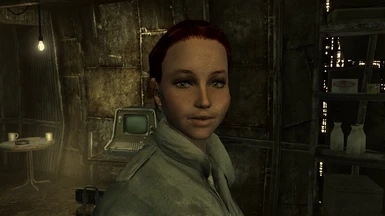
Not the offend the creator of the mod. But the faces for Moria and Cromwell aren't good but Moria's face is hideous. She looks like she has deepened skin around her face.
This mod didn't seem to install correctly with NMM for me - the textures wound up in \Fallout 3 goty\Data\Hall of Face\Data\textures.
If you're having the same problem, here's what I did:
1. Uninstall and Delete with NMM (right-click mod > Uninstall or Delete > Delete mod (permanently) ...) 2. Download MANUALLY and extract to a new folder -- Optionally, copy the contents of the folder "Hall Of Face Optionnal" into "Hall of Face" (some mouth textures) 3. Open the folder "Hall of Face" (NOT "Hall Of Face Optionnal") and locate the "Data" folder 4. Compress "Data" into a new RAR or 7z file, and give the new file a meaningful name 5. In NMM > 'Mods' tab, click the green "+" sign to add mod manually, select the newly created archive and click 'Open' 6. Install as usual
Oh for F's sake. I'm a moron. Thank you for taking the time to help a moron without being mean. I'm sorry you had to take your time to respond to such a dumb question. Kudos are yours, sir!
Pardon, does this mod work with the 'Good hair day' mod? I know both add hair, so I wondered. If not, would it work if I deleted the 'hair' subfolder in the Hall of Face folder? Thank you for this great mod.


27 comments
But the faces for Moria and Cromwell aren't good but Moria's face is hideous. She looks like she has deepened skin around her face.
If you're having the same problem, here's what I did:
1. Uninstall and Delete with NMM (right-click mod > Uninstall or Delete > Delete mod (permanently) ...)
2. Download MANUALLY and extract to a new folder
-- Optionally, copy the contents of the folder "Hall Of Face Optionnal" into "Hall of Face" (some mouth textures)
3. Open the folder "Hall of Face" (NOT "Hall Of Face Optionnal") and locate the "Data" folder
4. Compress "Data" into a new RAR or 7z file, and give the new file a meaningful name
5. In NMM > 'Mods' tab, click the green "+" sign to add mod manually, select the newly created archive and click 'Open'
6. Install as usual