


0 of 0


About this mod
Pushing the graphical boundaries with Dying Light !
- Requirements
- Permissions and credits
- Changelogs
- Donations
Description of the preset:
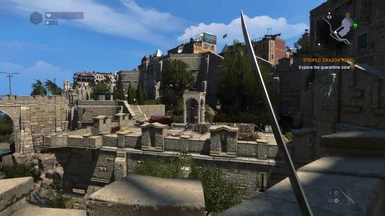
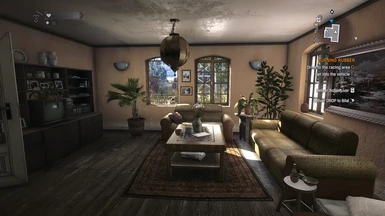
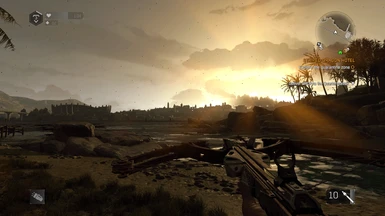
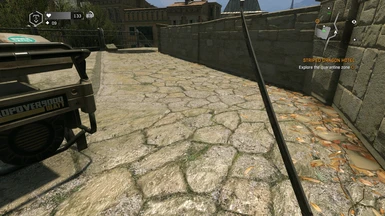
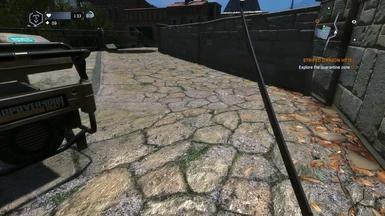
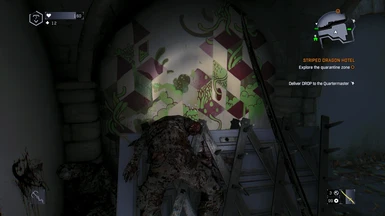
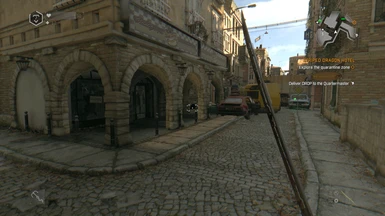
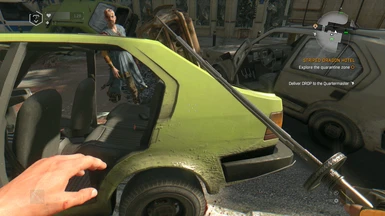
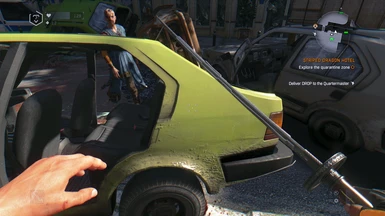
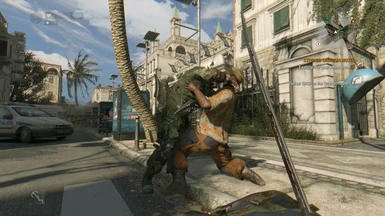
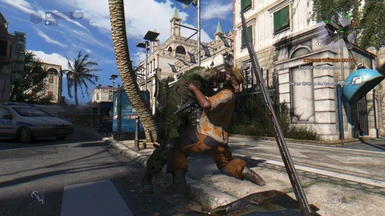
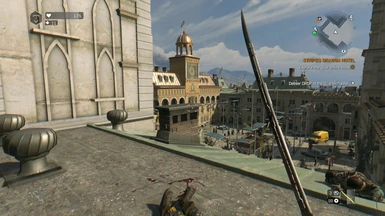
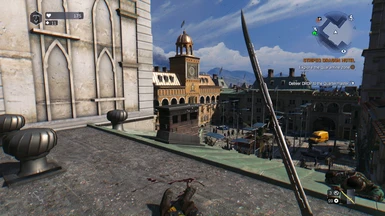
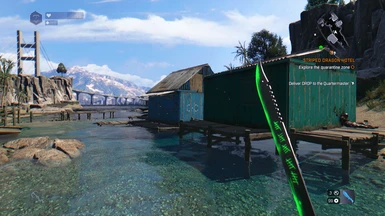
I'm presenting my preset for Dying Light to take a new approach towards improving the visual fidelity for this game.
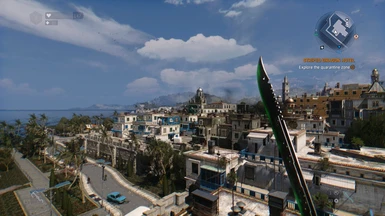
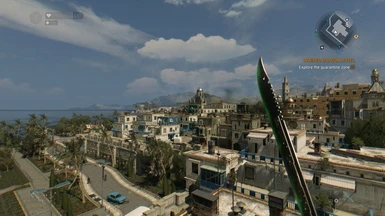
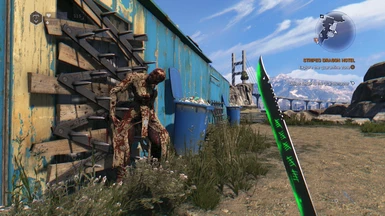
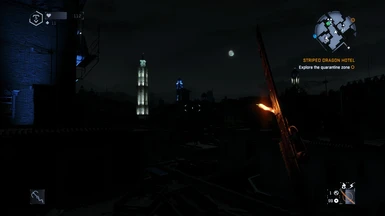
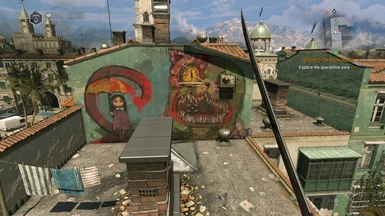
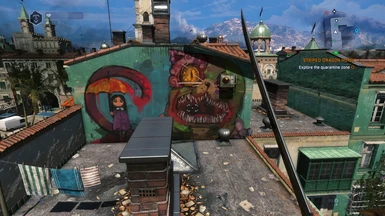
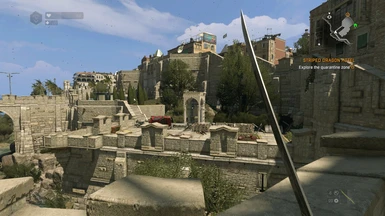
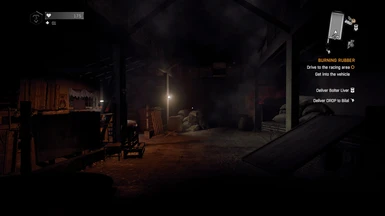
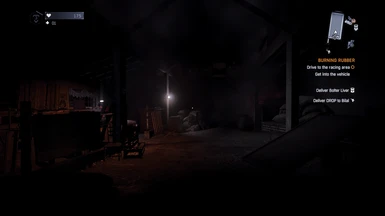
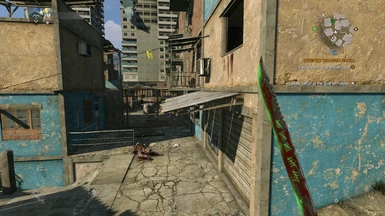
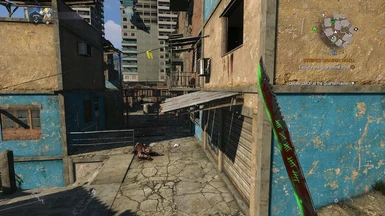
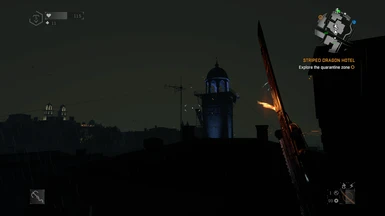
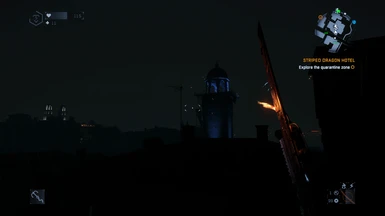
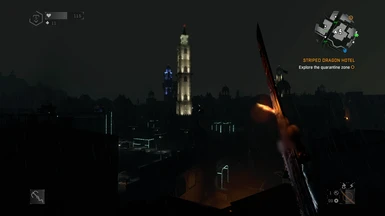
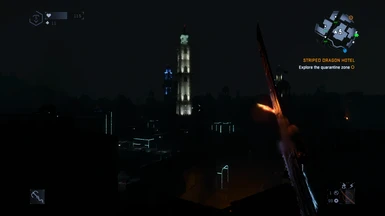
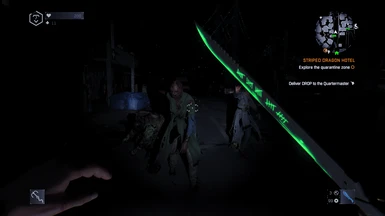
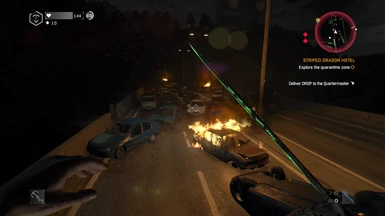
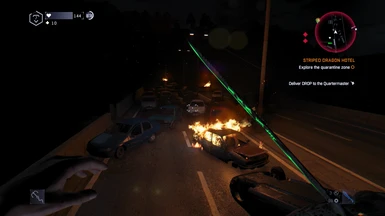
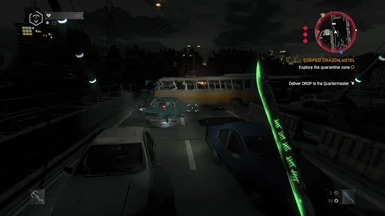
I created a new and "better" look that focuses on quality and "realism". This preset attempts to bring most natural and consistant look to the game if the filter never existed. Over a month of work has gone into building this preset with the latest version being most complex.
Something that sets this preset apart from others. It does not use fancy advanced shaders like MXAO/SSAO/GI/etc. When using ReShades these effects create tons of graphical inconsistencies due to UIs being translucent as well as not being implemented down to the engine. So in simple words, it actually starts to degrade the visual quality of the game. Therefore this preset aims to improve the look, stay consistant and offer a new yet fresh experience for both new and older players of Dying Light.
If you like my work, considering endorsing and/or leaving a comment ! :)
Hey you ! This version of ReShade is made to work best with ReShade 4.9.1 which by now is fairly outdated but this is also very costly to run due to all the post processing required to achieve that image. Therefore I have a mod that makes a lot of changes to the engine but also uses some ReShade to fill in the gaps. It is drastically less intensive than this.
You can find more info on here

I'm presenting my preset for Dying Light to take a new approach towards improving the visual fidelity for this game.
I created a new and "better" look that focuses on quality and "realism". This preset attempts to bring most natural and consistant look to the game if the filter never existed. Over a month of work has gone into building this preset with the latest version being most complex.
Something that sets this preset apart from others. It does not use fancy advanced shaders like MXAO/SSAO/GI/etc. When using ReShades these effects create tons of graphical inconsistencies due to UIs being translucent as well as not being implemented down to the engine. So in simple words, it actually starts to degrade the visual quality of the game. Therefore this preset aims to improve the look, stay consistant and offer a new yet fresh experience for both new and older players of Dying Light.
If you like my work, considering endorsing and/or leaving a comment ! :)
Hey you ! This version of ReShade is made to work best with ReShade 4.9.1 which by now is fairly outdated but this is also very costly to run due to all the post processing required to achieve that image. Therefore I have a mod that makes a lot of changes to the engine but also uses some ReShade to fill in the gaps. It is drastically less intensive than this.
You can find more info on here
Features
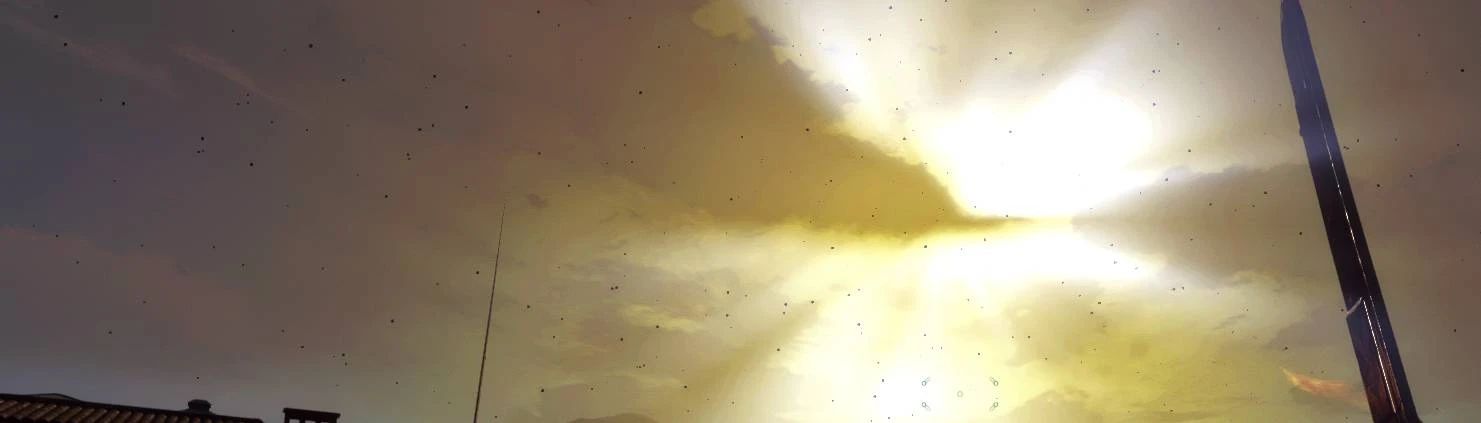
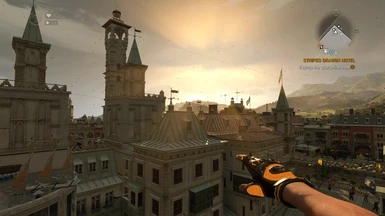
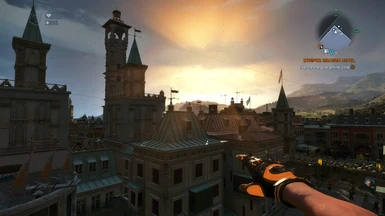
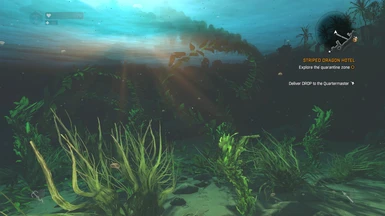
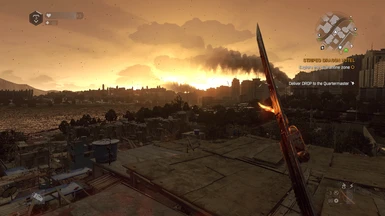
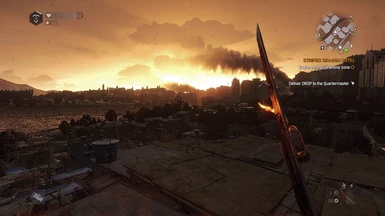
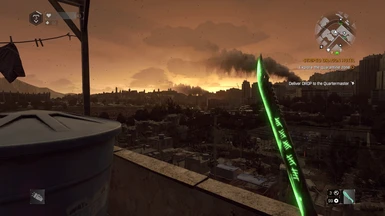
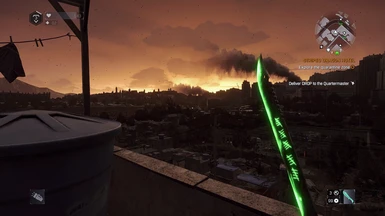
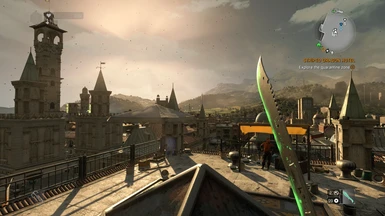
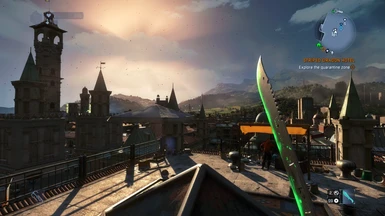
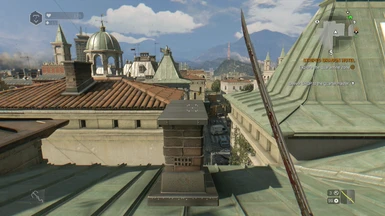
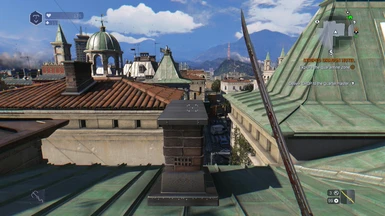
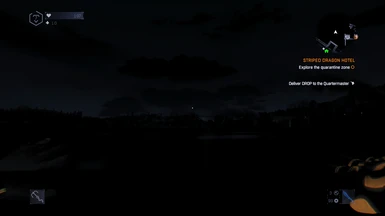
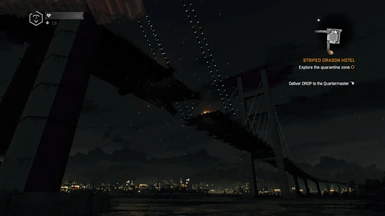
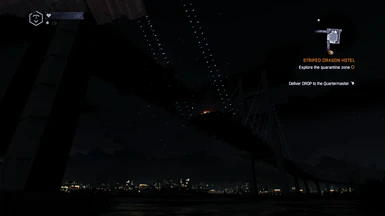
~ Improved sunsets and sunrises
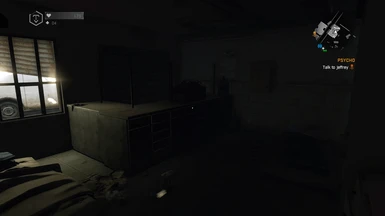
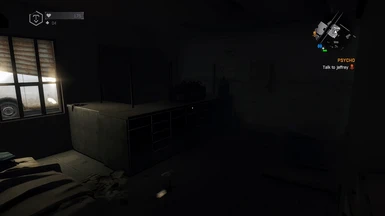
~ Day and Night cycles have smoother coloring and stronger lighting
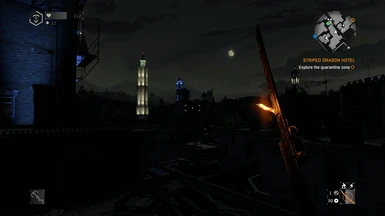
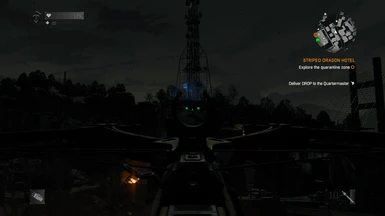
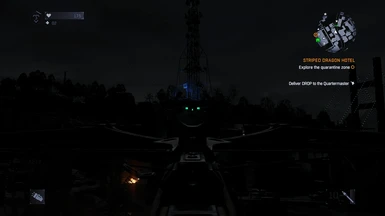
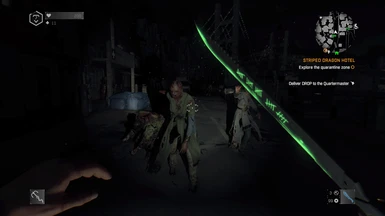
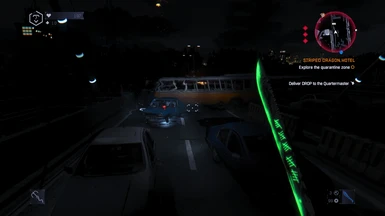
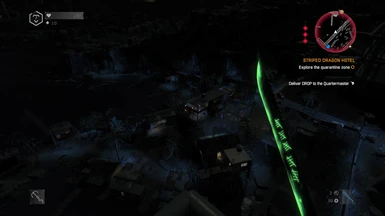
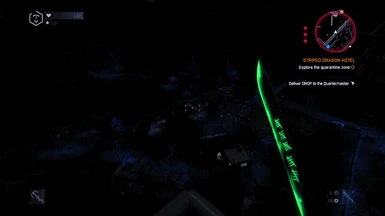
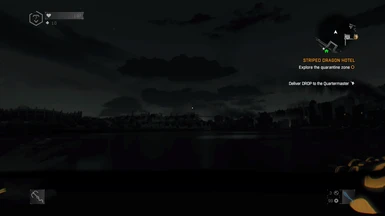
~ Nights are darker and more intense
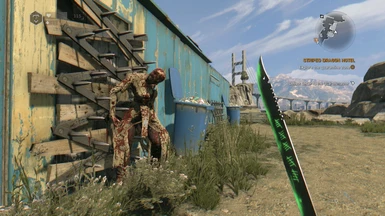
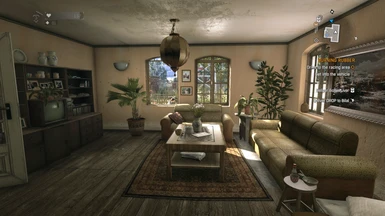
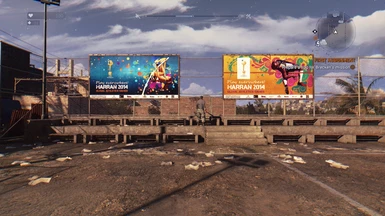
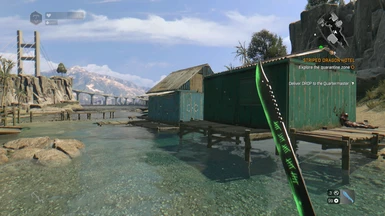
~ Improved texture depth/visibility/color
~ Removed greenish/yellowish filter [fully]
~ Added new soft shadows
~ Various graphical and visual bug fixes (like light bleeding and artifacts)
~ Strong graphical consistency
~ Engine corrections/improvements [Film Grain fix]
~ Colors were adjust to look as close as possible to what it might have looked with colors
~ Compatible with ReShade 5.x.x
~ And much more...
1.9 Requirements
I finally released the big update to the engine fixes that actually fix a lot of old issues that this preset attempted to fix. So from now on, the 1.9 works only with the mod DLEiF - Dying Light Engine 'improvements' and Fixes . [all in one version]
- must be played with Filmgrain
What is DLEiF ?
1.8 Requirements
- This preset must be played with the extension as it is built around it. [It fixes film grain fully]
- The extension is now seperate so please download both main files.
- Film grain is now fully compatible and must be enabled.
Please use in game brightness to change how dark/bright you want your game to be !

~ Improved sunsets and sunrises
~ Day and Night cycles have smoother coloring and stronger lighting
~ Nights are darker and more intense
~ Improved texture depth/visibility/color
~ Removed greenish/yellowish filter [fully]
~ Added new soft shadows
~ Various graphical and visual bug fixes (like light bleeding and artifacts)
~ Strong graphical consistency
~ Engine corrections/improvements [Film Grain fix]
~ Colors were adjust to look as close as possible to what it might have looked with colors
~ Compatible with ReShade 5.x.x
~ And much more...
1.9 Requirements
I finally released the big update to the engine fixes that actually fix a lot of old issues that this preset attempted to fix. So from now on, the 1.9 works only with the mod DLEiF - Dying Light Engine 'improvements' and Fixes . [all in one version]
- must be played with Filmgrain
What is DLEiF ?
Spoiler:
This is a mod that contains quite a few fixes that are achieved by tweaking the engine graphics instead of forcing more shaders through a ReShade. So think of it as LC extension but on a bigger scale. I spent probably far too much time on it. But now we can achieve more things because of it and customize the game much more.
For example, it contains stormy night lighting fix which eliminates the issue of having extremely strange light behavior at night. So therefore I don't need to put additional shaders to try and fix this issue here.
Show
This is a mod that contains quite a few fixes that are achieved by tweaking the engine graphics instead of forcing more shaders through a ReShade. So think of it as LC extension but on a bigger scale. I spent probably far too much time on it. But now we can achieve more things because of it and customize the game much more.
For example, it contains stormy night lighting fix which eliminates the issue of having extremely strange light behavior at night. So therefore I don't need to put additional shaders to try and fix this issue here.
1.8 Requirements
- This preset must be played with the extension as it is built around it. [It fixes film grain fully]
- The extension is now seperate so please download both main files.
- Film grain is now fully compatible and must be enabled.
Please use in game brightness to change how dark/bright you want your game to be !
ADDON (extended game time):
Spoiler:
This addon was created by Signette, he did an amazing job..- please make sure to endorse his mod
"Dynamic weather and extended time cycles"
I've basically edited his original time placements to something closer to vanilla. The main reason I wanted this, is because I realized how incredibly quickly days and nights just go by. It feels far too fast and doesn't exactly let the player to enjoy some of the beautiful moments from sunsets or dusks.
So whats the vanilla and the new time ?
In vanilla, one game hour is about 1.44min. So 8 in game hours are 11.5 (11:30) min real time.
With addon, one game hour is about 2.5(2:30) min. So 8 in game hours are 20 min real time.
Installation:
1. Download the file
2. Go to : Steam\steamapps\common\Dying Light\DW\
3. Open the zip file and extract it in the location given in step 2.
Just to be clear, the zip file should contain [Data3.pak] file which goes inside DW folder inside of your Dying Light launcher folder.
If you're installing this with my LC Extension then make sure to install this first and then install the extension according to instructions.
Make sure to create a backup in case you'll want to do a quick uninstall of this mod for the original file.
Show
This addon was created by Signette, he did an amazing job..- please make sure to endorse his mod
"Dynamic weather and extended time cycles"
I've basically edited his original time placements to something closer to vanilla. The main reason I wanted this, is because I realized how incredibly quickly days and nights just go by. It feels far too fast and doesn't exactly let the player to enjoy some of the beautiful moments from sunsets or dusks.
So whats the vanilla and the new time ?
In vanilla, one game hour is about 1.44min. So 8 in game hours are 11.5 (11:30) min real time.
With addon, one game hour is about 2.5(2:30) min. So 8 in game hours are 20 min real time.
Installation:
1. Download the file
2. Go to : Steam\steamapps\common\Dying Light\DW\
3. Open the zip file and extract it in the location given in step 2.
Just to be clear, the zip file should contain [Data3.pak] file which goes inside DW folder inside of your Dying Light launcher folder.
If you're installing this with my LC Extension then make sure to install this first and then install the extension according to instructions.
Make sure to create a backup in case you'll want to do a quick uninstall of this mod for the original file.
Installation:
ReShade 5.x.x update Installation:
UNINSTALLATION

Spoiler:
1. Download ReShade 4.9.1
2. Steps towards installing ReShade :
2.1. Press on "Click here to select a game and manage it's ReShade installation"
2.2. Find Dying Light in the list of games it tries to find on your computer and press "Use selected application". If it's not on the list, then do the optional step bellow.
2.2. [optional] Click on Browse and find Dying Light launcher folder (should be in your Steam folder. Example: C:\Program Files (x86)\Steam\steamapps\common\Dying Light\DyingLightGame.exe )
2.3. Dying Light uses Direct3D11 so select "Direct3D 10/11/12"
2.4.Select these effect packages to install and press OK: (Listed in order)
qUINT | Color effects | reshade-shaders | FXShaders | Legacy
2.5. Check these effects in the list of packages and press OK. Rinse and repeat till you got all of them selected: (Written in order)
2.6. There is one shader that is being corrupted when installed. AdaptiveTint.fx
It and other 3 shaders are located in [ Dying Light\reshade-shaders\Shaders\Daodan\dev ]
Copy AdaptiveTint.fx and paste it into [ Dying Light\reshade-shaders\Shaders ]
Copy Canvas.fxh | Stats.fxh | Tools.fxh and paste them into [ Dying Light\reshade-shaders\Shaders\qUINT ]
3. Download my ReShade preset "Dying Light Graphical Improvements". Open it with 7zip or Winrar. You'll find a file called "Dying Light Graphical Improvements.ini" and drop it into your Dying Light launcher folder. Example: C:\Program Files (x86)\Steam\steamapps\common\Dying Light
3.5. Installing the extension:
In your Dying Light folder, go to DW folder (C:\Program Files (x86)\Steam\steamapps\common\Dying Light\DW), open Data3.pak with Winrar or 7zip.
For new modders: (To open it: Double click Data3.pak, it will prompt you on how you want to open it. Click on More apps, if Winrar or 7zip isn't listed then press "Look for another app on this PC" And find where your Winrar or 7zip is installed, click on WinRAR.exe or 7zip.exe)
Inside the Dying Light Graphical Improvements.zip you should find another file called Dying Light LC extension.zip . Extract the contents of this zip file anywhere. Open Data3.pak (with Winrar or 7zip) and drop the extracted contents of Dying Light LC extension.zip into Data3.pak .
4. Start the game and get into the main menu, in game a message should pop up on how to open the ReShade menu. [home] button by default
4.1. In the ReShade menu, you can find my preset by clicking on the "ReShadePreset.ini" then a tab will open up in which you'll find my preset "Dying Light Graphical Improvements", select that and confirm.
4.2. At the bottom right you should see "Performance Mode" click on that if it's not on and close it by pressing [home] again.
5. Enjoy!
Show
1. Download ReShade 4.9.1
2. Steps towards installing ReShade :
2.1. Press on "Click here to select a game and manage it's ReShade installation"
2.2. Find Dying Light in the list of games it tries to find on your computer and press "Use selected application". If it's not on the list, then do the optional step bellow.
2.2. [optional] Click on Browse and find Dying Light launcher folder (should be in your Steam folder. Example: C:\Program Files (x86)\Steam\steamapps\common\Dying Light\DyingLightGame.exe )
2.3. Dying Light uses Direct3D11 so select "Direct3D 10/11/12"
2.4.Select these effect packages to install and press OK: (Listed in order)
qUINT | Color effects | reshade-shaders | FXShaders | Legacy
2.5. Check these effects in the list of packages and press OK. Rinse and repeat till you got all of them selected: (Written in order)
Spoiler:
qUINT by Marty McFly:
qUINT_lightroom.fx
qUINT_sharp.fx
Color effects by prod80:
PD80_03_Shadows_Midstones_Highlights.fx
PD80_04_Color_Gradients.fx
PD80_04_Contrast_Brightness_Saturation.fx
PD80_04_Saturation_Limit.fx
PD80_02_Bloom.fx
Shaders by brussell
EyeAdaption.fx
reshade-shaders by Daodan:
AdaptiveTint.fx
FXshaders by luluco250:
AdaptiveTonemapper.fx
Legacy:
Deband
Show
qUINT by Marty McFly:
qUINT_lightroom.fx
qUINT_sharp.fx
Color effects by prod80:
PD80_03_Shadows_Midstones_Highlights.fx
PD80_04_Color_Gradients.fx
PD80_04_Contrast_Brightness_Saturation.fx
PD80_04_Saturation_Limit.fx
PD80_02_Bloom.fx
Shaders by brussell
EyeAdaption.fx
reshade-shaders by Daodan:
AdaptiveTint.fx
FXshaders by luluco250:
AdaptiveTonemapper.fx
Legacy:
Deband
2.6. There is one shader that is being corrupted when installed. AdaptiveTint.fx
It and other 3 shaders are located in [ Dying Light\reshade-shaders\Shaders\Daodan\dev ]
Copy AdaptiveTint.fx and paste it into [ Dying Light\reshade-shaders\Shaders ]
Copy Canvas.fxh | Stats.fxh | Tools.fxh and paste them into [ Dying Light\reshade-shaders\Shaders\qUINT ]
3. Download my ReShade preset "Dying Light Graphical Improvements". Open it with 7zip or Winrar. You'll find a file called "Dying Light Graphical Improvements.ini" and drop it into your Dying Light launcher folder. Example: C:\Program Files (x86)\Steam\steamapps\common\Dying Light
3.5. Installing the extension:
In your Dying Light folder, go to DW folder (C:\Program Files (x86)\Steam\steamapps\common\Dying Light\DW), open Data3.pak with Winrar or 7zip.
For new modders: (To open it: Double click Data3.pak, it will prompt you on how you want to open it. Click on More apps, if Winrar or 7zip isn't listed then press "Look for another app on this PC" And find where your Winrar or 7zip is installed, click on WinRAR.exe or 7zip.exe)
Inside the Dying Light Graphical Improvements.zip you should find another file called Dying Light LC extension.zip . Extract the contents of this zip file anywhere. Open Data3.pak (with Winrar or 7zip) and drop the extracted contents of Dying Light LC extension.zip into Data3.pak .
4. Start the game and get into the main menu, in game a message should pop up on how to open the ReShade menu. [home] button by default
4.1. In the ReShade menu, you can find my preset by clicking on the "ReShadePreset.ini" then a tab will open up in which you'll find my preset "Dying Light Graphical Improvements", select that and confirm.
4.2. At the bottom right you should see "Performance Mode" click on that if it's not on and close it by pressing [home] again.
5. Enjoy!
ReShade 5.x.x update Installation:
Spoiler:
It's not a must to update to this version as it does create essentially more bugs and requires more things to do just for little bit of more performance on ReShade usage but not actual game performance. I personally don't recommend it as of this version still. But for anyone who does anyway, here's the instructions.
1. Back up all of the shaders that you downloaded through ReShade 4.9.1. This folder you need to back up is called "reshade-shaders" and is located in Dying Light folder (Where the launcher is)
2. Uninstall ReShade 4.9.1. Check uninstallation section.
3. Download ReShade 5.1 and install it with the same first few steps till you get to downloading shaders. At that point, skip the stage of downloading any shaders and finish.
4. Just as a precaution, you should copy and paste the back up "reshade-shaders" folder back into Dying Light folder (Where the launcher is)
Show
It's not a must to update to this version as it does create essentially more bugs and requires more things to do just for little bit of more performance on ReShade usage but not actual game performance. I personally don't recommend it as of this version still. But for anyone who does anyway, here's the instructions.
1. Back up all of the shaders that you downloaded through ReShade 4.9.1. This folder you need to back up is called "reshade-shaders" and is located in Dying Light folder (Where the launcher is)
2. Uninstall ReShade 4.9.1. Check uninstallation section.
3. Download ReShade 5.1 and install it with the same first few steps till you get to downloading shaders. At that point, skip the stage of downloading any shaders and finish.
4. Just as a precaution, you should copy and paste the back up "reshade-shaders" folder back into Dying Light folder (Where the launcher is)
UNINSTALLATION
Spoiler:
To uninstall the ReShade, do these steps:
Open ReShade installation file (The same one that you installed ReShade with)
Press on "Click here to select a game and manage it's ReShade installation"
Find Dying Light in the list of games it tries to find on your computer and press "Use selected application".
Dying Light uses Direct3D11 so select "Direct3D 10/11/12"
And then choose Uninstall
You can additionally delete this folder inside Dying Light folder, "reshade-shaders"
/// The ReShade 5.x.x uninstalls all files including shaders \\\
To uninstall the extension:
Open the Data3.pak file with winrar or 7zip and simply delete the data folder inside of it.
Show
To uninstall the ReShade, do these steps:
Open ReShade installation file (The same one that you installed ReShade with)
Press on "Click here to select a game and manage it's ReShade installation"
Find Dying Light in the list of games it tries to find on your computer and press "Use selected application".
Dying Light uses Direct3D11 so select "Direct3D 10/11/12"
And then choose Uninstall
You can additionally delete this folder inside Dying Light folder, "reshade-shaders"
/// The ReShade 5.x.x uninstalls all files including shaders \\\
To uninstall the extension:
Open the Data3.pak file with winrar or 7zip and simply delete the data folder inside of it.
Known issues:
- the sun is bigger.
- Not every single location may look perfect, this game wasn't built to look colorful and therefore some times things might appear simply too bright. This has been done to the maximum ability to prevent and minimize that effect. But something to keep in mind.
- the sun is bigger.
- Not every single location may look perfect, this game wasn't built to look colorful and therefore some times things might appear simply too bright. This has been done to the maximum ability to prevent and minimize that effect. But something to keep in mind.
Credits:
Techland (for releasing the game)
ReShade (For existing and making projects like this become alive)
Me (*high fives myself*)
Signette (for letting me use and edit his addon)
All of the creators of shaders that I'm using in this preset