


0 of 0
Documentation
Readme
View as plain text
Fluffy Manager 5000 (v1.795) by FluffyQuack (www.youtube.com/fluffyquack)
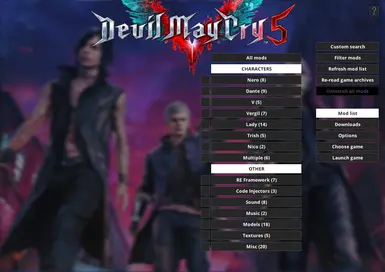
This is a mod manager, trainer and jukebox -- all in one! Designed to be used for various Capcom games.
Features:
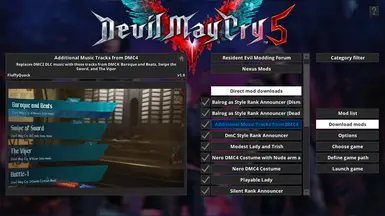
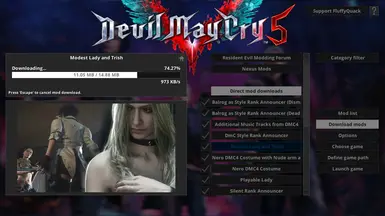
- Installing mods. It'll automatically create backups of existing files.
- Uninstalling mods. It'll either restore backup or delete files, based on a file exists in the original game.
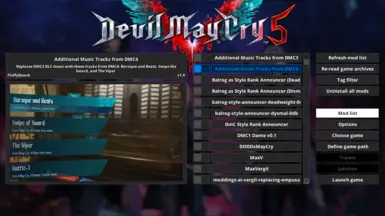
- Show a brief explanation alongside a screenshot preview of a mod (if the mod has that information supplied).
- Trainer functionality, supports RE HD (release version), RE0 (release version), Revelations, Revelations 2 (v4.1), RE5 (Patch #1), RE4 (v1.0.6), RE6 (v1.0.6), Devil May Cry 4 Special Edition, and Resident Evil 2.
- Support for custom games for mod managing.
- Jukebox!
Installing and running Fluffy Manager 5000:
- Unpack the modmanager anywhere and run modmanager.exe.
- You can use keyboard, mouse or an xinput device (aka an xbox 360 controller) to use the program. It also supports optional background input.
Details about mod manager usage (using RE6 as example):
- Make sure you have a clean install of RE6 with no mods installed! This is important as the program makes automatic backups of files as you install mods, so if you already have mods installed, it'll confuse the mod manager.
- Copy any mods into games\RE6\mods (or games\RE5\mods, or other similar path depending on game).
- Run the mod manager. Note that the program might need to be run with administrative rights to function properly.
- Fluffy Manager is packaged with one sample mod ("Input Text Removal") for RE6. You can use this as example on how to unpack mods into the mod manager, or how to set up your own mods.
If you are a mod creator and you want to make your mod fully compatible with the mod manager. Follow these steps:
- You should pack the mod so it has this folder structure: [nameofmod]\[modfiles] . You can look at the sample mods in the mod manager for an example. Make sure all files are in the [nameofmod] folder, including any readme or screenshots.
- (optional) The mod manager will try to read extra info about the mod it'll display in the mod manager. If you create a file called modinfo.ini, you can add some extra information. You can look at the sample mods to see how this is set up. The extra info in modinfo.ini can include:
-- "name: " Name of mod. (ie, "name: Sherry with pink clothes")
-- "description: " Description of what the mod does. (ie, "description: This mod turns Sherry's Asia outfit to pink.")
-- "author: " Name of people who created the mod. (ie, "author: Mr Awesome Modder Dude")
-- "version: " Version number of mod. (ie, "version: v1.0")
-- "screenshot: " - File name of screenshot for mod manager to display while mod is selected. Screenshot can be in several common formats (including png and jpg). Ideal resolution is 1280x720, but any resolution will work. (ie, "screenshot: pinksherry.png")
- (optional) If you don't bother to create a modinfo.ini file, you can still make the mod manager automatically show a screenshot by naming it "screenshot.png" or "screenshot.jpg".
Additional notes:
- As the mod manager takes backups, it may potentially use quite a bit of space if you install large mods.
- If you ever reinstall the game before uninstalling mods via the mod manager, just delete the "installed.ini" (this will be in RE6\mods, RE5\mods or REV\mods, depending on the game). That'll let the mod manager know that you have no mods installed anymore.
- If the game ever becomes patched, you should make sure you have no mods installed before the game is patched, otherwise the mod manager will no longer become aware which files are in a modded state and not. If you get into such a state, you can delete installed.ini (games/RE6/installed.ini using RE6 as example) and reinstall the game (or verify file integrity on steam), to ensure it's in a clean state with no modded files.
Details about trainer usage:
- Click on "activate trainer" to start using the trainer. Go through the "trainer functions" menus to change various behaviour in the game.
- For advanced users, you can host a network session with the trainer and let other people join you (they'll need your IP input in their config, and you need to forward port 9950 via your router or modem). That way, you can ensure trainer pokes are in sync between players.
- Some functions are just immediate pokes (it'll change a value in memory once) and others are freezes (continuous value changes). You can go into "Trainer functions->Options" to remove freezes. There are also code snippet changes which changes parts of the game code. Selecting "Remove all freezes" will also revert all code snippet changes. This is only useful for RE6 where you can play coop and make sure you have the same pokes active as your partner.
- The trainer has some basic anti-cheat functionality. It isn't perfect, but if you activate pokes which could easily be used as cheating, it'll automatically freeze your score to 1000 in RE6 mercenaries, or increase your played time in RE HD.
Some neat stuff you can do with the trainer in RE6:
- "Trainer functions->Player stats" This lets you view various stats about kills and such for the current match.
- "Trainer functions->Screen mode" This lets you turn on splitscreen view during any mode.
- Start a splitscreen mercs match by yourself, select "Poke->Character menu->2P->Change control->AI" and then start the match. You're now playing with the AI! You can go into "Poke->Screen mode" if you'd prefer to turn off splitscreen view.
- "Trainer functions->Global speed" This lets you mess around with the game speed, for instance making it slow motion or fast motion.
- There are a bunch of other features with the trainer. Just look around and see what's possible! Some pokes are there to help with modding, so it may not be interesting for someone just messing around with the game.
- "Trainer functions->6 players in mercs duo create menu" while in the "create game" menu for mercs or mercs duo, and you can host a 6 players mercs match. Other people won't need the trainer running for this to work.
Quick step-by-step guide on adding a custom game for the mod manager:
- Go into options and enter the "Define Game Info" menu.
- Click on "Current game" and select the first "custom game" slot.
- Select "game name" and change it. Ie, "Ultra Street Fighter 4".
- Select "mod directory," and type it in a short name which will be used for the directory where mods are stored. Ie, inputting "USF4" makes the mod manager create the folder "games\USF4\mods".
- Select "executable name" and write the name of the executable for the game. Ie, "SSFIV.exe".
- Select "Steam ID" and write down the steam app id for the game. This is completely optional! If you fill this in, you can launch the game via the mod manager. A quick way to find a game's app id, is searching for a game on this website: http://steamdb.info/app/45760/
- Select "Steam directory" and write down the directory name steam uses for the game. This is also optional! If you fill this in, the mod manager will automatically find the install path for the game. Ie, "Super Street Fighter IV - Arcade Edition".
- Select "Install path" and write down the location of where the game is installed. You don't have to do this step if you already filled in "steam directory".
- Once that's done, you can copy mods to "Games\USF4\Mods" and install them like any other game, and the mod manager will automatically handle backups and such. You can add up to 10 custom games like this, and the mod manager will remember the information you input (it's saved in "Data\GameInfo.bin").
Details about jukebox usage:
- Jukebox!
- You can change sound volume in options if it's too high or low.
Controls:
- Mod manager can be used with mouse, keyboard, or an xbox 360 controller. When not in focus, you can still use it with alternate controls.
Keyboard controls:
- Up/down: Navigate menus
- Escape: Turn on/off menus
- Enter: Select menu option
- Left/right: Alter menu values (hold shift to make it faster)
- Backspace: Go back to previous menu
Keyboard controls when not in focus:
- Tab: Hold to interact with mod manager
- I/K: Navigate menus
- U: Turn on/off menus
- O: Select menu option
- J/L: Alter menu values (hold shift to make it faster)
- U: Go back to previous menu
Xbox 360 gamepad controls:
- D-pad up/down: Navigate menus
- Start: Turn on/off menus
- A: Select menu option
- D-pad left/right: Alter menu values (hold X to make it faster)
- B: Go back to previous menu
Xbox 360 gamepad controls when not in focus:
- LB: Hold to interact with mod manager
- D-pad up/down: Navigate menus
- Left thumb stick down: Turn on/off menus
- RB: Select menu option
- D-pad left/right: Alter menu values (hold X to make it faster)
Extra credits:
- Maluc for helping out with making many of the trainer functions.
- Aquamatey for testing the trainer.