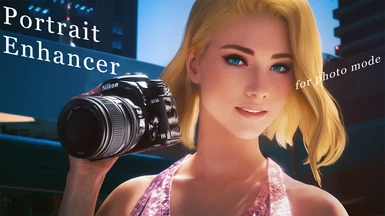
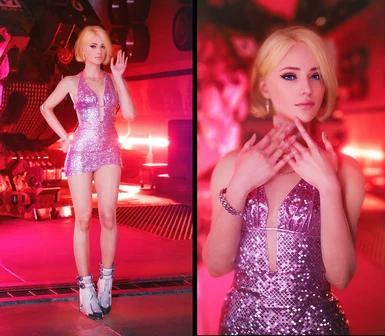
Please let me know if the new included Reshade files are easy to use. These files contain specific filters that I personally use. They don't change colours, they add a realistic depth of field effect and another reduces pixelation through a long exposure filter. More importantly, one provides a convenient preview of a rotated screen, no need to twist your neck anymore. I have also included a video on the main mod page demonstrating these features in action.
how to make it work as intended ( about LIGHTING, UNFORTUNATELY YOU NEED TO PAY FRANS BOUMA for his cyberlit ) or you can use CharLi mod on nexus. 1. Uninstall reshade, reinstall back 2. download that reshade filter file from this mod, only take INI file and put it into where cyberpunk2077.exe (JUST TAKE INI FILE ONLY, DONT COPY ALL OF IT) 3. open reshade - THIS IS IMPORTANT - YOU NEED TO SET YOUR DISPLAY DEPTH CORRECTLY a. search display depth in reshade interface and tick it. you will see messed up artifact looking images. b. go to add-ons bar (look at above reshade interface) - do as i say - tick "copy depth buffer before clear operations" then tick " copy depth buffer during frame to prevent artifact " c. Boom ! you get perfect display depth for reshade shader to work 4. what setting you need to mess with are ADOF - BOKEH DOF (people who love photography knew abt this) freeze shot - just to see the result easily when you do potrait images reallongexposure - this is the best effect for your hair, because it remove messy artifact at your hair adaptivetonemapper - make the screeenshot looks great - its like instagram filter
"why dont just use ingame photomode for perfect hair resolution" - yes you get best result for hair with ingame shot but reshade filter wont be applied, if youre good at photoshop then it might work for you, im lazy enough to go more editing and adding hair
Oh my god, you are just a life saver!!! I can't count how many times my shoots was fcked up cuz of this hair artifacts :x Thank you so much for that tip with Long Exposure shader <3
I'm so confused. I did the below steps just like you said and my screen is still all messed up with artififacts. Am I supposed to click something else after the one that says "during fram to prevent artifact"?
3. open reshade - THIS IS IMPORTANT - YOU NEED TO SET YOUR DISPLAY DEPTH CORRECTLY a. search display depth in reshade interface and tick it. you will see messed up artifact looking images. b. go to add-ons bar (look at above reshade interface) - do as i say - tick "copy depth buffer before clear operations" then tick " copy depth buffer during frame to prevent artifact " c. Boom ! you get perfect display depth for reshade shader to work
Sorry, been AFK for ages. Back now. No longer playing CP77 though. Does it still work? If not, could you update the tweak, so I can upload it here? I shall credit ye
Question to all the virtual photographers out there:
I'm using Reshade to manage and apply the Bookeh (DoF). However, it is not being applied in the screenshot when I press Spacebar in the Photo Mode. I know I could hide the UI and do printscreen, however then the additional pathtracing bounces arent applied.
Hello, enjoy your PE very much. I have decided to utilize the ReShade option as well. My question is... which effect packages should I choose? I cannot seem to find any instructions regarding which to choose. Thank you!
I'm sorry, i might be blind, but i can't see the hotkey binds in the ini file anywhere, what am i looking for exactly? got all the preset working, reshade downloaded, completed tutorial and selected the PortraitEnchanter.ini file, just trying to get the freeze shot to work.
Edit: Nevermind, figured it out, had to open Reshade in-game (Home button), press freeze shot and bind a key to it, then resize and rotate the picture in picture to fit my ultrawide, works now.
What are we suppoed to do with all the various files in the reshade folder? I was confused on if thats supposed to go into the Cyberpunk folder or have it link with Reshade somehow? If its supposed to be with ReShade then how do I get the files to it?
A lot of core mods have been updated, and while this has no dependencies. It would seem it still needs updating since its not currently working for me.
Yeah, presets do load some times, but not every time you open up the photo mode, and then its just preset 1 or 9. I could only see the other ones when I opened up photo mode while jumping. Weird.
I noticed this yesterday. Sadly yeah. I've got a few photo mode mods installed, and some are broken some are not. This one seems to be one that's partially broken. I managed to get a few pics but yeah. Needs an update. All in due time I suppose
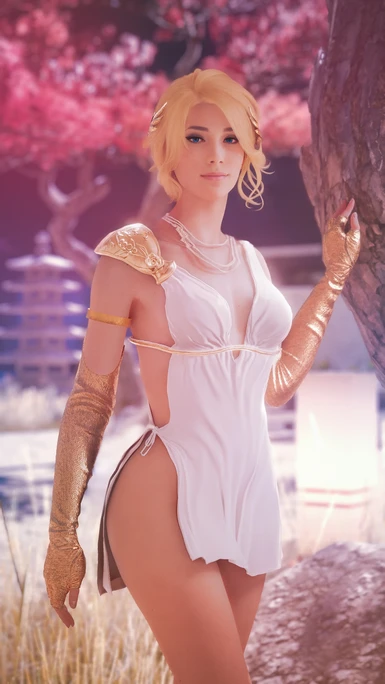
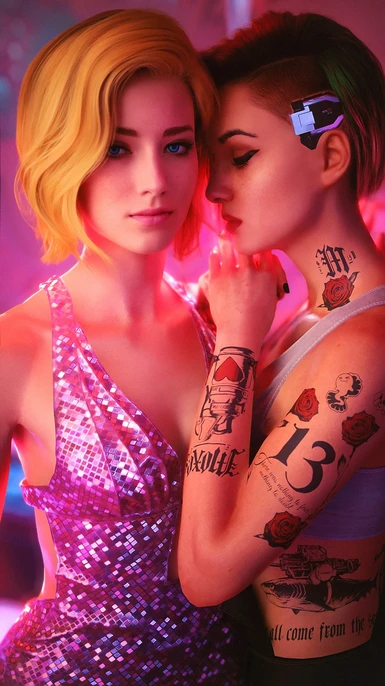
Must have patience and hope that great mods like this one will eventually be updated. Some of my best pics ever with this mod. I really appreciate the mod author for making it and sharing it with us.


158 comments
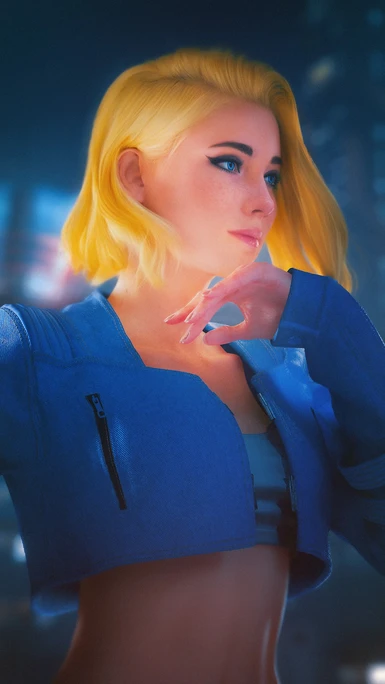
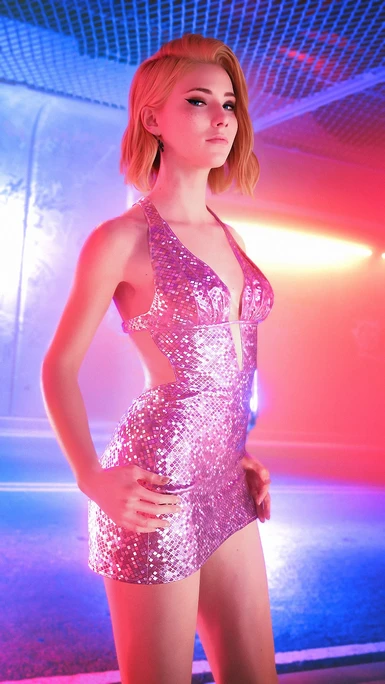
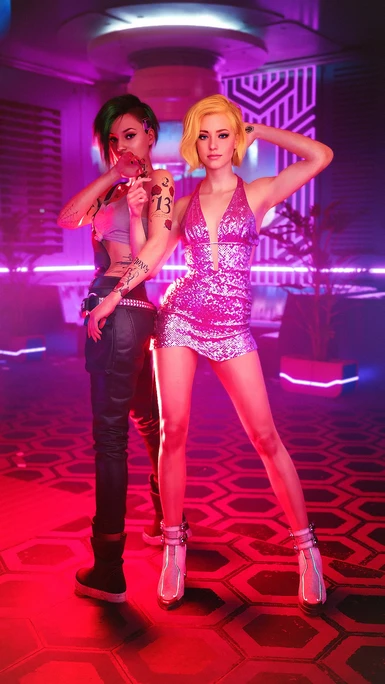
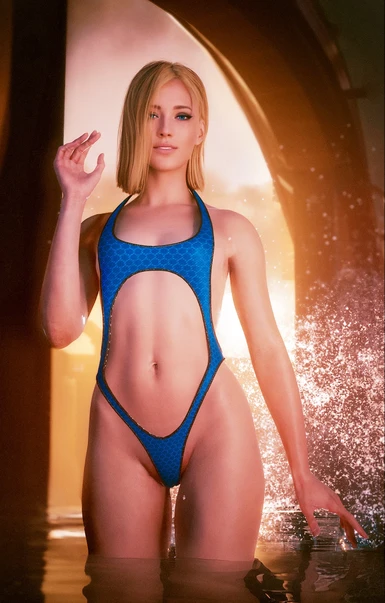
Guide: Achieving photorealistic hair in Cyberpunk 2077
Please let me know if the new included Reshade files are easy to use. These files contain specific filters that I personally use. They don't change colours, they add a realistic depth of field effect and another reduces pixelation through a long exposure filter. More importantly, one provides a convenient preview of a rotated screen, no need to twist your neck anymore. I have also included a video on the main mod page demonstrating these features in action.
1. Uninstall reshade, reinstall back
2. download that reshade filter file from this mod, only take INI file and put it into where cyberpunk2077.exe (JUST TAKE INI FILE ONLY, DONT COPY ALL OF IT)
3. open reshade - THIS IS IMPORTANT - YOU NEED TO SET YOUR DISPLAY DEPTH CORRECTLY
a. search display depth in reshade interface and tick it. you will see messed up artifact looking images.
b. go to add-ons bar (look at above reshade interface) - do as i say - tick "copy depth buffer before clear operations" then tick " copy depth buffer during frame to prevent artifact "
c. Boom ! you get perfect display depth for reshade shader to work
4. what setting you need to mess with are ADOF - BOKEH DOF (people who love photography knew abt this)
freeze shot - just to see the result easily when you do potrait images
reallongexposure - this is the best effect for your hair, because it remove messy artifact at your hair
adaptivetonemapper - make the screeenshot looks great - its like instagram filter
"why dont just use ingame photomode for perfect hair resolution" - yes you get best result for hair with ingame shot but reshade filter wont be applied, if youre good at photoshop then it might work for you, im lazy enough to go more editing and adding hair
3. open reshade - THIS IS IMPORTANT - YOU NEED TO SET YOUR DISPLAY DEPTH CORRECTLY
a. search display depth in reshade interface and tick it. you will see messed up artifact looking images.
b. go to add-ons bar (look at above reshade interface) - do as i say - tick "copy depth buffer before clear operations" then tick " copy depth buffer during frame to prevent artifact "
c. Boom ! you get perfect display depth for reshade shader to work
Should I uncheck "generic depth" and "Use aspect ratio heuristics"?
Maybe you are just trolling us :'(
Any chance you could update for 2.1? 😉
Ignore that. I was missing TweakXL.If not, could you update the tweak, so I can upload it here? I shall credit ye
I'm using Reshade to manage and apply the Bookeh (DoF). However, it is not being applied in the screenshot when I press Spacebar in the Photo Mode. I know I could hide the UI and do printscreen, however then the additional pathtracing bounces arent applied.
Is there a trick to fix this?
effects
Take screenshots using ReShade screenshot, otherwise the effects won't show in the image afterwards
Edit: Nevermind, figured it out, had to open Reshade in-game (Home button), press freeze shot and bind a key to it, then resize and rotate the picture in picture to fit my ultrawide, works now.
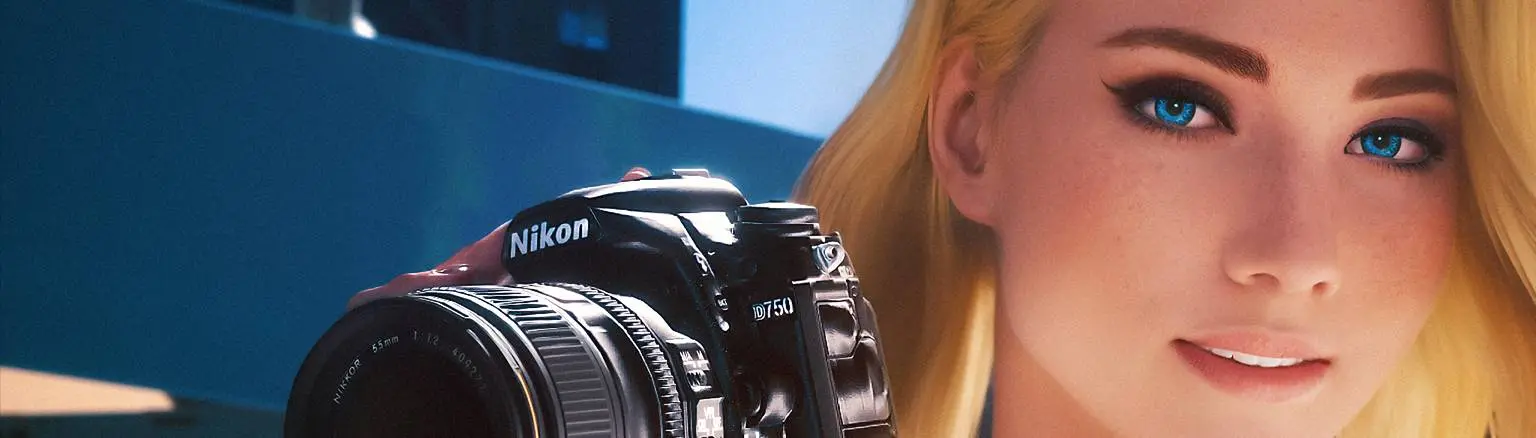
Where can i get that nikon camera?
It would seem it still needs updating since its not currently working for me.
I could only see the other ones when I opened up photo mode while jumping. Weird.
Please take a look mod author (:
I managed to get a few pics but yeah. Needs an update.
All in due time I suppose