


0 of 0


About this mod
Now updated for Phantom Liberty! The BEST Reshade preset to fix TAA Blurriness, remove Green Tint, and improve overall image quality with only 0-3 FPS loss! See for yourself!
- Permissions and credits
- Donations
2.0 OVERHAUL UPDATE!
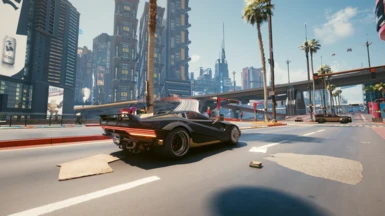
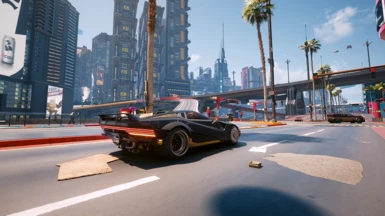
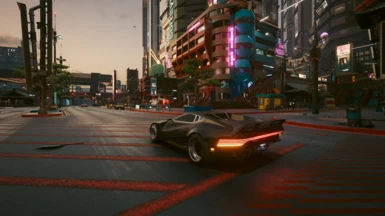
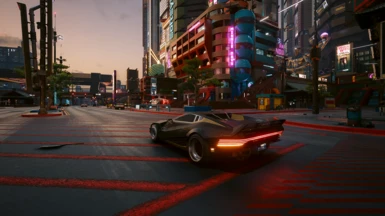
I spent a very long time going through every Reshade setting and tweaking them to achieve what I believe is the perfect look for Cyberpunk. As a professional colorist, I didn’t aim to make my Reshade look purely “cinematic” or “realistic” like others but simply enhance the colors and textures to their best potential. This Reshade fixes TAA Blurriness, Green tint, washed-out colors, and enhances texture sharpness/visibility.
My reshade is a lot less complex than most presets here on Nexus, consisting of only 4 shaders. But after days of careful optimization, I believe I've created the best-looking Reshade available with only 0-3 FPS loss. I had a ton of fun making this! I hope this Reshade will elevate your experience and immersion for Cyberpunk!
--> I recommend putting your in-game Gamma Correction setting to 1 when using this preset. If this is too dark for your liking, you can simply lower your in-game gamma a couple notches (somewhere between 0.90 - 0.95) when using my Reshade.
--> The included file has an optional version that has about 50% less sharpening. This might be ideal if you're playing at native 4K resolution or 1440p with no DLSS.
--> If you have HDR enabled and are seeing a VERY washed out image with my preset, try switching your in game HDR settings from "HDR pcRGB" to "HDR PQ" and vice versa. Most monitors and TV's work better with "HDR PQ," which is a YcbCr color space.
Shaders I'm using and what they do:
1) "LiftGammaGain.fx" is doing the heavy lifting to balance all colors and greatly enhance shadow contrast. The hardest part was to find the perfect balance that looked great at anytime and anywhere. You'd be surprised how tricky it was to balance all the colors in this game. You manage to make one area look perfect during night, but end up looking horrible during the day. Not to mention the completely different color palette between Night City and the Badlands. In the process of eliminating all tint and haziness, the image looks somewhat unsaturated and bluish. This is fixed in the next shader process.
2) Here's where the magic happens with Prod80's "ContrastBrightnessSaturation.fx." First, I slightly lowered exposure and contrast. This reduces haziness and bloom even further. This also gives the overall image a much less "harsh" look, leaning more into a realistic tone. Distant buildings and mountains become more defined with the natural color of the sky, instead of being washed out with white bloom. Next, I increased saturation through a subtractive method and reduced blue tint by carefully adjusting each color value separately. Roads and distance haze are more naturally greyish-blue by reducing blue saturation. Greens are slightly muted to further eliminate green tint in the Badlands during night, but just enough to still allow foliage to pop. Red and yellows are given a slight bump to make neon and lights pop, but not too much to make roads, dirt, and skin look oversaturated. Turquoise is given a slight boost to give the sky and distance haze a natural color. Purple and violet are given a significant bump to give neon extra pop, but not too much to be distracting.
3) "LumaSharpen.fx" is being used to sharpen fine detail. You'll notice this mostly on close-up objects, such as cracks in the ground, facial features, material textures, etc.
4) "Clarity.fx" is being used as a final and more broad pass of sharpening for the whole image. This shader also takes into account local contrast of edges, which gives edge highlights a bit more pop. The sharpening here will be noticeable on mid to far objects, such as buildings, foliage, etc. While in most cases, it would be unwise to stack 2 sharpening shaders (3 if you're using in-game sharpening), I believe "LumaSharpen" and "Clarity" complement each other as they both have their own strengths. "Luma" focuses on fine close detail while "Clarity" focuses on edge contrast and further objects. I've taken extra time to make sure ghosting and haloing artifacts are kept to a minimum while still alleviating TAA blur. If you prefer more sharpening, feel free to use the in-game sharpening slider in your settings.
Installation:
Here's a quick tutorial on how to install Reshade if you don't have it already: https://www.youtube.com/watch?v=kwj58T-V2a0
1) Install Reshade for Cyberpunk 2077
2) Download my preset. In my .zip file, choose one of my 2 included presets. One has 50% less sharpening than the other, which is ideal if you're playing with no DLSS or at native 4K. Then, drag and drop the "bin" folder into your game folder. Accept the replace prompt if it pops up.
2) After installing your Reshade preset of choice to your Cyberpunk folder, open the game, press home on your keyboard to open Reshade, click on the blue bar at the top where it says "ReshadePreset", then click on "Mango's Ultra Reshade V2," then click select.
3) In Reshade, click on the blue "Add-ons" tab at the top. In the "Add-ons" tab, check the box "copy depth buffer during frame to prevent artifacts." Doing so will also check the box above it. Then you're all done!
Updates:
1.0 - Initial release
2.0 - In preparation for Phantom Liberty, I had an itch to go back and tweak my Reshade preset a bit. My original plan was to just tweak a few minor things, but I ended up spending about 60 hours completely overhauling my preset. I not only achieved what I believe is the perfect Reshade for this game, but also one of the most performance friendly with only a 0-3 FPS impact. Compared to about 3-5 on my original. Despite having only 4 shaders now, this overhaul looks drastically better than my old one. The reason this overhaul took so long was because I was strived to achieve what 50 other Reshades I've downloaded couldn't, and that was too look amazing both day/night, exterior/interior, and all weathers. Even the #1 downloaded Reshade on Nexus, "True HDR," looks ok at night, but horrendous during the day, especially in the Badlands. Not to mention its 10 FPS impact! I meticulously balanced each and every color's saturation, contrast, and brightness to look great everywhere and anytime in the game. I've optimized sharpening and contrast to not only eliminate TAA blur even more, but also increase visibility compared to the base game by reducing bloom haze. Compared to my original, you can expect:
- Reduced blue tint (colors are much more natural and diverse now)
- Removed bloom and adjusted contrast (colors are now naturally blight and visibility is drastically improved)
- Only 0-3 FPS impact (compared to 3-5 FPS before)
- Only 1 available preset (no more "Lite" or "Super"). Lite not needed since the FPS impact is even lower now, and Super is not needed since I wanted a single preset that was the best look I can achieve.
- Reduced crushed blacks and blown out whites (adding to visibility)
2.1 - Changed "Clarity" blending mode to reduce sharpening artifacts. Reduced "Clarity" and "Lumasharpen" strength by 25% to prevent sharpening artifacts. Feel free to use the in-game sharpening (in Cyberpunk settings) if you prefer more sharpening. I'd recommend no more than 50% to prevent artifacts.
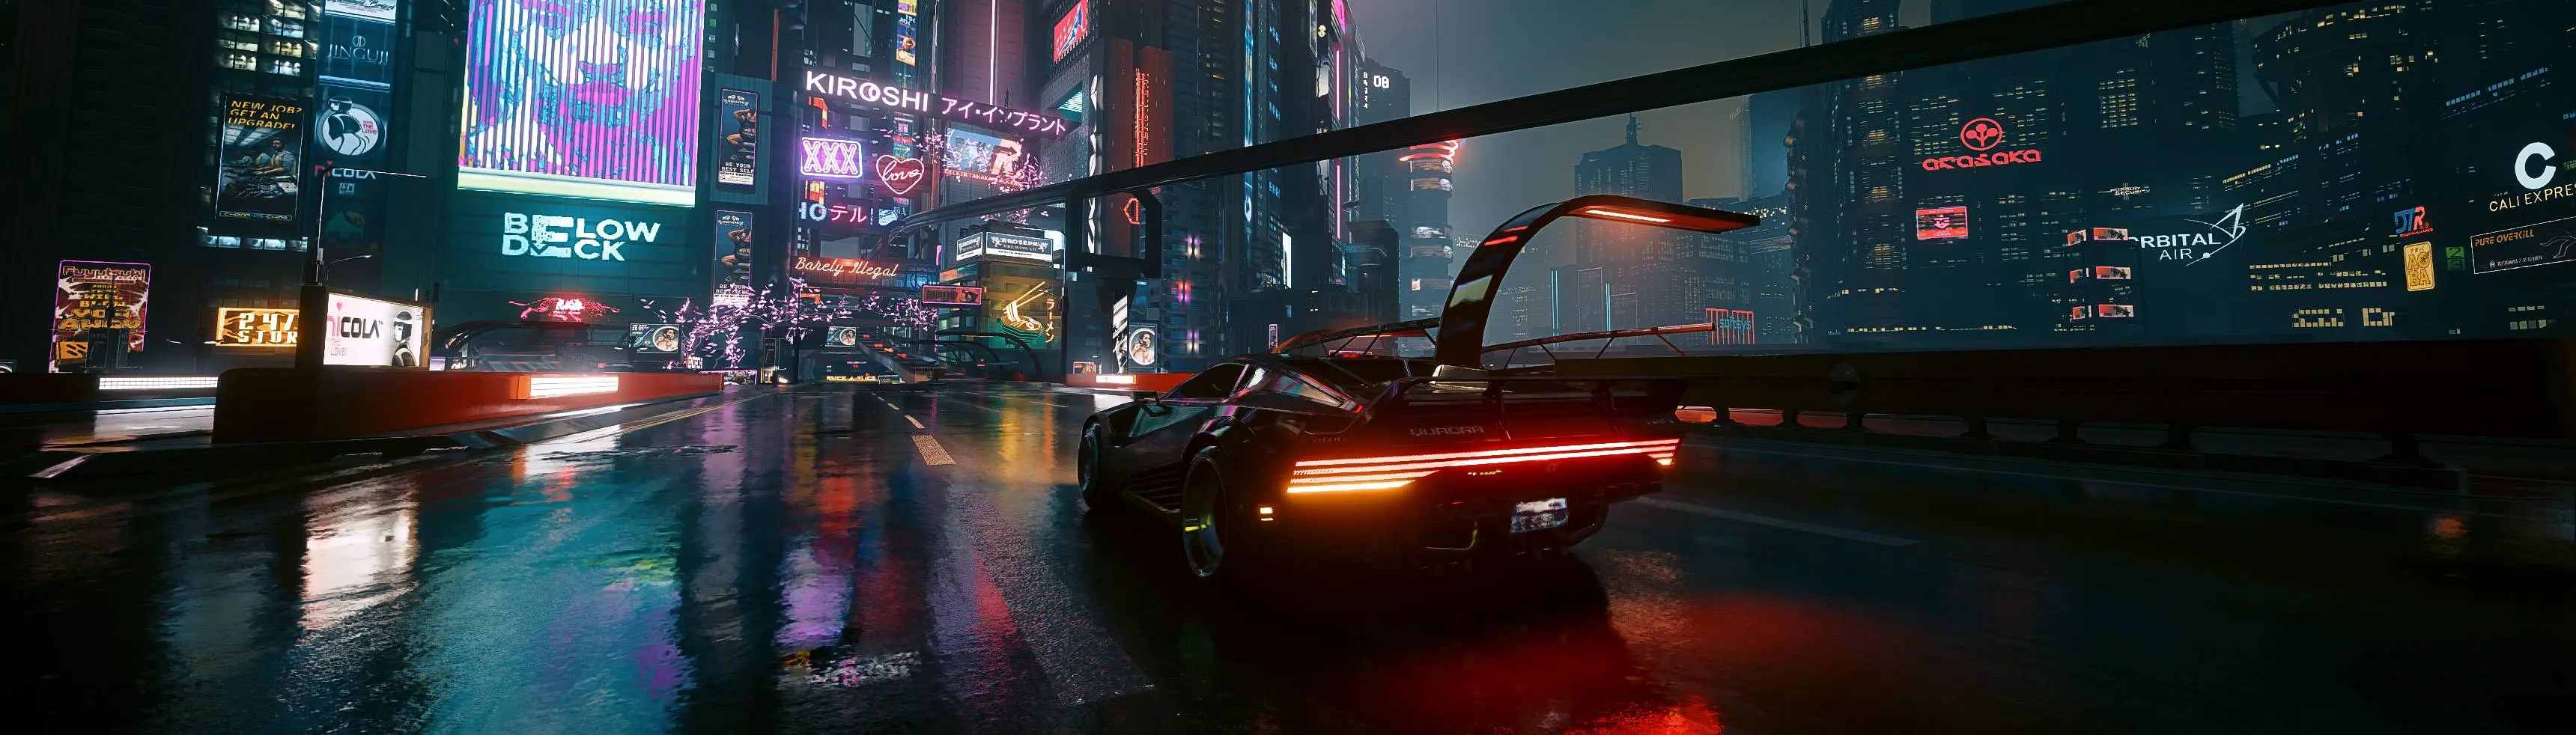
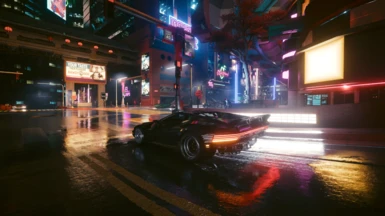
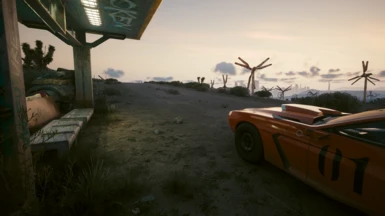
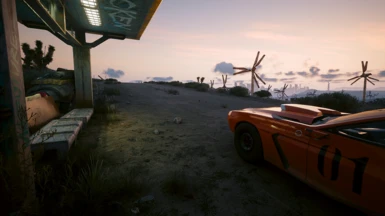
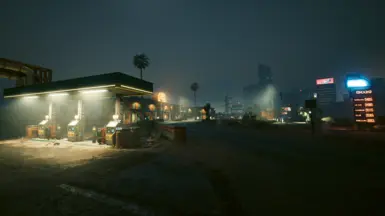
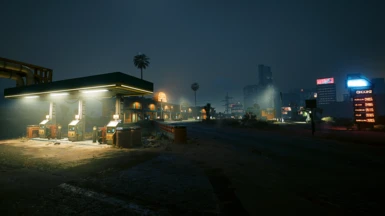
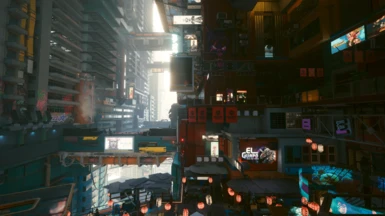
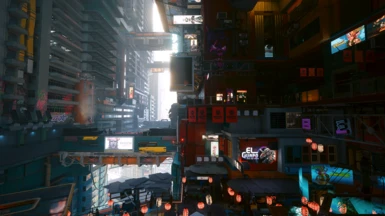
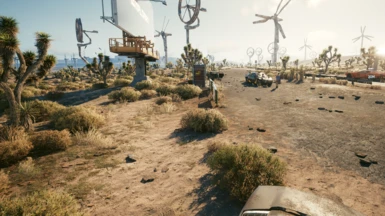
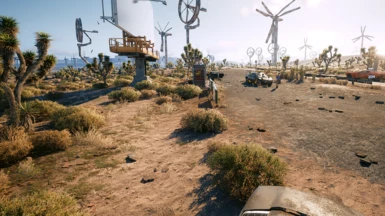
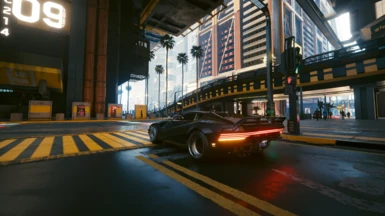
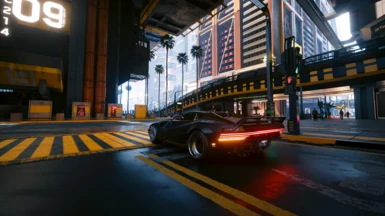
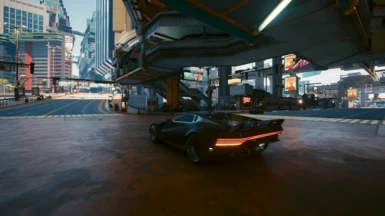
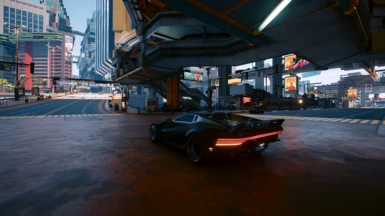
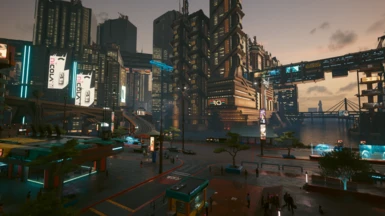
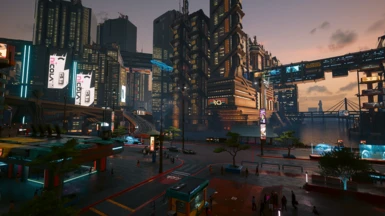
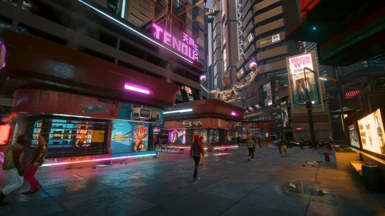
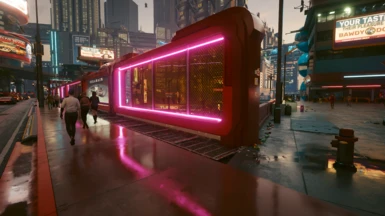
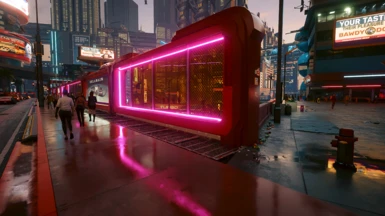
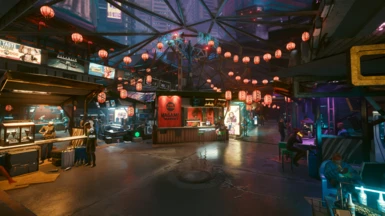
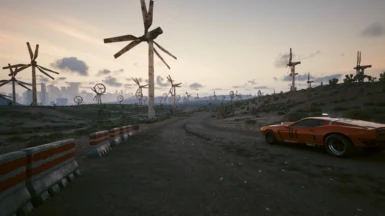
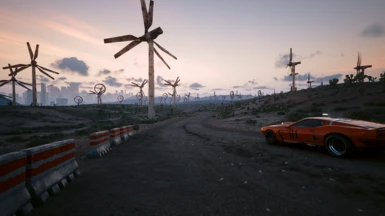
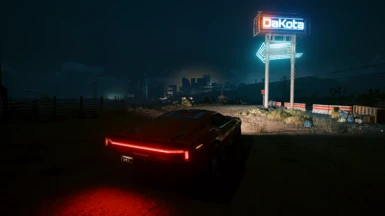
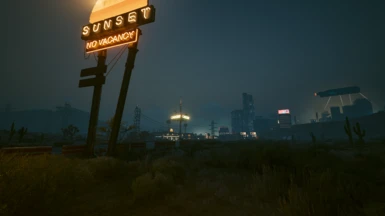
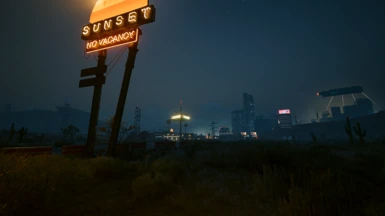
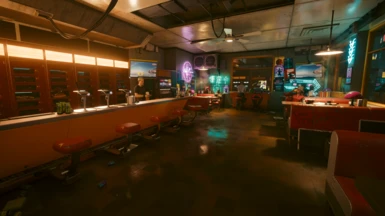
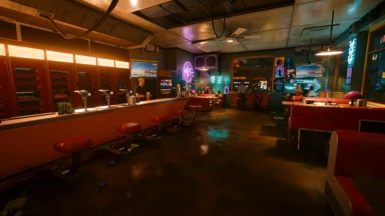
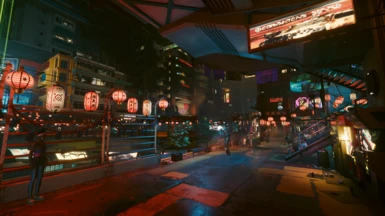
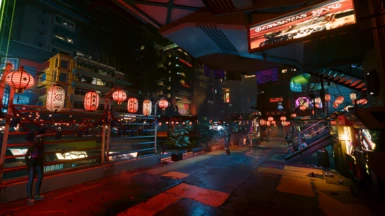
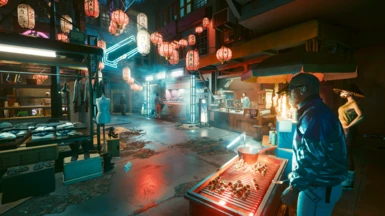
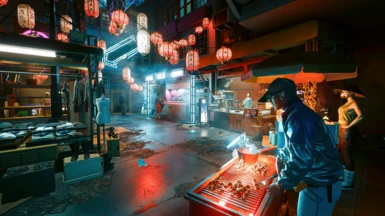
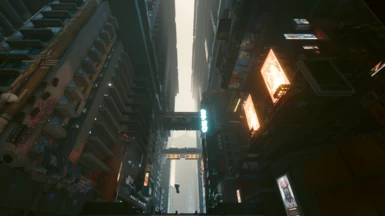
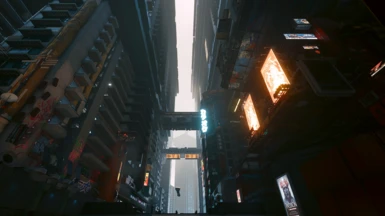
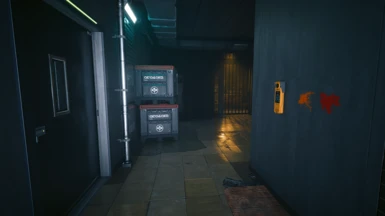
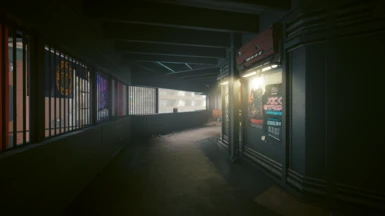
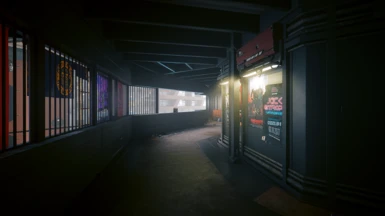
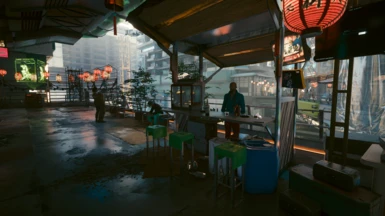
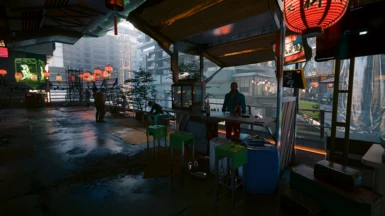
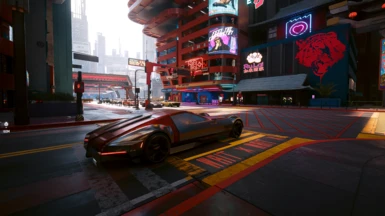
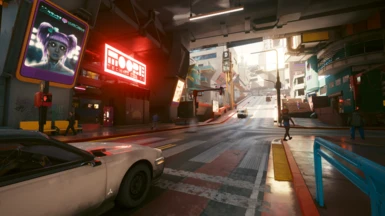
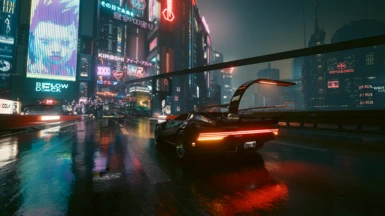
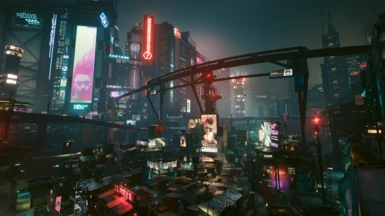
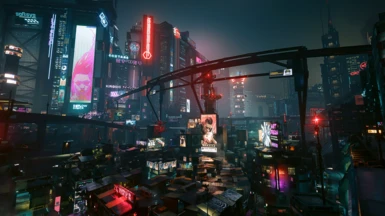
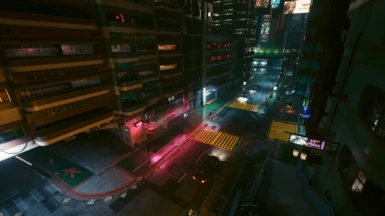
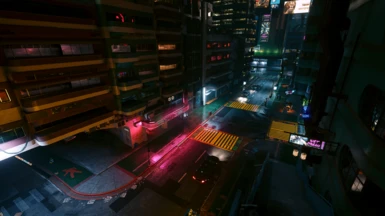
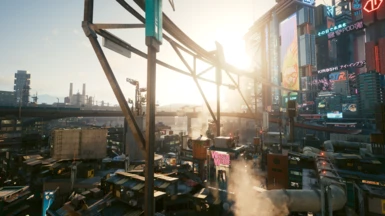
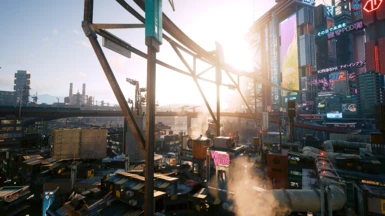
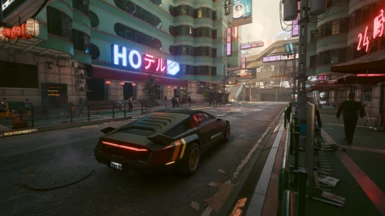
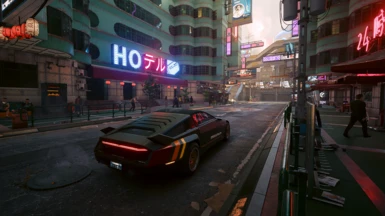
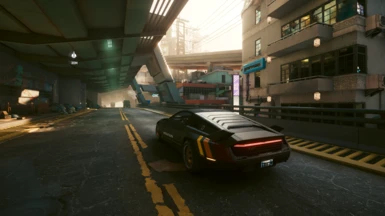
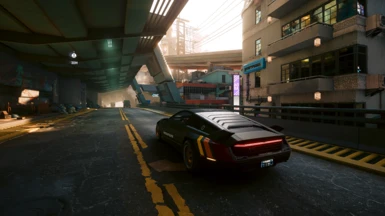
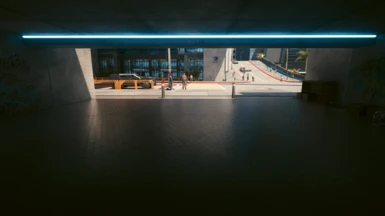
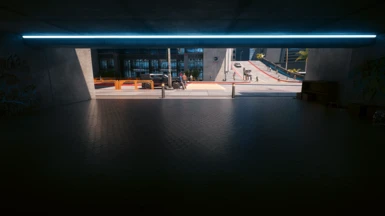
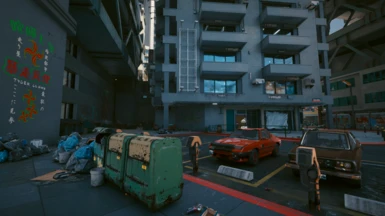
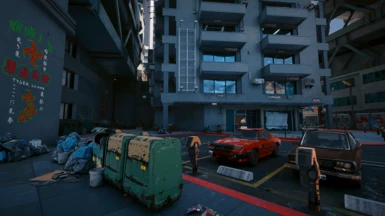
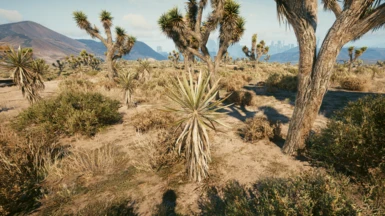
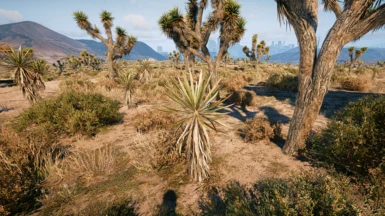
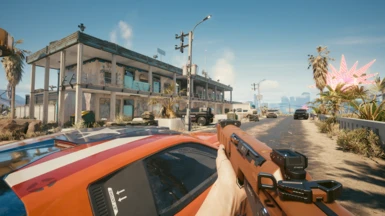
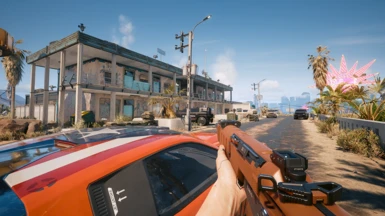
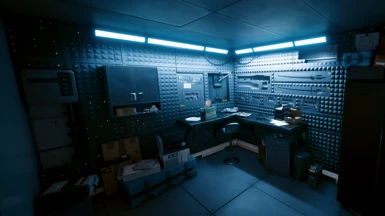
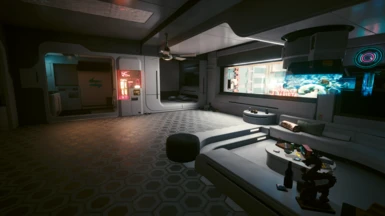
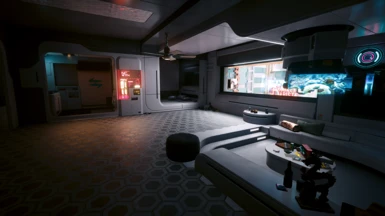
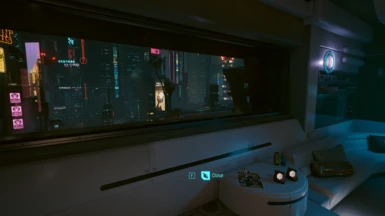
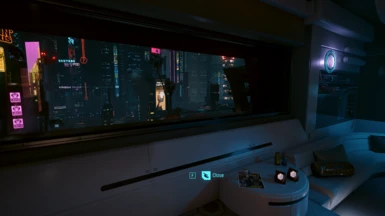
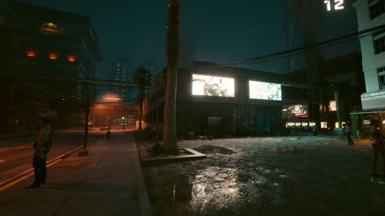
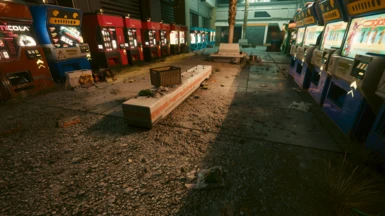
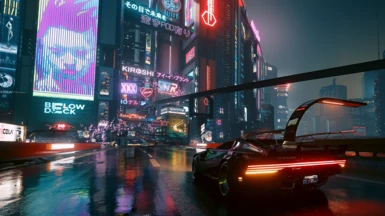
*Screenshots taken at 1440p DLSS Quality*
*Lower your gamma correction (located in game settings) if my Reshade preset is too dark for you (around 0.90 - 0.95)*
*My Specs: RTX 3080, Ryzen 5950X, 32GB 3200Mhz RAM, SSD Storage. Average 60FPS @ 3440x1440p DLSS Quality, RT On*
I spent a very long time going through every Reshade setting and tweaking them to achieve what I believe is the perfect look for Cyberpunk. As a professional colorist, I didn’t aim to make my Reshade look purely “cinematic” or “realistic” like others but simply enhance the colors and textures to their best potential. This Reshade fixes TAA Blurriness, Green tint, washed-out colors, and enhances texture sharpness/visibility.
My reshade is a lot less complex than most presets here on Nexus, consisting of only 4 shaders. But after days of careful optimization, I believe I've created the best-looking Reshade available with only 0-3 FPS loss. I had a ton of fun making this! I hope this Reshade will elevate your experience and immersion for Cyberpunk!
--> I recommend putting your in-game Gamma Correction setting to 1 when using this preset. If this is too dark for your liking, you can simply lower your in-game gamma a couple notches (somewhere between 0.90 - 0.95) when using my Reshade.
--> The included file has an optional version that has about 50% less sharpening. This might be ideal if you're playing at native 4K resolution or 1440p with no DLSS.
--> If you have HDR enabled and are seeing a VERY washed out image with my preset, try switching your in game HDR settings from "HDR pcRGB" to "HDR PQ" and vice versa. Most monitors and TV's work better with "HDR PQ," which is a YcbCr color space.
Shaders I'm using and what they do:
1) "LiftGammaGain.fx" is doing the heavy lifting to balance all colors and greatly enhance shadow contrast. The hardest part was to find the perfect balance that looked great at anytime and anywhere. You'd be surprised how tricky it was to balance all the colors in this game. You manage to make one area look perfect during night, but end up looking horrible during the day. Not to mention the completely different color palette between Night City and the Badlands. In the process of eliminating all tint and haziness, the image looks somewhat unsaturated and bluish. This is fixed in the next shader process.
2) Here's where the magic happens with Prod80's "ContrastBrightnessSaturation.fx." First, I slightly lowered exposure and contrast. This reduces haziness and bloom even further. This also gives the overall image a much less "harsh" look, leaning more into a realistic tone. Distant buildings and mountains become more defined with the natural color of the sky, instead of being washed out with white bloom. Next, I increased saturation through a subtractive method and reduced blue tint by carefully adjusting each color value separately. Roads and distance haze are more naturally greyish-blue by reducing blue saturation. Greens are slightly muted to further eliminate green tint in the Badlands during night, but just enough to still allow foliage to pop. Red and yellows are given a slight bump to make neon and lights pop, but not too much to make roads, dirt, and skin look oversaturated. Turquoise is given a slight boost to give the sky and distance haze a natural color. Purple and violet are given a significant bump to give neon extra pop, but not too much to be distracting.
3) "LumaSharpen.fx" is being used to sharpen fine detail. You'll notice this mostly on close-up objects, such as cracks in the ground, facial features, material textures, etc.
4) "Clarity.fx" is being used as a final and more broad pass of sharpening for the whole image. This shader also takes into account local contrast of edges, which gives edge highlights a bit more pop. The sharpening here will be noticeable on mid to far objects, such as buildings, foliage, etc. While in most cases, it would be unwise to stack 2 sharpening shaders (3 if you're using in-game sharpening), I believe "LumaSharpen" and "Clarity" complement each other as they both have their own strengths. "Luma" focuses on fine close detail while "Clarity" focuses on edge contrast and further objects. I've taken extra time to make sure ghosting and haloing artifacts are kept to a minimum while still alleviating TAA blur. If you prefer more sharpening, feel free to use the in-game sharpening slider in your settings.
Installation:
Here's a quick tutorial on how to install Reshade if you don't have it already: https://www.youtube.com/watch?v=kwj58T-V2a0
1) Install Reshade for Cyberpunk 2077
2) Download my preset. In my .zip file, choose one of my 2 included presets. One has 50% less sharpening than the other, which is ideal if you're playing with no DLSS or at native 4K. Then, drag and drop the "bin" folder into your game folder. Accept the replace prompt if it pops up.
2) After installing your Reshade preset of choice to your Cyberpunk folder, open the game, press home on your keyboard to open Reshade, click on the blue bar at the top where it says "ReshadePreset", then click on "Mango's Ultra Reshade V2," then click select.
3) In Reshade, click on the blue "Add-ons" tab at the top. In the "Add-ons" tab, check the box "copy depth buffer during frame to prevent artifacts." Doing so will also check the box above it. Then you're all done!
Updates:
1.0 - Initial release
2.0 - In preparation for Phantom Liberty, I had an itch to go back and tweak my Reshade preset a bit. My original plan was to just tweak a few minor things, but I ended up spending about 60 hours completely overhauling my preset. I not only achieved what I believe is the perfect Reshade for this game, but also one of the most performance friendly with only a 0-3 FPS impact. Compared to about 3-5 on my original. Despite having only 4 shaders now, this overhaul looks drastically better than my old one. The reason this overhaul took so long was because I was strived to achieve what 50 other Reshades I've downloaded couldn't, and that was too look amazing both day/night, exterior/interior, and all weathers. Even the #1 downloaded Reshade on Nexus, "True HDR," looks ok at night, but horrendous during the day, especially in the Badlands. Not to mention its 10 FPS impact! I meticulously balanced each and every color's saturation, contrast, and brightness to look great everywhere and anytime in the game. I've optimized sharpening and contrast to not only eliminate TAA blur even more, but also increase visibility compared to the base game by reducing bloom haze. Compared to my original, you can expect:
- Reduced blue tint (colors are much more natural and diverse now)
- Removed bloom and adjusted contrast (colors are now naturally blight and visibility is drastically improved)
- Only 0-3 FPS impact (compared to 3-5 FPS before)
- Only 1 available preset (no more "Lite" or "Super"). Lite not needed since the FPS impact is even lower now, and Super is not needed since I wanted a single preset that was the best look I can achieve.
- Reduced crushed blacks and blown out whites (adding to visibility)
2.1 - Changed "Clarity" blending mode to reduce sharpening artifacts. Reduced "Clarity" and "Lumasharpen" strength by 25% to prevent sharpening artifacts. Feel free to use the in-game sharpening (in Cyberpunk settings) if you prefer more sharpening. I'd recommend no more than 50% to prevent artifacts.
*Screenshots taken at 1440p DLSS Quality*
*Lower your gamma correction (located in game settings) if my Reshade preset is too dark for you (around 0.90 - 0.95)*
*My Specs: RTX 3080, Ryzen 5950X, 32GB 3200Mhz RAM, SSD Storage. Average 60FPS @ 3440x1440p DLSS Quality, RT On*