


0 of 0
Documentation
Readme
View as plain text
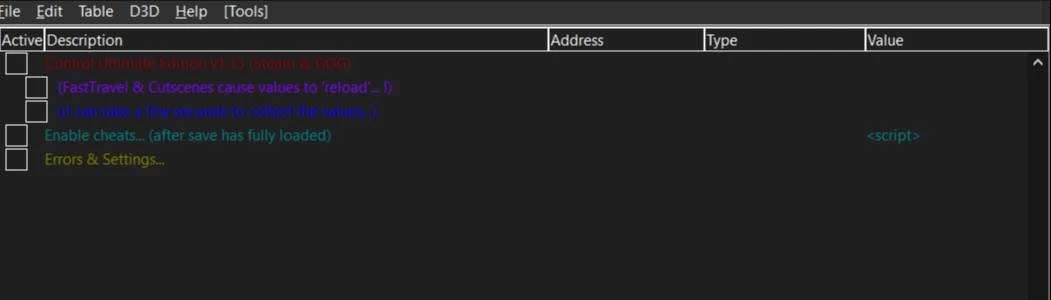
Control v1.13 (Steam & GOG) (incl DLCs ~ DX12 only)
Prenotes:
- This version also makes use of features introduced in CE v7.1x or higher...
- Best practise is to load the table AFTER your save game has fully loaded...
- You should only work with 'normal color' cheats (do not touch 'greyed' info)
- When returning to the main game menu, best is to disable the main script first (using [Ctrl+F12]) !
- FastTravel (and Cutscenes) will 'reset' data structure pointers. Whenever this happens,
you must re-enable selected (sub)options again, if needed...
Also - prior/during those moments - any locked values should be unlocked to avoid possible crashes !
- All values (pointers) will be collected while "active" as player.
(iow not while in 'ESC' or 'TAB' mode)
- Also - where appropriate - 'greyed' structure pointers are shown, and these must contain a value to work properly !
(if zero, switch back ingame to have them collected)
- If you initially selected an incorrect game_exe, you might be prompted with a warning upon selected the correct exe.
You can safely ignore this message, and the table will load fine thereafter...
- After returning back to the Title Screen, you should disable all cheats (using [Ctrl+F12]) !
(or else there is a good chance of crashing the game upon returning ingame...)
Prenote: values indicated with '(-)' means "lower values are better". For all other values, higher means better.
* Features:
> Health: (pretty much informational, as - by switching to a different weapon - you will loose health anyway)
- No Damage: will give you - sort of - godmode
(in a few rare cases, you'll wind up with a "red" screen. In such case, disable the cheat and get hurt to a value
lower then about '0.20~0.30'; and then use (blue) heal points prior to re-enabling)
> Ammo: locking it gives a 'No Reload' status
- Weapon Charge Duration: by lowering this value, you can release the firebutton already earlier on
(eg: '0.01' ~ which still allows you to aim before firing - primarily effective with 'Pierce')
- Max Charge: increasing this value gives you more "ammo"
> Launch/Dodge/Slam Charge: gives you basically infinite energy for respective/all abilities that use it
- Launch & Slam Damage (these values also depend on your current ability status)
> Levitate: lock and/or set to high value (eg: '10')
- Infinite Hover: when set, you will never drop to the surface (unless using [Space] again of course)
> Seize Duration: the lower the value, the longer your seized enemies stay alive (eg: '0.1')
(note: do NOT enter a too low value as seized enemies might not die at all)
- Max Enemies: how many enemies you can seize concurrently
- Seize Range: range up to which you can start seizing them (eg: '50')
> Source & Skill Points: edit them to your liking
> Materials: allows you to edit any/present 'Assets'
HowTo:
a. set all values to a "pre_max" value: simply click the 'Set to MaxQuantity...' button (red top-right button)
(see greyed 'Components - Base...' to change this pre_max value)
b. copy/paste this list: click the 'Copy list...' button (top-right button); then paste it into Notepad
c. edit specific item: select it in the list, then click the 'Edit item values...' button (top-right button)
1) double-click the 'Address: Value' column
2) Total: set it to a new value (and [Enter])
Notes:
a. the script scans memory to collect them all; hence it can take 10~15s to build the list...!
b. no extended testing has been performed on value ranges (only tested with max set to '99')
> Timers:
1) Expedition (Executive ~ Jukebox): allows you to "lock" the timer during 'Expeditions'
- Timer: lock its actual current time status (or set it to a higer value)
- Ignore Timer: same effect but without the need to lock its time_value
Notes:
a. the timer will - visually - continue to decrease, but pressing [Esc] twice will restore (restart from) its locked value
b. the game seems to save these values (iow by enabling 'Ignore Timer' just once, you no longer need to worry about it) ?!
2) Shum Deadline (Arcade ~ AWE)
3) Bureau Alerts
- Activate Bureau Alert: set it to 'Enabled' to unlock an alert. If you want to try a different one, just enable again (etc...)
Notes:
- 'Ignore Timer' must be disabled for this option to work !
- once enabled, a new alert is raised; and this option is then auto-disabled (or else it would continuously raise alerts)
if that happens, just open the mission_list and 'track' that particular alert mission...
- in most cases, the mission will be "silently" added to your missions_list. If you want to "keep it aside" for the time being,
then just lock the timer. If you want to remove it, then set the timer_value to '1'.
- if the new alert mission does NOT get added to the list, then you must accept the alert ([G]) immediately upon showing.
when successfull, the game will tell you where to go next (do not consult your missions until informed as such)
- DX11 users: always select 'Delayed Enabled' (if the other option works out for you, do use it of course...)
> Miscellaneous:
- Board Countermeasures: allows you to edit the target values for currently selected challenges
(setting it to its maximum value will instantly complete that challenge)
- Assist Mode: basically allows you to dis/enable these options, as found in the [Options ~ Gameplay] menu
Note: for some reason, it can take a bit of time (5~10s) to populate the values... ?!
- FOV: dis/enable and change FOV on the fly
- [F] Hold Time: time to execute pressing "main" [F] key (lower is faster)
(does not apply to all [F] actions though)
- Outfits: add/remove outfits from that list
- System speed: change overall speed of the game
* [Tools] menu: (see top menu-bar choices)
> Compact View:
allows you to show/hide the typical CE interface (Compact (default) = show only the cheats-list)
> Select & Launch Your Game...: allows you to launch the game directly from this table.
The 1st time, you'll need to find/select your game's (sub)folder. Once the game has launched - and you want to keep its (sub)folder location - you can/must save the table manually to keep that setting permanently.
(see also 'Cheat table settings' below)
> Disable All Cheats: will disable all cheats, and unlock any locked values
(you could use this between mission/save/etc-loads when crashes seem to occur at that moment in time)
Note: [Ctrl+F11] = unlocks 'locked' values only ~ [Ctrl+F12] = disables all cheats (incl scripts)
> Show Table Name: will - in most cases - only show correct tablename when game has not yet been launched/attached.
v7.1+ users will/should always get the correct tablename shown !
> Errors & Settings:
§ Error Statistics...: logs errors handled by CE (basically handling possible crashing);
and all values should remain at '0' normally
(not used here...)
§ Cheat table settings...: (as user you can change certain - default - settings here)
- Browser: upon clicking the 'Info' button, this broswer will be launched with a search string
to find the related game topic @FRF (it should use your default search engine)
- Compact View Mode: set your preferred default startup
- Color: will be used as background color in the cheat list overview
(you can use one of the online 'Color picker' tools to get a proper (hex)value)
- Game' exe and (sub)folder: exe used for 'auto-attach'-ing; and opening the proper game folder via 'Select & Launch Your Game'
Note 1: the 1st time that you use this feature, your game folder_location will be copied here. However, you must save
the CE table manually in order to keep this setting permanently.
Also: clear this info in case you have changed your game location thereafter... (or update it manually here)
Note 2: some tables offer a feature to export/save certain reports to a file.
In such cases, the "export function" will look for its 'Report export location' here.
(if you get a '... is undefined' error message, you'll have an incorrect path reference filled in here !)
* <game> : refers to your game location (entered in previous field above)
* <table>: refers to your CE table location (see also: [Tools ~ Show Table Name...])
* 'any existing folder' (eg: C:\TEMP\)
Note: use 'apply above changes...' to check out your changes first, before saving !
Important: if you want to keep any change(s) permanently, you must manually save the table, quit CE and load up the table again!
- Developer tools... (do not use, unless at your own risk)
Important: this table depends on '(game verification...)' set properly. Iow do not change this setting !
- Maintenance scripts... (do not use, unless at your own risk)
(allows table author to manage 'system' settings more easily ~ again, not to be used by gamer at all !)
ps: you can change/introduce hotkeys via CE's 'hotkey' feature