Note: You do not need to create a projects folder or any additional directories. The editor will automatically generate required folders such as Save_Backup when needed. Simply run the script and start editing your save files.
Quick Update on Project Progress Hey everyone! Just wanted to drop a quick update and keep you all in the loop with how things are going.First off, I forgot to mention earlier—while pictos are listed in the interface, the actual mapping for them isn’t implemented yet. So at the moment, those don’t function as intended. What does currently work are upgrades for weapons, outfits, and hair. Those features are up and running smoothly.Now for the bigger news: I’ve made the decision to completely redo the project and migrate it to a new language—C#. After spending some time thinking about the direction I want this project to go, I came to the conclusion that Python, while great for a lot of things, felt too limited when it comes to building the kind of UI I envision.By porting everything over to C#, I’ll have much more flexibility to create a more polished and responsive user interface, which is a big priority moving forward.In the meantime, I’ve also been doing some behind-the-scenes testing with the save file system. So far, I’ve successfully managed to modify weapon levels and get them working in-game. I've also confirmed that adjustments to gold values are functioning correctly.Lots more to come, and I’ll keep updating as progress continues. Thanks for following along!
Quick Update on the Project – PT2I’ve just uploaded the final Python-based update. There will be no further updates to the current version — all development is now shifting over to the C# + Avalonia rewrite. This is going to be a major undertaking, but it's the right move to ensure better performance, UI flexibility, and long-term support.Once the new version reaches feature parity with the current Python build, I’ll release a fresh alpha build for everyone to test.✅ What’s in the final Python update?
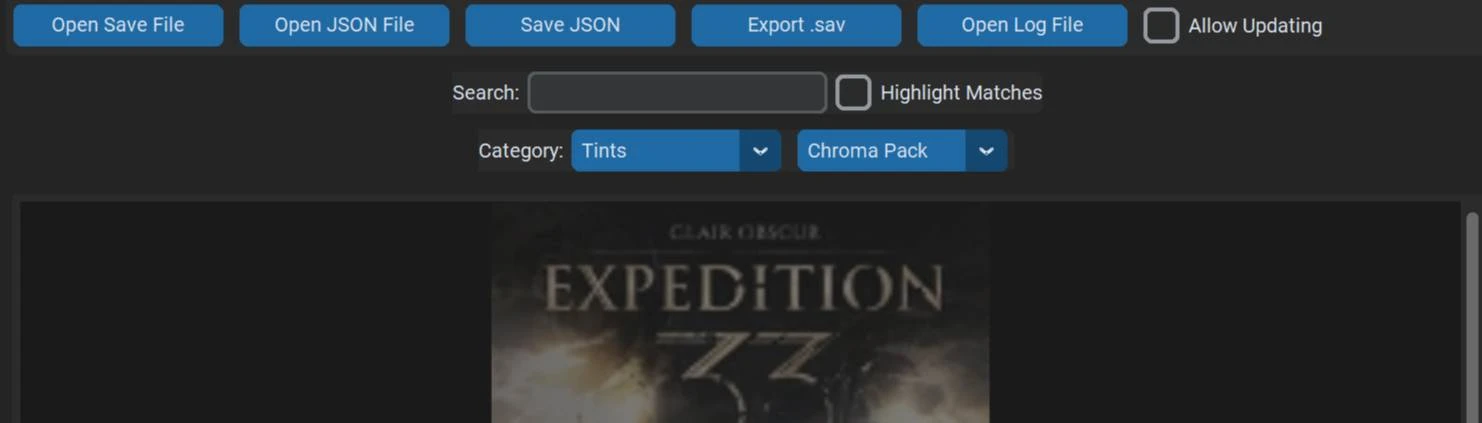
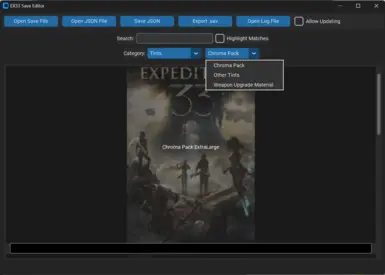
New category structure: Some tints were reorganized into their own dedicated categories.
UI performance boost: The background image was removed due to lag caused by the volume of new entries.
Thanks again to everyone who’s downloaded, tested, and supported this project. Your interest is what inspired the rewrite — and I can’t wait to show you what’s coming next!
Guide originally written by DrNibelungen. Full credit to them for sharing this helpful information!
Open your local Game Pass save folder C:\Users\<YourUser>\AppData\Local\Packages\KeplerInteractive.Expedition33_ymj30pw7xe604\SystemAppData\wgs\ 00090000044E48CB_000000000000000000000000697F9EC3 The final folder name (the long hex string) can vary from one PC to another.
Find the sub‑folder that matches your latest in‑game save time
Inside the main `wgs` folder you will see many sub‑folders.
Pick the one whose Modified timestamp matches the exact second shown on the in‑game Load Game screen. (File size for the correct save is usually 60 KB – 200 KB.)
Locate the real save file
Inside that sub‑folder you will see two files:
1. `container.X` (ignore this file).
A long filename of letters and numbers, for example `667B1F128A8F4BA6971EED5B330A062E`
Back up the original
Copy the long filename file to a safe spot as a backup.
Note its exact original name for later.
Rename the working copy
In the same folder, rename the long filename and change its extension to: `exp.sav` or something with .sav extension.
Edit the save
Open exp.sav in the save editor.
Make your changes, then choose Export to .sav.
Restore the Game Pass filename
The editor will output an updated file still called: exp.sav
Rename it back to the exact original long filename saved in step 4.
Launch the game and verify
Start the game normally and load your save.
Confirm that your edits appear in‑game.
Tips
Always keep the untouched backup until you are sure everything works.
If changes do not show up, you probably chose the wrong sub‑folder in step 2—repeat the process with the folder whose timestamp matches your save exactly.
Hi, and thank you — that honestly means a lot.No need to apologize at all — discovering your project actually helped me make a clear decision. I originally built my editor just for myself, but when it unexpectedly gained traction, I started rewriting it in C# and Avalonia to give it a proper UI and better long-term support. When I saw how much further along your editor was — especially with the mappings and cross-platform support — I realized the community was already in good hands.Best of luck to you and the rest of the team! I'm really glad the save editor space for this game has grown so much, and I appreciate the kind words. 🙌
there is another save game editor that allows you to add pictos and also master them in the editor. It doesn't allow you to add weapons (yet) like this one though
Thanks for the mod, i managed to make it work. Credits to @dunnetahl However, i am only looking for coats. I am interested in buildcrafting and i don't want to spend time grinding them. I thought this would help but it does not.
Would you kindly share if you have plans for the inventory items as well? Or do you know of any way this could be done? I tried basic noob CE as well, didn't work.
EDIT: following thread helped me with this. Managed to get my coat/recoats: https://fearlessrevolution.com/viewtopic.php?t=34748 Y'all gon need CE 7.5. Boot game > Open CE 7.5 > Select the application > drag & drop the file from the forum > click to enable > by ticking boxes you enable/disable the cheats. I only needed to edit the inventory for coats/recoats which was called :consumable respec
you can easily use cheat engine to add things like recoats with value search. search for how many you have, use one, search for how many you have now, etc.
Thanks for making this mod. It worked for me. I actually learned about python customtkinter, i used to use tk a lot with tcl/tk. brings me back.
Anyway, i am using xbox game pass and the saves are different. It would be nice if you supported these files too, but i was still able to figure it out and figured I would post the steps here.
Open your local Game Pass save folder C:\Users\<YourUser>\AppData\Local\Packages\KeplerInteractive.Expedition33_ymj30pw7xe604\SystemAppData\wgs\ 00090000044E48CB_000000000000000000000000697F9EC3 The final folder name (the long hex string) can vary from one PC to another.
Find the sub‑folder that matches your latest in‑game save time
Inside the main `wgs` folder you will see many sub‑folders.
Pick the one whose Modified timestamp matches the exact second shown on the in‑game Load Game screen. (File size for the correct save is usually 60 KB – 200 KB.)
Locate the real save file
Inside that sub‑folder you will see two files:
1. `container.X` (ignore this file).
A long filename of letters and numbers, for example `667B1F128A8F4BA6971EED5B330A062E`
Back up the original
Copy the long filename file to a safe spot as a backup.
Note its exact original name for later.
Rename the working copy
In the same folder, rename the long filename and change its extension to: `exp.sav` or something with .sav extension.
Edit the save
Open exp.sav in the save editor.
Make your changes, then choose Export to .sav.
Restore the Game Pass filename
The editor will output an updated file still called: exp.sav
Rename it back to the exact original long filename saved in step 4.
Launch the game and verify
Start the game normally and load your save.
Confirm that your edits appear in‑game.
Tips
Always keep the untouched backup until you are sure everything works.
If changes do not show up, you probably chose the wrong sub‑folder in step 2—repeat the process with the folder whose timestamp matches your save exactly.
i think you might need to have the game running for it to work, i did the edits then started the game and the changes didn't work, it started making other folders and i removed those files and tried again and now idk what happen or why it doesn't read my original save and the damn cloud sync didn't helped either, I'm gonna switch to steam version cuz the constant file changes is stupid for the gamepass version unless the creator finds away to edit the gamepass one,i did the back up and still didn't work. PS - I'm gonna try this and see if i can get my main save back and thanks for this info.
Thanks a lot for putting together a guide for Xbox users! I really appreciate you taking the time to share that information—especially since I don’t have access to an Xbox myself, which means I wasn’t able to create a guide for where or how to place the .sav file on that platform.If you don’t mind, I’d like to go ahead and sticky your post so it’s easier for other users to find. It’s a valuable resource, and having it pinned will help anyone else running the save editor on Xbox avoid confusion. Great work, and thanks again for contributing to the community!
Thanks for the update. Much better without the images.
2 questions:
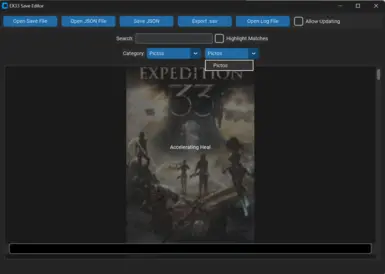
1. when I add a picto, it just adds it at level 1, is it possible to set the level of the picto when we add it?
2 I added a random picto to test this and now I can't remove it. I've tried deleting the 1 and saving but it doesn't commit, I've tried setting it to 0 which commits but I still have the picto when loaded. I also can't really figure out how to implement the backups. I tried copying a backup to my backup folder in my sandfall savegames and editing the filename to the same format as the others, but it did not appear in my saved games list when I opened the game. Any advice would be greatly appreciated.
2 I added a random picto to test this and now I can't remove it. I've tried deleting the 1 and saving but it doesn't commit, I've tried setting it to 0 which commits but I still have the picto when loaded. I also can't really figure out how to implement the backups. I tried copying a backup to my backup folder in my sandfall savegames and editing the filename to the same format as the others, but it did not appear in my saved games list when I opened the game. Any advice would be greatly appreciated.
Important Notes on Removing Items (e.g., Pictos, Tints, etc.)When attempting to remove certain items—like pictos, tints, and likely most other inventory elements—it's important to understand how the game handles save data. Once an item is added to your inventory and the game is saved, that item is actually stored in two separate locations within the save file.
The first location tracks the item in your inventory.
The second is a deeper internal section used by the game to manage item progression—such as leveling or upgrades tied to that item.Even if you remove the item from your inventory, it still exists in the leveling data section. When the game loads and detects the item in that section, it automatically re-adds it to your inventory. Because of this, removing the item with a script isn’t enough; it will simply reappear. To truly remove the item, you’ll need to manually edit both parts of the save file.
Backup Folder and Files (Failsafe System)The backup folder and associated files were created as a precaution—a kind of “Oh sh*t button”—in case something goes wrong during the editing process. These backups allow the user to restore the .sav or .json files to a previous working state.How to Apply Your Edited Save FileAfter you've made your changes and exported the updated .sav file, follow these steps:
Make sure the game is completely closed when doing this, to avoid conflicts or corruption
1. when I add a picto, it just adds it at level 1, is it possible to set the level of the picto when we add it?
As of right now, no—any picto added using the current method will only appear at level 1. The system doesn't currently support assigning a specific level at the time of addition.However, once that picto is added and you find the same one again in-game through normal progression, the game will automatically increase its level. This behavior isn't limited to pictos—it's the same for weapons and likely other level-based items. The game tracks item progression (such as levels) in a separate section of the save file, which handles upgrades independently from inventory entries.So while direct level assignment isn't supported at the moment, the game will handle leveling naturally based on your in-game actions. Manually setting levels would require editing that separate progression section of the save file, which isn’t currently part of the automated script.
However, this is something that will be addressed in the upcoming full rewrite and migration to a new language. The planned update will include more robust handling of item properties, including level assignment for items like pictos and weapons. The goal is to make the editing process more flexible, stable, and user-friendly. Stay tuned—there’s a lot of exciting functionality coming soon!
lol I don't know why but people who write code tend to have an issue writing instructions for people who aren't familiar.
This was fairly easy but as someone who only dabbles I often find myself trying to follow someone else's instructions and then spending half a day teaching myself the part they left out.
I also had a bit of trouble but I managed to get it working for myself and also a friend so here is a guide that will hopefully help anyone having trouble. Not all of these steps are necessarily 100% required as described, but if you follow them, you should achieve success.
1. Go to the Files tab on this page and select manual download to download the EX33 Save Editor-165-v0-1-0-alpha-1746842294.7z to your Downloads folder
Extract the ex33_save_editor folder from the .7z into your Downloads folder
for most windows users you will want to select Windows X86-64 MSI Installer (3.1.1) [1] (sig) from the Downloads section once downloaded, double-click to run the installer once python is installed
3. Go to https://github.com/trumank/uesave-rs/releases and scroll down to Download uesave_cli 0.6.2 and select uesave_cli-x86_64-pc-windows-msvc.zip
extract the uesave.exe from the .zip into the ex33_save_editor folder
4. Open Microsoft Store, search python and then install python through the microsoft store
5. (this is where we use the command line so I will try to make this as detailed as possible for everyone) hold the Super key and press R (the Super key is aka the Windows key, it is usually between alt and ctrl on the left side of the keyboard and has the Windows logo), this will make a small window appear in the bottom left corner that says Run in the title. Type 'cmd' and hit enter.
now you should have a black terminal open that the last line of text says something like: C:\Users\Name>_
where 'Name' would be whatever your username is
you want to type:
cd Downloads
now your bottom line should look like this:
C:\Users\Name\Downloads>_
type:
cd ex33_save_editor
bottom line should look like this:
C:\Users\Name\Downloads\ex33_save_editor>_
now type
pip install -r requirements.txt
and your last few lines should look something like this:
[notice] A new release of pip is available: 25.0.1 -> 25.1.1 [notice] To update, run: C:\Users\Name\AppData\Local\Microsoft\WindowsApps\PythonSoftwareFoundation.Python.3.13_qbz5n2kfra8p0\python.exe -m pip install --upgrade pip
C:\Users\Name\Downloads\ex33_save_editor>_
now type:
python ex33_save_editor.py
and the editor should launch, on the first launch it will ask you to select the location of your uesave.exe and after you have selected it, the application should open as shown in the mod photos.
If you encounter any errors, there should be some suggestion in the terminal output on what to try but if anyone is still having issues and you post them here I will try to help if I can.
6. okay, now we've got the app open, next thing you need to do is click Open Save File, and here is the path for the save files (for steam at least):
you will need to make sure your file manager (File Explorer by default in Windows 10/11) has Show Hidden Files enabled in order to see the AppData folder
then in the SaveGames folder there should be another folder with a large string of numbers and inside that there should be an EXPEDITION_0.sav
once you've selected that file, it will create a backup and a .json file, then you can click Open JSON File and open it
also check 'Allow Updating'
now you can make your edits
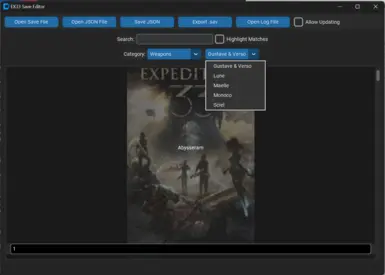
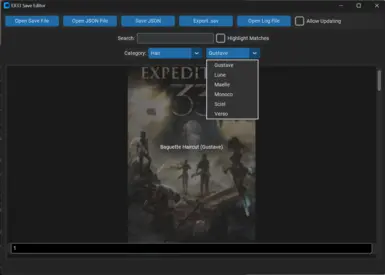
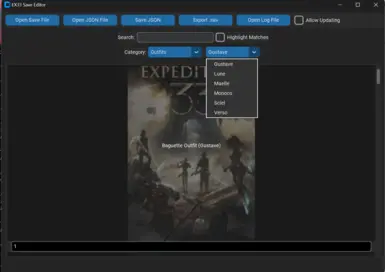
7. select a category (like outfit), select a character, you will see a list of all the outfits with a black bar below each description. If you have this item, this black bar will have a 1, and if you don't have the item, it will be blank
now if you want to add the item, click the black bar, type 1, hit enter, then click Save JSON. Select a different category and go back to the one you changed to make sure the black bar is now showing a 1. If you see a 1, your changes committed.
Once you've checked that all your changes have committed by switching categories and checking back, you can click Export .sav and you should be good to the launch the game with your edits made.
Again, I will try to answer any questions I can and hopefully this helps. Thank you very much to the mod author, I forgot to tell my gf to do the kestral village final duel with Maelle to get Medalum before I went to work and she was gonna give up on playing the game because she was so upset, so you saved her playthrough, much thanks.


86 comments
projectsfolder or any additional directories. The editor will automatically generate required folders such asSave_Backupwhen needed. Simply run the script and start editing your save files.Quick Update on the Project – PT2I’ve just uploaded the final Python-based update. There will be no further updates to the current version — all development is now shifting over to the C# + Avalonia rewrite. This is going to be a major undertaking, but it's the right move to ensure better performance, UI flexibility, and long-term support.Once the new version reaches feature parity with the current Python build, I’ll release a fresh alpha build for everyone to test.✅ What’s in the final Python update?
- Massively expanded pictos: Nearly 195 entries added.
- New category structure: Some tints were reorganized into their own dedicated categories.
- UI performance boost: The background image was removed due to lag caused by the volume of new entries.
Thanks again to everyone who’s downloaded, tested, and supported this project. Your interest is what inspired the rewrite — and I can’t wait to show you what’s coming next!
- Open your local Game Pass save folder
- Find the sub‑folder that matches your latest in‑game save time
- Inside the main `wgs` folder you will see many sub‑folders.
- Pick the one whose Modified timestamp matches the exact second shown on the in‑game Load Game screen.
- Locate the real save file
- Inside that sub‑folder you will see two files:
- 1. `container.X` (ignore this file).
- A long filename of letters and numbers, for example `667B1F128A8F4BA6971EED5B330A062E`
- Back up the original
- Copy the long filename file to a safe spot as a backup.
- Note its exact original name for later.
- Rename the working copy
- In the same folder, rename the long filename and change its extension to: `exp.sav` or something with .sav extension.
- Edit the save
- Open exp.sav in the save editor.
- Make your changes, then choose Export to .sav.
- Restore the Game Pass filename
- The editor will output an updated file still called: exp.sav
- Rename it back to the exact original long filename saved in step 4.
- Launch the game and verify
- Start the game normally and load your save.
- Confirm that your edits appear in‑game.
TipsC:\Users\<YourUser>\AppData\Local\Packages\KeplerInteractive.Expedition33_ymj30pw7xe604\SystemAppData\wgs\
The final folder name (the long hex string) can vary from one PC to another.00090000044E48CB_000000000000000000000000697F9EC3
(File size for the correct save is usually 60 KB – 200 KB.)
step 2—repeat the process with the folder whose timestamp matches your save exactly.
Thx!
there is another save game editor that allows you to add pictos and also master them in the editor. It doesn't allow you to add weapons (yet) like this one though
EX33 Save Editor Linux Port using cargo install of uesave-rs
However, i am only looking for coats. I am interested in buildcrafting and i don't want to spend time grinding them. I thought this would help but it does not.
Would you kindly share if you have plans for the inventory items as well? Or do you know of any way this could be done? I tried basic noob CE as well, didn't work.
EDIT: following thread helped me with this. Managed to get my coat/recoats:
https://fearlessrevolution.com/viewtopic.php?t=34748
Y'all gon need CE 7.5.
Boot game > Open CE 7.5 > Select the application > drag & drop the file from the forum > click to enable > by ticking boxes you enable/disable the cheats. I only needed to edit the inventory for coats/recoats which was called :consumable respec
Anyway, i am using xbox game pass and the saves are different. It would be nice if you supported these files too, but i was still able to figure it out and figured I would post the steps here.
- Open your local Game Pass save folder
- Find the sub‑folder that matches your latest in‑game save time
- Inside the main `wgs` folder you will see many sub‑folders.
- Pick the one whose Modified timestamp matches the exact second shown on the in‑game Load Game screen.
- Locate the real save file
- Inside that sub‑folder you will see two files:
- 1. `container.X` (ignore this file).
- A long filename of letters and numbers, for example `667B1F128A8F4BA6971EED5B330A062E`
- Back up the original
- Copy the long filename file to a safe spot as a backup.
- Note its exact original name for later.
- Rename the working copy
- In the same folder, rename the long filename and change its extension to: `exp.sav` or something with .sav extension.
- Edit the save
- Open exp.sav in the save editor.
- Make your changes, then choose Export to .sav.
- Restore the Game Pass filename
- The editor will output an updated file still called: exp.sav
- Rename it back to the exact original long filename saved in step 4.
- Launch the game and verify
- Start the game normally and load your save.
- Confirm that your edits appear in‑game.
TipsC:\Users\<YourUser>\AppData\Local\Packages\KeplerInteractive.Expedition33_ymj30pw7xe604\SystemAppData\wgs\
The final folder name (the long hex string) can vary from one PC to another.00090000044E48CB_000000000000000000000000697F9EC3
(File size for the correct save is usually 60 KB – 200 KB.)
PS - I'm gonna try this and see if i can get my main save back and thanks for this info.
.savfile on that platform.If you don’t mind, I’d like to go ahead and sticky your post so it’s easier for other users to find. It’s a valuable resource, and having it pinned will help anyone else running the save editor on Xbox avoid confusion. Great work, and thanks again for contributing to the community!2 questions:
1. when I add a picto, it just adds it at level 1, is it possible to set the level of the picto when we add it?
2 I added a random picto to test this and now I can't remove it. I've tried deleting the 1 and saving but it doesn't commit, I've tried setting it to 0 which commits but I still have the picto when loaded. I also can't really figure out how to implement the backups. I tried copying a backup to my backup folder in my sandfall savegames and editing the filename to the same format as the others, but it did not appear in my saved games list when I opened the game. Any advice would be greatly appreciated.
Thanks for the mod!
Important Notes on Removing Items (e.g., Pictos, Tints, etc.)When attempting to remove certain items—like pictos, tints, and likely most other inventory elements—it's important to understand how the game handles save data. Once an item is added to your inventory and the game is saved, that item is actually stored in two separate locations within the save file.
- The first location tracks the item in your inventory.
- The second is a deeper internal section used by the game to manage item progression—such as leveling or upgrades tied to that item.Even if you remove the item from your inventory, it still exists in the leveling data section. When the game loads and detects the item in that section, it automatically re-adds it to your inventory. Because of this, removing the item with a script isn’t enough; it will simply reappear. To truly remove the item, you’ll need to manually edit both parts of the save file.
Backup Folder and Files (Failsafe System)The backup folder and associated files were created as a precaution—a kind of “Oh sh*t button”—in case something goes wrong during the editing process. These backups allow the user to restore the.savor.jsonfiles to a previous working state.How to Apply Your Edited Save FileAfter you've made your changes and exported the updated.savfile, follow these steps:C:\Users\YourUsername\AppData\Local\Sandfall\Saved\SaveGames\[random-number-folder]
- Copy your modified
- Overwrite the existing save file when prompted.
Make sure the game is completely closed when doing this, to avoid conflicts or corruption.savfile into that folder.As of right now, no—any picto added using the current method will only appear at level 1. The system doesn't currently support assigning a specific level at the time of addition.However, once that picto is added and you find the same one again in-game through normal progression, the game will automatically increase its level. This behavior isn't limited to pictos—it's the same for weapons and likely other level-based items. The game tracks item progression (such as levels) in a separate section of the save file, which handles upgrades independently from inventory entries.So while direct level assignment isn't supported at the moment, the game will handle leveling naturally based on your in-game actions. Manually setting levels would require editing that separate progression section of the save file, which isn’t currently part of the automated script.
However, this is something that will be addressed in the upcoming full rewrite and migration to a new language. The planned update will include more robust handling of item properties, including level assignment for items like pictos and weapons. The goal is to make the editing process more flexible, stable, and user-friendly.
Stay tuned—there’s a lot of exciting functionality coming soon!
is this only working for the Steam Version? GamePass doesnt have .sav files
This was fairly easy but as someone who only dabbles I often find myself trying to follow someone else's instructions and then spending half a day teaching myself the part they left out.
having trouble. Not all of these steps are necessarily 100% required as
described, but if you follow them, you should achieve success.
1. Go to the Files tab on this page and select manual download to download
the EX33 Save Editor-165-v0-1-0-alpha-1746842294.7z to your Downloads
folder
Extract the ex33_save_editor folder from the .7z into your Downloads folder
2. Download python here: https://www.python.org/downloads/release/python-311/
for most windows users you will want to select Windows X86-64 MSI Installer (3.1.1) [1] (sig) from the Downloads section
once downloaded, double-click to run the installer
once python is installed
3. Go to https://github.com/trumank/uesave-rs/releases and scroll down to
Download uesave_cli 0.6.2 and select
uesave_cli-x86_64-pc-windows-msvc.zip
extract the uesave.exe from the .zip into the ex33_save_editor folder
4. Open Microsoft Store, search python and then install python through the microsoft store
5. (this is where we use the command line so I will try to make this as detailed as possible for everyone)
hold the Super key and press R (the Super key is aka the Windows key, it is
usually between alt and ctrl on the left side of the keyboard and has
the Windows logo), this will make a small window appear in the bottom
left corner that says Run in the title. Type 'cmd' and hit enter.
now you should have a black terminal open that the last line of text says something like:
C:\Users\Name>_
where 'Name' would be whatever your username is
you want to type:
cd Downloads
now your bottom line should look like this:
C:\Users\Name\Downloads>_
type:
cd ex33_save_editor
bottom line should look like this:
C:\Users\Name\Downloads\ex33_save_editor>_
now type
pip install -r requirements.txt
and your last few lines should look something like this:
[notice] A new release of pip is available: 25.0.1 -> 25.1.1
[notice] To update, run:
C:\Users\Name\AppData\Local\Microsoft\WindowsApps\PythonSoftwareFoundation.Python.3.13_qbz5n2kfra8p0\python.exe
-m pip install --upgrade pip
C:\Users\Name\Downloads\ex33_save_editor>_
now type:
python ex33_save_editor.py
and the editor should launch, on the first launch it will ask you to select
the location of your uesave.exe and after you have selected it, the
application should open as shown in the mod photos.
If you encounter any errors, there should be some suggestion in the terminal
output on what to try but if anyone is still having issues and you post
them here I will try to help if I can.
6. okay, now we've got the app open, next thing you need to do is click Open Save File, and here
is the path for the save files (for steam at least):
C:\Users\Name\AppData\Local\Sandfall\Saved\SaveGames\
you will need to make sure your file manager (File Explorer by default in
Windows 10/11) has Show Hidden Files enabled in order to see the AppData
folder
then in the SaveGames folder there should be another folder with a large string of numbers and inside that there should be an
EXPEDITION_0.sav
once you've selected that file, it will create a backup and a .json file, then you can click Open JSON File and open it
also check 'Allow Updating'
now you can make your edits
7. select a category (like outfit), select a character, you will see a
list of all the outfits with a black bar below each description. If you
have this item, this black bar will have a 1, and if you don't have the
item, it will be blank
now if you want to add the item, click the black bar, type 1, hit enter, then click Save JSON. Select a different
category and go back to the one you changed to make sure the black bar
is now showing a 1. If you see a 1, your changes committed.
Once you've checked that all your changes have committed by switching
categories and checking back, you can click Export .sav and you should
be good to the launch the game with your edits made.
Again, I will try to answer any questions I can and hopefully this helps. Thank
you very much to the mod author, I forgot to tell my gf to do the
kestral village final duel with Maelle to get Medalum before I went to
work and she was gonna give up on playing the game because she was so
upset, so you saved her playthrough, much thanks.