Documentation
Readme
View as plain text
Video One - the first half hour at: http://youtu.be/CZ3qVKVbQUQ shows the game start
Video Two - the second half hour at: http://youtu.be/iqlppQW1QC4 shows the daytime Castle Grounds and the route to the Healing Crystals
Video Three - the second hour at: http://youtu.be/p5IlQWzloCI shows the night time Castle Grounds and the route to the Healing Crystals and Dawn on the beach!
video four at: http://youtu.be/YulDbujQ2eU the tempo picks up in this half hour clip as the Team descend the dizzy heights of the Nexus Vaults
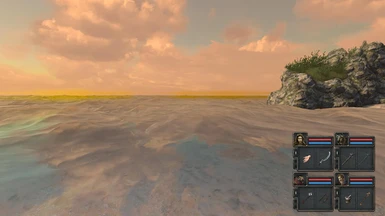
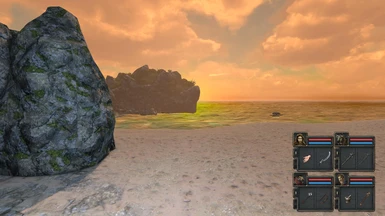
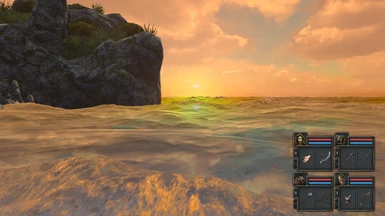
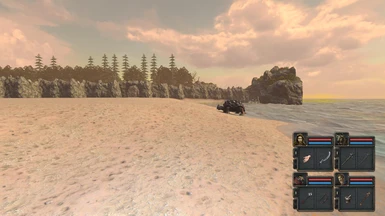
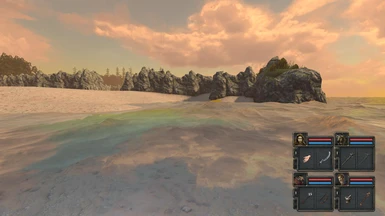
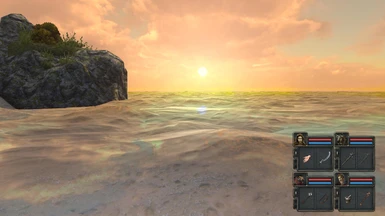
Your team of four adventurers have been shipwrecked on an island but luckily are able to swim to the safety of a calm and deserted beach.
The tranquility found in the first few minutes, soon gives way to the discovery of a lever on a nearby wall, as you pull the lever you hear
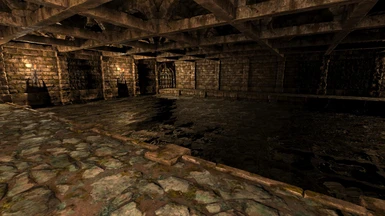
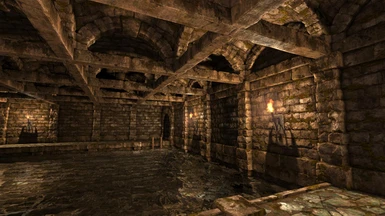
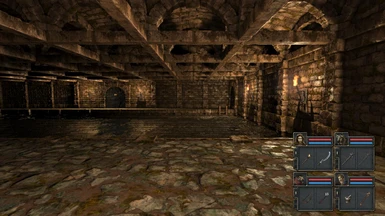
a door opening nearby. This door leads to a dark dungeon way below the beach and soon a letter you find, that talks of three beautiful gems!
These gems are undoubtedly priceless and are found on your journey through the dungeon. Make it back to the beach with the three gems and you have completed the game!
TIP: for the first hour of the game only, a rock found on the ground inside the dungeon means that there is a secret button nearby.
(After the first hour of the game, secret buttons are no longer marked by a rock.) TIP: a torch holder on the wall will very often provide light to aid your exploration.
If you find a torch holder without a torch, try placing a torch into the bracket! It may open a nearby secret door.
TIP: look out for a "mortar and pestle" that one of your team could use to make up health potions with. The simple bowl can be found on triggering a secret room early in the game,
but there is a secret button inside the secret room that reveals one further secret room in which the precious bowl is found. Once you have it there are many opportunites to use the bowl on your adventures.
LeveL 1 [Crusadors] 1st dungeon level from Surface (Launch beach)
LeveL 2 [Surface] Launch Beach, game starts here
LeveL 3 [Deep Dungeons] second stage dungeons, lovely puzzles
LeveL 4 [The Nexus Vaults] third stage dungeons and real fighting starts now
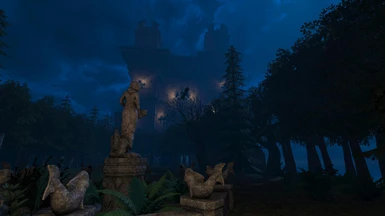
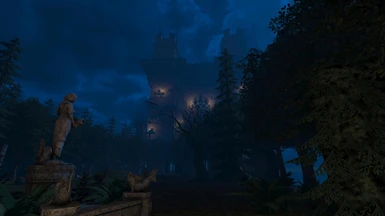
LeveL 5 [Castle Grounds] easy outside areas, looks gorgeous
LeveL 6 [Blue Stones I] Healing Crystals and Your Home Base, dump your excess stuff here
LeveL 7 [Old Railings Level] Tricky getting those 2 levers pulled (Tomb Level here too)
LeveL 8 [Survival Beach] looks pretty similar to Surface Beach but more fighting
LeveL 9 [River of Archers] underwater levers need finding here, quite difficult
LeveL 10 [The Old Mine] Loot and hidden areas galore
LeveL 11 [Planteganet Army] Toorum's remains and quite a lot of his blessed artefacts, grab 'em!
LeveL 12 [Lagoons] underwater secret buttons and loot, patience is a virtue, take it slow
LeveL 13 [Prison Fortress] Blue Stones II is here somewhere, can you find it?
LeveL 14 [Old Dungeons] in developement
LeveL 15 [Swamp Lands] curiously difficult to move around because of the trees
LeveL 16 [Castlevania] also known as Lindworm Warehouse
KEY -- -- Found on Level -- -- for use on Lev
iron Launch beach Crusadors
iron Crusadors
iron Crusadors -5
gold Crusadors -5
mine Crusadors -5
brass Railings Crusadors
LOCK -- -- Found on Level -- -- enables what?
brass Crusadors -3
STEP BY STEP SURVIVAL BEACH
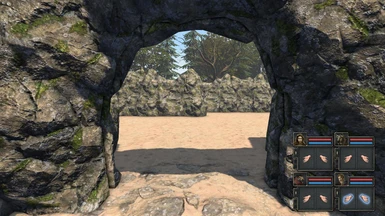
1. Find the nearby lever on the beach that opens the doors in the rock wall
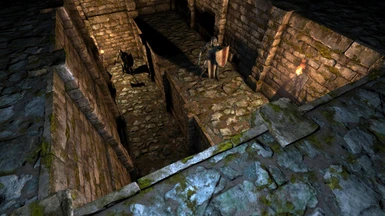
2. Descend the stairs to the Two Crusadors Dungeon. Note in the centre, are two Crusadors!
3. At the foot of the stairs you just came down, find a nearby small rock, this indicates a secret button on the wall right there
4. Press the secret button
5. Jump down one level
6. Jump down one level, find a nearby small rock, this indicates a secret button on the wall right there
7. Press the secret button
8. enter the small room, grab the sling and Press the secret button inside the room, this reveals a second secret room
9. Grab the Mortar and the Iron Key - move on and find two torches to grab from the walls
10. After grabbing the second wall torch look on the ground, find a nearby small rock, this indicates a secret button on the wall right there
11. Press the secret button
12. Jump down one level, move straight ahead in a straight line to the other side of the grand hall, find a secret button on the wall right there
13. Press the secret button, take the handaxe, REST THE TEAM (another secret button inside the secret room can merely closes the door while your team rests)
13A take a look at the metal door, try unlocking it if you have a key (it needs a BRASS KEY!)
14. Jump down the pit. click on TAB to see which direction you are facing. Change to SOUTH facing, move forward, this opens only ONE internal gate so you're just fighting one Mummy
15. To retrieve all critical weapons from this location now - you can activate the remaining gates and fight the other 3 Mummies if you wish, gain Bow and Flintlock and Daggers, OR come back and do that later, up to you!
16. Jump down one level
17. Jump down one level
18. your corridor now goes around in one great square at the foot of some kind of tower. Find a wall torch, grab the wall torch, a secret door opens revealing a staircase, do not ascend it yet!
19. Imagine the location that is diagionally opposite this wall torch bracket, go there to find a secret button.
20. Press the secret button, retrieve the Whitewood Wand for your Wizard, now move along to the other end of the corridor, note a locked door, do you have an Iron Key? if so you may go on a little sightseeing tour of the castle grounds but without a Gold Key AS WELL you cannot descend the Pit in the Castle Grounds down to the Blue Stones. Without a Gold Key you cannot exit Blue Stones, so you are better off going to this place WITH a Gold Key really.
21 return to the stairs and Ascend up the stairs, move along the ledge and fight two Mummies waiting around the corner
22 Where there were waiting is a secret button, it opens TWO nearby secret doors, enter the one it a little further back, retrieve various bombs SAVE THE GAME HERE
MORE SECRETS TO BE HAD: find the corridor half way that was closed by a portcullis, this has a secret door half way along it containing 3 more keys, gold, mine and iron keys!
23 from that Bomb Stash room jump down to the Mummy Guards below at the nearest point, what you are aiming to do is get down from there as soon as possible to the next level down
24 Jump down one level, hurry to the next wall, turn right, hurry to the ladder up, go up it REST THE TEAM, SAVE THE GAME HERE
25 Go back down the ladder, defeat all the Herders, use the Poison Bombs to kill them all.
26 You arrive back at the Two Crusadors Dungeon that you first arrived in Look at the Two Crusadors. Look closely, there are two LEVERS
27 Jump down - ENSURE you land immediately next to a lever. Find weapons and THEN return to Step 23, remember the Mummy Guards? You will need all your newly aquired fighting skills here, USE ALL THE BOMBS YOU FOUND to defeat these Mummies! NOTE: 3 spiders are very dangerous, save your Freeze Bombs for these
28 Find the pit down in STEP 14, now from here find the Locked Dooor mentioned in Step 20, this leads to Bluestones pit, go there and from here choose 4 different missions
29 The brass key can be found by choosing THE RAILINGS MISSION but each mission needs a Gold Key so make sure you choose wisely
30 if you choose the Railings Mission the critical part is finding the 2 master Levers, these are sited on the Northern Edge 2 levels down, so move North, drop down 2 levels North, pull 1 or 2 levers to unlock doors further down, this leads to Survival Beach WARNING you need a Rapier Sword to exit Survival Beach - so do not do the Old Railings Level until you have a Rapier (which is found on Plantagenet Army level, which is accessed after Nexus Vaults)
31 assuming you found the Rapier - head to Survival Beach from the Old Railings Level. You need to go via the Old Railings level for this which is off Blue Stones! Don't forget to find the brass key in Old Railings Level before you jump down any pit, it is on the bottom floor! On arriving in Survival Beach find the Vilson Orb next to the Sea Column Statue, then place the Rapier on the correct statue and find the PIT DOWN to River of Archers
32 In River of Archers you start on Island 1, there are two ladders near your position. Find a hidden lever at the bottom of the river in between these 2 ladders, it's quite difficult to spot so look at the walls closely, it is there, pull the lever and return to the island, you can now move to the grass walk.
33 You soon come to the Philosopher Head, standing in front of it opens a nearby trapdoor and this leads to THE OLD MINE! dark down there, so take some light :)
34 at the end of the Mine Area is the Lagoons Level which needs a lot of planning and patience. 1st you need some spare TORCHES. Carry 2 torches spare with you, these will be needed to activate pathways and if you see a torchbracket on the side with no torch, that needs fixing (to start up a pathway). SO, 2 buttons on the wall as soon as you enter bring on magic pathways. First of all get used to what these 2 wall buttons do, then move on further towards a few stones on the path to the right. Jump in here, you find a SECRET BUTTON that activates the next leg of the pathway needeed
35 Pretty soon you succeed in getting 3 pathways to take you near to a Lagoon Island but there is about 2 meters gap! What do you do. Jump in by the island, there is a secret button that activates the last little bit .... and so it goes on
36 Do you have 3 prison keys? If so jump in by the stones and instead of pushing the secret button move past it to deeper water, here you find an underwater exit to a PRISON AREA, 3 prison keys are needed
37 the first mission from Blue Stones is more likely to be the Nexus Vaults, you choose the opposite wall to insert a gold key - this you notice opens two exit doors at the same time, the first goes to Nexus Vaults, you first see underwater tanks, don't jump in yet!
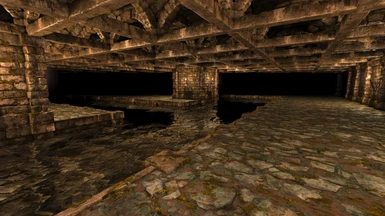
38 NEXUS VAULTS MISSION (Gear Key) move towards the far wall where you find a few rocks strewn on the ground. Jump into the water right here where the rocks are. Now turn to face the rocks, there is a secret buton that releases an iron door on the SOUTHERN end of the level. without pressing this secret button you can't progress to the Nexus Vaults.
39 now move to the Southern end of the level and find the Gear Lock. You don't have the Gear Key yet but make a note of where the Gear Lock is
40 now enter through the Iron Door to Nexus Vaults
41 SAVE THE GAME. There are Wyverns and Xerleroids here which are pretty dangerous. You need your wits about you! Find as many Hub Keys as you can. The Gear Key is here too.
42 Progress through the level carefully and evade the Xerleroid which is pretty lethal, you can hear the thing pining or crying - this is a danger sign. Capture it at the start of the level (high up) if you can. There is a metal cage right at the start, don't waste it on any less ferocious creatures
43 On the ground level there is a secret to be had. Hub Key 1 opens the tower. Hub Keys 2 opens the inner courtyard, this is where the secret is. Move along the courtyard and take out a viscous dog. At the far end of the courtyard is a secret button! Make sure you explore it
44 Move through the level to a final tower where 2 Crusadors keep guard over loot! Can you get the loot? (it's possible but not easy)
45 to get back to the start of the level (to use the Gear Key) do 1 of 2 things: 1. from the 2 crusadors guarding the loot, use their teleporter OR jump down into the Nexus Sewers, the very bottom of the level, find a secret button right in the back of the sewers, this transports you back to the start
46 Back at the Gear Lock, use the Gear Key here to enter the next section
47 solve the easy puzzle by just throwing a piece of food or clothing onto the middle island, this releases the exit door to the side passages :SECRET: find the rope in the side passages
48 the three Vilson Orb locks are here in the side passages, remember this for when you get the 3rd Vilson Orb, move on towards the end of this area
49 Head to the Bumblebee Room where you found 1 Vilson Orb in the entrance gate
50 You now have a Hub Key to enter this room, ascend the stairs to the Plantagenet Army, note on the RIGHT HAND SIDE is a corridor with "SAFE ROOMS" all along that wall, as you move on, a secret door opens, if you enter an automatic trap allows you to "capture" unwanted enemies
51 SECRET: The middle trap contains a secret back exit. In the middle trap press the exit button an extra time as if to close it on yourself, this opens an extra exit door at the back! LOOT !!
52 One ladder in the Plantagenet Sewers allows you to enter the base, beware there are a couple of broken ladders that don't do much.
53 Slowly wear down the Army and their legion of creatures. An exit door on the far side is triggered by simply going to the opposite ground on the base that faces that door, or throw an item on to that ground, it will open the exit door
54 to your left as you enter the level, this corridor has a secret button that allows you to roam a "HERDER BASE" kill them and some food and extra items are accessed.
55 More important, in the centre are four stone ALTARS. Each one holds precious objects, one the Rapier, which allows you to move into critical areas on "Survival Beach" - get all four Altar Items, or just the Rapier, up to you, but the more Altars you conquer, the more "magic bridges" are triggered to allow you easy exit from the Base.
56 With the Rapier - return to THE BLUE STONES I to do the "Old Railings" Mission
Q+A
Q How do I get the Rapier Sword?
A Go to Plantaganet Army
Q How do I get to Plantagenat Army?
A Remember the first bumble bee in the room? Go to that room but do not descend the pit! Use the stairs
Q Why do I need the Rapier?
A To place in the statue that has his hands outstretched, this unlocks a nearby exit/ entrance
Q How do I get the Rapier?
A Your team need to defeat the Plantaganet Army and find the Rapier in the middle of their base
Q How do I do that?
A There is one ladder that leads up to the base sited fom the sewers below but be careful, the Plantaganet Army are many!
Q How do I exit the level?
A You can retreat the same way you came
Q But there is a second exit
A Yes to unlock it - you need to throw an item onto the corresponding tile opposite it on the base, or just go there, you will see the exit door unlock
Q How do I get off the base?
A When you start picking up the most highly valuable treasures in the base e.g. The Rapier, magic bridges trigger across the sewers to allow you off the base
Q what is the point of these herbs?
A you must brew them using a mortar
Q what is a mortar?
A a bowl that you find early in the game, look out for stones on the dungeon floor, these indicate secrets
Q I didn't find the mortar
A from Crusadors entrance jump down 1 level, find the revolver, jump down 1 more level, push secret button, enter secret room, push next secret button, find mortar
Q then?
A examples: Blooddrop Cap + Crystal flower = Potion of Strength
Etherweed + Crystal flower = Potion of Willpower
Mudwort + Crystal flower = Potion of Vitality
Falconsyre + Crystal flower = Potion of Dexterity
Q any more
A Advanced recipes : requires alchemy 5:
-willpower (Permanent +1 increase to willpower): Crystal Flower + Etherweed
-strength (perm. +1 strength): Crystal Flower + Blooddrop Cap
-vitality (perm. +1 vitality): Crystal Flower + Mudwort
-dexterity (perm. +1 dexterity): crystal flower + Falconskrye
-antivenom (cures poison/ or poison resist?): blooddrop cap + mudwort (level 2)
-antidote (cures disease) etherweed + mudwort (level 2)
-potion of bear form (yes, it turns you into a bear! - very good if you find your front line down and you need some heavy melee): mudwort +falconskrye (level 4?)
-shield (like the mage spell; boosts your armor rating by quite a lot): mudwort + etherweed (level 2)
-rage (like the mino ability, but at will!): booddrop cap + falconskrye (requires alchemy 4)
Q where do the cube keys fit?
A you need SIX. Proceed from Blue Stones I. Head to "Deep Dungeons" Castle Area from Blue Stones Stairs, head to where the three Crusadors stood guard on the holy scrolls!
Q where are the three Vilson Orbs?
A There are actually four in the game but you just need three
1. on the launch beach on the beach where you pull the lever, diagonally opposite to the lever
2. on Survival Beach by the tower statue in the sea
3. when teleported from the Lindworm Warehouse in Castlevania to a Ruin in the forest from which there is no path out
4. inside BumbleBee room near start of game
Q how do you get to the RED GEM?
A in Crusadors level (first dungeon from first beach) drop down and fight one Crusador, teleport to Castle Area, insert Iron Key to access Library and from there secret door to ladder that reaches RED GEM
Q how do you get to the Green Gem?
A Although the Green Gem is sited next to the RED GEM this doesn't mean you can get it anywhere near the start of the game
A To get the green Gem just complete the LAGOONS LEVEL. This level is accessed from THE MINE (end of Mine area)
A At the end of the LAGOONS LEVEL you enter a castle area, you see the Green Gem ahead - place an unwanted item into the alcove to your right, this triggers a bridge for you PLUS you hear a portcullis rising, this is the locked door in front of the RED GEM unlocking, just get both gems now!
Q how do you get to the Blue Gem?
A this is on the Prison Level, do you have 3 prison keys? Then just go to Lagoons Level (Reached from end of MINE area) jump in the water by a pile of stones, find the watery exit from the level (underwater) Blue Gem is here BUT YOU MUST HAVE 3 prison keys!
Q how do you get to the Blue Gem?
A as you put the Gear Key in you must RACE to grab the blue gem before your team are erased from history by the Prison Defences. Unlock with the Gear Key then swiftly grab the blue gem
Q How do you get back to put the 3 Vilson Otbs in?
A From Blue Stones 1, ascend stairs to first dungeon water area, this is where you found the first secret button underwater and used the first Gear Key. Return to the Gear Lock there and follow the passages from there!
Q Where are tomb keys?
A Carefully look on base of Plantagenet Army, there are 2 on stone altars in the base
Q I fought the Band of Ratlings after placing the Rapier, but when I drop down onto a River Island I can't get anywhere
A Look from the island at the river bank, look for 2 small rocks, these mark where a secret lever is at the bottom of the river (2 levels down)
Q is there a ROPE in the game?
A yes there are two ropes in the game
ROPE 1 is at the bottom of the Nexus Vaults. After fighting (the first) several dogs at the bottom of the level you find the Nexus Locks opened by HUB KEYS, the first couple of unlocks leads you to a level ground with 1 dog, go as far back as you can, find a secret button (or 2)
ROPE 2 is just after you use the first GEAR KEY. You come to a room with a water tank, you have to chuck a medium weighted object onto the island to open the door. The viewing panel at the far end allows you to see into an unexplored area, this is where the 2nd rope is! in that unexplored area (use TAB to see the map)
Q skyway on Nexus Vaults?
A get there from Lindworm Warehouse. 4 ^ 6 < 6 > 4 < 9 >
Q Where is a spare bow?
A Spare bow in Blue Stones I
Q How do I get the Lightning Bow?
A Find all 3 Vilson Orbs, use them after inserting the first GEAR KEY, then head down to the Tomb, in the Tomb a secret button by a Trapdoor releases a TELEPORTER GATE, teleport to find the Lightning Bow! (there's a hidden tomb key nearby to there too!)
Q where is the second gear key?
A in the second Blue Stones
Q Where is the second Blue Stones?
A in the Prison Fortress, before you ascend the primary ladders (from Lagoons) you find a hub key, simply put it back! you hear a door opening, this opens to Blue Stones II
Q where is the third Gear Key?
A go down the trap door in the Tomb Level, you find it there
Q how do you get off River of Archers Islands?
A the middle island where you find a baked maggot, here you have to swim South to an underwater lever, then swim back again, a bridge has activated
Q what about the tiny island?
A here, face the ruined cottage and jump in, swim along the edge until you see a tall ladder, go up the ladder, you're on the middle island again
CASTLEVANIA, the Lindworm Warehouse: 2 ways in, FULL ENTRY from using all the 6 Cube Keys on "DEEP DUNGEONS" (from Blue Stones I)
LIMITED ENTRY from dropping down the Swamplands Chasm
LIMITED ENTRY gets you two teleporters C & D
FULL ENTRY gets you all four A - D
Where do they go? teleporter A Back to Plantagenet SPECIAL MISSION (Teleporter Off? All four altars must be pillaged on the original Plantagenet mission, otherwise this Teleporter does not light up)
Back at Plantagent there are seven treasure rooms, four were accessable on the original mission: Toorum's remains and his beloved gloves etc but NOW find and loot his most revered armour in a Locked wooden box, his Elements Shield and finally his Life Giving Force, on this mission you must return to Plantagenet and wrench the last 3 Toorum artefacts from the holy resting places! What a mission!
teleporter B side mission to Blue Stones I, precints - find the Sabre, the holy Sabre left behind by Toorum - if your Team get torn apart by the evil creatures infesting the Precincts, Blue Stones I is not far away!
teleporter C skyway on Nexus Vaults and you had better have a head for heights - plenty of secrets and loot here - see more info above! ENJOY!
teleporter D head to Swamplands and find a Vilson Orb but is there more?
Q where are the second set of Gems?
A Towards the end of the game the secret comes out! There's a second set of 3 gems, the 2nd Green is on the River Of Archers in the Acolyte's ruin, she guards it most preciously and if she finds you near it, there'll be trouble!
Q where are the final 2 gems?
A in the Lindworm Warehouse, get to it after using the six Cube keys! Cube Locks look like Gear Locks but they have an eerie (Cursed) focal light eminating from them WARNING ethereal guards wander the Warehouse Reception!
Q where in the Lindworm Warehouse are the final 2 gems?
A when you see the first 2 Lindworms, just jump down to see portcullis gates on either side, 1 gem is sited behind each gate, just GET 'EM!
Q where do the Teleporters on Tomb Level go?
A first teleporter goes to a secret area in the Castle Grounds where a treasure chest and Super Weapons can be looted
Q TO DO >> The second Teleporter goes to XX The Old Dungeons
LeveL 1 [Crusadors] 1st dungeon level from Surface (Launch beach)
LeveL 2 [Surface] Launch Beach, game starts here
LeveL 3 [Deep Dungeons] second stage dungeons, lovely puzzles
LeveL 4 [The Nexus Vaults] third stage dungeons and real fighting starts now
LeveL 5 [Castle Grounds] easy outside areas, looks gorgeous
LeveL 6 [Blue Stones I] Healing Crystals and Your Home Base, dump your excess stuff here
LeveL 7 [Old Railings Level] Tricky getting those 2 levers pulled (Tomb Level here too)
LeveL 8 [Survival Beach] looks pretty similar to Surface Beach but more fighting
LeveL 9 [River of Archers] underwater levers need finding here, quite difficult
LeveL 10 [The Old Mine] Loot and hidden areas galore
LeveL 11 [Planteganet Army] Toorum's remains and quite a lot of his blessed artefacts, grab 'em!
LeveL 12 [Lagoons] underwater secret buttons and loot, patience is a virtue, take it slow
LeveL 13 [Prison Fortress] Blue Stones II is here somewhere, can you find it?
LeveL 14 [Old Dungeons] in developement
LeveL 15 [Swamp Lands] curiously difficult to move around because of the trees
Level 16 [Castlevania] also known as Lindworm Warehouse


