File information
Created by
Partoutatix and 01DarkLord04Uploaded by
PartoutatixVirus scan
About this mod
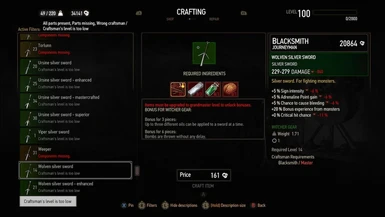
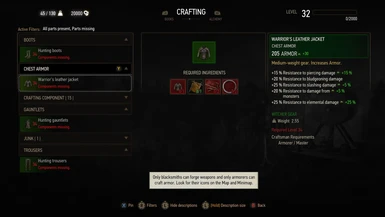
Increases required craftsman level to "Master" for all Witcher & Relic schematics. Non-witcher gear becomes relevant for a good while.
- Permissions and credits
- Changelogs
Increases required craftsman level to "Master" for all Witcher & Relic-level schematics that required less than that (configurable). Non-witcher gear becomes relevant for a good while.
Optional mod "Upgraded Starting Viper Gear":
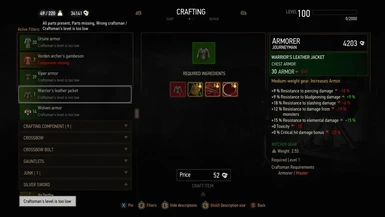
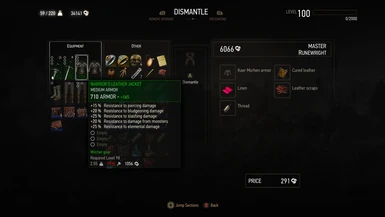
Makes the Warrior's Leather Jacket and Viper Swords scale up to the player's level when crafted as they felt useless/a dead end by the time you unlocked master craftsmen, gives them their NG+ stats(and proportionally enhances their NG+ versions) aligned with FCR3 witcher gear stat changes. Also adds schematics for witcher versions of the starting Boots/Pants/Gloves to go with the Kaer Morhen/Warrior Leather Jacket piece, the stats are based on their Blood&Wine-only versions. You can dismantle these high level armor pieces to obtain the starting armor pieces in order to be able to recraft them into an even better version at a higher player level or in NG+. A script automatically adds the extra schematics to Geralt.
Install:
Avoid Vortex, TW3 Mod Manager recommended if you need a manager.
Otherwise place the \Mods and \bin folders directly inside your <TW3 game install> folder.
With the nextgen/4.00 version of the game to get the mod menu to work you additionaly need to edit the dx11filelist.txt and dx12filelist.txt files in The Witcher 3 Wild Hunt GOTY\bin\config\r4game\user_config_matrix\pc by adding your mod's xxx.xml; mod menu filename to those lists or let the Menu Filelist Updater or TW3 Mod Manager do it for you.
Run a properly installed & configured Script Merger to identify and solve potential conflicts with other mods.
How to install most simple TW3 Mods for newbies/klutzes:
First you gotta locate your The Witcher 3 game install location. Usually it's somewhere like "C:\GOG Games\The Witcher 3 Wild Hunt GOTY" for Good Old Games versions of the game or "C:\Program Files (x86)\Steam\steamapps\common\The Witcher 3" for Steam versions of the game.
Mandatory:
Script Merger
Download, run/install it, run what it installed to be sure it's working.
Optional but highly recommended:
TW3 Mod Manager
Download, run/install it, run what it installed to be sure it's working. Installing it all to some place like C:\TW3Modding\ should work.
After that you can install most mods by downloading them manually (VORTEX NOT RECOMMENDED WITH TW3 MODS, IT WILL EVENTUALLY CAUSE PROBLEMS). Extract their contents somewhere (rightclick on the downloaded mod file->extract) and then place their files&folders in the right places in your game install yourself OR let TW3 Mod Manager extract and place them correctly for you (Recommended).
If you're not using TW3 Mod Manager you need to make sure all of your mod's \modxxx folders end up directly inside your <TW3 game install>\Mods folder (or <TW3 game install>\mods, wherever your other mods are). If there's no mods folder in your TW3 game install folder (TW3MM would've created one for you) you can create one by rightclicking on some empty space there -> "New" -> "Folder" and write Mods as its name. That means your \modxxx folders ends up as <TW3 game install>\Mods\modxxx. TW3MM would place it there automatically for you so you wouldn't have to.
If your mod has \dlcxxx folders they similarly need to be directly inside your <TW3 game install>\dlc folder (or <TW3 game install>\DLC wherever your other dlcs are). They should end up as <TW3 game install>\dlc\dlcxxx ( never <TW3 game install>\dlc\dlc\dlcxxx !). TW3MM would do this automatically for you.
Your mod's mod menu file xxx.xml would have to end up as <TW3 game install>\bin\config\r4game\user_config_matrix\pc\xxx.xml. Again, TW3MM would do this automatically for you.
With the nextgen/4.00 version of the game to get the mod menu to work you additionaly need to edit the dx11filelist.txt and dx12filelist.txt files in The Witcher 3 Wild Hunt GOTY\bin\config\r4game\user_config_matrix\pc by adding your mod's xxx.xml; mod menu filename to those lists. TW3MM would do this automatically for you.
If you happen to have more mod menus than what can fit on the mod menu list you can easily edit & group mod menus together into subgroups yourself using something like notepad++, example: 1-> 2 (that mod menu was placed in a "combat" subgroup, example from [url=https://www.nexusmods.com/witcher3/mods/3650]Menu Strings).
With the nextgen/4.00 version of the game to get the mod menu to work you additional need to edit the dx11filelist.txt and dx12filelist.txt files in The Witcher 3 Wild Hunt GOTY\bin\config\r4game\user_config_matrix\pc and add your mod's xxx.xml mod menu file to those lists.
If your mod has custom keybinds you probably have to add them to your <My Documents>\The Witcher 3\input.settings file using some editor like notepad++. Once more, TW3MM will usually do this automatically for you.
After your mod's files & folders are in the right places you need to run Script Merger and merge any conflicting files that can be merged together (that means both .ws scripts and .xml bundled files).
Sadly, not all mods will automatically merge together, most probably won't (though all LEGO merge automatically with each other, obviously), but some unresolved conflicts can be solved with a little manual help:

The bottom half is the output/result of your merge, the yellow <Merge Conflict> line is the conflicting line that SM can't figure out automatically.
Right click on the merge conflict and you get some simple options:

^There you picked the line from mod 2, but you can also pick the lines from both mods, in any order:

Or you can even write your own code in there. Of course knowing which lines to choose or how to make them work together does require you to somewhat understand what the code does. When in doubt you might try asking the concerned mod's authors & users for help in the comments sections.
However keep in mind that there's no guarantee that any 2 mods can be effectively merged together, nor is there any guarantee that 2 mods are working well together even if they merged automatically and the game seems to be running ok.
That's why to be extra safe you should carefully read each mod's install instructions to make sure there aren't any special instructions or requirements for the mod to work (some mods might require other mods to work such as the unification/community patch or shared imports) or incompatibilities, and then merge & run the game after each new mod install to make sure it's running well.
Uninstall:
Unmerge the files if you merged them before. Uninstall/delete the mod's files.
Things you can configure:
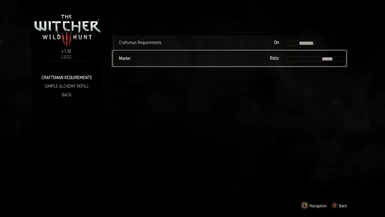
The mod menu lets you configure whether the mod is enabled or disabled and set the item quality level starting from which Master Craftsmen are required for crafting it.
Changed files(main mod):
game\gameplay\crafting\craftingManager.ws
Changed files(optional version):
\gameplay\items\def_item_crafting_armor.xml
\gameplay\items\def_item_crafting_weapons.xml
\gameplay\items\def_item_ep1_stand_alone.xml
\gameplay\items\def_item_ep2_stand_alone.xml
and the same thing for \gameplay\items_plus\


