


0 of 0


 in a radius (infinite vertical reach)")
")


")
About this mod
PlanBuild enables you to plan, copy and share your building creations in Valheim with ease. Including tools for terrain modification and immersion items.
- Requirements
- Permissions and credits
-
Translations
- Spanish
- Polish
- Changelogs
- Donations
PlanBuild
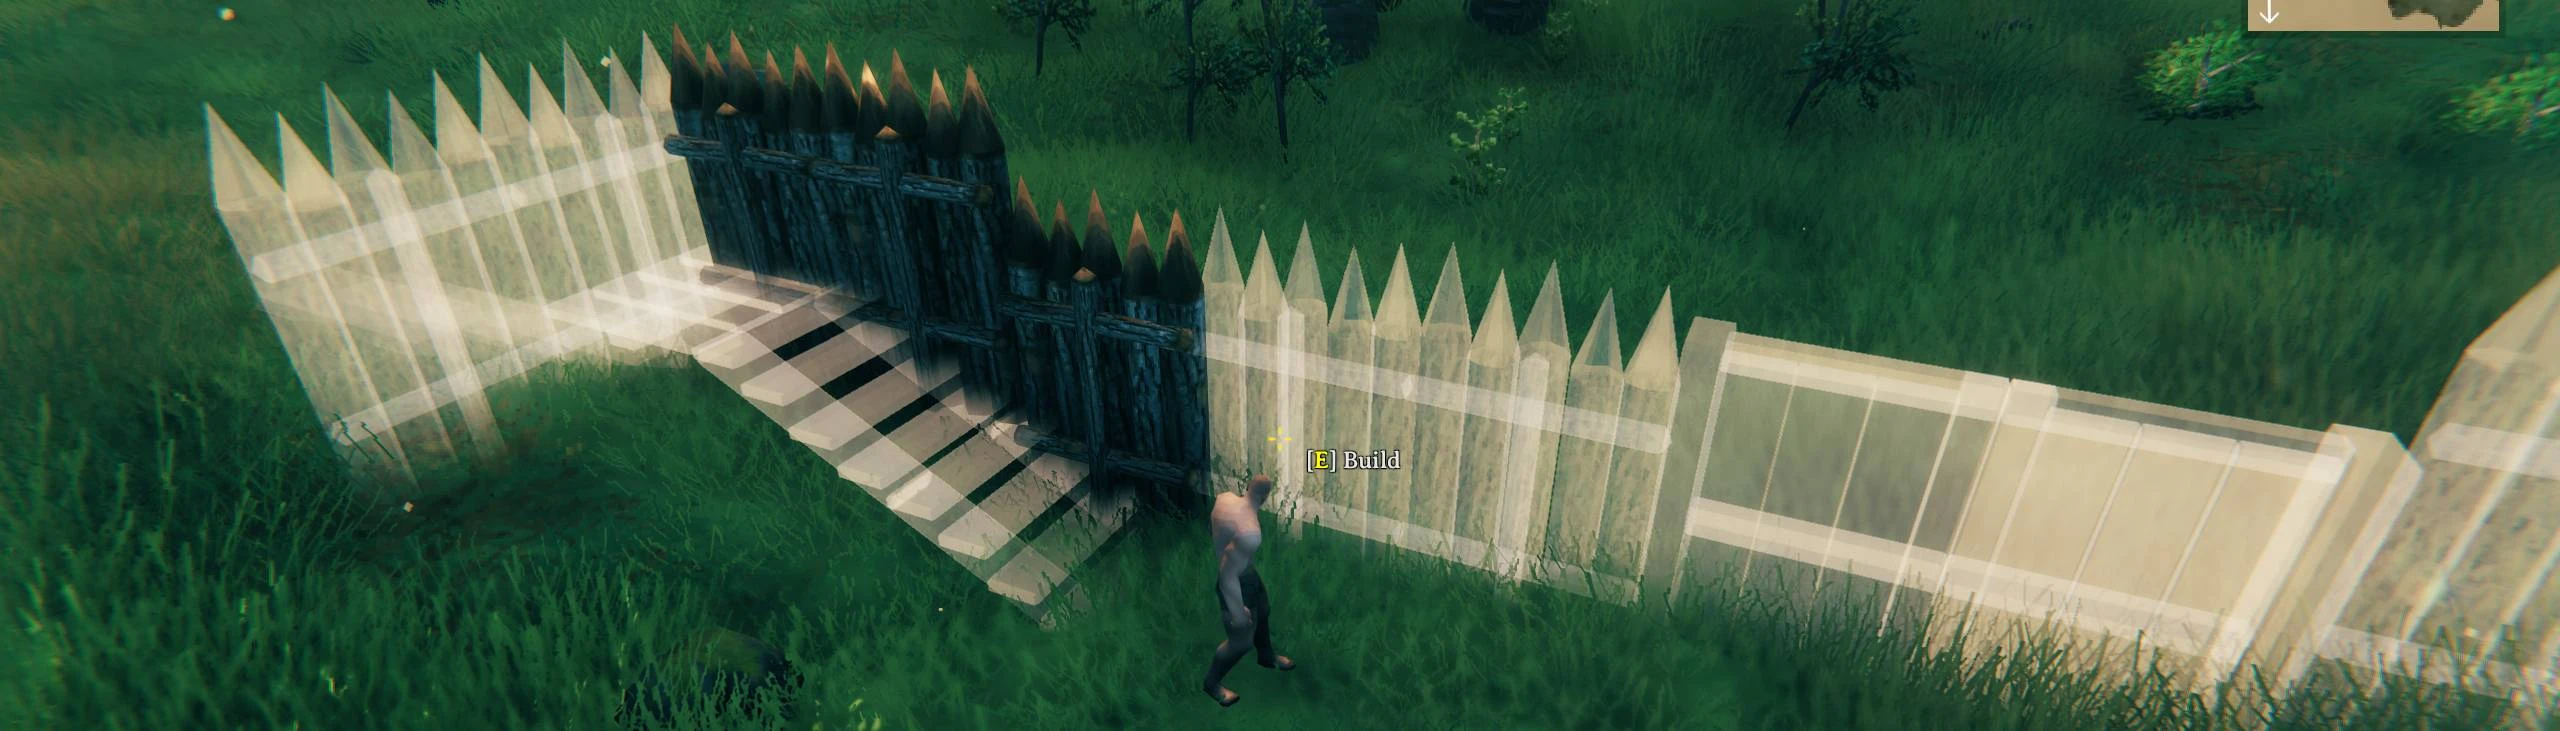
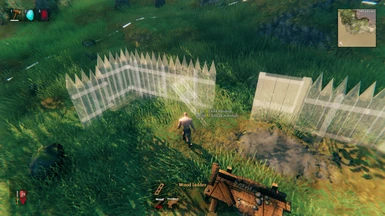
PlanBuild enables you to plan, copy and share your building creations in Valheim with ease. The mod adds two new tools to the game. The Plan Hammer is used to plan your creations before actually gathering all the materials. When you are happy with your build, you can add the required building materials one by one or use a custom totem to automatically build the pieces for you. The Blueprint Rune lets you copy, save or delete your creations as a single building piece which can also be shared with other players using the mod and also includes terrain modification tools for quick and more precise terraforming without using the Hoe or Cultivator.
Planning

Introducing a new item, the Plan Hammer, which can be crafted from a single log of wood and the blessing of Odin shining upon you.

Plan the construction of pieces without the need to gather the resources first. Anyone can add the required resources to the planned structure later and finish the construction after it was placed.
The Plan Hammer is compatible with custom piece tables from other mods. All custom pieces will be incorporated into the runes table for the planned pieces. You still need a Hammer and the required crafting station to finish the construction.
Planned pieces that are unsupported can not be finished. These pieces are also slightly more transparent so you can see what is and isn't supported. The planned pieces themselves do not require support, so you can build forever (if you can reach far enough).
Real pieces also snap to the planned pieces, so you could even use them as spacers or rulers.
Plan Totem

Build a Plan Totem near your planned structures to be able to add resources in a centralized location for all individual pieces on the plan.
It will also protect existing structures. Any piece that is destroyed (not removed by the Hammer) will be replaced with a plan for that same piece in the same place!
This needs to be built with the vanilla Hammer tool and costs you 1 Wood and 1 Grey Dwarf Eye.
Skuld Crystal

Includes the Skuld Crystal, a wearable item that removes the shader effect from the blueprints, so you can see what the construction will look like when completed.
Create it from a single Grey Dwarf Eye.
Watch your step! The pieces are still not really there, and will not support you!
Blueprinting
Introducing a new item, the Blueprint Rune, which can be crafted from a single stone and festering willpower given to you by the gods.

Copy existing structures into Blueprints and rebuild them as planned or regular pieces all at once. The blueprints are saved in and loaded from the filesystem as .blueprint files. Also supports .vbuild files (you can load and build your BuildShare saves with this mod)! After switching to the blueprint mode, the piece table of the Blueprint Rune offers three different categories:
Tools

The Blueprint Rune comes with a handful of tools to handle blueprint creation and terraforming.
Clipboard

You can find all of the temporary blueprints you make using the "Copy" command of the "Edit Selection" tool here. These are reset on every logout.
Blueprints

Place a blueprint as planned pieces. Select your previously saved blueprint and place it anywhere in the world. This works just like any other vanilla building piece. Additionally there are some extra controls to make placing your structures exactly as you want them as easy as possible:
Undo/Redo
The Blueprint Rune features an undo/redo mechanic for most of its actions. Placed blueprints, terrain/paint modifications and object deletions can be reversed using the bp.undo console command. A reversed action can also be replayed using the bp.redo console command. For easy access we recommend binding those commands to a key of your liking. To bind those commands to your mouse's "back" and "forth" keys for example type this into the game's console:
Blueprint Marketplace
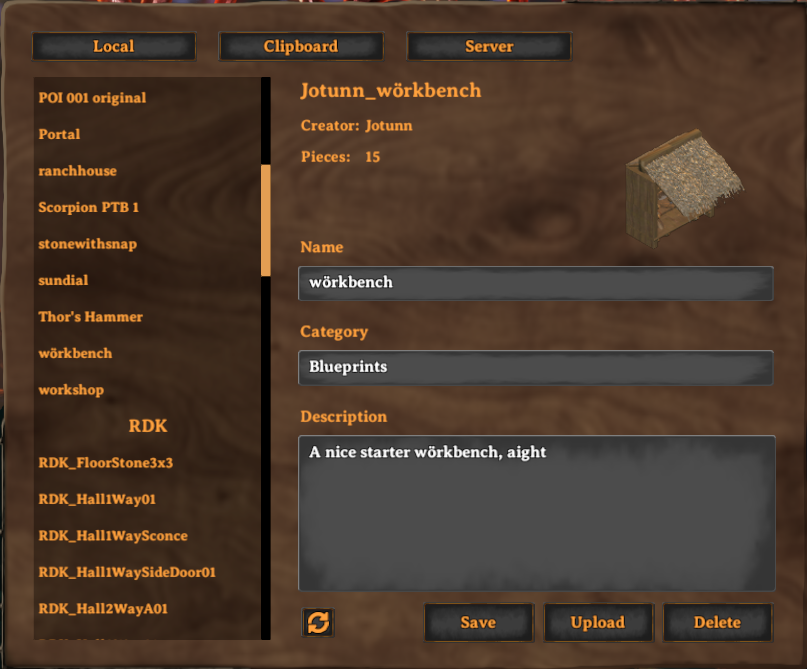
Manage and share your blueprints through a custom GUI added to the game. Per default the marketplace is accessible via End key. Rename your local blueprints, assign a Category for them (which will create a new tab on your Blueprint rune for those blueprints) or add a description to them. If a server has this feature enabled, upload your local blueprints to that server so others can download and build your creations as well. Players with admin rights on a server can also manage the server side list through that interface.
Marketplace Pieces
You can place one of two new rune themed pieces in the world which provide access to your own blueprints and the market on the server. If you want to completely stop clients from accessing the server blueprints via Hotkey, there is a server enforced config which disables that Hotkey for all clients.
Installing
It is recommended to use a mod manager to install PlanBuild and all of its dependencies.
If you want to install it manually, load all of these mods as they are all required for PlanBuild to function and install them according to their respective install instructions:
Finally extract all of the contents of the PlanBuild mod archive into [pre]<Valheim>\BepInEx\plugins\PlanBuild[/pre]
It is possible for clients not using PlanBuild to connect to a server using it. Those clients won't see any planned pieces but are still able to play. You can not connect to a server without PlanBuild when the mod is installed on your local game for griefing reasons.
Compatibility
Fully compatible with:
The Hammer's PieceTable is scanned automatically, mods that add Pieces should be compatible. If you find a mod that adds pieces to the Hammer and they don't show up, please post a bug report with a link to the mod or join the Jötunn Discord and ping [pre]@Jules[/pre] or [pre]@MarcoPogo[/pre].
Configuration
A lot aspects of this mod are configurable either through the config file found in your game folder ([pre]<Valheim>\BepInEx\configs\marcopogo.PlanBuild.cfg[/pre]) or using the BepInEx ConfigurationManager:
Console commands
PlanBuild adds some new console commands to the game:
Building Community
Head over to the Valheimians page to find a community of builders and share your own creations. PlanBuild blueprints are supported.
Changelog
Check the Changelog on github to see what's new
Credits
The original PlanBuild mod was created by MarcoPogo
Blueprint functionality originally created by Algorithman & Jules
Blueprint Marketplace GUI created by Dreous
All further coding by MarcoPogo & Jules
Special thanks to Jere for exchanging code and ideas
Made with Löve and Jötunn
Contact
Source available on GitHub: https://github.com/sirskunkalot/PlanBuild. All contributions welcome!
You can find us at the Jötunn Discord ([pre]Jules#7950[/pre] and [pre]MarcoPogo#6095[/pre]).
PlanBuild enables you to plan, copy and share your building creations in Valheim with ease. The mod adds two new tools to the game. The Plan Hammer is used to plan your creations before actually gathering all the materials. When you are happy with your build, you can add the required building materials one by one or use a custom totem to automatically build the pieces for you. The Blueprint Rune lets you copy, save or delete your creations as a single building piece which can also be shared with other players using the mod and also includes terrain modification tools for quick and more precise terraforming without using the Hoe or Cultivator.
Planning
Introducing a new item, the Plan Hammer, which can be crafted from a single log of wood and the blessing of Odin shining upon you.
Plan the construction of pieces without the need to gather the resources first. Anyone can add the required resources to the planned structure later and finish the construction after it was placed.
The Plan Hammer is compatible with custom piece tables from other mods. All custom pieces will be incorporated into the runes table for the planned pieces. You still need a Hammer and the required crafting station to finish the construction.
Planned pieces that are unsupported can not be finished. These pieces are also slightly more transparent so you can see what is and isn't supported. The planned pieces themselves do not require support, so you can build forever (if you can reach far enough).
Real pieces also snap to the planned pieces, so you could even use them as spacers or rulers.
Plan Totem
Build a Plan Totem near your planned structures to be able to add resources in a centralized location for all individual pieces on the plan.
It will also protect existing structures. Any piece that is destroyed (not removed by the Hammer) will be replaced with a plan for that same piece in the same place!
This needs to be built with the vanilla Hammer tool and costs you 1 Wood and 1 Grey Dwarf Eye.
Skuld Crystal
Includes the Skuld Crystal, a wearable item that removes the shader effect from the blueprints, so you can see what the construction will look like when completed.
Create it from a single Grey Dwarf Eye.
Watch your step! The pieces are still not really there, and will not support you!
Blueprinting
Introducing a new item, the Blueprint Rune, which can be crafted from a single stone and festering willpower given to you by the gods.
Copy existing structures into Blueprints and rebuild them as planned or regular pieces all at once. The blueprints are saved in and loaded from the filesystem as .blueprint files. Also supports .vbuild files (you can load and build your BuildShare saves with this mod)! After switching to the blueprint mode, the piece table of the Blueprint Rune offers three different categories:
Tools
The Blueprint Rune comes with a handful of tools to handle blueprint creation and terraforming.
- Create new blueprint: Directly create a blueprint from a selection indicated by the circle marker.
- Hold Ctrl to highlight all pieces which will be saved into the blueprint
- Hold Alt and click to include vanilla snap points in your blueprint (without it only snap point markers are converted to snap points)
- Use the Scroll Wheel to change the selection radius
- Use Shift + Scroll to adjust the camera distance.
- Add to selection: Add pieces to the current selection. Currently selected pieces will be highlighted in green. Per default only the hovered piece will be added to the selection. You can use various modifiers to change that behaviour.
- Press Q to quickly switch to the "Remove from selection" tool
- Hold Alt and click to add all connected pieces. This uses a flood fill to find connected pieces.
- Hold Ctrl and click to add pieces in a radius
- Use the Scroll Wheel while holding Ctrl to change the selection radius
- Hold Shift and click once to define a "starting piece" and click again on another piece to select every piece in between those two.
- Use Shift + Scroll to adjust the camera distance.
- Remove from selection: Remove pieces from the current selection. Currently selected pieces will be highlighted in green. Per default only the hovered piece will be removed from the selection. You can use various modifiers to change that behaviour.
- Press Q to quickly switch to the "Add to selection" tool
- Hold Alt and click to remove all connected pieces. This uses a flood fill to find connected pieces.
- Hold Ctrl and click to remove pieces in a radius
- Use the Scroll Wheel while holding Ctrl to change the selection radius
- Hold Shift and click to clear the current selection
- Use Shift + Scroll to adjust the camera distance.
- Edit selection: Left click to open a menu. From here you can choose what to do with your current selection:
- Copy: Make a temporary blueprint of your current selection. It will copy all pieces in the selection into a new building piece and automatically select that piece for you to build. The copy is also saved into the "Clipboard" category of the rune for you to access until you log out from the current world.
- Cut: Make a temporary blueprint of your current selection and delete all pieces in the current selection. The copy is also saved into the "Clipboard" category of the rune for you to access until you log out from the current world.
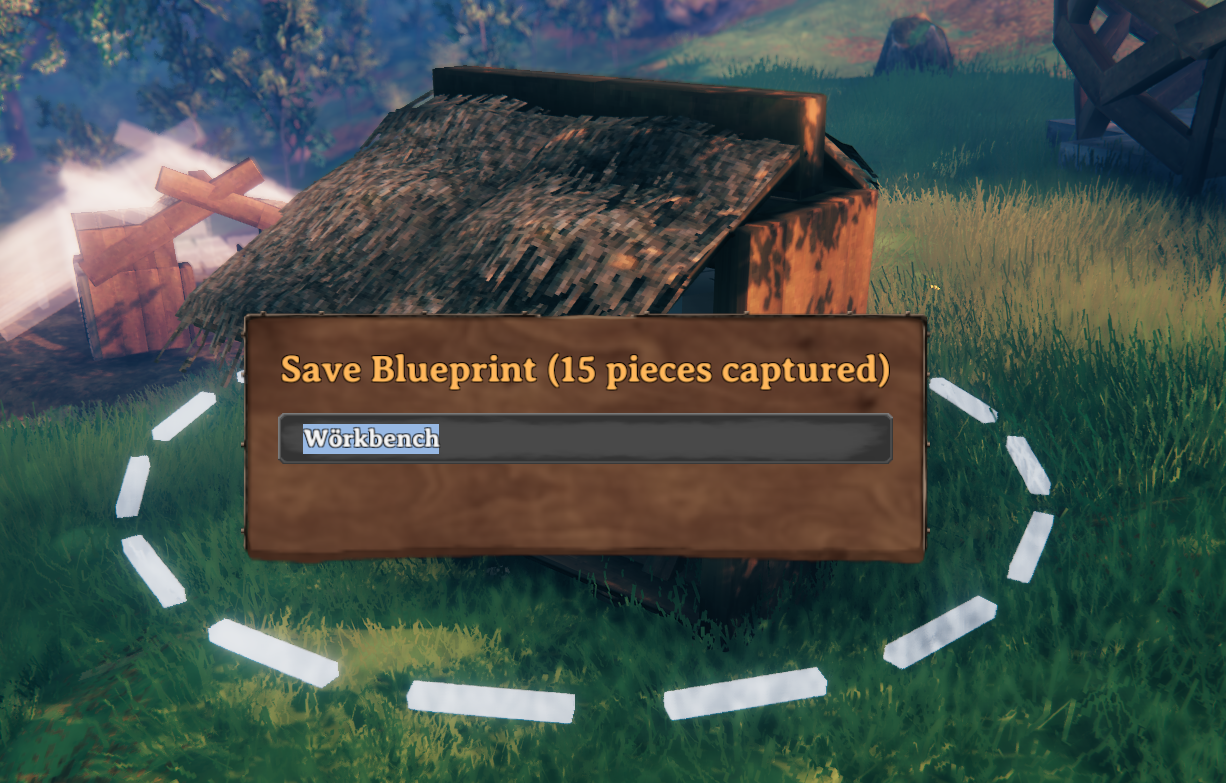
- Save: Save the current selection as a new blueprint into the file system. Opens up a new GUI window where you can enter Name, Category and Description of the blueprint. These blueprints are kept between game sessions and can also be used in the marketplace and shared with other players.
- Copy with vanilla snap points: Make a temporary blueprint of your current selection which also includes all vanilla snap points of the pieces selected.
- Cut with vanilla snap points: Make a temporary blueprint of your current selection and delete all pieces in the current selection including all vanilla snap points of the pieces selected.
- Save with vanilla snap points: Save the current selection as a new blueprint into the file system including all vanilla snap points.
- Delete: Delete all pieces in the current selection. This removes all the pieces without refunding the building materials.
- Cancel: Exit the menu without any action.
- Snap point marker: Add snap point markers to all points you want to have as snap points in your blueprint. The rotation of the markers does not matter, only the center point. We highly suggest that you also use Snap points made easy so you can cycle through the snap points when placing the blueprint. Note: You have to select the marker piece in order to capture it in the blueprint. Markers placed while having an active selection will automatically be added to that selection.
- Use Remove to delete a placed marker again (just like you would delete a piece with the hammer).
- Use Shift + Scroll to adjust the camera distance.
- Center point marker: Add a center point marker to your blueprint to determine the center of the blueprint. This is where it will be anchored while placing it. If a blueprint does not have a center point marker, a bottom corner of the blueprint is found and used as the center. Note: You have to select the marker piece in order to capture it in the blueprint. Markers placed while having an active selection will automatically be added to that selection.
- Use Remove to delete a placed marker again (just like you would delete a piece with the hammer).
- Use Shift + Scroll to adjust the camera distance.
- Terrain modification marker: Add terrain mod markers to your blueprint. When the blueprint is built, the terrain is leveled to the position of that marker. Note: You have to select the marker piece in order to capture it in the blueprint. Markers placed while having an active selection will automatically be added to that selection. You can interact with those markers to set various options of the terrain modification:
- Shape: Set a circle or square shape.
- Radius: Radius of the terrain mod operation.
- Rotation: Rotation of the marker (only makes sense on the square marker).
- Smooth: Add smoothing to the edges of the terrain modification.
- Paint: Optionally set a new "paint" (Grass, Dirt, etc) to the ground when modifying the terrain.
- Remove planned pieces: Delete planned pieces again. Per default only the hovered piece will be deleted. But you can use various modifiers to change that behaviour.
- Press Ctrl to delete plans in a radius, can be used to clean up after using it to measure distances, or as a general cleanup tool. Resources that were already added to the unfinished plans will be refunded.
- Use the Scroll Wheel while holding Ctrl to change the deletion radius.
- Use Shift + Scroll to adjust the camera distance.
- Terrain Tools: Allows you to "flatten" the terrain in a chosen radius or remove previously made modifications. Uses Valheim's TerrainCompiler and is 100% compatible with the vanilla game and modifications made with the Hoe for example.
- Press Q to switch between a circle and a square shaped marker.
- Press Ctrl to add smooth edges to the flattened area
- Press Alt to remove terrain modifications.
- Use the Scroll Wheel to change the tool radius.
- Use Ctrl + Scroll to rotate the square marker.
- Use Alt + Scroll to move the marker on the Y-axis.
- Use Shift + Scroll to adjust the camera distance.
- Delete Objects: Allows you to remove vegetation objects in a chosen radius.
- Press Ctrl to remove all objects including Pieces and Items (Warning: Very destructive).
- Use the Scroll Wheel to change the tool radius.
- Use Shift + Scroll to adjust the camera distance.
- Paint terrain: Allows you to reset the terrain "paint" per biome (grass in the Meadows, sand at beaches, etc). Can also paint dirt or paved onto every terrain. Can be used as a "brush" by holding down the Attack button continously.
- Press Q to switch between a circle and a square shaped marker.
- Press Ctrl to paint "dirt".
- Press Alt to paint "paved".
- Use the Scroll Wheel to change the tool radius.
- Use Ctrl + Scroll to rotate the square marker.
- Use Shift + Scroll to adjust the camera distance.
Clipboard
You can find all of the temporary blueprints you make using the "Copy" command of the "Edit Selection" tool here. These are reset on every logout.
Blueprints
Place a blueprint as planned pieces. Select your previously saved blueprint and place it anywhere in the world. This works just like any other vanilla building piece. Additionally there are some extra controls to make placing your structures exactly as you want them as easy as possible:
- Use Scroll to rotate the blueprint.
- Use Ctrl + Scroll to move the blueprint on the Z-axis.
- Use Alt + Scroll to move the blueprint on the X-axis.
- Use Ctrl + Alt + Scroll to move the blueprint on the Y-axis.
- Use Q to reset the offset on all axes.
- Use Shift + Scroll to adjust the camera distance.
- There is a (server enforced) config option to allow placing the blueprints as regular pieces, so you can configure per server if you want to allow "cheating" structures without resources. When enabled, build your structures without building costs by pressing Ctrl while placing the blueprint. Admins are always allowed to "direct build". You can change the default building behaviour in the config file.
Undo/Redo
The Blueprint Rune features an undo/redo mechanic for most of its actions. Placed blueprints, terrain/paint modifications and object deletions can be reversed using the bp.undo console command. A reversed action can also be replayed using the bp.redo console command. For easy access we recommend binding those commands to a key of your liking. To bind those commands to your mouse's "back" and "forth" keys for example type this into the game's console:
bind mouse3 bp.undo
bind mouse4 bp.redo
Blueprint Marketplace
Manage and share your blueprints through a custom GUI added to the game. Per default the marketplace is accessible via End key. Rename your local blueprints, assign a Category for them (which will create a new tab on your Blueprint rune for those blueprints) or add a description to them. If a server has this feature enabled, upload your local blueprints to that server so others can download and build your creations as well. Players with admin rights on a server can also manage the server side list through that interface.
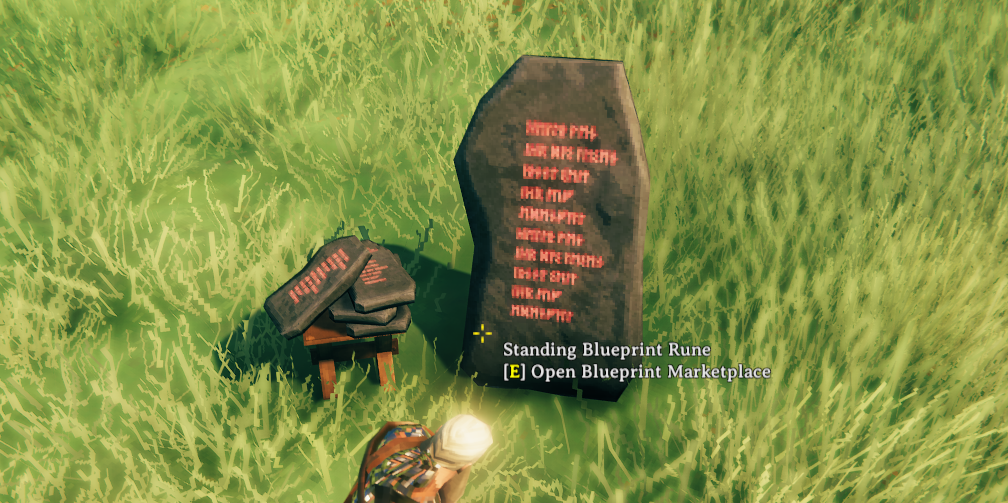
Marketplace Pieces
You can place one of two new rune themed pieces in the world which provide access to your own blueprints and the market on the server. If you want to completely stop clients from accessing the server blueprints via Hotkey, there is a server enforced config which disables that Hotkey for all clients.
Installing
It is recommended to use a mod manager to install PlanBuild and all of its dependencies.
If you want to install it manually, load all of these mods as they are all required for PlanBuild to function and install them according to their respective install instructions:
Finally extract all of the contents of the PlanBuild mod archive into [pre]<Valheim>\BepInEx\plugins\PlanBuild[/pre]
It is possible for clients not using PlanBuild to connect to a server using it. Those clients won't see any planned pieces but are still able to play. You can not connect to a server without PlanBuild when the mod is installed on your local game for griefing reasons.
Compatibility
Fully compatible with:
- Build Camera
- Craft from Containers
- ValheimRAFT (partial compat, blueprinting does not work)
- ComfyGizmo
The Hammer's PieceTable is scanned automatically, mods that add Pieces should be compatible. If you find a mod that adds pieces to the Hammer and they don't show up, please post a bug report with a link to the mod or join the Jötunn Discord and ping [pre]@Jules[/pre] or [pre]@MarcoPogo[/pre].
Configuration
A lot aspects of this mod are configurable either through the config file found in your game folder ([pre]<Valheim>\BepInEx\configs\marcopogo.PlanBuild.cfg[/pre]) or using the BepInEx ConfigurationManager:
- Server Settings (enforced on all clients connecting to a server)
- Allow blueprint rune: Allow usage of blueprint rune for clients connecting to the server. Admins are always allowed to use it. (default true)
- Allow direct build: Allow placement of blueprints without materials on this server. Admins are always allowed to use it. (default false)
- Allow terrain tools: Allow usage of the terrain modification tools on this server. Admins are always allowed to use them. (default false)
- Allow serverside blueprints: Allow sharing of blueprints on this server. (default false)
- Allow clients to use the GUI toggle key: Allow clients to use the Hotkey to access server blueprints. Admins are always allowed to use it. (default true)
- Excluded plan prefabs: Comma separated list of prefab names to exclude from the planned piece table on this server. Admins are always allowed to build them.
- Blueprints
- Default build mode: Default build mode when placing blueprints. (default Plan)
- Unlimited health: Set Piece health to its maximum value when directly building blueprints. (default false)
- Place distance: Place distance while using the Blueprint Rune. (default 50)
- Terrain smoothing: Smoothing value of the terrain tool when flattening with smoothing modifier key pressed. (default 0.5)
- Camera offset increment: Camera height change when holding the camera modifier key and scrolling. (default 2)
- Invert camera offset scroll: Invert the direction of camera offset scrolling. (default false)
- Placement offset increment: Placement height change when holding the modifier key and scrolling. (default 0.1)
- Invert placement height change scroll: Invert the direction of placement offset scrolling. (default false)
- Selection increment: Selection radius increment when scrolling. (default 1)
- Invert selection scroll: Invert the direction of selection scrolling. (default false)
- Selection connected check margin: Distance of the shell used to check for connectedness. (default 0.01)
- Show the transform bound grid: Shows a grid around the blueprints' bounds to visualize the blueprints' edges. (default false)
- Tooltip enabled: Show a tooltip with a bigger thumbnail for blueprint pieces. (default true)
- Tooltip Color: Set the background color for the tooltip on blueprint pieces.
- Undo queue name: Global name of the blueprint undo queue used for bp.undo and bp.redo commands. Can be set to the same value as other mods' config (if supported) to combine their undo queues. (default blueprintqueue)
- Add player prefix to file name: Add your current player profile name to any blueprint file created with that player. (default true)
- Directories
- Blueprint search directory Base directory to scan (recursively) for blueprints and vbuild files, relative paths are relative to the valheim.exe location (default .)
- Save directory: Directory to save blueprint files, relative paths are relative to the valheim.exe location (default BepInEx/config/PlanBuild/blueprints)
- Keybindings
- Blueprint Marketplace GUI toggle key: Hotkey to show the blueprint marketplace GUI (default End)
- ShiftModifier: First modifier key to change behaviours on various tools (default LeftShift)
- CtrlModifier: Second modifier key to change behaviours on various tools (default LeftCtrl)
- AltModifier: Third modifier key to change behaviours on various tools (default LeftAlt)
- Toggle: Key to switch between modes on various tools. (default Q)
- Plans:
- Plan unknown pieces: Show all plans, even for pieces you don't know yet. (default false)
- Plan totem build radius: Build radius of the plan totem (default 30)
- Plan totem particle effects: Show particle effects when building pieces with the plan totem. (default true)
- Visual
- Transparent Ghost Placement: Apply plan shader to ghost placement (currently placing piece). (default true)
- Unsupported color: Color of unsupported plan pieces.
- Supported color: Color of supported plan pieces.
- Transparency: Additional transparency for finer control. (default 30%)
- Plan totem glow color: Color of the glowing lines on the Plan totem.
Console commands
PlanBuild adds some new console commands to the game:
- plan.blacklist.print - Print out the server's plan blacklist
- plan.blacklist.add - [prefab_name] Add a prefab to the server's plan blacklist
- plan.blacklist.remove - [prefab_name] Removes a prefab from the server's plan blacklist
- bp.local - Get the list of your local blueprints
- bp.remove - [blueprint_id] Remove a local blueprint
- bp.push - [blueprint_id] Upload a local blueprint to the current connected server
- bp.server - Get the list of the current connected servers blueprints
- bp.pull - [blueprint_id] Load a blueprint from the current connected server and add it to your local blueprints
- bp.thumbnail - [blueprint_id] ([rotation]) Create a new thumbnail for a blueprint from the actual blueprint data, optionally provide additional rotation of the blueprint on the thumbnail
- bp.regenthumbnails - Create a new thumbnail for all local blueprints
- bp.undo - Undo your last rune action (build, delete or terrain)
- bp.redo - Redo your last undone rune action (build, delete or terrain)
- bp.clearclipboard - Clear the clipboard category of all saved blueprints
- selection.gui - Show the selection GUI
- selection.clear - Clears the current selection
- selection.copy - Copy the current selection as a temporary blueprint
- selection.cut - Cut out (copy and delete) the current selection as a temporary blueprint
- selection.save - Save the current selection as a blueprint
- selection.delete - Delete all prefabs in the current selection
Building Community
Head over to the Valheimians page to find a community of builders and share your own creations. PlanBuild blueprints are supported.
Changelog
Check the Changelog on github to see what's new
Credits
The original PlanBuild mod was created by MarcoPogo
Blueprint functionality originally created by Algorithman & Jules
Blueprint Marketplace GUI created by Dreous
All further coding by MarcoPogo & Jules
Special thanks to Jere for exchanging code and ideas
Made with Löve and Jötunn
Contact
Source available on GitHub: https://github.com/sirskunkalot/PlanBuild. All contributions welcome!
You can find us at the Jötunn Discord ([pre]Jules#7950[/pre] and [pre]MarcoPogo#6095[/pre]).