


0 of 0


About this mod
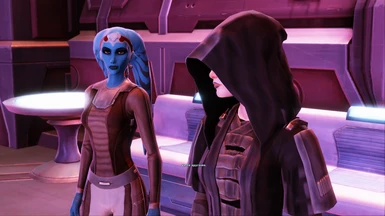
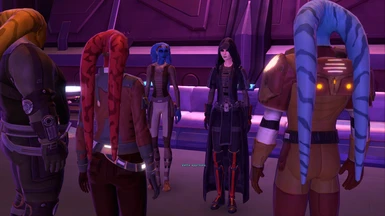
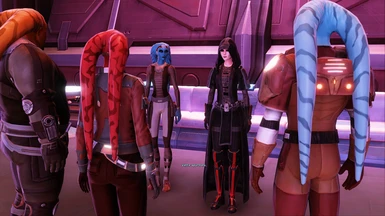
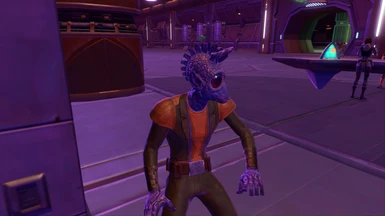
A stunning and realistic ReShade that completely overhauls SWTOR's lighting, enhancing nearly every aspect of SWTOR's visual experience.
- Permissions and credits
Immaculate ReShade
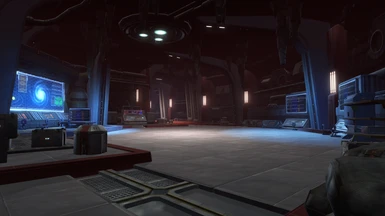
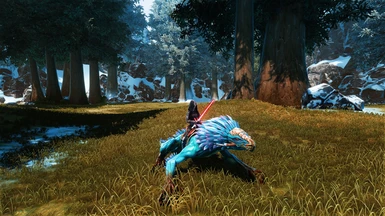
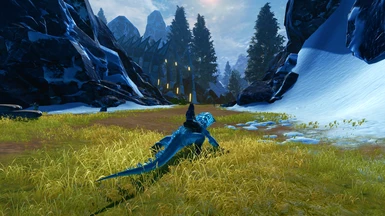
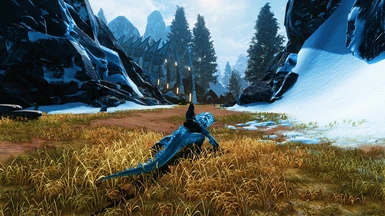
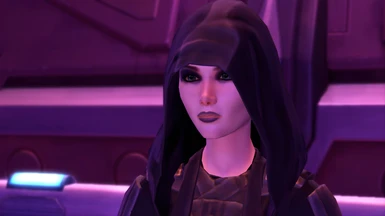
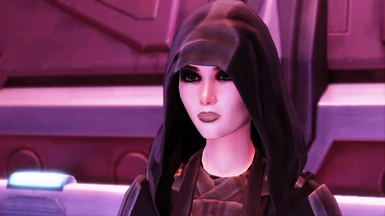
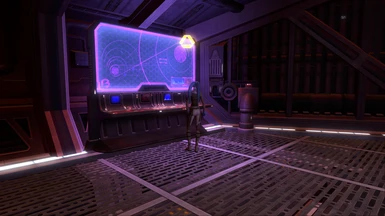
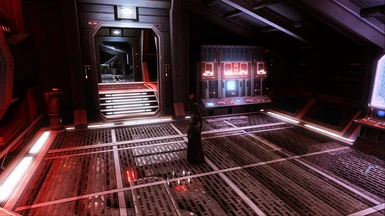
This screenshot and gameplay ReShade goes well beyond basic lighting tweaks that most other reshades use. Immaculate ReShade utilizes more complex shaders to really push SWTOR into the modern era. As we all know, SWTOR's vanilla lighting was bad even in 2011, and it certainly doesn't live up to the standards of the current year. This ReShade aims to completely overhaul the lighting to an almost unrecognizable extent while still keeping within the bounds of something that won't hurt your eyes looking at it. Emphasizing a sense of realism in the environments was a huge goal when designing this reshade preset.
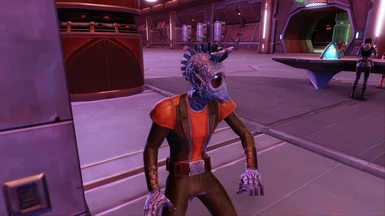
Though my intention with this reshade was primarily to create a screenshot-focused preset specifically for environment and character photography, as you'll see in the images tab. This reshade can absolutely still be used for gameplay, I use it for gameplay as well, and it is such a huge improvement over vanilla lighting. Though in more add-dense and effect-dense content like raids, the effects may kill your frame rate or be too extreme on your eyes. If you're just completing story missions across the galaxy, however, this will work perfect for you! If you do both, this preset can be turned on or off at will with the "End" hotkey on your keyboard, which is changeable in the reshade settings panel.
At lower resolutions, This Reshade's sharpening effects may look a bit too abrasive when stacked on top of each other. I recommend turning off the Filmic Anamorphic Sharpen shader when playing at lower resolutions, though I would still leave Luma Sharpen enabled as its primary affect is to increase the clarity and crispness of textures in the world since SWTOR's textures are very low resolution.
Preset In-Action
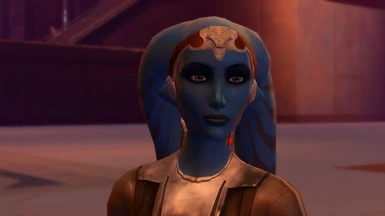
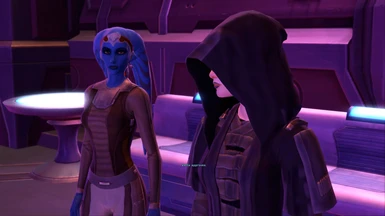
Blue Filter Removal
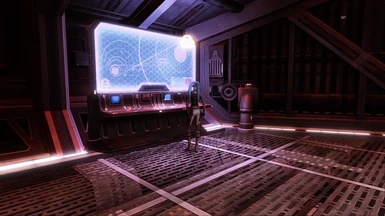
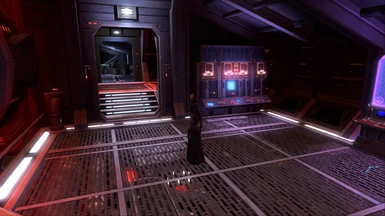
Optionally, there's an option to fully remove the blue filter SWTOR has over the entire game. This preset already reduces it substantially, but the lightroom shader removes it completely, at the cost of all things blue being less colorful. This effect is enabled by default. If you would like to turn that off, in the reshade settings panel, tick off the box for the Lightroom [qUINT_lightroom.fx] shader. All the screenshots uploaded to this page do not have this option turned on.
Here's two before and after screenshot gifs of lightroom turned off and turned on:


And two more with reshade off and reshade on with the blue filter removed:


Installation Instructions
Unfortunately, SWTOR is a bit finnicky in regards to RayTracing and reshade. There's a little work involved in getting it to work, but fret not! I will detail exactly how to do it in this instruction guide. Please pay close attention and read thoroughly! One mistake can cause everything to not work.
What you'll need:
1. DXVK (this both boots performance and allows the depth buffer to be opened)
2. A modded reshade executable (I have one in the files tab)
3. My reshade preset (duh lol)
4. iMMERSE Pro from Pascal Gilcher's patreon
Step 1: Install DXVK.
If you're using RayTracing, follow this step. If not, skip to Step 2.
DXVK can be found here: https://github.com/doitsujin/dxvk/releases/tag/v2.0
On this page, scroll all the way to the bottom and click on the "dxvk-2.0.tar.gz" file to download it.
In your downloads, unzip it, and then unzip the second file inside.
Open the x64 folder, and copy d3d9.dll
Paste d3d9.dll in your main SWTOR directory. If installed through steam, this is the file path:
C:\Program Files (x86)\Steam\steamapps\common\Star Wars - The Old Republic\swtor\retailclient
Step 2: Install the modded reshade executable from this page's files.
Download the file
In your downloads folder, open the executable file titled "Modded Reshade 5.9.2 executable.exe".
Ignore the popup and click okay. Bans are not given to reshade users in SWTOR, this warning only exists for competitive shooter games and the like.
With the application running, search the list of applications until you find "Star Wars: The Old Republic (swtor.exe).
If the game is not found in the list, click "browse" and locate the swtor exe in your file manager, the same place you pasted the d3d9.dll from step 1. If you skipped Step 1, the file path is:
C:\Program Files (x86)\Steam\steamapps\common\Star Wars - The Old Republic\swtor\retailclient
Once the game has been selected, click next.
> If you're using Ray Tracing and have installed DXVK in step 1, Choose "Vulkan" as the rendering API and click next.
> If you're not using Ray Tracing and skipped Step 1, choose "Directx 9" as the rendering API and click next.
Do not install any shader packages, click "skip". Other than the RTGI shader from Pascal's Patreon, all the files you need are included in the file on this page.
You will know that reshade has successfully been installed because it will tell you as such.
Step 3: Install my preset.
Download my reshade preset in the files tab on this page
Unzip the file in your downloads folder.
Copy everything inside the folder (reshade-shaders, ImmaculateReshade.ini).
Paste them in your SWTOR directory, found here:
C:\Program Files (x86)\Steam\steamapps\common\Star Wars - The Old Republic\swtor\retailclient
Step 3a: Install Ray Tracing
If you're installing RayTracing, You'll need the iMMERSE shader suite.
Go to Pascal Gilcher's Patreon here: https://www.martysmods.com/patreon/
Subscribe for the $5 /month option.
Download the iMMERSE Pro shaders.
In your downloads, unzip iMMERSE_Pro
Copy the Shaders and Textures folders and paste them inside the reshade-shaders folder in the SWTOR game directory.
Step 4: Configure reshade in-game.
Open SWTOR
If reshade was installed properly, you should see a dark gray bar across the top of your screen with details on your reshade installation when the game opens.
Ignore the prompt telling you reshade is out of date and there's a new version available. The version of reshade you need is the one in this page's files.
Press the "Home" key on your keyboard.
The Resahde Home panel will open, prompting you to take a guided tour. If you're unfamiliar with reshade, taking the tour is a good idea, otherwise you can skip the tutorial.
In the Home panel, select the Immaculate ReShade.ini preset.
In the Home panel, you will find a long blue button that says "Edit global preprocessor definitions"
A dialogue box will open. Set these preprocessor definitions if they aren't already set:
RESHADE_DEPTH_LINEARIZATION_FAR_PLANE1000
RESHADE_DEPTH_INPUT_IS_UPSIDE_DOWN0
RESHADE_DEPTH_INPUT_IS_REVERSED0
RESHADE_DEPTH_INPUT_IS_LOGARITHMIC0
RESHADE_DEPTH_MULTIPLIER1.250
With these preprocessor definitions set, click out of the dialogue box to save and confirm them, and click the "reload" button at the bottom of the panel.
In the in-game preferences, under graphics, turn Anti Aliasing to Medium. If you're using Ray Tracing, turn off Enhanced Shadows.
Complete: If this was done correctly, everything you need to do is done.
If you experience any issues with the reshade, search for help online first, you probably aren't the first person to have your issue. Most problems will be user-error, but if nothing comes up or the solutions you've tried didn't work, leave a comment on this mod page, I may have made an error in my instructions and a comment highlighting that would help future users.