


0 of 0

Starship Troopers Extermination modding guide
This guide will serve as a resource for modders looking to learn how to edit existing content in the game using Unreal engine.
Our uproject:
To start you're going to need to install unreal engine version 4.27, launch that and create an empty project with no starter content. The name of the project doesn't matter but try and avoid a path which has spaces.
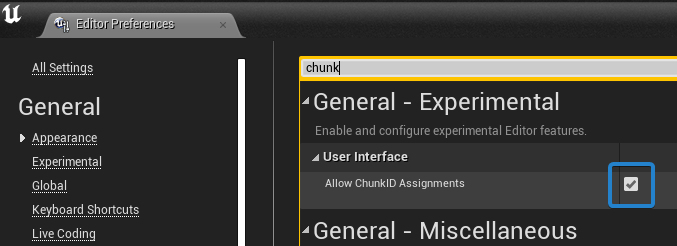
With your Uproject open, in the top left go to "Edit-> Editor Preferences", search for and enable "Allow Chunk ID assignments"
Under "Edit-> Project settings" search for chunk again and enable the setting "Generate Chunks" if it isn't enabled already.
This is all we need to do to set up our Uproject for modding :)
Blender:
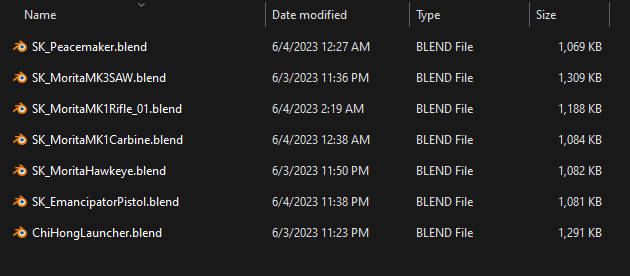
We're going to download the required blend files (you can also rip them from Fmodel or Umodel but that does require the AES key), I re-created most of the weapons in game, they should serve as a pretty accurate base for modders to work from.
The first thing we need to do is install an addon I created to help out with the modding process of this game.
Once the addon is installed you'll see it on your N panel in the 3d viewport.
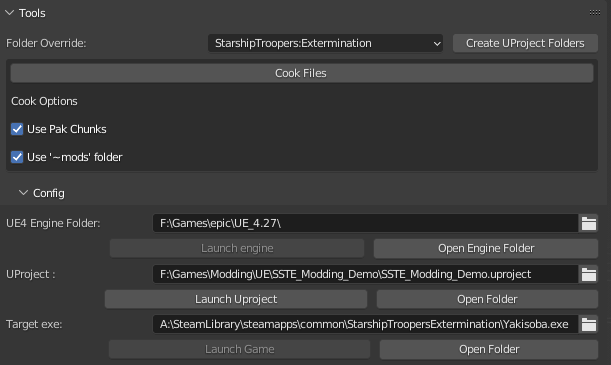
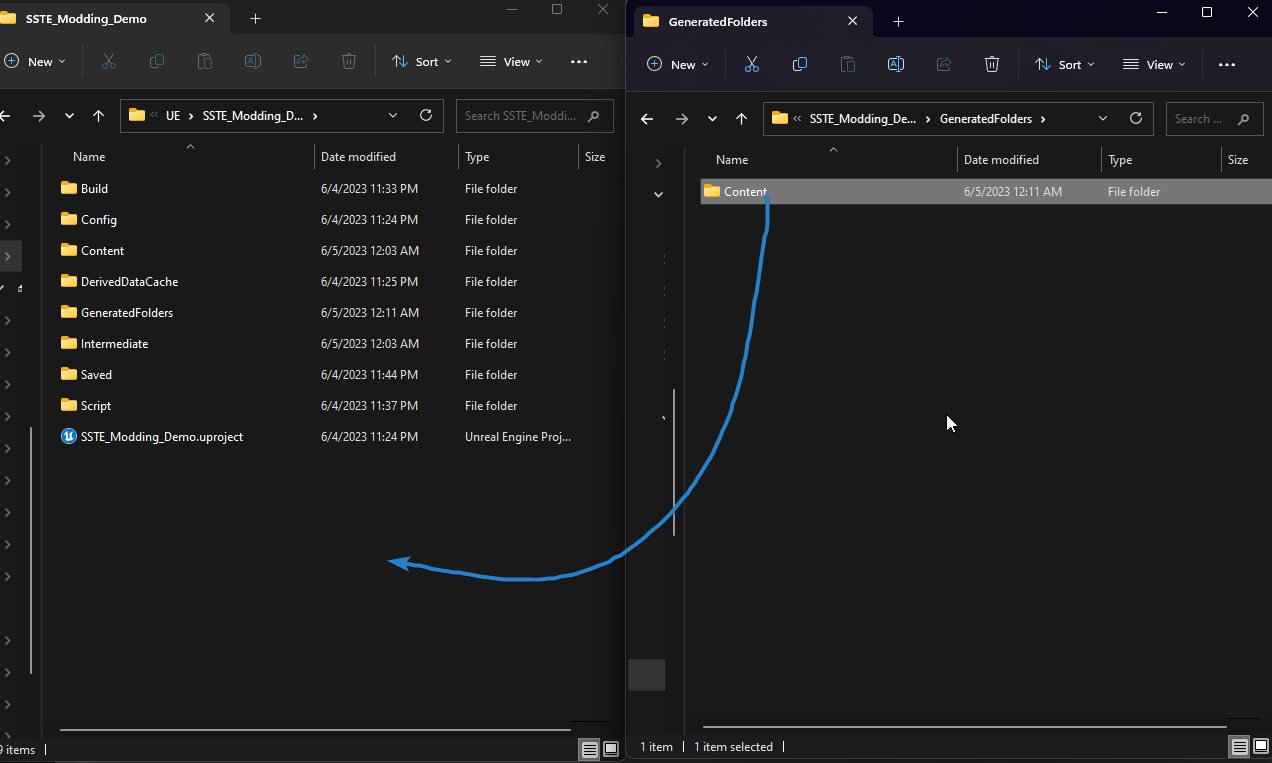
One of the features of the addon is to generate a games folder structure, after pressing and confirming "Create Uproject folders" you're going to have a new folder in the root of your UProject called "Generated folders" Go into that folder and you should see a folder called "Content" drag and drop this folder right along side your uproject (move it backwards 1 directory)
You should see the folders pop up inside of Unreal engine. Having those generated folders help out with exporting and finding the proper place to put your modified assets. With one of the blend files open (I am using the Emancipator in this demo) Export the file as an FBX with the following setting.
Disable "Armature -> Add Leaf bones"
Disable "Bake Animation"
Back to Unreal:
Import the fbx you exported to the folder "Yakisoba\Weapons\Pistols\Emancipator"
All we need to do now inside is unreal is assign our imported skeletal mesh to our proper chunk.
Right click the skeletal mesh Emancipator pistol (the square with the purple/magenta line) go to "Asset Actions -> Assign to chunk", input 1 into the box that pops up.
Our model will now be packaged to chunk 1! All the other assets we've imported will default to chunk 0 as we don't want to overwrite the skeleton or the material instance. (If you have any texture files you wish to modify don't forget to assign those to the proper chunk as well)
Back to Blender:
In blender all we have left to do is press the "Cook Files" button, if everything goes as planned your mod files will be placed in "StarshipTroopersExtermination\Yakisoba\Content\Paks\~mods", navigate to that folder and delete pak chunk 0, that file will stop the game from booting if present. You'll need to remove that folder every time you cook your files.
That should be everything you need to get your modified weapon in engine :) If you have any questions please join the Discord, everyone is welcome.
This guide will serve as a resource for modders looking to learn how to edit existing content in the game using Unreal engine.
Our uproject:
To start you're going to need to install unreal engine version 4.27, launch that and create an empty project with no starter content. The name of the project doesn't matter but try and avoid a path which has spaces.
With your Uproject open, in the top left go to "Edit-> Editor Preferences", search for and enable "Allow Chunk ID assignments"
Under "Edit-> Project settings" search for chunk again and enable the setting "Generate Chunks" if it isn't enabled already.
This is all we need to do to set up our Uproject for modding :)
Blender:
We're going to download the required blend files (you can also rip them from Fmodel or Umodel but that does require the AES key), I re-created most of the weapons in game, they should serve as a pretty accurate base for modders to work from.
The first thing we need to do is install an addon I created to help out with the modding process of this game.
Once the addon is installed you'll see it on your N panel in the 3d viewport.
One of the features of the addon is to generate a games folder structure, after pressing and confirming "Create Uproject folders" you're going to have a new folder in the root of your UProject called "Generated folders" Go into that folder and you should see a folder called "Content" drag and drop this folder right along side your uproject (move it backwards 1 directory)
You should see the folders pop up inside of Unreal engine. Having those generated folders help out with exporting and finding the proper place to put your modified assets. With one of the blend files open (I am using the Emancipator in this demo) Export the file as an FBX with the following setting.
Disable "Armature -> Add Leaf bones"
Disable "Bake Animation"
Back to Unreal:
Import the fbx you exported to the folder "Yakisoba\Weapons\Pistols\Emancipator"
All we need to do now inside is unreal is assign our imported skeletal mesh to our proper chunk.
Right click the skeletal mesh Emancipator pistol (the square with the purple/magenta line) go to "Asset Actions -> Assign to chunk", input 1 into the box that pops up.
Our model will now be packaged to chunk 1! All the other assets we've imported will default to chunk 0 as we don't want to overwrite the skeleton or the material instance. (If you have any texture files you wish to modify don't forget to assign those to the proper chunk as well)
Back to Blender:
In blender all we have left to do is press the "Cook Files" button, if everything goes as planned your mod files will be placed in "StarshipTroopersExtermination\Yakisoba\Content\Paks\~mods", navigate to that folder and delete pak chunk 0, that file will stop the game from booting if present. You'll need to remove that folder every time you cook your files.
That should be everything you need to get your modified weapon in engine :) If you have any questions please join the Discord, everyone is welcome.