


0 of 0

Pre-requisites
Latest version of Blender
The Blender mesh importer
Bethesda Archive Extractor
Latest Dev version of Nifskope
A model (Under 65k Polys / Tris)
Step 1
Open Nifskope, then locate the archive browser, open the "Starfield - Meshes01.ba2",

Step two:
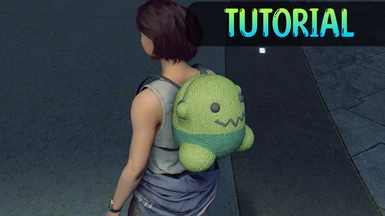
Now with the archive browser open, you may now freely view and search for the mesh in the game. For this tutorial I'll be making a simple constellation jetpack replacer, so I'll search "SpaceSuit_Constellation_Backpack_M"
Step three:
After having clicked the mesh entry you should see a preview on the right hand side of the model.
Move from "Archive Browser" to "Block list"

The follow this path
>NiNode>BSGeometry>Meshes>Mesh 0>Mesh
(This is the .mesh (Visible in game geometry) that you'll be replacing / taking weighting from.)
(As further explanation, the .NIF is mostly just a data handler for the .MESH in Starfield)

Pre-requisites
Latest version of Blender
The Blender mesh importer
Bethesda Archive Extractor
Latest Dev version of Nifskope
A model (Under 65k Polys / Tris)
Step 1
Open Nifskope, then locate the archive browser, open the "Starfield - Meshes01.ba2",
Step two:
Now with the archive browser open, you may now freely view and search for the mesh in the game. For this tutorial I'll be making a simple constellation jetpack replacer, so I'll search "SpaceSuit_Constellation_Backpack_M"
Step three:
After having clicked the mesh entry you should see a preview on the right hand side of the model.
Move from "Archive Browser" to "Block list"
The follow this path
>NiNode>BSGeometry>Meshes>Mesh 0>Mesh
(This is the .mesh (Visible in game geometry) that you'll be replacing / taking weighting from.)
(As further explanation, the .NIF is mostly just a data handler for the .MESH in Starfield)
And copy the text following the backslash.
(19228da49332b37f0e2d)
Step Three
Open Bethesda Archive Extractor, open "Starfield - Meshes01.ba2" then type or paste the hash, right click it, then hit extract
(REALLY IMPORTANT NOTE: MAKE SURE THE BOX NEXT TO "Starfield - Meshes01.ba2 IS NOT CHECKED. If it is, you'll begin to unpack all of the meshes in the archive. So just check the box next to your specific mesh)
Step Four:
Open Blender then go to >Edit>Preferences>Install, then select the archive from the geometry bridge script
Step Five
Go to file>Import>Starfield_Geometry, then import the mesh you extracted
---------------------------------------------------------------------------------------
=Quick controls guide for the unfamiliar=
Mouse scroll moves the the camera back and forth
Holding mouse button and moving the mouse orbits the camera
Holding shift and moving the mouse button pans the camera
---------------------------------------------------------------------------------------
Step Six
Go to file>Import>Starfield_Geometry, then import the mesh you want to see in Starfield.
Now the mesh might be too big OwO or maybe too small UwU. Let's fix this!
---------------------------------------------------------------------------------------
=Another quick controls guide for the unfamiliar=
Left clicking a model selects it
Holding S allows you to scale it
And the tools on the left side of the viewport are self explanatory, you'll just need to hold and drag them into their appropriate direction while active
---------------------------------------------------------------------------------------
Step Seven
Now that your mesh is alligned, it's time to weight paint!
Hold shift, then click the model from Starfield (In my case it's the Constellation pack)
Then while still holding shift, click your custom model.
If done right, model from Starfield should be outlined in dark orange, and your custom model should be in a light orange.

With both still highlighted, go to Object mode>Weight Paint

And now your mesh should be blue.
Then go to Object weights > Transfer weights

Then in the bottom left, click the "Transfer Mesh Data" button and change the "Source layers selection" to "By name"

And now your mesh should be red (if it's based off of one bone) visual may vary if you're working with more than one

Now just click your model in this collection (Mine is WilbyBack01) and then Object data propeties
(The models will lose their orange highlight in the viewport, don't worry)

You can check the bones in "Vertex Groups" and it'll show where X bone is weighted on X part of the body.
(You can revisit and manually paint later if something doesn't seem right when testing in game)
Step eight
Go back up to weight paint from earlier, then reselect object mode.

With both still highlighted, go to Object mode>Weight Paint
And now your mesh should be blue.
Then go to Object weights > Transfer weights
Then in the bottom left, click the "Transfer Mesh Data" button and change the "Source layers selection" to "By name"
And now your mesh should be red (if it's based off of one bone) visual may vary if you're working with more than one
Now just click your model in this collection (Mine is WilbyBack01) and then Object data propeties
(The models will lose their orange highlight in the viewport, don't worry)
You can check the bones in "Vertex Groups" and it'll show where X bone is weighted on X part of the body.
(You can revisit and manually paint later if something doesn't seem right when testing in game)
Step eight
Go back up to weight paint from earlier, then reselect object mode.
Then go to the panel on the right, click the old mesh name and delete it.
(I like to copy the original name then paste it onto my custom mesh after it's deleted.)

Step Nine
Change to "Active tool and workspace settings", export starfield mesh tab, then Export mesh
I usually click smooth seam normals and normalize weights (I don't know what either means and won't pretend to) then export it to the appropriate location.

(Remember: These must 100% absolutely be placed in the Documents\My Games\ path, or they won't load)
Step Ten (Optional)
Other notes
If this uses custom textures, you'll need to replace the original models textures with them.
If you're doing an object that uses multiple material groups, you'll need copy the weights for each part, create a .mesh for each, then you'll need to create a new BsGeometry for each part inside of the .nif.
If you don't want to replace the original .mesh, you can simply export your new .mesh to a custom folder in geometries, then change the .mesh path mentioned in Step 2.
Step Ten
Test your mesh in game!

Wanna keep up to date, help, or be included with future Starfield content? Join the server!
Discord Server