


0 of 0
Character Model Replacement Guide
Link to google doc ver: link
Required tools:
Unity Assets Bundle Extractor ver. 3.0 beta - Provided in https://github.com/SeriousCache/UABE ,( Might also need to import this file into UABE for it to recognize and open Unity 2020.3.24f1 assets files - classdata.tpk)
AssetStudio - https://github.com/Perfare/AssetStudio
Unity version 2020.3.24f1 - https://unity3d.com/get-unity/download/archive
Unity skinned mesh generation script - https://pastebin.com/raw/iCpxzSEF
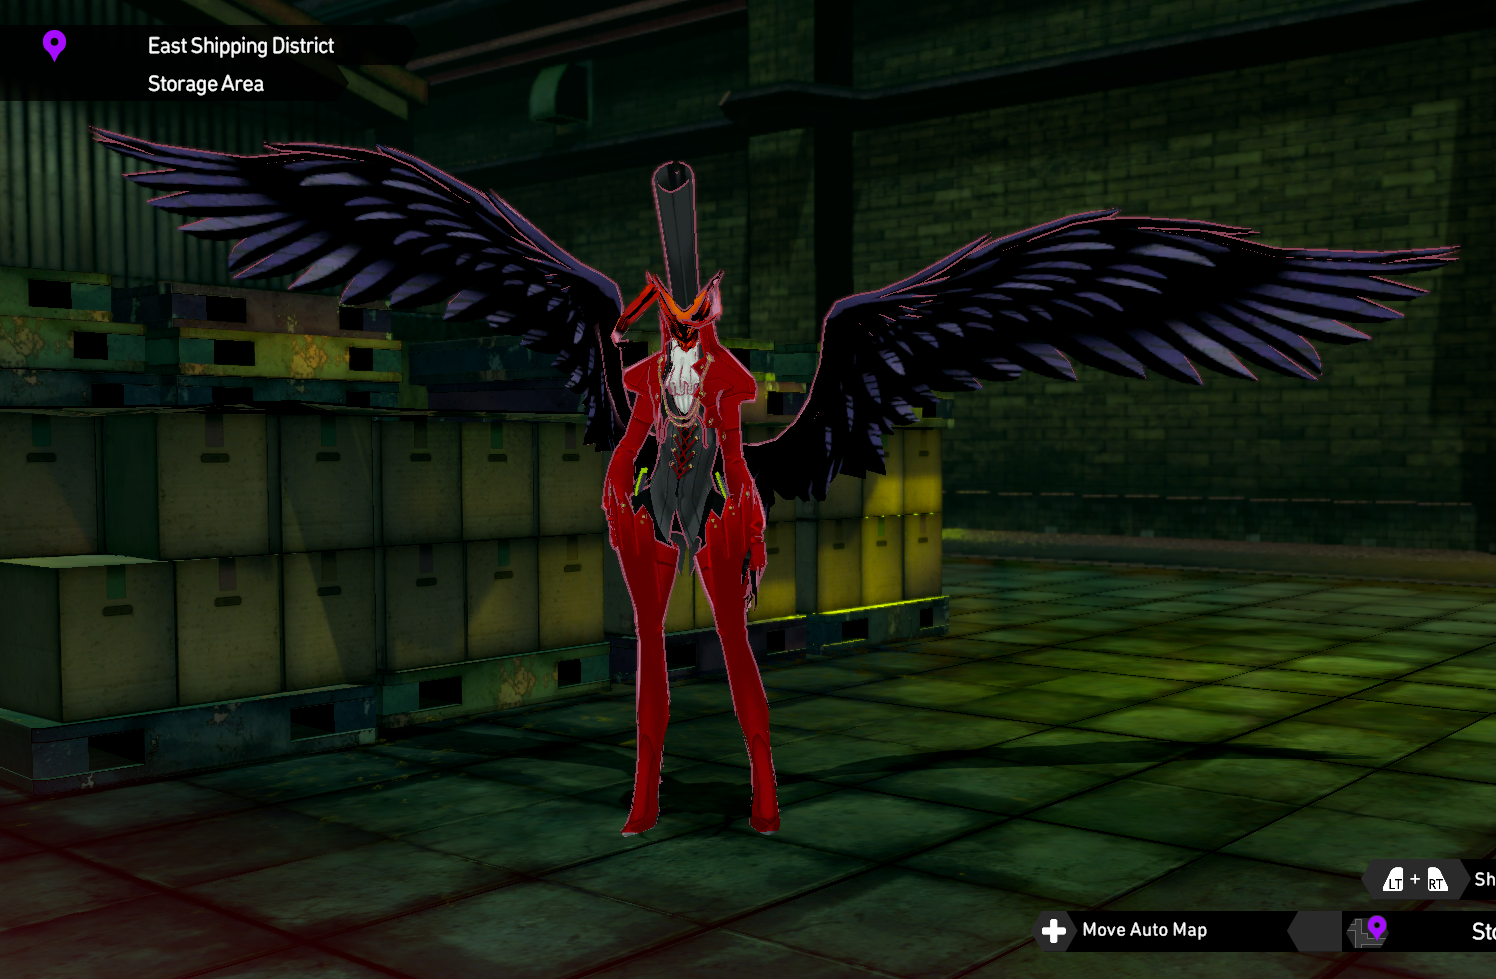
Archives with “pc” are character archives, the “_dress” files are where the models are. ex: Ringo has two main archives, pc001_dress00 is the character model with the jacket and pc001_dress01 is the character model without the jacket.
Prerequisite model set-up: 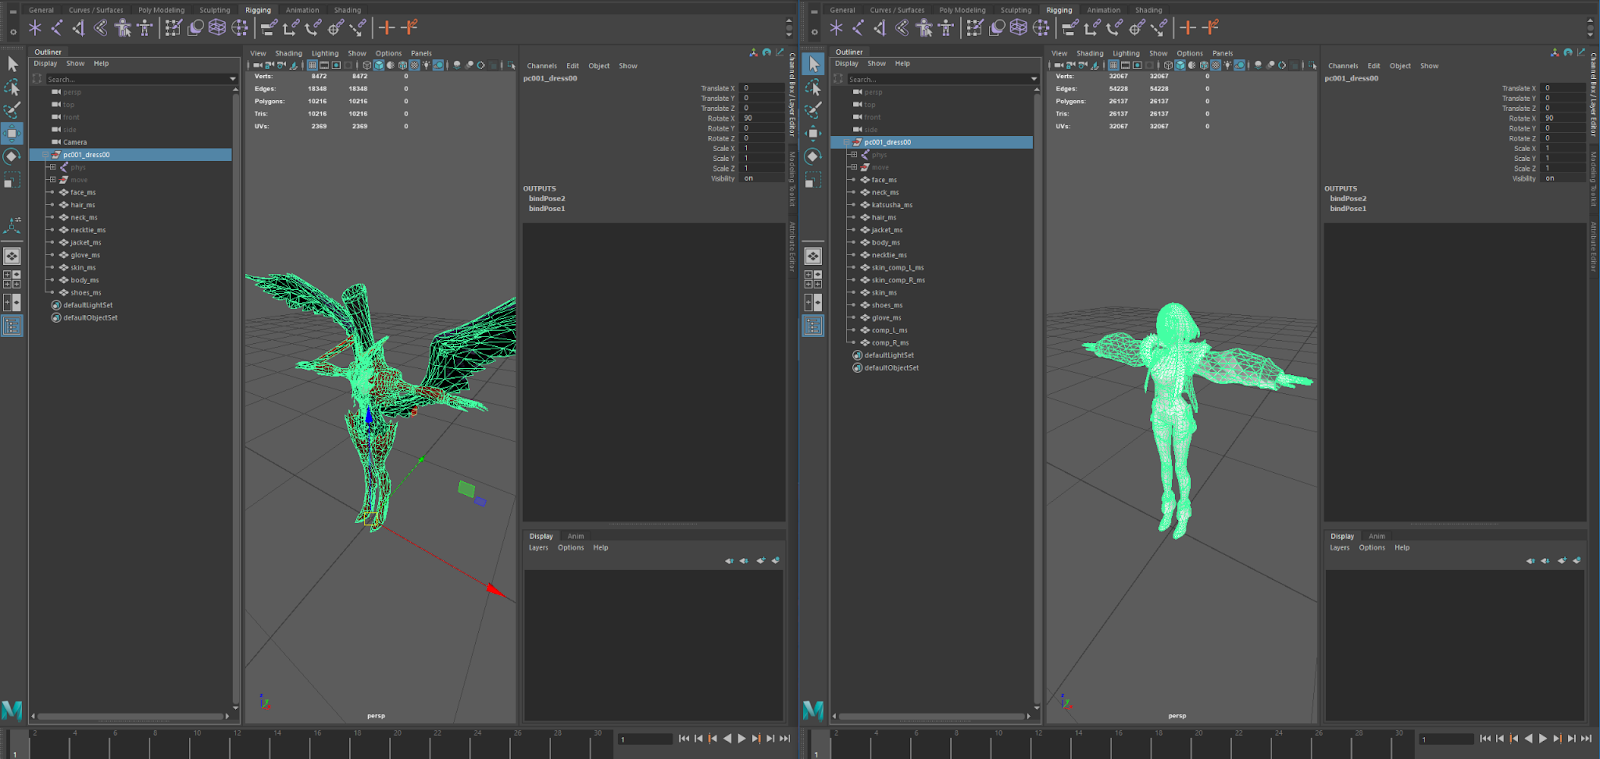


Or
Link to google doc ver: link
Required tools:
Unity Assets Bundle Extractor ver. 3.0 beta - Provided in https://github.com/SeriousCache/UABE ,( Might also need to import this file into UABE for it to recognize and open Unity 2020.3.24f1 assets files - classdata.tpk)
AssetStudio - https://github.com/Perfare/AssetStudio
Unity version 2020.3.24f1 - https://unity3d.com/get-unity/download/archive
Unity skinned mesh generation script - https://pastebin.com/raw/iCpxzSEF
- Identify which character model you want to replace by using AssetStudioGUI.exe.
- Open AssetStudioGUI go to file -> open and go to SOUL HACKERS2\SOUL HACKERS2_Data\StreamingAssets\win\character.
- Open AssetStudioGUI go to file -> open and go to SOUL HACKERS2\SOUL HACKERS2_Data\StreamingAssets\win\character.
Archives with “pc” are character archives, the “_dress” files are where the models are. ex: Ringo has two main archives, pc001_dress00 is the character model with the jacket and pc001_dress01 is the character model without the jacket.
- Navigate to a character archive and click Open.
- After the file has finished loading in, click on the “Asset List” tab to see a list of the assets which can be previewed/ listened to on the right hand panel.
- Choose Export -> All Assets to export all assets associated with the character. This will give you the base meshes as well as the rigged mesh and associated textures.

Prerequisite model set-up:
- Your custom model must be in the same translation/rotation/scale as the original and be in roughly the same default position/pose as the original model
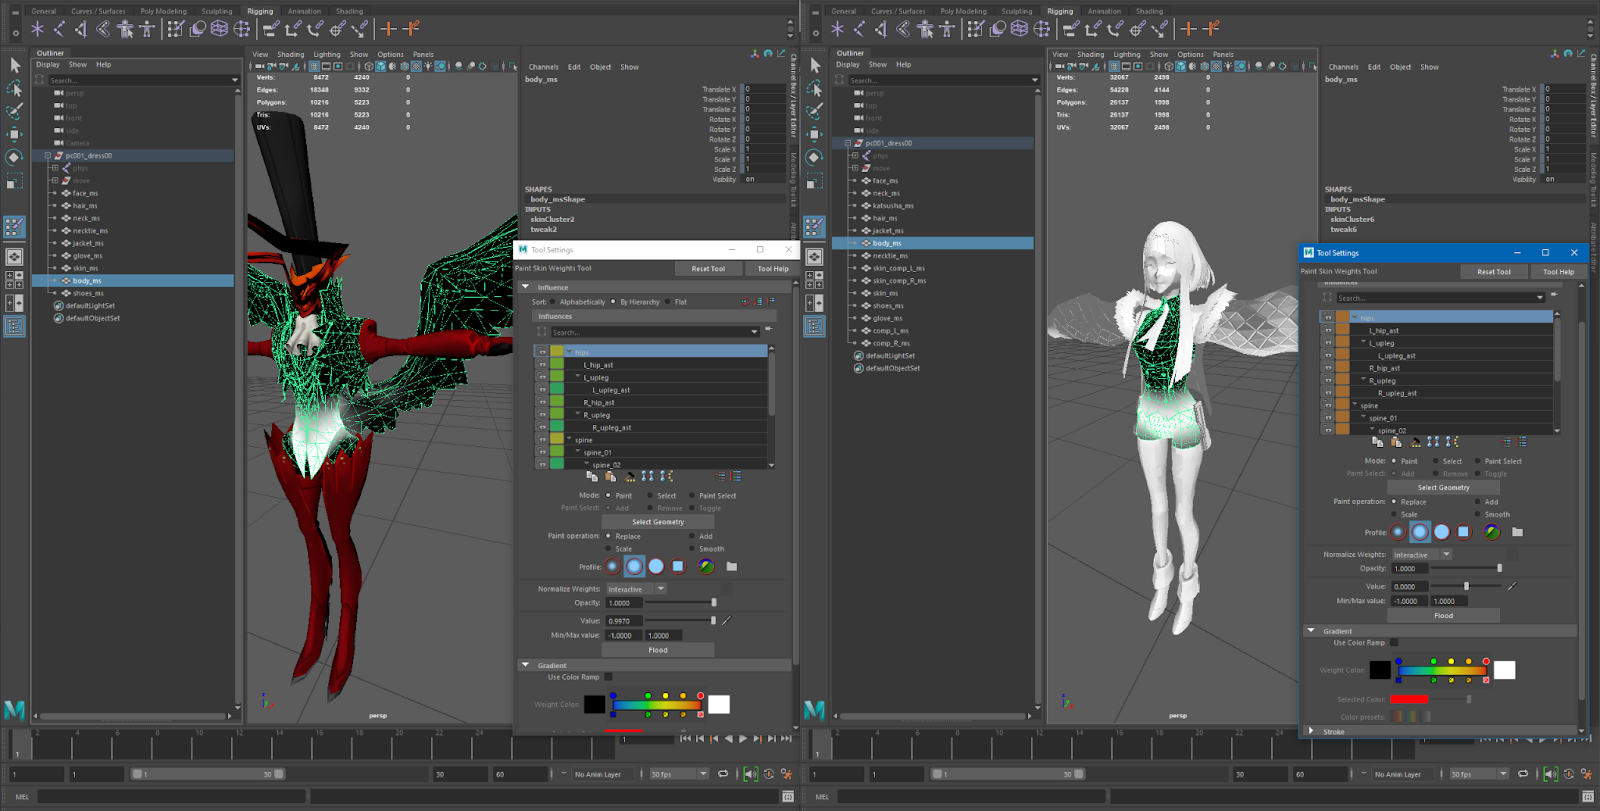
- The custom model’s bone hierarchy must match the bone hierarchy of the original model and have mesh groups that are set up and named similarly to the original model (ex. body_ms, skin_ms). If you don’t need a particular mesh group for your model (ex. necktie_ms , com_L_ms) you don’t need to include it in your model
- When rigging, each mesh must have the same bones rigged to it as the original model as well. If you don’t need to use a bone then you can give it a paint weight influence of 0 but it still needs to be shown as rigged to that mesh.
- For the purpose of simplicity, combine textures of the same type into one file (all diffuse textures in one file, all normal textures in one file, etc.) and fix the UV mapping on the model to accommodate the combined texture file. This is so that your custom model’s actual mesh can be set up similarly to the original’s mesh in terms of mesh groups and not worry about how the custom model was originally set up in terms of texture mapping.
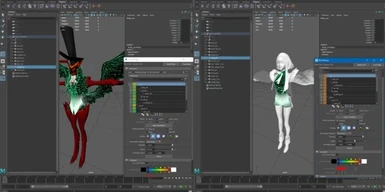
- Import Custom model into Unity.
- Export your model as FBX
- Open an empty project in Unity 2020.3.24f1
- Import both the original model and the custom model into the asset window of Unity.
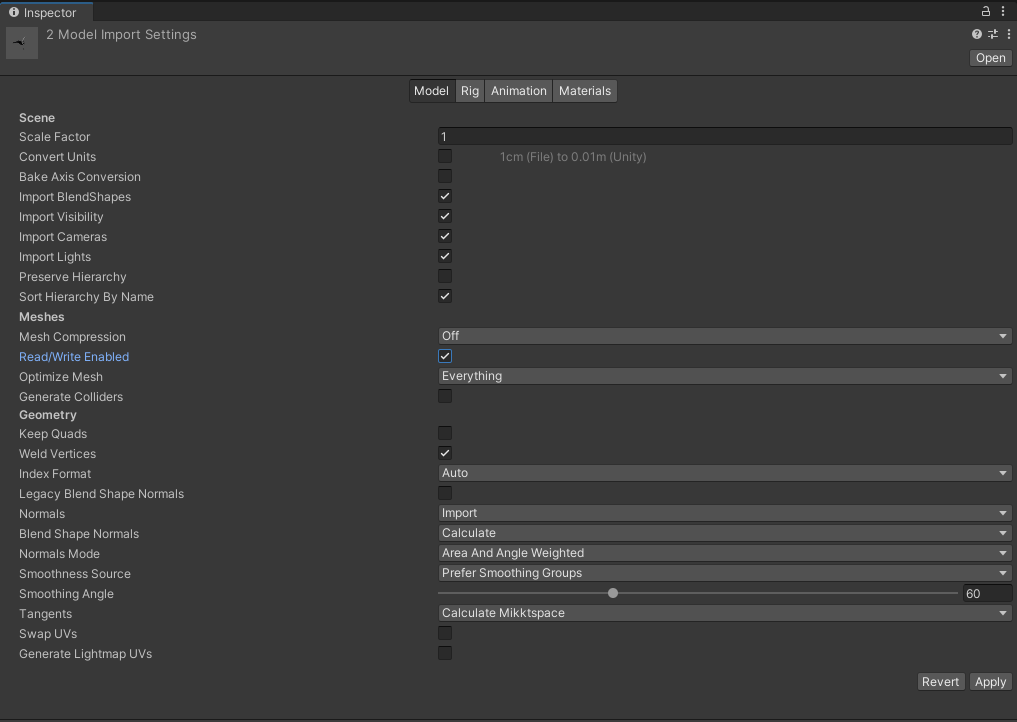
- In the inspector window for both of the fbx models, make sure “Convert Units” is unchecked and “Read/Write Enabled” is checked.
- Set up the mesh generation script
- In the Asset window, create two folders and name them “EDITOR” and “EXPORT”
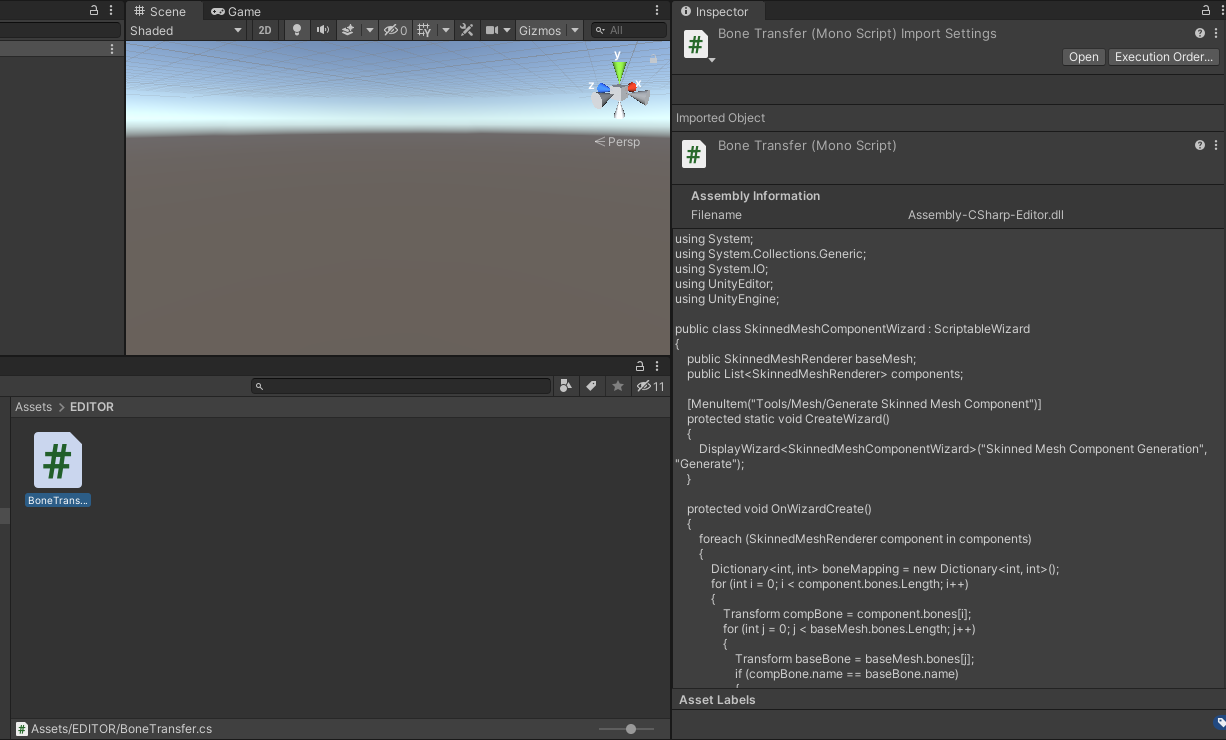
- In the EDITOR folder, create a new C# script and copy/paste the code from the Unity skinned mesh generation script into the new script you created.
- Save the scene and project and you should now have a “Tools” dropdown menu appear on the top. If it doesn’t show up, you may need to close and restart the project to see it appear.
- If the Tools menu still doesn’t appear, make sure you have a Microsoft .Net 4.x version installed and in the Edit->Project Settings-> Player switch the Api Compatibility to .Net 4.x and restart the project.

- Generate fixed bone index meshes of your custom model
- Drag both the custom model and the original model into the scene view
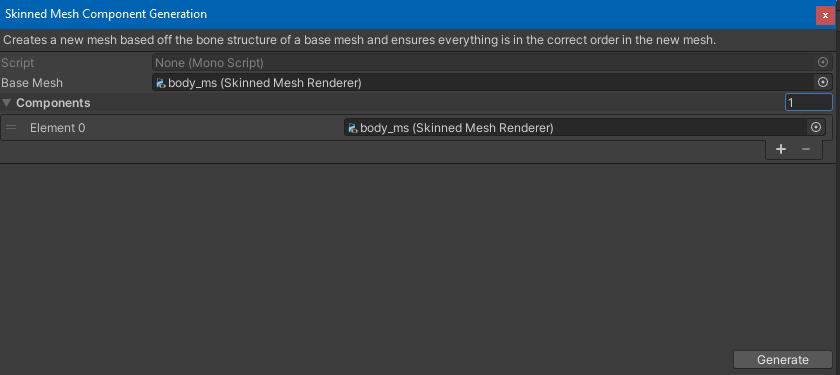
- Go to Tools ->Mesh -> Generate Skinned Mesh Component
- In the window that appears drag a mesh group from the original model from the scene hierarchy to the Base Mesh section.
- In the Components section, change it to 1.
- Drag the same mesh group from your custom model in the Element 0 section that appears, then click Generate
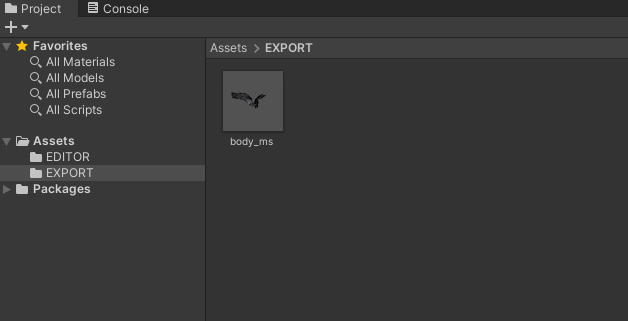
- If successful, you should now see a new mesh generated in the EXPORT folder. This mesh contains the bone indexes in the right order based on the original mesh which will prevent the model from appearing distorted in game.
- If you instead get an error that says something like “Key Not Found” this means that your custom mesh doesn’t match the original mesh exactly in terms of which bones are rigged to that mesh. You would need to go back and make sure those same bones are rigged to that mesh in the same hierarchy order that the original mesh has. Again, not all of the bones need to have a paint weight influence. If you don’t need or want a particular bone, rig it to the mesh with an influence of 0.

- Do the same steps and generate new skinned meshes for all mesh parts of your custom model

- Apply the newly generated mesh component on the model
- Delete the original model from the scene
- Delete the original model from the scene
- In your custom mesh in the scene Hierarchy, for each mesh group, duplicate it and rename the duplicated mesh with a different suffix, I used “_FIXED”.
- Rename the newly generated meshes in the EXPORT folder the same way.
- For each duplicated mesh, in the inspector window on the Mesh component, drag the mesh with the same name from the EXPORT folder onto the Mesh component. The model might become distorted after applying the fixed mesh, but this is expected.

- Build the project
- Save the scene and the project
- Go to File -> Build Settings…
- Make sure the current scene is applied in the “scenes to build” section, then click Build and select a build location.
- Dumping the custom model data from the build
- Using UABE, go the build location and find the “sharedassets0.assets” file
- After opening the file, you should see your fixed meshes listed as assets there
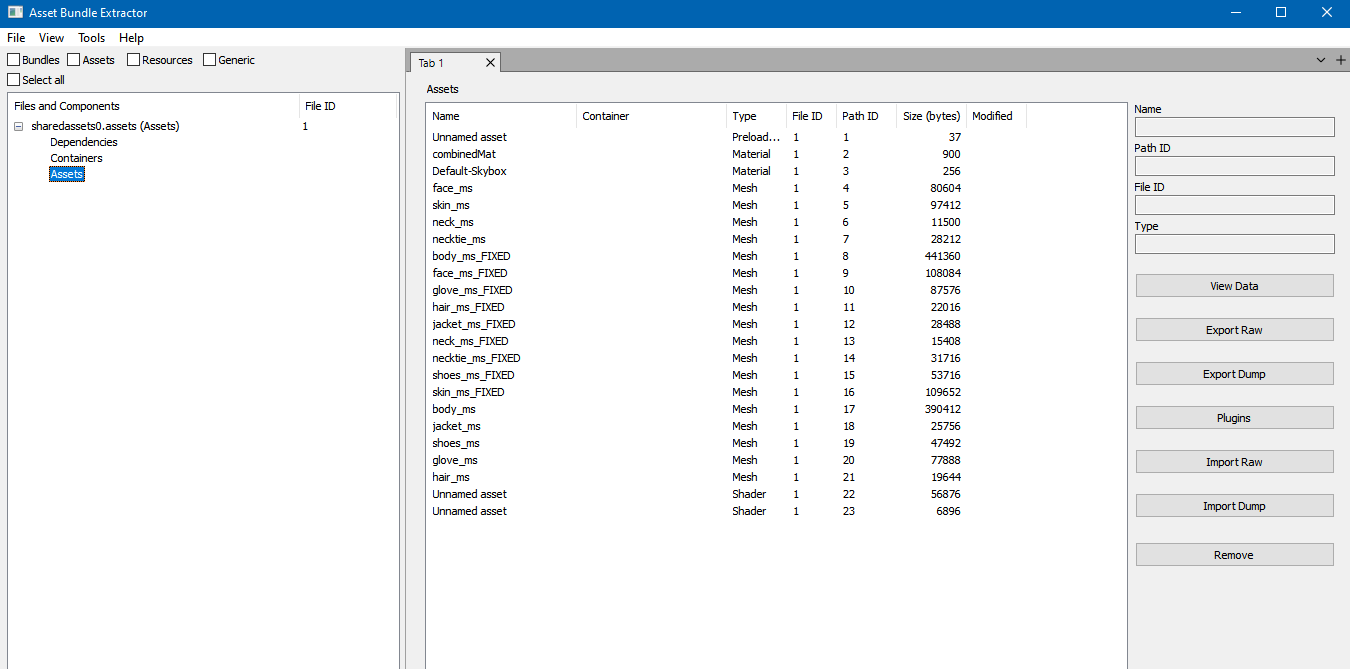
- Select the Fixed Meshes and Export Dump them as json files to a specified location.
- Dumping the original model data from the game
- Using UABE, open the character archive where the original model is stored and you should see a list of assets with the mesh parts from the original mesh.
- Dump the mesh parts as json to a specified directory as well.

- Edit fixed mesh name and hash data to match the original
- Open the json dump for one of your “_FIXED” custom mesh parts
- Change the m_Name so that it matches the name of the mesh it’s going to replace. The file name itself doesn’t need to change.

- Copy the m_BoneNameHashes and m_RootBoneNameHash values from the original mesh’s json dump to your custom mesh’s json dump.
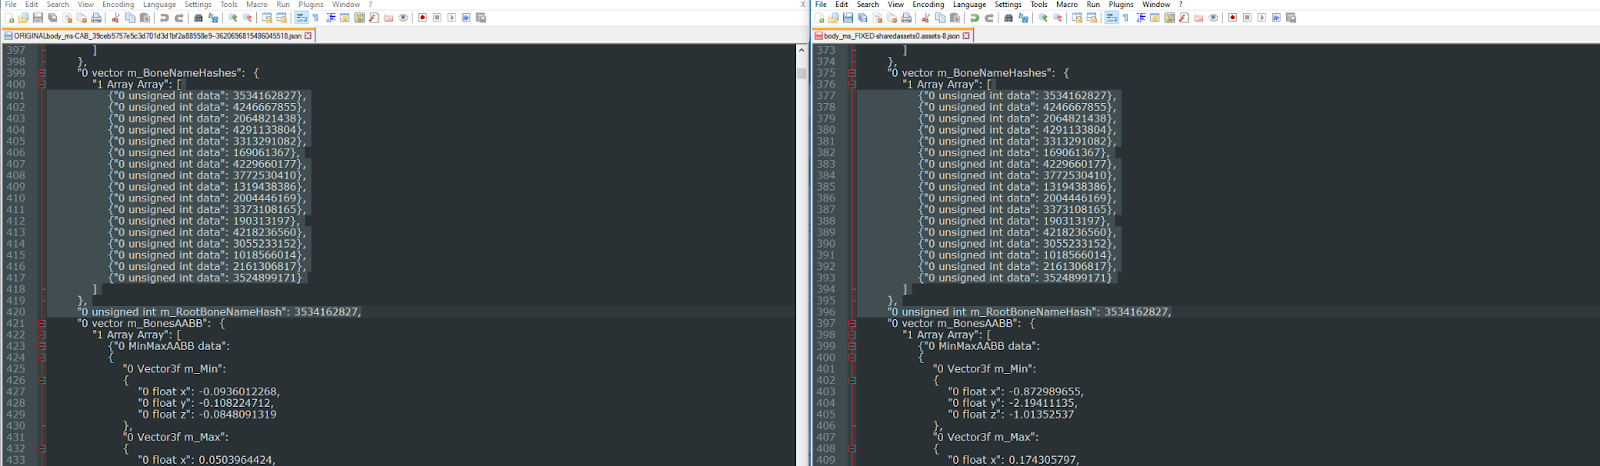
- Do this for all mesh dumps of your custom mesh.
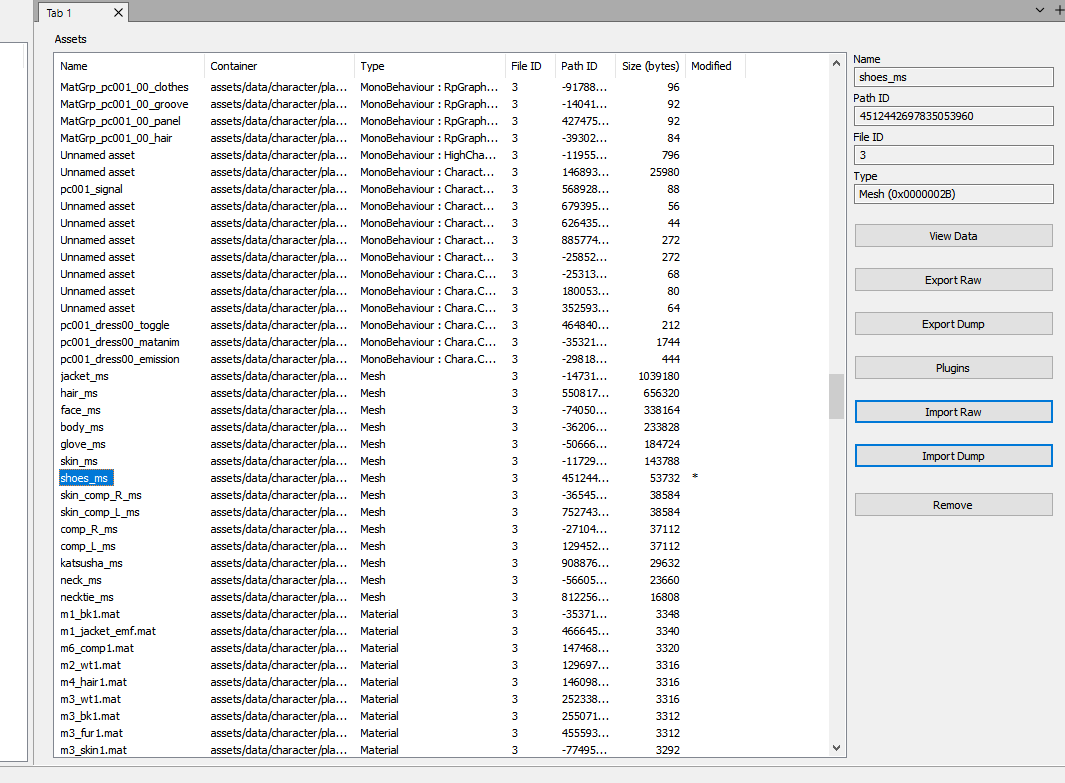
- Import the custom mesh dumps back into the character archive
- In UABE, select a mesh part from the character archive
- Go to import dump and select the json mesh dump for that section from your custom mesh dump
- You should now see a “*” in the modified section of UABE.
- Do this for all of your custom mesh dumps from Unity.
- Blank out unneeded meshes with a “empty” or “dummy” mesh dump
- import a mesh dump that represents an almost empty file except for maybe a very small non visible polygon, you can use that dump to overwrite meshes you don’t want to be shown for your model (ex: katsusha_ms or a skin_comp mesh).
Or
- Give the original mesh dump some bad data (ex: input an invalid bone hash in katsusha_ms to blank it out)
- Use UABE to swap textures with the included plugin.
- Save and swap out the old archevie for the custom one.
- When finished, go to Apply and Save All and save the new modified archive with the same name as the original archive for the character.
- Backup the original Archive and swap out the old archive for your custom one.
- You should now see your custom model appear in game due to the modified mesh parts you imported in the archive.