About this mod
A beginner tutorial and a template to quickly pack your mods for install.
- Permissions and credits
- Donations
It is more focused on NPC mods, but still applies to other kinds of mods.
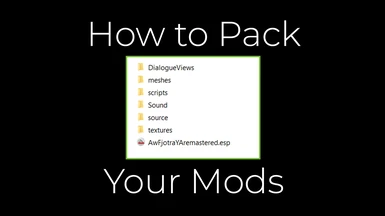
It also includes a sample folder you can use directly as a template.
The basic mod plug-in
I assume you already know how to use the Creation Kit.
When you make and save a new mod, the CK will create an .esp file with the name you give it. Let's call it "mymod.esp"
This file will be located in your game Data folder.
The path to this file will be something like: [wherever you installed Steam]/Steam/steamapps/common/Skyrim Special Edition/Data
Other files connected to your mod
If you are making an NPC or an NPC replacer, there are other files you will need so that the mod will work properly.
If the NPC is simple and doesn't use custom assets, you'll only need the tintmask and the facegen.
First of all, you have to export the NPC head from the CK. To do so click on your NPC's name in the Actors list and Ctrl+F4 (you'll get a confirmation message, click OK).
How to get the exported files:
The tintmask is a texture .dds file that gives the NPC makeup, facepaint, details etc. and it's located in this folder: textures/actors/character/facegendata/facetint/[a folder named after your plugin]
The facegen is a .nif file that contains the 3D head mesh so you'll find it in: meshes/actors/character/facegendata/facegeom/[a folder named after your plugin]
If you are doing a replacer of an existing Skyrim NPC, the last folder for both will be skyrim.esm or the name of one of the DLCs.
If you are adding custom assets to your NPC, you'll have to place them in the right folders, meshes in the meshes path, textures in the textures path, of course.
Now, how to assign the right path will depend on how the texture and meshes are connected to your mod in the CK.
If you are just making a texture/mesh replacer for vanilla assets you'll have to use the vanilla path (example: if you want to replacer the eye textures for everyone in game you'll have to place your .dds files in textures/actors/character/eyes/).
Otherwise, if you are adding your own meshes and textures you'll have to create new folders for those, that you can name whatever you want.
BE CAREFUL: don't use the vanilla path for things like changing the eye texture to your modded character only or you will change the eyes for every other character in the game. Use a custom folder for your unique assets.
The more common case for this is when you add custom hair to your NPC: you create a new head part that points to the hair mesh (I wrote a detailed tutorial about this here: https://wadelandofice.wordpress.com/2021/02/12/skyrim-special-edition-making-a-custom-npc-follower/)
For the hair textures the easiest way is to create a new folder in the texture folder and edit the NPC head .nif file so that the textures point to your custom folder (as explained in the above tutorial).
But if you also add custom skin etc. you might want to create a new Texture Set in Creation Kit and point to the texture files from there (I recommend doing this only if you know about how textures work and where to place diffuse, normals, speculars etc.) - the important thing is that the path leads to the folder where you placed your textures.
Same thing goes if you need to add sounds, scripts and other things.
In the Data folder you'll find all the right places to put those things.
For example Sound/Voice/mymod.esp/ will be the place to put your NPC voice files - in a folder with the same name of your NPC's voice type.
Scripts generated by the CK will automatically go in the scripts (.pex files) and source/scripts folders (.psc files) - just check that the names correspond to those in the CK
How to Pack everything up:
Now that you know where the files are, you have to copy them and put them in your own archive so that it'll be ready to share.
You can place this anywhere, just create a new folder and give it a name like the name of your mod. Everything in this folder should go directly into the Data folder of whoever installs your mod. You don't need to create a "Data" folder, usually mod managers already know where to put the files.
So the first thing you place in the folder is your plug-in .esp - the one we called mymod.esp.
Then you'll have to recreate the path of all other files you need to include.
So you'll make a folder called meshes, in there another folder called actors, etc. so that the end result will be the same path you have in your game: meshes/actors/character/facegendata/facegeom/[a folder named after your plugin]
Do the same for textures, sound, scripts etc.
Now all you have to do is pack your main folder into a zipped archive (you can use winzip, winrar, 7zip or other similar software) and your mod is ready to be installed!
In the pack I already included a basic template with the folders for your NPC's facegen and tintmask so you can use it by just replacing the names and add the other folders you need.
Happy modding :D
_______________
Tutorial by Allison Wade.
For mods and more visit my website: https://wadelandofice.wordpress.com/


