


0 of 0

About this mod
A simple step-by-step guide for everybody - to become texture artist of his/her own textures!
- Permissions and credits
Hello to all of you friends.
I'm working in a Stock market company as salesman; so, obviously I'm not a 3d modeler nor a 2d digital artist. But, I do creating my own textures for Skyrim. "How?", you may ask. Well, the process for each one of you to become 'texture artist' is actually very simple.. All you need is to follow my guide, as I followed many tutorials on YouTube and learned how. So, here is what you need to do:
1. Obviously, you need Photoshop.It's not too bad to acquired it; the 'Design Plan' of Adobe its costs around 37 dollars per month. That's.. what.. 2 less beers per month? You can get the 'Design Plan' and 6-7 Adobe applications, Photoshop included of course. And of course, you need also a plugin to use with Photoshop, to create .dds textures!!! You'll get the plugin from HERE.

2. If you want simply to 'upscale' a texture (and make it really good!), there are plenty paid or free sites to help you on this task. I personally using THIS. The site is free, there is no 'watermark' on the final image, you can upscale everything 2X or 4X and the Algorithm makes the final texture 200% much better (and larger!) than the original one! (But.. of course, you'll have similar textures with million other users).

3. Let's clarify this.. There are many amazing 3d modelers out there and here on Nexus. But, most of them are simply 'baking' their textures in the 3d program they're using (Blender, 3d Max, etc.) Or, they're trying to 'paint' their textures but the result is not so 'realistic' as their fine 3d models.. After 'baking' a texture, you need to improve it by editing it or adding details the 'bake' didn't. I watched a dozen YouTube tutorials and I found that simply 'baking a texture' is not enough; it needs extra editing..
3. So, you want your own textures but you're not an artist (as I'm not too). You need to 'create' your own textures. For detailed models (like an armor), it's quite difficult to do it if you're not an artist. But for environment or simple objects (let’s say a statue), to create better textures is very very simple.
4. You need to find a good pic/image. I'm using THIS site. Why not 'Google search'? Well, Google decided long time ago to remove the high-res image
searching. Even if you set your search in 'high images', you'll get less than 2K res images. In this site I'm suggesting, you'll get really high res images!

5. Okay, you found a good wood image. Obviously, is not seamless. If you use it as it is (simply make it 1024x1024 or 2048x2048 or 4096x4096) won't work. You'll have 'seams' on your model. You need to make the image seamless!

6. Now comes the fun part. You opening Photoshop and you creating a 2048x2048 new file (blank). Then, you opening the image (in our case, this wood texture) you found and you placing it, in this new file. Like I wrote above, the image is not 'seamless' and you need to edit it, to make it perfect for texture use.


7. Press Ctrl+A and select the entire canvas. Press Ctrl+J to duplicate the layer of the image (without any non-visible parts). Delete the original layer and now press Ctrl+J to make a new copy of the layer.

8. Go now up to the command bar and select 'Filter', and then 'Offset'. Set the settings as in the image bellow if your texture is 2K; meaning, you typing the half of the texture's resolution! If, let's say, the texture is 4K, you'll need to put '-2048' & '+2048'. If it's 1K, you'll need to put '-512' & '+512'.


9. As you see, the filter 'broke' the image is 4 parts, with seams obviously! You need to fix that; and it's quite simple. On the right-bottom corner, there is the 'Layers' panel. Bellow it, there are some icons. Select and press the one says 'Add layer mask'. A 'white box' will appear next to your image's layer. You'll work on this white box, not on the image itself! Remember, you need to have selected this 'white box' (mask), not the image!

10. Now, go and pick the 'Brush' tool. Select a 'soft' round brush and make it large (around 200 or more). Now, with the 'Brush' tool selected go to your image on top & middle of it; start 'painting' scrolling to the bottom. Check the 'white box' on the 'Layers' panel! Now it has a 'black line' vertically across it, you see?.. Now, do the same ('paint') from left & middle all over (horizontally) to the right! You see that 'black cross' in the 'white box' (mask)?


11. Now, press on the image('Layers' panel) to select it and press Ctrl+Shift+Alt+E (ok... it's tricky to press all these together, but you'll manage it). You created a 'Stamp Visible' copy of your previous image you made the 'mask editing'. Now, press Ctrl+J to create a copy of that. Now, press Ctrl+Alt+F to re-run the 'Offset' filter one more time!

12. You see? Already the image looks quite seamless. But! If you look carefully to the four MIDDLE points (left, right, up, down) you'll notice some 'seams'. You need to fix them. Pick the 'Clone Stamp' tool and select a 'soft' preset, large enough (200 or more). Now, go to your image and by keep pressing the Alt button (to change the cursor to a 'target' icon) select a nice piece of seamless part and left-click on this area.


13. Now, go to each one of these middle points (left, right, up, down) and click on each one of them several times (10-12 or more) and you'll 'stamp' the previous selected area to those four points (left, right, up, down). You may want to add guidelines to help you 'point perfect' to the specific area/point. How you adding guidelines? You clicking on the roulers (lef and up) and you dragging a guide and placing it to every edge of the image, but of course to the middle too (and you creating 'a cross' of guidelines). Now, you have 'cross-marks' to click perfectly on them.
14. Now, again you pressing Ctrl+Shift+Alt+E to create a 'Stamp Visible' copy. And then, re-run the 'Offset' filter by pressing Ctrl+Alt+F... Now, your texture is seamless!!! Check the edges of the image; check the left-bottom one and then the right-bottom one and see how the texture continues perfectly! All you need now is to press Ctrl+Shift+E and you merging all in one layer and you can save it now (as .dds) and create your diffuse (color) texture!
15. But you need also to have a normal map of this texture. Okay, lets do it. You need to get 'CrazyBump' tool/app from the Net. It's easy to find it and you can use it without purchasing it (but strongly recommending you to buy it, is cheep and super helpful)! Double-click on it and open the tool. You are clicking on the far bottom-left yellow icon to start it.


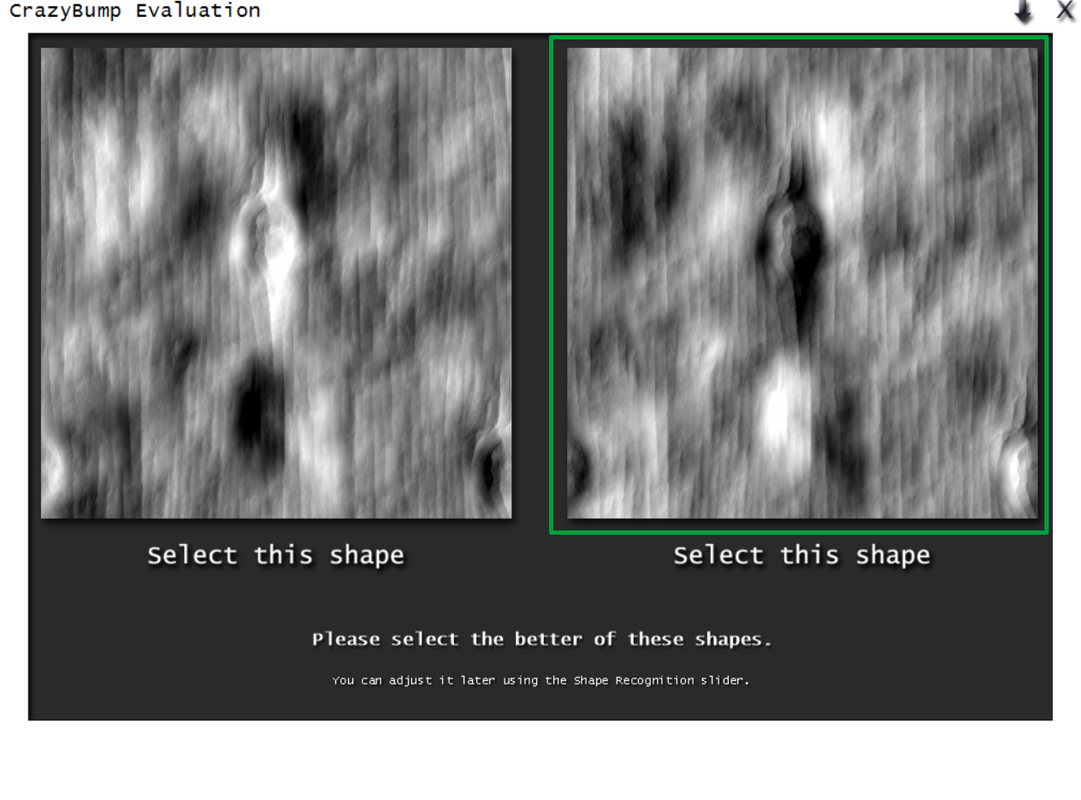
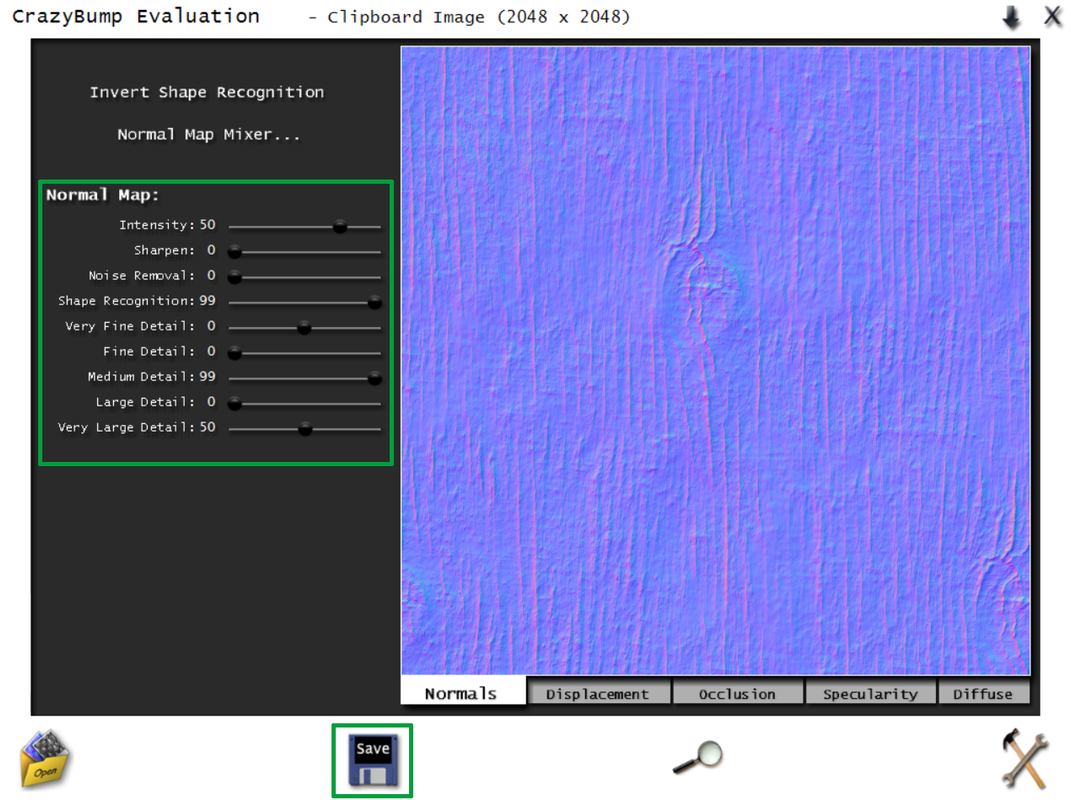
16. Go back to your Photoshop and press Ctrl+A & then Ctrl+C, to select and copy the entire texture you just previously made. Go back to the 'CrazyBump' tool and select the far bottom-left icon says 'Paste photograph from clipboard'. Select the right 'gray' preset. When you'll do it, the tool appearing the 'normal map' of the texture you did! Now, you can 'play' with the settings and get your favorite 'bump' result you like your texture to have!
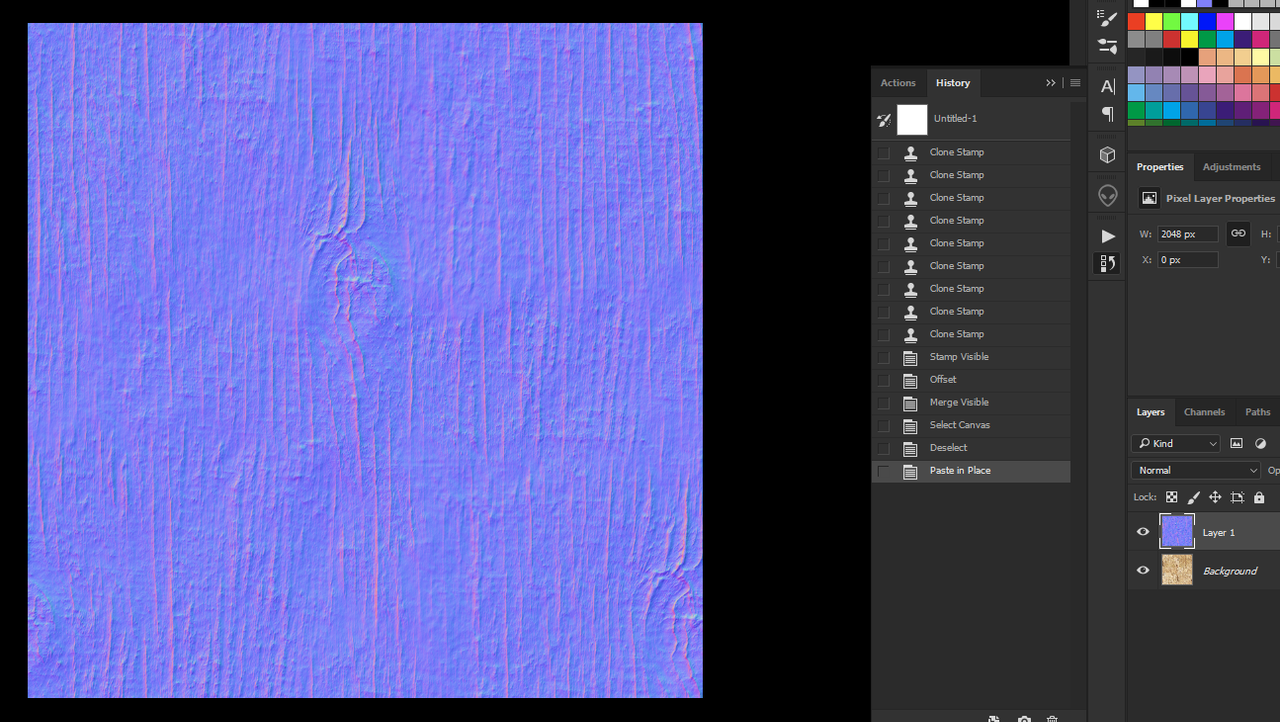
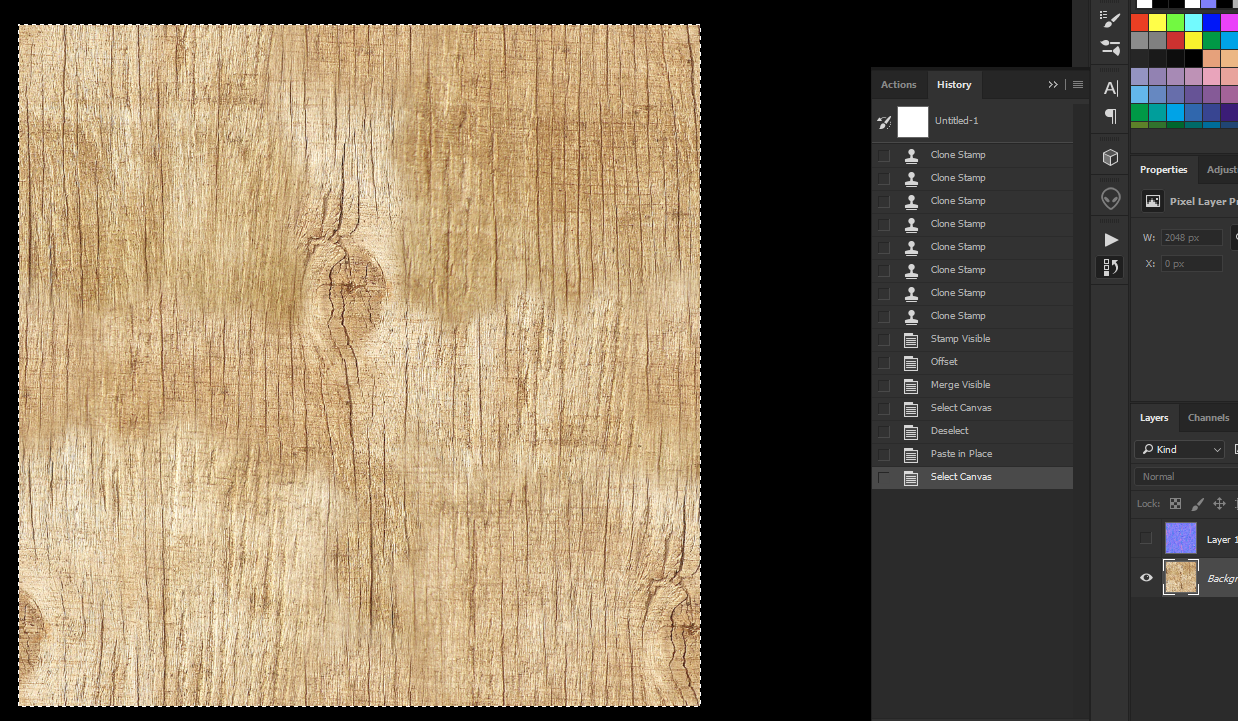
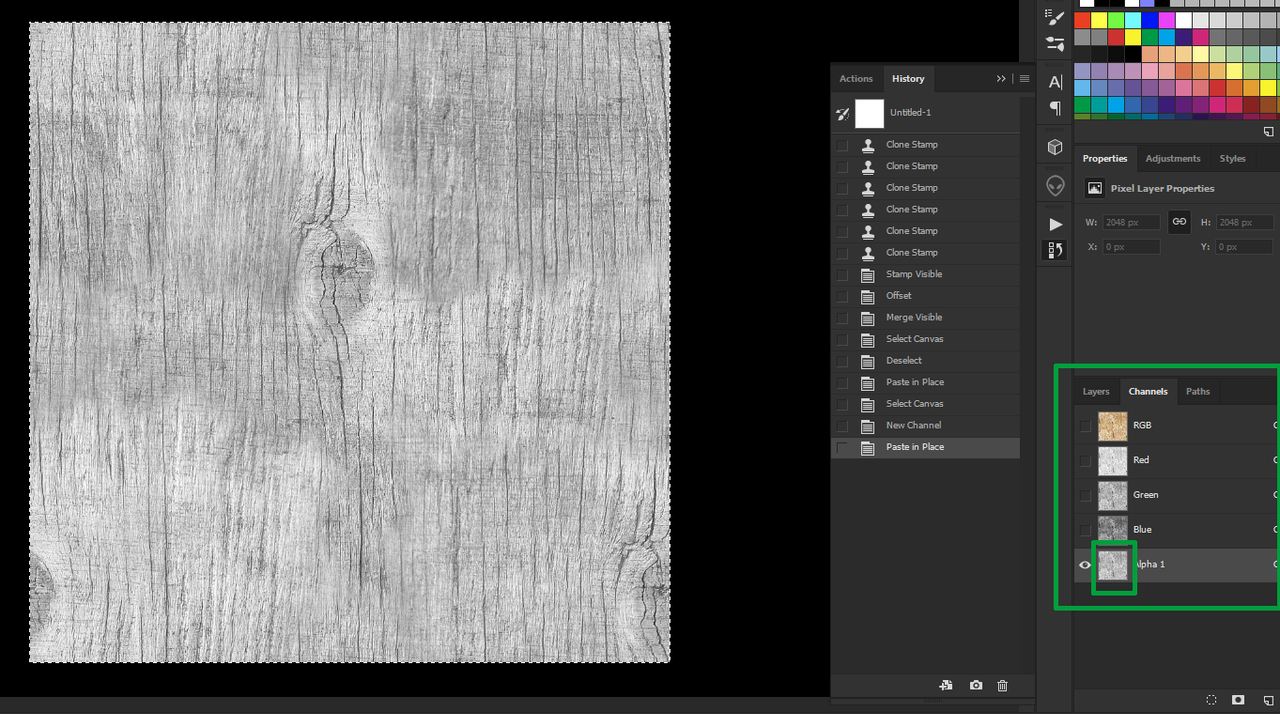
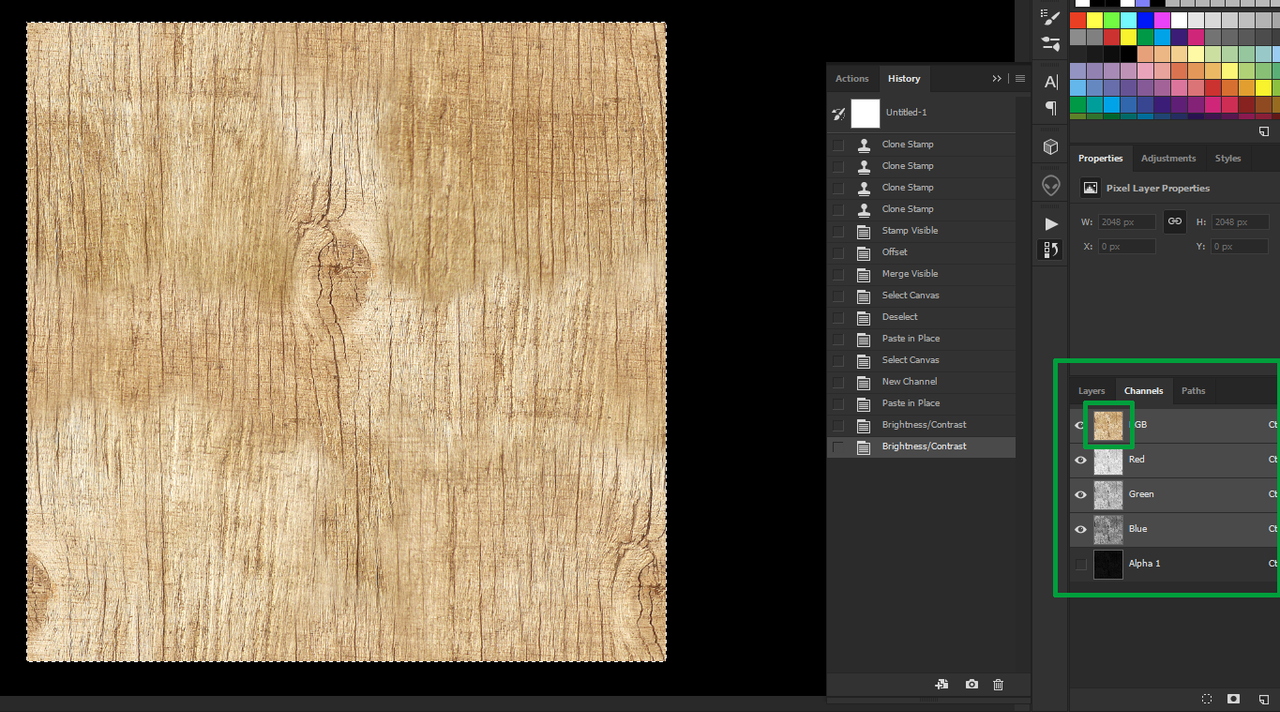
17. When you finish your 'play' withthe settings, go down and press the 'disc' icon, to save it. Select 'Save Normals to Clipboard', the first option. Now, go back to Photoshop. Press Ctrl+Shift+V to perfectly place the copied normal map on the texture you made. Go the layer bellow (the color, the actual diffuse texture you did) and press Ctrl+A & Ctrl+C to copy the image; you may disable the above layer with the 'normal map' if it diffusing you. Now, go to the far bottom-right 'Layers' panel and choose the 'Channels' tab. And select from the small icons bellow the 'Create New Channel'; the entire image now is totally black!

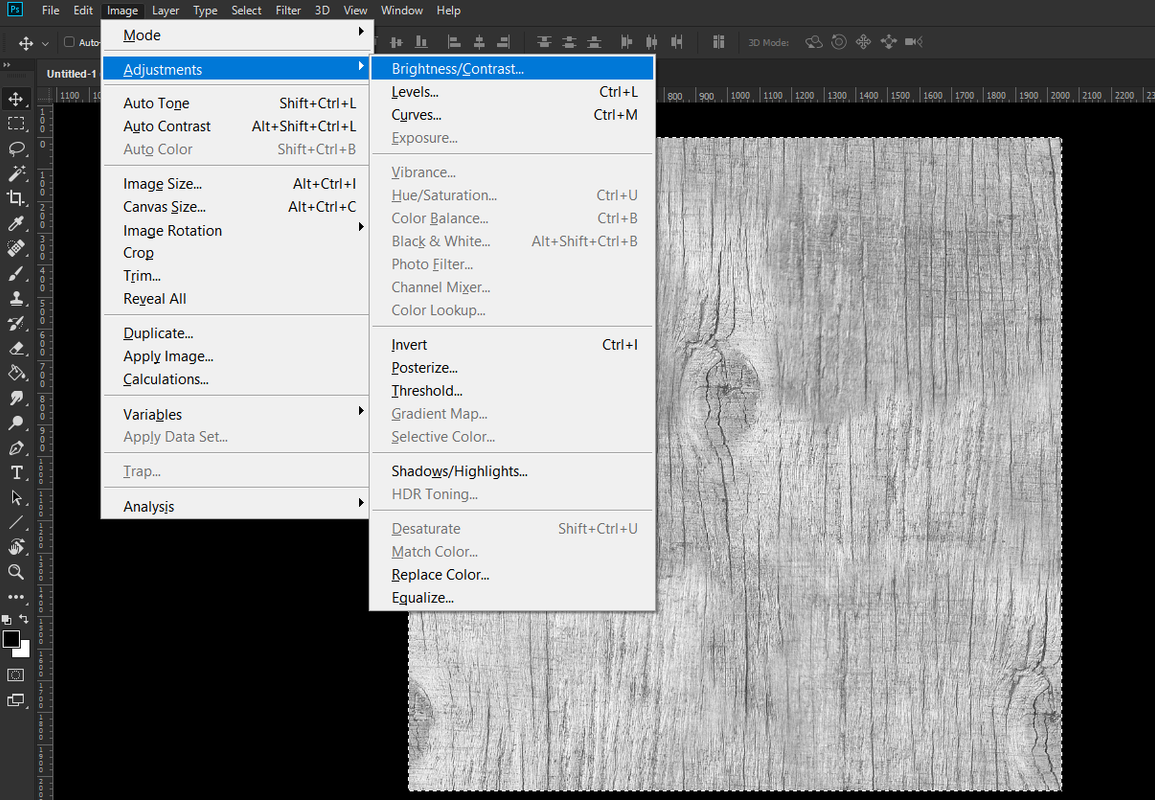
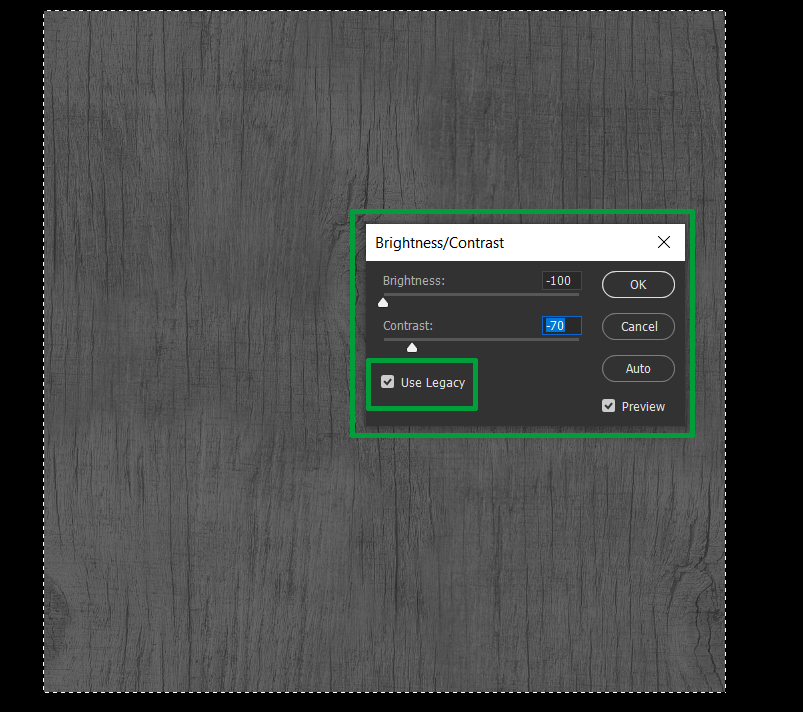
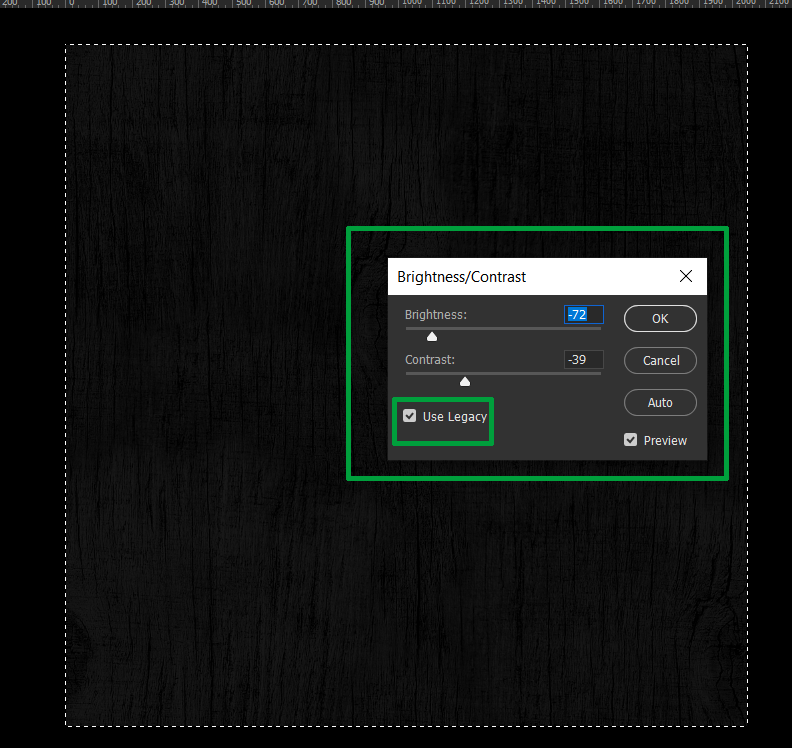
18. Now, press Ctrl+Shift+V to paste the texture you previously copied. The 'Alpha Channel' you just made (and it was black), now has your texture (in black/white tone). As much as white you leaving this, the harder bump you'll get - that's best for metallic parts! But here we have a nature object, a wood. So, you need to dark it a lot! Go up to the command line and select 'Image' -> 'Adjustments' -> 'Brightness/Contrast'. Click on 'Use Legacy' to select it and 'play with the settings' to make the image really dark and click 'Ok'. You probably need to re-run this process to make the image really-really dark! Click 'Ok'.
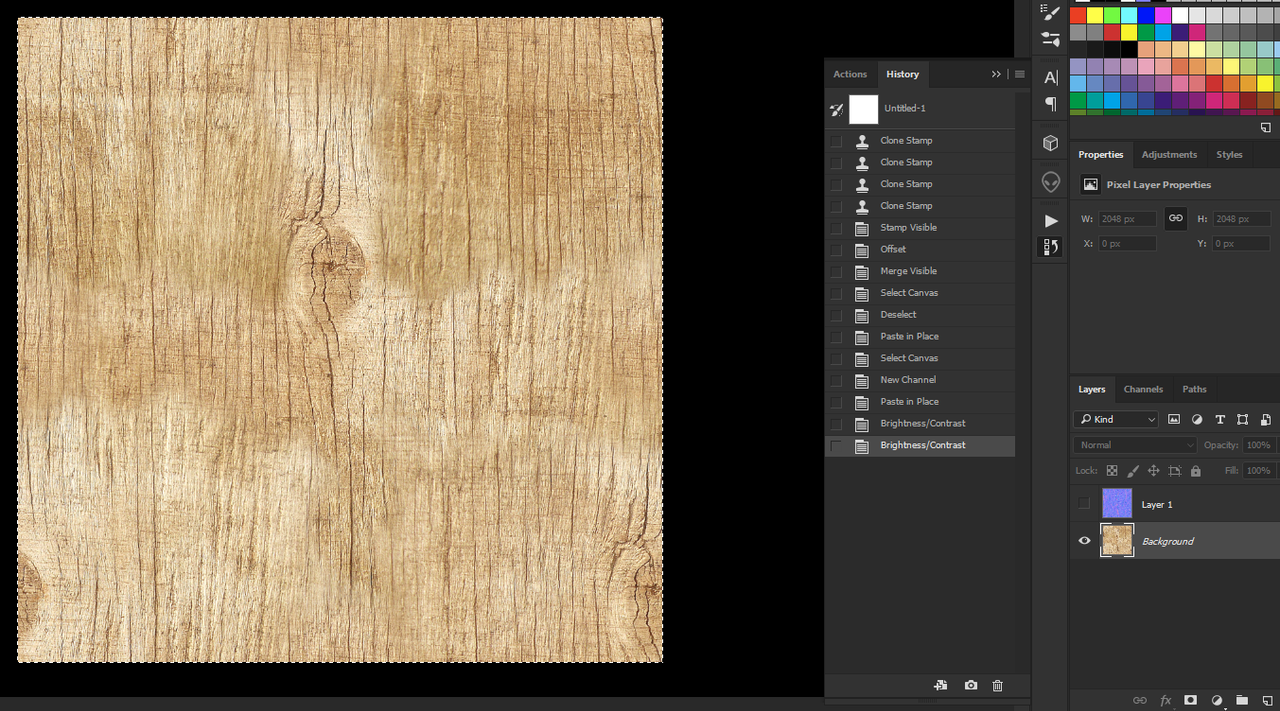
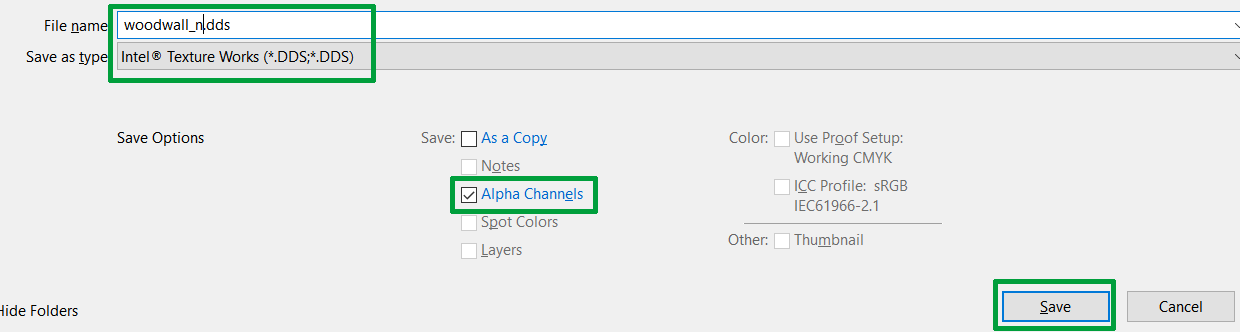
19. Now, while you are in the 'Channels' tab of the far bottom-right 'Layers' panel, select the 'RGB' top channel to 'see back' your actual image (not the channels) and select the 'Layers' tab. You have your normal map layer and the diffuse bellow. Enable the normal map layer and press Ctrl+E to merge all down! Now, press Ctrl+Shift+S to open the 'Save As' panel. Save your normal map texture, with the setting you prefer to use (if you want compression, etc.)
...And that's it! You made a seamless diffuse (color) and normal map texture from scratch, your own unique texture!
Obviously, you need lot of practice to make the perfect result, but after 4-5 times you'll try, trust me.. you'll get your perfect result!
Another way to make seamless a texture, is the following small trick (NOT included in the pdf file you'll download):
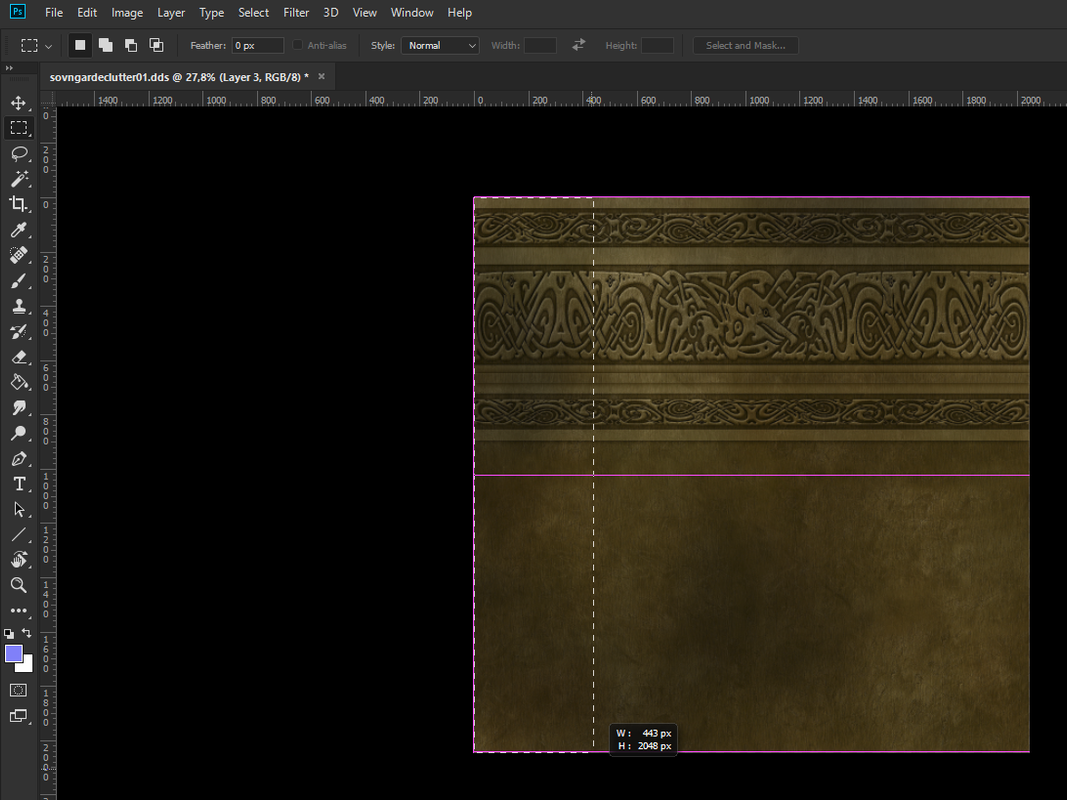
1. Let's say you have a jar texture (Sovngarde is, I think) like the following. I edited the texture to loose it's seamless form; so now, you see there is different (darker) side on the left, lighter side on the right - and obviously the upper side is different than the bottom one. If you place this on a jar mesh, you'll have seams all over (up-down, right-left):
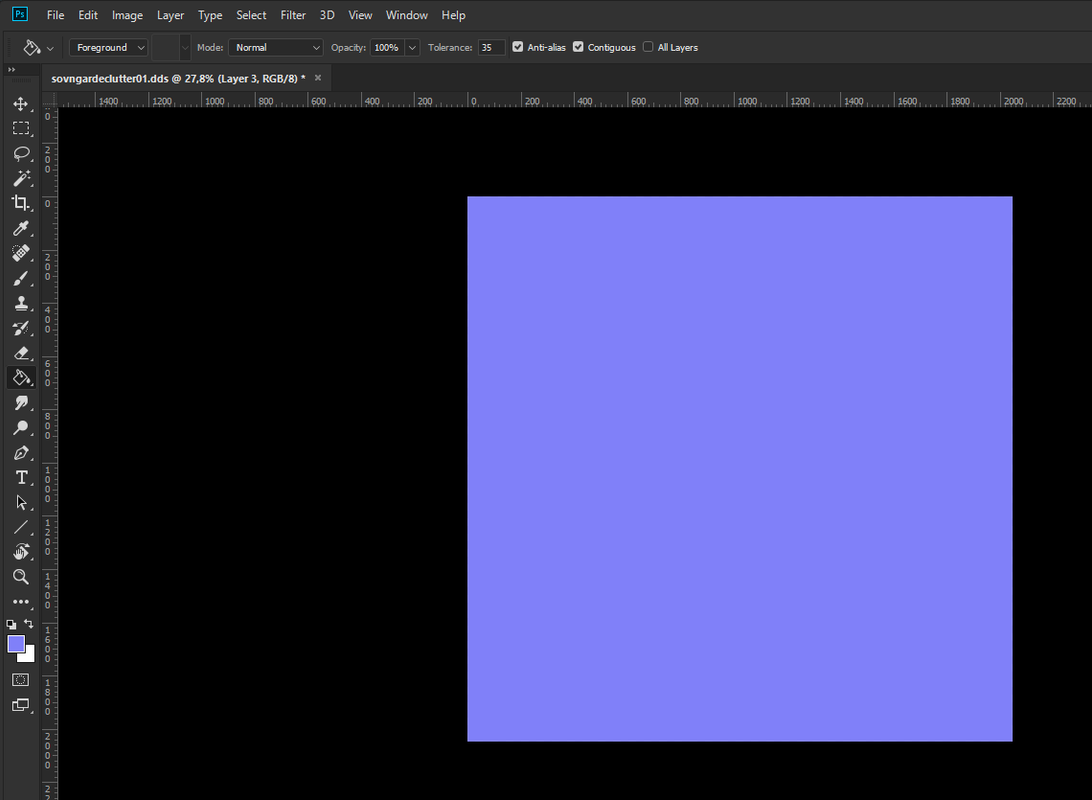
2. Okay, so what we do? We're creating a new layer over the image (blank) and we're filling the layer with a solid color (like that cyan I did), to be able to see very clear what we're about to do:
3. Next, with the 'Rectancular Marguee' tool, you selecting an area (from the desired side you like to 'copy'):
4. You copy this to a new layer and you disabling the rest texture bellow, so you have this small piece and the 'cyan' solid background bellow:
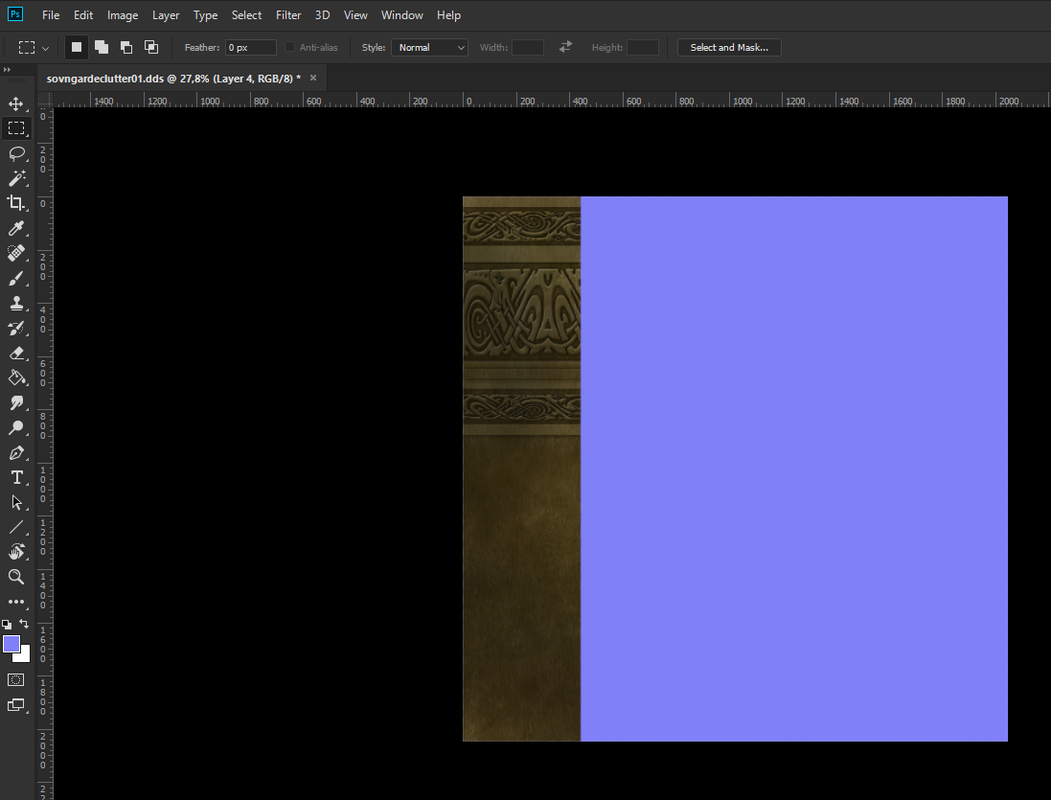
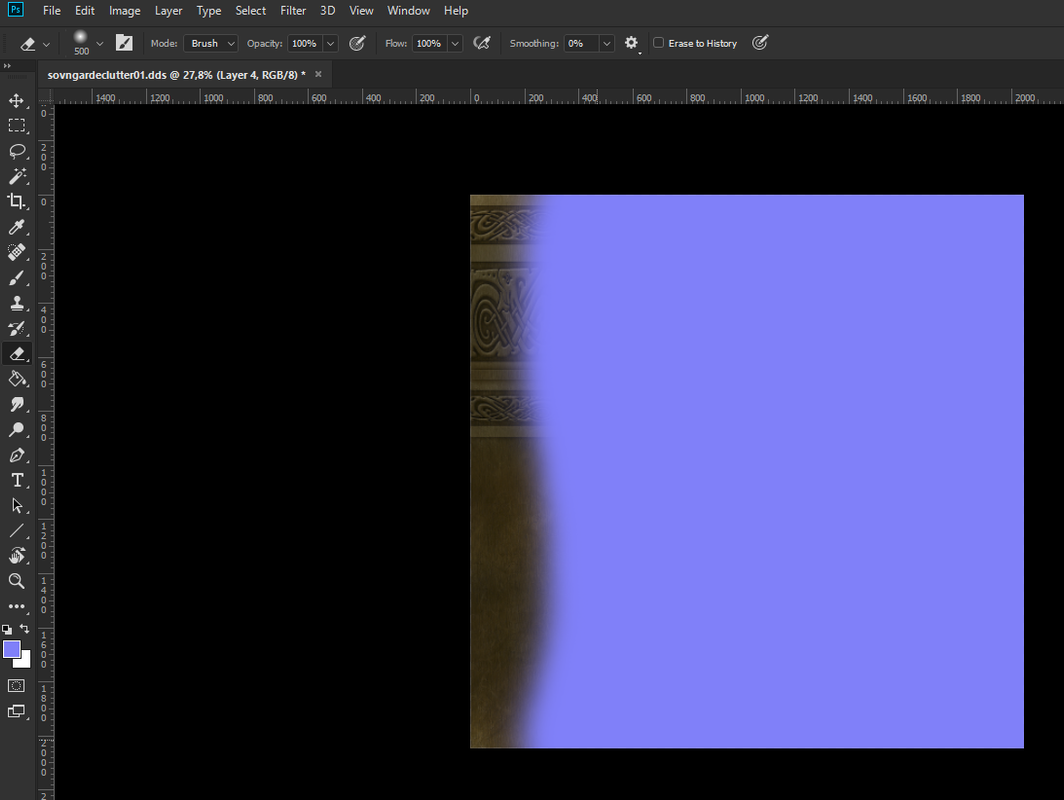
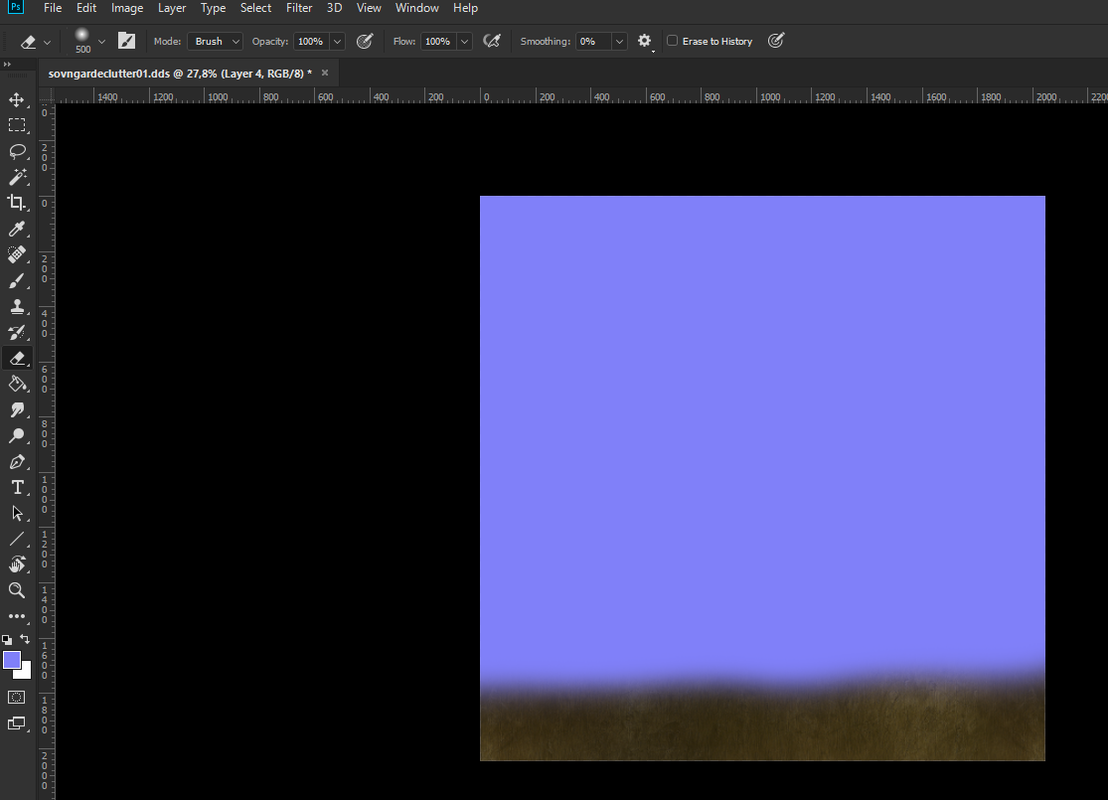
5. Now, you picking the 'Eraser' tool (and selecting a 'soft brush' preset with large size, 200 or more) and you erasing the right side - making it 'soft' and 'blurr':
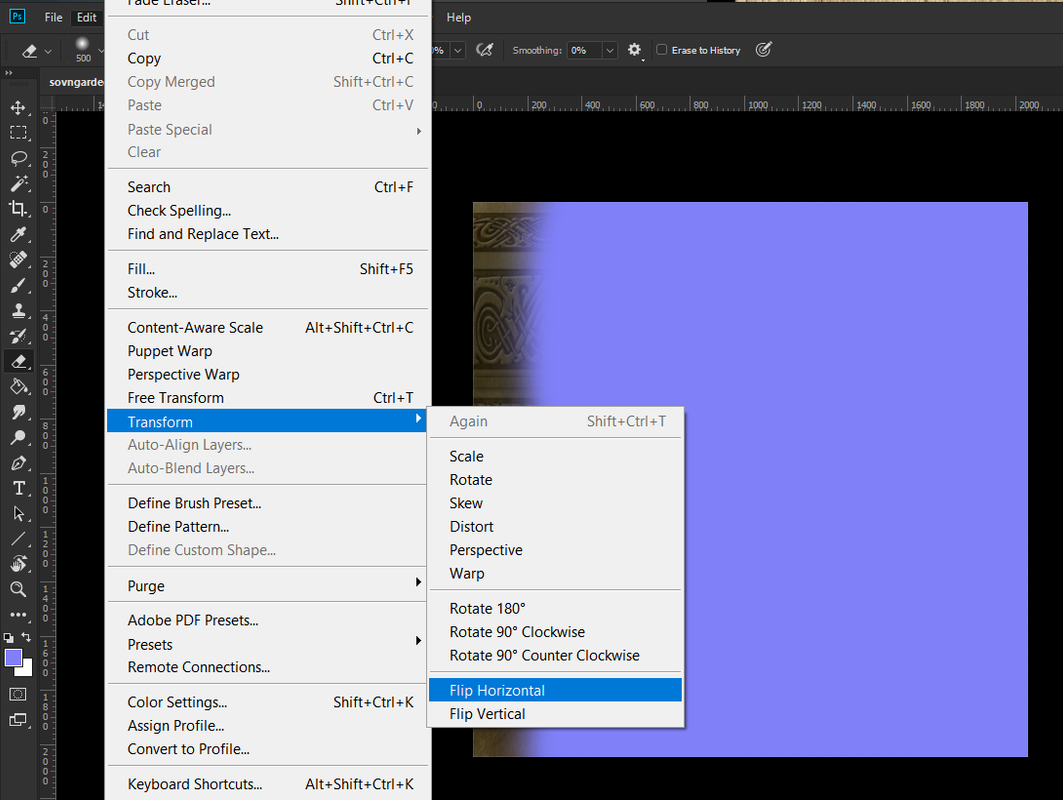
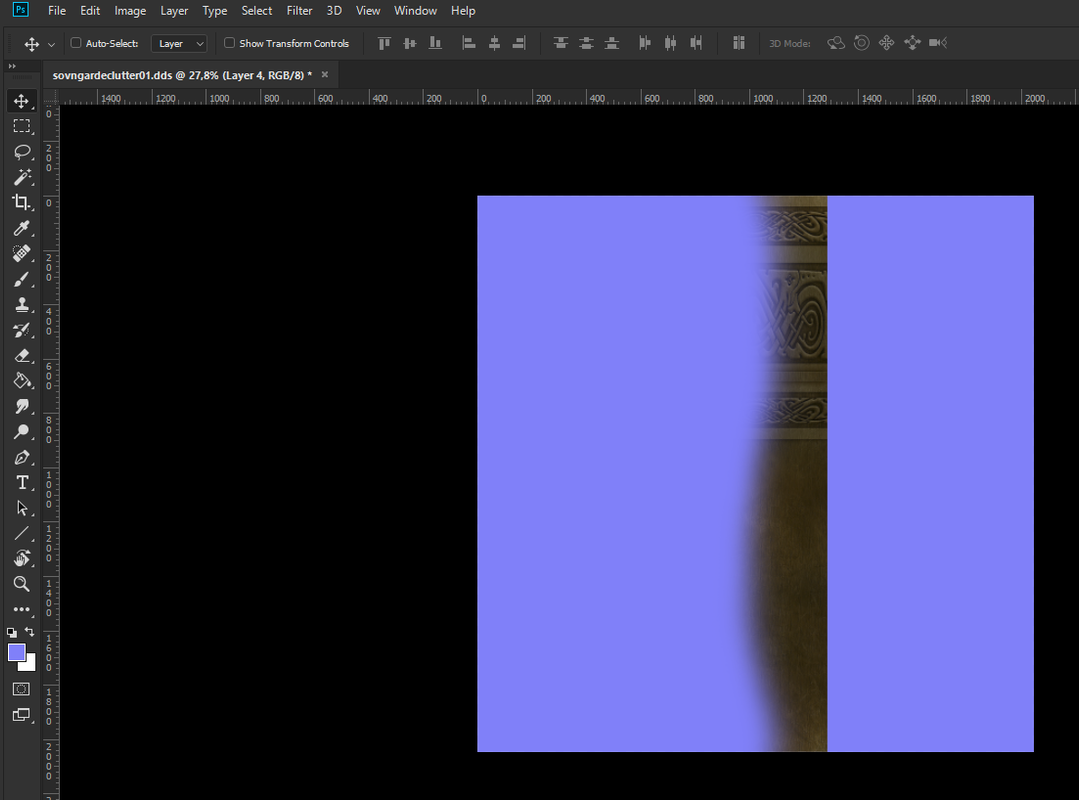
6. Now, go to the upper command bar and select 'Image' -> 'Transform' -> 'Flip Horizontal'. The image will 'flip' and you'll have the straight edge on the right side. With the 'Selection' tool (the first icon, the 'arrows', from the left panel) you dragging the 'flipped' piece and you placing all the way far to the right:
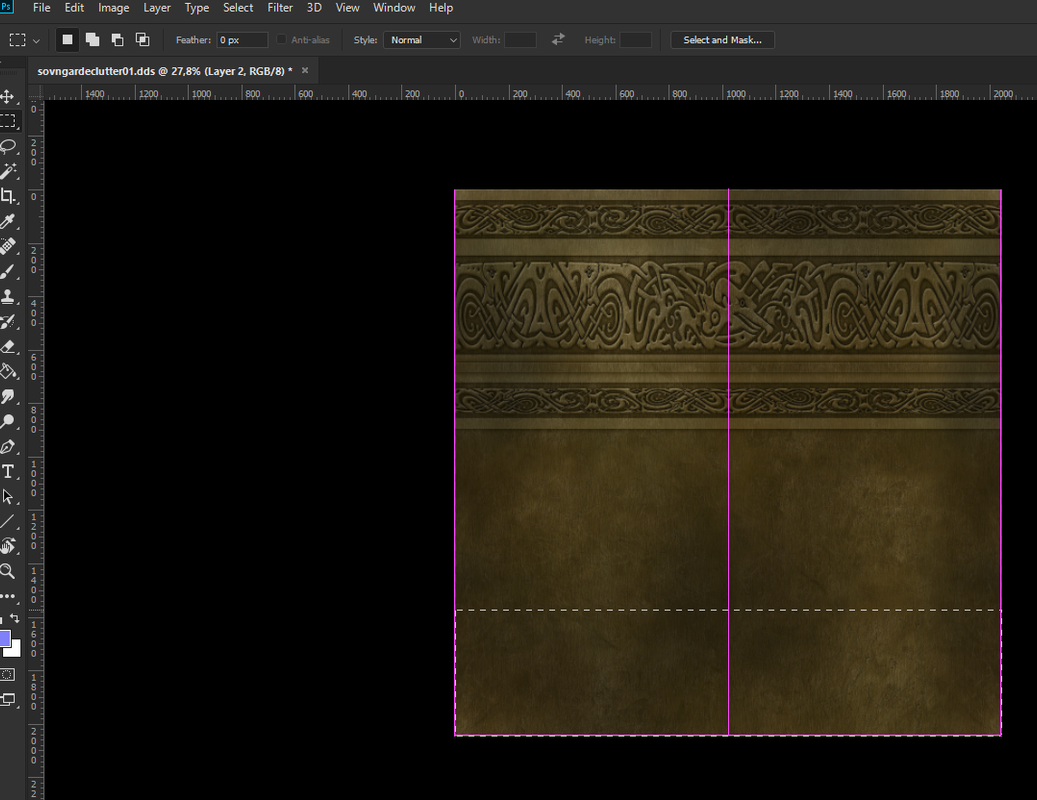
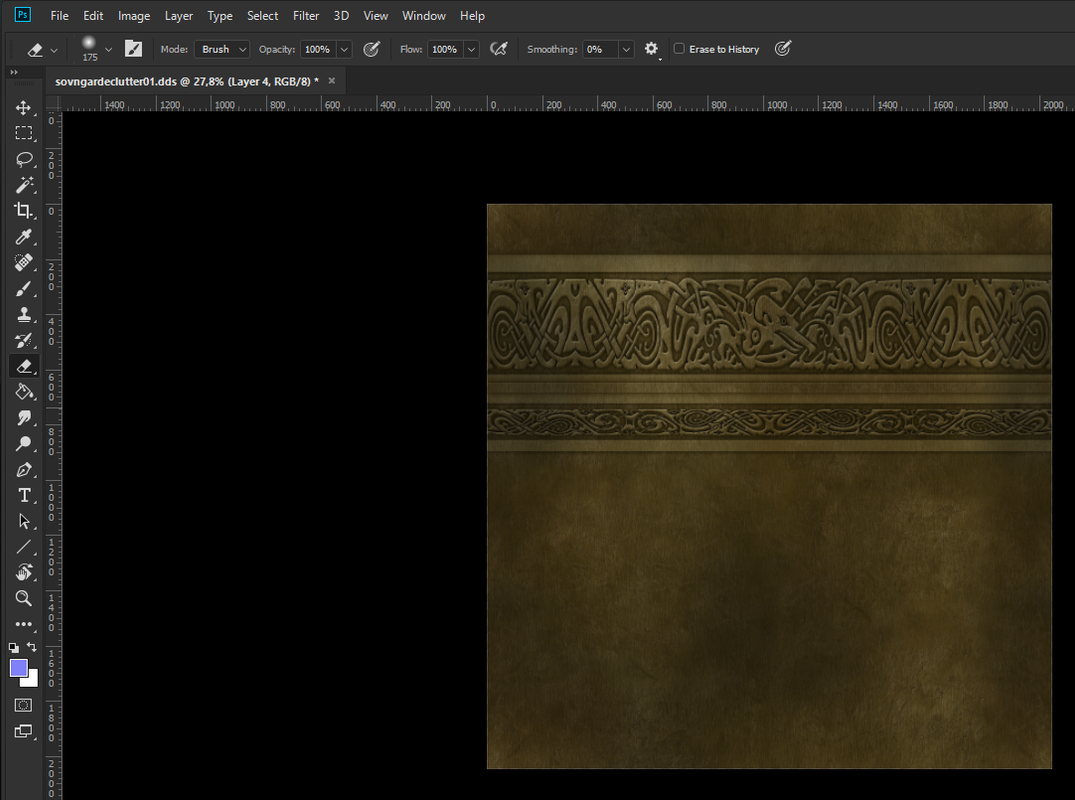
7. Now, disable this 'cyan' background, pick this small piece's layer and drag it exactly above the completed (original) jar texture. Pressing the Ctrl+Shift+E and you merging the small piece (you dragged on the right) exactly ontop of the jar texture. Now, check! The left side's edge is identical with the right side:

8. But now, let's say we want the very same bottom edge to be exactly the same ontop, like if we want to have this continuing vertically too. Again, we selecting a small piece (horizontally now) with the tool you did before:
9. Again, you enabling the 'cyan' solid layer to be able to see exactly what you're about to erase - and you picking the tool and erasing the top edge of it:
10. Now, the process is similar, but you choosing differently. You going up to the command bar, you selecting 'Image' -> 'Transform' -> 'Flip Vertically' and now the straight bottom edge was 'flipped' and became 'upper'. Again, you dragging this piece all the way to the top! Now you can delete the 'cyan' layer, you don't need it anymore - and you merging this new piece with the rest jar texture bellow. And... done! You have a perfect seamless texture (check carefully the image, how indentical is the above side with the bottom one, and how the left with the right one):
Enjoy your own textures, have fun!
I'm working in a Stock market company as salesman; so, obviously I'm not a 3d modeler nor a 2d digital artist. But, I do creating my own textures for Skyrim. "How?", you may ask. Well, the process for each one of you to become 'texture artist' is actually very simple.. All you need is to follow my guide, as I followed many tutorials on YouTube and learned how. So, here is what you need to do:
1. Obviously, you need Photoshop.It's not too bad to acquired it; the 'Design Plan' of Adobe its costs around 37 dollars per month. That's.. what.. 2 less beers per month? You can get the 'Design Plan' and 6-7 Adobe applications, Photoshop included of course. And of course, you need also a plugin to use with Photoshop, to create .dds textures!!! You'll get the plugin from HERE.
2. If you want simply to 'upscale' a texture (and make it really good!), there are plenty paid or free sites to help you on this task. I personally using THIS. The site is free, there is no 'watermark' on the final image, you can upscale everything 2X or 4X and the Algorithm makes the final texture 200% much better (and larger!) than the original one! (But.. of course, you'll have similar textures with million other users).
3. Let's clarify this.. There are many amazing 3d modelers out there and here on Nexus. But, most of them are simply 'baking' their textures in the 3d program they're using (Blender, 3d Max, etc.) Or, they're trying to 'paint' their textures but the result is not so 'realistic' as their fine 3d models.. After 'baking' a texture, you need to improve it by editing it or adding details the 'bake' didn't. I watched a dozen YouTube tutorials and I found that simply 'baking a texture' is not enough; it needs extra editing..
3. So, you want your own textures but you're not an artist (as I'm not too). You need to 'create' your own textures. For detailed models (like an armor), it's quite difficult to do it if you're not an artist. But for environment or simple objects (let’s say a statue), to create better textures is very very simple.
4. You need to find a good pic/image. I'm using THIS site. Why not 'Google search'? Well, Google decided long time ago to remove the high-res image
searching. Even if you set your search in 'high images', you'll get less than 2K res images. In this site I'm suggesting, you'll get really high res images!
5. Okay, you found a good wood image. Obviously, is not seamless. If you use it as it is (simply make it 1024x1024 or 2048x2048 or 4096x4096) won't work. You'll have 'seams' on your model. You need to make the image seamless!
6. Now comes the fun part. You opening Photoshop and you creating a 2048x2048 new file (blank). Then, you opening the image (in our case, this wood texture) you found and you placing it, in this new file. Like I wrote above, the image is not 'seamless' and you need to edit it, to make it perfect for texture use.
7. Press Ctrl+A and select the entire canvas. Press Ctrl+J to duplicate the layer of the image (without any non-visible parts). Delete the original layer and now press Ctrl+J to make a new copy of the layer.
8. Go now up to the command bar and select 'Filter', and then 'Offset'. Set the settings as in the image bellow if your texture is 2K; meaning, you typing the half of the texture's resolution! If, let's say, the texture is 4K, you'll need to put '-2048' & '+2048'. If it's 1K, you'll need to put '-512' & '+512'.
9. As you see, the filter 'broke' the image is 4 parts, with seams obviously! You need to fix that; and it's quite simple. On the right-bottom corner, there is the 'Layers' panel. Bellow it, there are some icons. Select and press the one says 'Add layer mask'. A 'white box' will appear next to your image's layer. You'll work on this white box, not on the image itself! Remember, you need to have selected this 'white box' (mask), not the image!
10. Now, go and pick the 'Brush' tool. Select a 'soft' round brush and make it large (around 200 or more). Now, with the 'Brush' tool selected go to your image on top & middle of it; start 'painting' scrolling to the bottom. Check the 'white box' on the 'Layers' panel! Now it has a 'black line' vertically across it, you see?.. Now, do the same ('paint') from left & middle all over (horizontally) to the right! You see that 'black cross' in the 'white box' (mask)?
11. Now, press on the image('Layers' panel) to select it and press Ctrl+Shift+Alt+E (ok... it's tricky to press all these together, but you'll manage it). You created a 'Stamp Visible' copy of your previous image you made the 'mask editing'. Now, press Ctrl+J to create a copy of that. Now, press Ctrl+Alt+F to re-run the 'Offset' filter one more time!
12. You see? Already the image looks quite seamless. But! If you look carefully to the four MIDDLE points (left, right, up, down) you'll notice some 'seams'. You need to fix them. Pick the 'Clone Stamp' tool and select a 'soft' preset, large enough (200 or more). Now, go to your image and by keep pressing the Alt button (to change the cursor to a 'target' icon) select a nice piece of seamless part and left-click on this area.
13. Now, go to each one of these middle points (left, right, up, down) and click on each one of them several times (10-12 or more) and you'll 'stamp' the previous selected area to those four points (left, right, up, down). You may want to add guidelines to help you 'point perfect' to the specific area/point. How you adding guidelines? You clicking on the roulers (lef and up) and you dragging a guide and placing it to every edge of the image, but of course to the middle too (and you creating 'a cross' of guidelines). Now, you have 'cross-marks' to click perfectly on them.
14. Now, again you pressing Ctrl+Shift+Alt+E to create a 'Stamp Visible' copy. And then, re-run the 'Offset' filter by pressing Ctrl+Alt+F... Now, your texture is seamless!!! Check the edges of the image; check the left-bottom one and then the right-bottom one and see how the texture continues perfectly! All you need now is to press Ctrl+Shift+E and you merging all in one layer and you can save it now (as .dds) and create your diffuse (color) texture!
15. But you need also to have a normal map of this texture. Okay, lets do it. You need to get 'CrazyBump' tool/app from the Net. It's easy to find it and you can use it without purchasing it (but strongly recommending you to buy it, is cheep and super helpful)! Double-click on it and open the tool. You are clicking on the far bottom-left yellow icon to start it.
16. Go back to your Photoshop and press Ctrl+A & then Ctrl+C, to select and copy the entire texture you just previously made. Go back to the 'CrazyBump' tool and select the far bottom-left icon says 'Paste photograph from clipboard'. Select the right 'gray' preset. When you'll do it, the tool appearing the 'normal map' of the texture you did! Now, you can 'play' with the settings and get your favorite 'bump' result you like your texture to have!
17. When you finish your 'play' withthe settings, go down and press the 'disc' icon, to save it. Select 'Save Normals to Clipboard', the first option. Now, go back to Photoshop. Press Ctrl+Shift+V to perfectly place the copied normal map on the texture you made. Go the layer bellow (the color, the actual diffuse texture you did) and press Ctrl+A & Ctrl+C to copy the image; you may disable the above layer with the 'normal map' if it diffusing you. Now, go to the far bottom-right 'Layers' panel and choose the 'Channels' tab. And select from the small icons bellow the 'Create New Channel'; the entire image now is totally black!
18. Now, press Ctrl+Shift+V to paste the texture you previously copied. The 'Alpha Channel' you just made (and it was black), now has your texture (in black/white tone). As much as white you leaving this, the harder bump you'll get - that's best for metallic parts! But here we have a nature object, a wood. So, you need to dark it a lot! Go up to the command line and select 'Image' -> 'Adjustments' -> 'Brightness/Contrast'. Click on 'Use Legacy' to select it and 'play with the settings' to make the image really dark and click 'Ok'. You probably need to re-run this process to make the image really-really dark! Click 'Ok'.
19. Now, while you are in the 'Channels' tab of the far bottom-right 'Layers' panel, select the 'RGB' top channel to 'see back' your actual image (not the channels) and select the 'Layers' tab. You have your normal map layer and the diffuse bellow. Enable the normal map layer and press Ctrl+E to merge all down! Now, press Ctrl+Shift+S to open the 'Save As' panel. Save your normal map texture, with the setting you prefer to use (if you want compression, etc.)
...And that's it! You made a seamless diffuse (color) and normal map texture from scratch, your own unique texture!
Obviously, you need lot of practice to make the perfect result, but after 4-5 times you'll try, trust me.. you'll get your perfect result!
Another way to make seamless a texture, is the following small trick (NOT included in the pdf file you'll download):
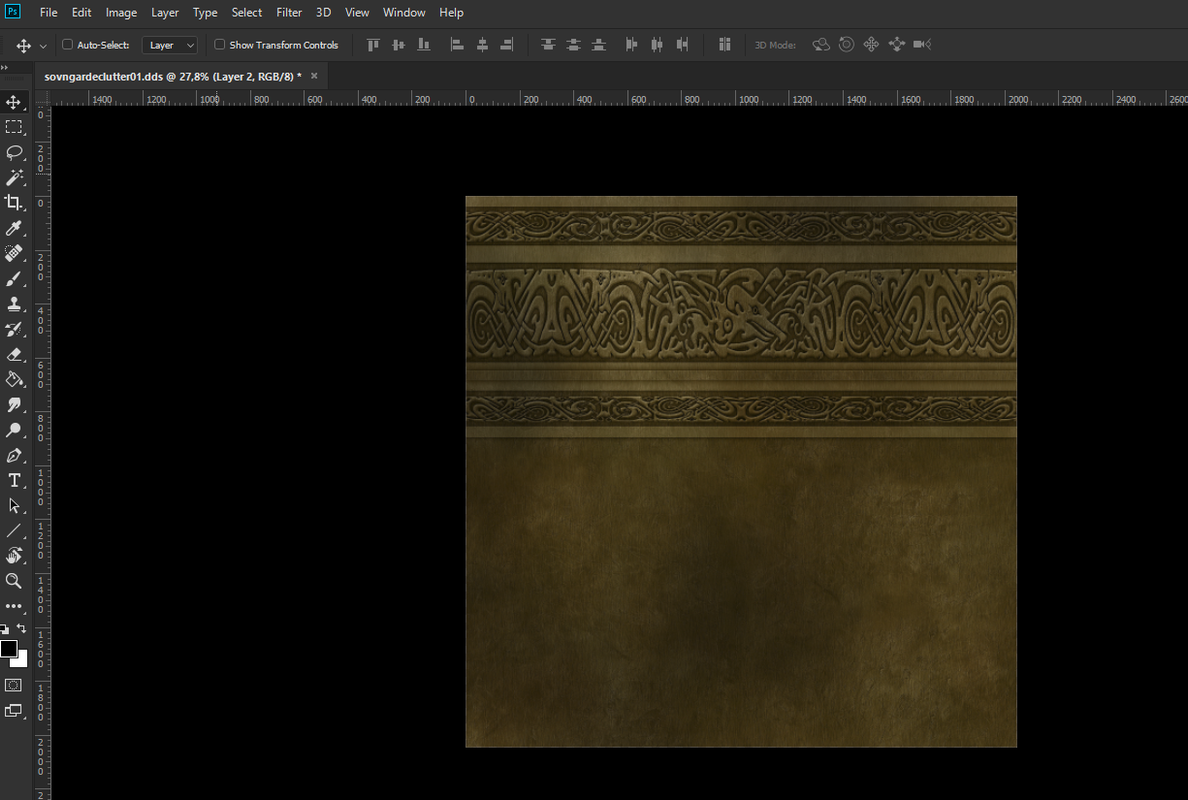
1. Let's say you have a jar texture (Sovngarde is, I think) like the following. I edited the texture to loose it's seamless form; so now, you see there is different (darker) side on the left, lighter side on the right - and obviously the upper side is different than the bottom one. If you place this on a jar mesh, you'll have seams all over (up-down, right-left):
2. Okay, so what we do? We're creating a new layer over the image (blank) and we're filling the layer with a solid color (like that cyan I did), to be able to see very clear what we're about to do:
3. Next, with the 'Rectancular Marguee' tool, you selecting an area (from the desired side you like to 'copy'):
4. You copy this to a new layer and you disabling the rest texture bellow, so you have this small piece and the 'cyan' solid background bellow:
5. Now, you picking the 'Eraser' tool (and selecting a 'soft brush' preset with large size, 200 or more) and you erasing the right side - making it 'soft' and 'blurr':
6. Now, go to the upper command bar and select 'Image' -> 'Transform' -> 'Flip Horizontal'. The image will 'flip' and you'll have the straight edge on the right side. With the 'Selection' tool (the first icon, the 'arrows', from the left panel) you dragging the 'flipped' piece and you placing all the way far to the right:
7. Now, disable this 'cyan' background, pick this small piece's layer and drag it exactly above the completed (original) jar texture. Pressing the Ctrl+Shift+E and you merging the small piece (you dragged on the right) exactly ontop of the jar texture. Now, check! The left side's edge is identical with the right side:
8. But now, let's say we want the very same bottom edge to be exactly the same ontop, like if we want to have this continuing vertically too. Again, we selecting a small piece (horizontally now) with the tool you did before:
9. Again, you enabling the 'cyan' solid layer to be able to see exactly what you're about to erase - and you picking the tool and erasing the top edge of it:
10. Now, the process is similar, but you choosing differently. You going up to the command bar, you selecting 'Image' -> 'Transform' -> 'Flip Vertically' and now the straight bottom edge was 'flipped' and became 'upper'. Again, you dragging this piece all the way to the top! Now you can delete the 'cyan' layer, you don't need it anymore - and you merging this new piece with the rest jar texture bellow. And... done! You have a perfect seamless texture (check carefully the image, how indentical is the above side with the bottom one, and how the left with the right one):
Enjoy your own textures, have fun!