


0 of 0


File information
Created by
AmethystDeceiver - Ashen - ViktoriaLandersUploaded by
AshenShugarIIVirus scan
Safe to use
About this mod
Universal Item Display Modder's Resource & Guide. Custom displays with major improvements to performance and resource usage compared to Vanilla displays. Designed to be fully customizable giving Mod Author's unmitigated creative control over the presentation of their displays!
- Permissions and credits
You may also be interested in improved vanilla displays: Immersive Display Overhaul

Universal Item Display Resource
Universal Item Display Resource
Originally provided by AmethystDeceiver as a modder's resource on the old BethSoft forums. For posterity I'll be pasting large portions of that post.
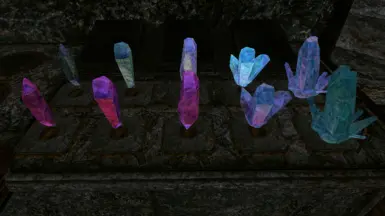
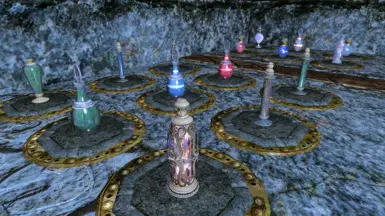
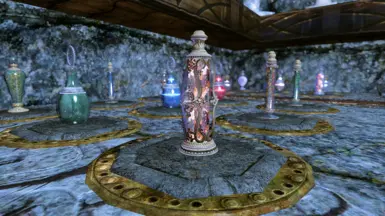
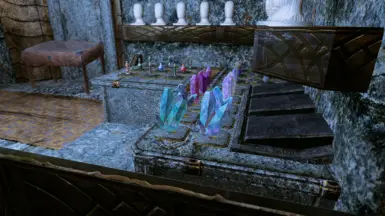
The primary benefit of these displays, and the reason I decided to turn this into a resource & guide is that you can make them look like anything you want, and they can be adapted to display any item in any position you like. A single display can even support different positions for different item types.
The Resource:
The mod comes with everything you need to get started. You can merge this into your plugin, copy/paste from it, or use it as reference material. Completely up to you. All records in this mod are prefixed with "AD_". A sample cell ("AD_Template") has also been provided with some template displays.
All scripts & meshes (dummy markers) in this resource are compatible with Skyrim LE.
The Guide:
These displays have been made for the following purpose:- Provides an easy way to adapt the scripts to be used as general display systems for just about anything.
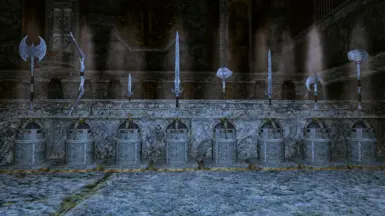
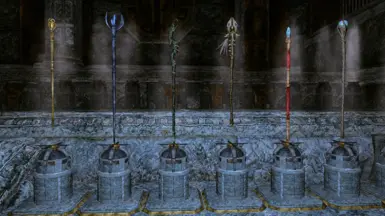
- Performance & Resource Usage. Vanilla weapon racks start to consume more resources than necessary if too many are within a single cell, and often become hard to use or inaccessible if crowded or too close to other objects. By comparison these displays offer major improvements with respect to performance and resource consumption.
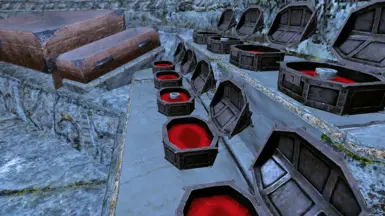
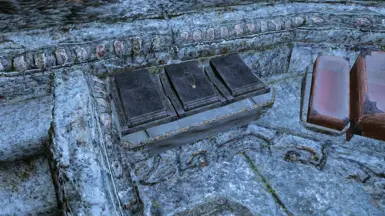
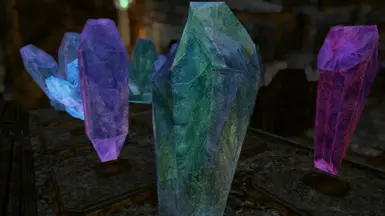
- Freedom of design. Your displays can look like anything you care to imagine.
- Better consistency in user-interface as this system uses the familiar inventory screen to place your items, rather than having to equip the weapon in hand before mounting it to the display.
To begin, I will cover the basic structure of how this system is set up:
1. The "Trigger" - This is a plain trigger box that is used to count the number of items that are currently being displayed. If the count is zero, it will allow a new item to be placed. If the number is one or more, it will not allow any more items to be placed.
2. The "Container" - The container simultaneously replaces the need for a "dummy marker" (the object that lets the placed item know exactly where to go) as well as provide the visual interface for placing the item (the built in show inventory screen).
3. The "Activator" - This object is what the player uses to interact with the Display system. It runs a script to open the Container, which in turn triggers the rest of the placement script. The Activator can be anything, from a simple player-activated trigger box, or a physical mesh.
How it works:
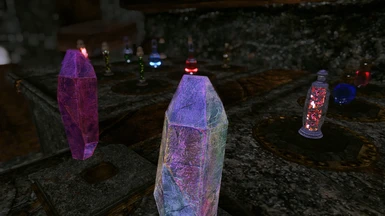
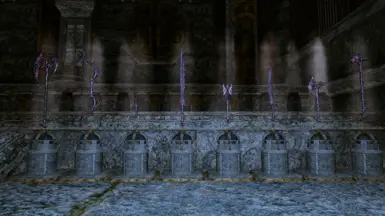
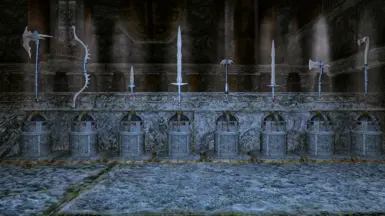
Reference Image:
Spoiler: 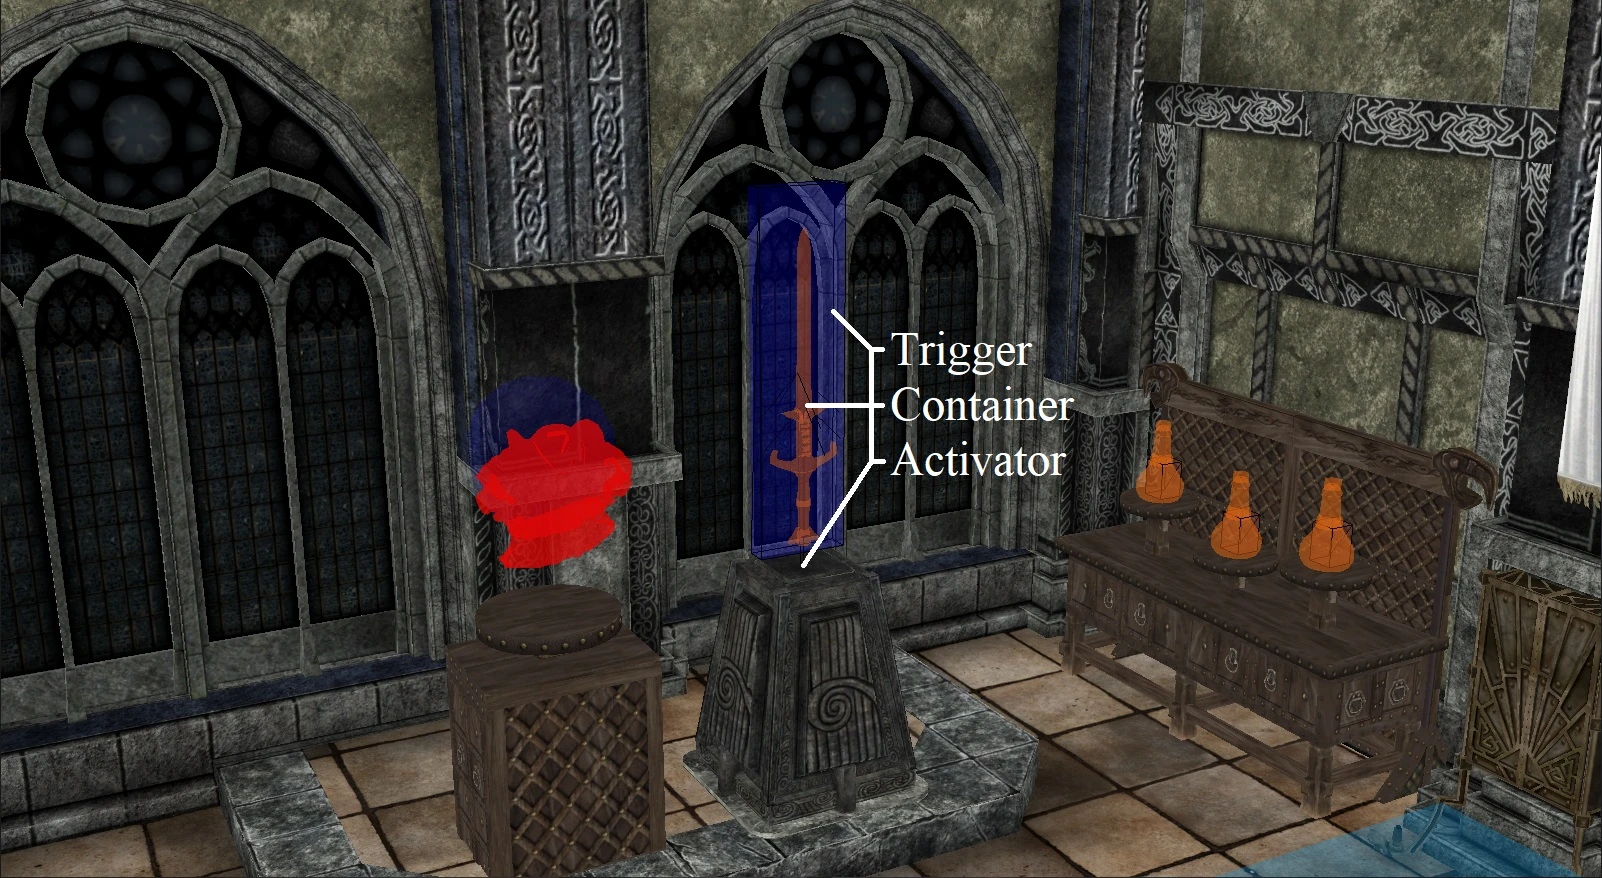
Show
The player activates the Display (the "Activator" mentioned above) which will open the Inventory Menu, from there the player can place any script-defined valid item into the Container. Once the item is placed into the Container, the script runs and automatically "drops" the object outside the Container aligning it to the same position and rotation as the Container or specified Marker. The player can now retrieve the item directly from the Display without having to open any containers or Inventory Menu's.
Assembly:
1. Create a Container: In the Object Window create a new Container and give it an Editor ID. You may also want to give it a visible name such as "Weapon Display". This name is what the player will see during the Inventory Menu.
2. Select a Model for your Container: DummyGreatSword01.nif was used in the reference image provided. Bethesda made many of these dummy markers which will appear invisible and unselectable in-game. This is ideal, you do not want to use a physical 3d mesh for the container, as it would not be good if the player can access or see the container itself in game. With Nifskope it's possible to convert practically any mesh into a dummy marker should you wish.
3. Create an Activator: In the Object Window create a new Activator and give it an Editor ID. A visible name will be required otherwise you won't be able to select it in-game. For consistency's sake it's usually best to give it the same name as the Container it will be paired with.
4. Select a Model for your Activator: This can be anything you want, preferrably a 3d mesh to help avoid any targeting issues.
5. Placing the Display: Drag your Activator and Container into the Render Window and position them as desired. The position and rotation of the Container's Pivot Point/Origin (an object's crosshair whilst selected in the Render Window) will dictate the position and rotation of any item displayed by it. Keep in mind different weapons/armors/objects can have different Pivot Points/Origins, the differences between that of a Staff and that of a Dagger are significant, for example. If needed, different item types can be told to occupy different positions with the help of additional marker objects and some Keywords (more on that later. A template demonstrating this technique has been provided in the plugin).
6. Create a Trigger: Once you've positioned your Container and Activator draw a trigger volume around your Container by selecting it in the Render Window and hitting the Create Trigger button on the CK's toolbar (Cube with a T inside it). Select "DefaultBlankTrigger" as the base object for your trigger volume. Once done, use the arrows to scale the dimensions of the Trigger. Ideally you want it placed and shaped to be as small as possible whilst still making sure it will intersect with any item placed by your display. Other objects intersecting your Trigger may result in false-positives, so be careful. Finally, change the collision layer to L_TRIGGER in the "Primitive" tab of its Reference Editor Window (double click the reference in the Render Window).
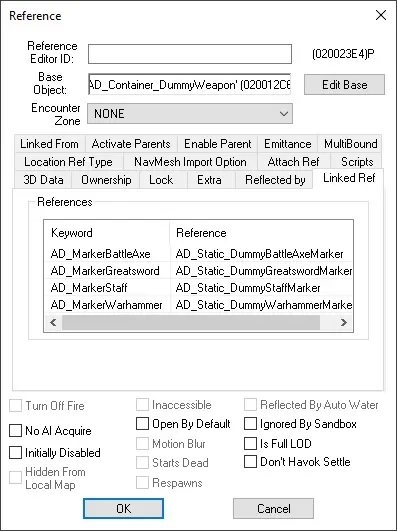
7. Keywords: Before we can add the scripts we need to make some Keywords for use with Linked Ref's (alternatively you can use ObjectReference Property's but those are worse for persistence). Two Keywords are required for use with the Activators, one for the Trigger and another for the Container, AD_ItemTriggerKeyword and AD_ItemContainerKeyword respectively in the template displays. Depending on how you configure your Displays their Containers may also need some Keywords so I recommend also creating similar Keywords to the following now: AD_MarkerBattleAxe, AD_MarkerGreatsword, AD_MarkerStaff, AD_MarkerWarhammer. Displays supporting a greater diversity of items will likely require additional Keywords.
8. Linked Ref's: Double-click your Activator in the Render Window and navigate to the Linked Ref tab then add the Trigger and the Container as Linked Ref's. You can select them in the Render Window or use the drop-down's to find them. When you're done you should have two entries under References with your Keyword's matching their respective objects. This is very important! If the Keywords don't match then none of this will work.
For your Container, if you wish to use multiple marker objects so you can support multiple different positions follow the same steps as above and match the Keyword to the appropriate Marker (this step may not be required if the Display only supports a single position and/or item type since you can just use the container location).
Example:
Spoiler:

Show
9. Messages: If you'd like to display some warnings for invalid objects, or when the player attempts to place more than one item you'll need to create some new Messages to handle that. Go to Messages in the Object Window, create a new message object and give it an Editor ID. Make sure to check the Message Box check box and fill your Message with whatever you wish to say (invalid item, too many items, etc).
10. Scripts: The Displays use two separate scripts - one for the Activator which is what players interact with, and one for the Container which handles the placement of the object being displayed in addition to filtering valid objects.
Add the AD_UniversalItemDisplayScriptCONT script to your Container or copy the following code:
Spoiler:
Show
{Script for Display Container. Written by AmethystDeceiver, with some tweaks by Ashen.}

Actor Property PlayerRef Auto
Bool Property Blocked = False  Auto Hidden
Message Property AD_MessageWarning  Auto
Message Property AD_MessageCount  Auto
Keyword Property ArmorShield  Auto
Keyword Property WeapTypeBattleAxe Auto
Keyword Property WeapTypeBow Auto
Keyword Property WeapTypeDagger  Auto
Keyword Property WeapTypeGreatSword  Auto
Keyword Property WeapTypeMace Auto
Keyword Property WeapTypeStaff Auto
Keyword Property WeapTypeSword Auto
Keyword Property WeapTypeWarAxe Auto
Keyword Property WeapTypeWarhammer Auto
Keyword Property ClothingRing  Auto
Keyword Property VendorItemPotion  Auto
Keyword Property VendorItemPoison  Auto
Keyword Property VendorItemGem  Auto
Keyword Property ClothingNecklace Auto
FormList Property AD_FormlistClaw Auto
FormList Property AD_FormlistUniqueJar Auto
Int Property PlacedItem = 0  Auto Hidden
Int Property DisplayType = 0  Auto
{0 = Universal display
1 = Universal weapon rack
2 = Dagger case
3 = Jewel display
4 = Shield plaque
5 = Potion/Poison
6 = Dragon Claw
7 = Coat Of Arms Weapon
8 = Unique Jar
9 = Necklace
10 = Soul Gems}

ObjectReference ItemRef
Form ItemBase

;=================================
;  Specific Weapon Location Markers
;=================================

;ObjectReference Property MarkerGreatSword Auto
;ObjectReference Property MarkerWarhammer Auto
;ObjectReference Property MarkerBattleAxe Auto
;ObjectReference Property MarkerStaff Auto
;deprecated in favour of keyword linked ref's

Keyword Property AD_MarkerGreatsword Auto
{Most weapon types will want to use this object as their origin location}
Keyword Property AD_MarkerStaff Auto
Keyword Property AD_MarkerWarhammer Auto
Keyword Property AD_MarkerBattleAxe Auto

;=================================

Event OnItemAdded(Form akBaseItem, int aiItemCount, ObjectReference akItemReference, ObjectReference akSourceContainer)
 If (akSourceContainer == PlayerRef)
  If (AllowedItems(akBaseItem))
If (aiItemCount == 1) && (PlacedItem == 0)
 PlacedItem += aiItemCount
 ItemBase = akBaseItem
 ItemRef = akItemReference
 RegisterForSingleUpdate(0.1)
Else
 AD_MessageCount.Show()
 PlacedItem += aiItemCount
 RemoveItem(akBaseItem, aiItemCount, False, PlayerRef)
 ;registering for a single update from the OnItemRemoved Event will force a recheck of the now singular item
EndIf
  Else
AD_MessageWarning.Show()
PlacedItem += aiItemCount
RemoveItem(akBaseItem, aiItemCount, False, PlayerRef)
  EndIf
 Else
  RemoveItem(akBaseItem, aiItemCount, False, akSourceContainer)
 Endif
EndEvent

Event OnItemRemoved(Form akBaseItem, int aiItemCount, ObjectReference akItemReference, ObjectReference akDestContainer)
 If (akDestContainer == PlayerRef)
  UnregisterForUpdate()
 Endif
 PlacedItem -= aiItemCount
 RegisterForSingleUpdate(0.1);This event fires when the player attempts to add more than one item to the
container, when an item is dropped and mounted properly, and when a
solitary item is removed before it can be dropped and mounted.
EndEvent;The latter won't have any object to "drop" but the MountCurrentItem function will still fire, harmlessly.


Event OnUpdate()
 UnregisterForUpdate()
 MountCurrentItem(ItemBase, ItemRef)
EndEvent


Function MountCurrentItem(Form akBaseItem, ObjectReference akItemReference)

 ObjectReference MountedItem

 If (akItemReference)
  DropObject(akBaseItem)
  MountedItem = akItemReference
 Else
 MountedItem = DropObject(akBaseItem)
 Endif

 If (MountedItem != None)
  Blocked = True
  Int i = 0
  While(!MountedItem.Is3DLoaded()) && (i < 10)
Utility.Wait(0.1)
i += 1
  EndWhile

  MountedItem.SetMotionType(Motion_Keyframed, False)

  if DisplayType == 0
MountedItem.TranslateToRef(Self, 9000.0, 0.0)
  Elseif MountedItem.HasKeyword(WeapTypeWarhammer)
MountedItem.TranslateToRef(GetLinkedRef(AD_MarkerWarhammer), 9000.0, 0.0)
;MountedItem.TranslateToRef(MarkerWarhammer, 9000.0, 0.0)
  Elseif MountedItem.HasKeyword(WeapTypeStaff)
MountedItem.TranslateToRef(GetLinkedRef(AD_MarkerStaff), 9000.0, 0.0)
;MountedItem.TranslateToRef(MarkerStaff, 9000.0, 0.0)
  Elseif MountedItem.HasKeyword(WeapTypeBattleAxe)
MountedItem.TranslateToRef(GetLinkedRef(AD_MarkerBattleAxe), 9000.0, 0.0)
;MountedItem.TranslateToRef(MarkerBattleAxe, 9000.0, 0.0)
  Elseif MountedItem.HasKeyword(WeapTypeDagger) ||
MountedItem.HasKeyword(WeapTypeGreatsword) ||
MountedItem.HasKeyword(WeapTypeMace) ||
MountedItem.HasKeyword(WeapTypeSword) ||
MountedItem.HasKeyword(WeapTypeWarAxe)
MountedItem.TranslateToRef(GetLinkedRef(AD_MarkerGreatSword), 9000.0, 0.0)
;MountedItem.TranslateToRef(MarkerGreatSword, 9000.0, 0.0)

  Else  ;bows, crossbows and any weapon that makes it this far
MountedItem.TranslateToRef(Self, 9000.0, 0.0)  ;non-weapon displays need to translate to self
  Endif

  Utility.Wait(1.0) ;could use while loop here with GetDistance() check against DestinationRef
(use logic above to fill this variable, would only need a single
TranslateToRef() call at the bottom then instead of repeating for each
if)
  Blocked = False
  ItemRef = None

 Endif

EndFunction

Bool Function AllowedItems(Form akBaseItem)
 If (DisplayType == 0)
  Return True
 Elseif (DisplayType == 1)
  Return (akBaseItem as Weapon)
 Elseif (DisplayType == 2)
  Return (akBaseItem.HasKeyword(WeapTypeDagger))
 Elseif (DisplayType == 3)
  Return ((akBaseItem.HasKeyword(ClothingRing)) || (akBaseItem.HasKeyword(VendorItemGem)))
 Elseif (DisplayType == 4)
  Return (akBaseItem.HasKeyword(ArmorShield))
 Elseif (DisplayType == 5)
  Return (akBaseItem.HasKeyword(VendorItemPotion)) || (akBaseItem.HasKeyword(VendorItemPoison)) || (akBaseItem as Potion)
 Elseif (DisplayType == 6)
  Return (AD_FormlistClaw.HasForm(akBaseItem))
 Elseif (DisplayType == 7)
  Return ((akBaseItem.HasKeyword(WeapTypeSword)) || (akBaseItem.HasKeyword(WeapTypeGreatSword)))
 Elseif (DisplayType == 8)
  Return (AD_FormlistUniqueJar.HasForm(akBaseItem))
 Elseif (DisplayType == 9)
  Return (akBaseItem.HasKeyword(ClothingNecklace))
 Elseif (DisplayType == 10)
  Return (akBaseItem as SoulGem)
 Endif
EndFunction
Add the AD_UniversalItemDisplayScriptACT script to your Activator or copy the following code:
Spoiler:
Show
{Script for Display Activator. Written by AmethystDeceiver, with some tweaks by Ashen.}

;use Linked Ref's with Keywords (better for persistence since you don't have any property's pointing at references), or use the ObjectReference Property version

Actor Property PlayerRef Auto

;================
;Keyword LinkedRef Version
;================

Keyword Property AD_ItemTriggerKeyword Auto
Keyword Property AD_ItemContainerKeyword Auto

Event OnActivate(ObjectReference akActionRef)

 If akActionRef == PlayerRef
  If ((GetLinkedRef(AD_ItemTriggerKeyword).GetTriggerObjectCount() == 0) && ((GetLinkedRef(AD_ItemContainerKeyword) as AD_UniversalItemDisplayScriptCONT).Blocked == False)) ;<<< The Script here MUST match the name of the script used by your containers. If this script doesn't compile check this first!
GetLinkedRef(AD_ItemContainerKeyword).Activate(akActionRef)
  EndIf
 EndIf

EndEvent

;/ - Comments out everything below it

;================
;ObjectReference Version
;================

ObjectReference Property ItemChest Auto
ObjectReference Property ItemTrigger Auto

Event OnActivate(ObjectReference akActionRef)

 If (akActionRef == PlayerRef
  If ((ItemTrigger.GetTriggerObjectCount() == 0) && ((ItemChest as AD_UniversalItemDisplayScriptCONT).Blocked == False))
ItemChest.Activate(akActionRef)
  EndIf
 EndIf

EndEvent

/;
I recommend giving the scripts new names to prevent any conflict with others who have used this resource (particularly the container script).
Auto-fill all the property's, and if needed, manually fill any property's that didn't match an Editor ID then save and close. Mousing over the "DisplayType" Property will give a tooltip list of different types of Display provided by this resource. Select the value that best fits the intended purpose, or add your own!
NOTE - The Activator Script has a line of code which refers to the Container Script by its exact name. If your scripts are named differently you will have to replace that part of the code with the name you did use and then recompile the Activator Script.
11. Reproduction: Once you have a given Display all set up and working correctly you can easily mass-produce them by selecting all your components (Activator, Trigger, Container + any additional Markers) in the Render Window and pressing Ctrl+D to duplicate the selection. Propogating Displays this way will preserve their respective Linked Ref relationships meaning you won't have to redo anything for the newly created Display to work as intended.
12. All Finished. Good Luck and Happy Modding :)
If you found this helpful please share screenshot's of your custom displays here. I'd love to see your creativity!