


0 of 0
About this mod
Bulk convert and resize DDS files. Maintain aspect ratio and only resize if target is smaller. Choose from multiple input sources and multiple output formats.
- Permissions and credits
- Changelogs
- Donations
DDS Texture Converter
Shout out to Niston, without whom I probably wouldn't have made this tool. Checkout their DDS Texture Scanner to help identify potentially problematic files that could cause CTDs and such.
Latest Changes v1.31 2024-02-25
- Add Feature: Drag and drop support for file list, source folder, and output folder.
- Fix parse error for some JPG files.
The drag and drop supports dragging a folder to the text box for source or output to set the text to the dropped folder. You will still need to press the scan or convert box accordingly.
You may also drag files and/or folders directly to the file list area. Upon drop it will immediately start scanning and will only select files that match your prior selected input type next to the scan button. So if you drop file types that are not of that chosen type they will be ignored. The source folder path will be updated to match a common root path of the dropped items.
What Is This?
The main goal of this application is to ease mass conversion of texture files. Allowing for bulk resizing, converting compression format, and conversion for Xbox.
This differs from other similar tools in that the resizing will only occur if your target resolution settings are smaller than the current resolution of the file. If the current resolution is smaller then that resolution is used. It will still run the conversion to save in the requested output compression and platform format.
Basic Usage
- This application requires .NET 8 available https://dotnet.microsoft.com/en-us/download
- Download the archive and extract it somewhere on your computer. Due to how the preferences for .NET applications works, if you move the application to a different folder it will not remember your previous settings.
- Use the ellipses buttons (three dots - ...) next to the source and destination text boxes to select the respective folders. Or type/paste in a valid path. You may also drag a folder from a file explorer window onto the text box to fill it with that folder.
- Select the desired input file type to scan from the drop down list next to the scan button.
- Click scan to load the files from the source folder list. It is recursive so it looks inside all sub folders. It may take time if you have many.
- Alternatively you may also drag files or folders to scan directly to the file list area. It will clear any previously scanned data and initiate a new scan when dropping. When doing this the source path is ignored as the drop operation will update it to match the items that is dropped.
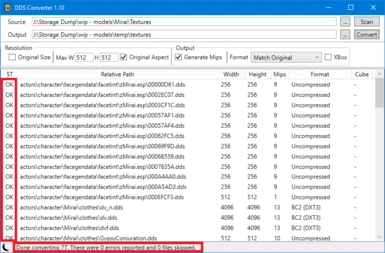
- This will allow you to review and make sure it sees all the files and shows details about what is currently there.
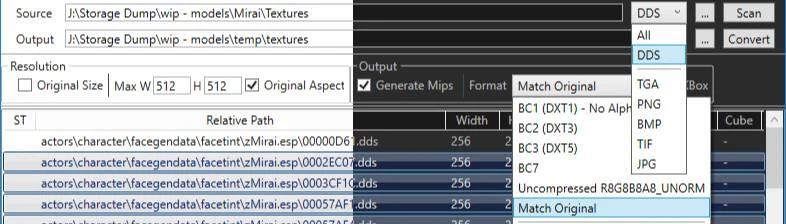
- Check your desired output settings for resolution, mip map generation, compression, and platform.
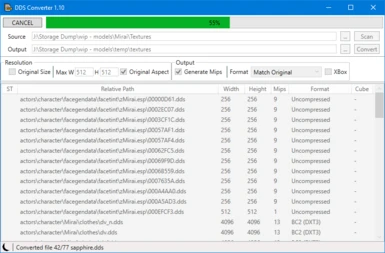
- When ready click Convert.
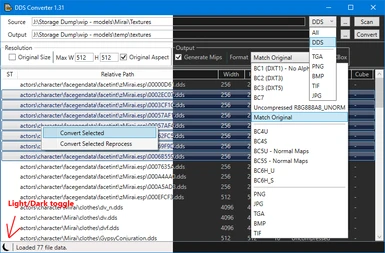
- If you want to convert only a selection from the list, you may multi select from the list and right click. Then choose to convert the selection.
- The UI will be blocked while the conversion processes. You will see the progress in the status bar at the bottom. There is a cancel button that shows during operations. Clicking it will stop the current operation after the active files are finished.
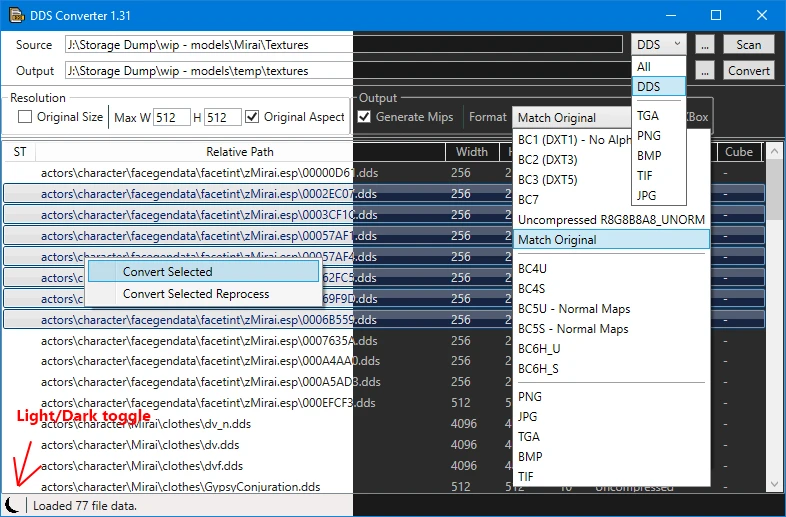
Choosing an output format
- In general conversions would normally be done in separate batches by a type. Not all files should necessarily have the same compression format. Excepting for maybe uncompressed.
- For example normal maps normally are not BC7, while a diffuse would not be BC4, BC5, or BC6. Similarly cube maps sometimes being very small in resolution do not benefit from compression as it tends to distort the result and are commonly uncompressed.
- To better help facilitate speed of work flow. There is a right-click context menu in the file list. The option there to convert only the selected entries using the current settings can assist. You may select for example all of your normal maps and the desired settings for that and process. Then change the compression and select all the diffuse and process. Then repeat for any others using whatever desired resolution, mip map, and output format options.
- The tool has a few non DDS file types listed as output formats. If you select one of these then it will convert to that file type. The mip map checkbox will be ignored as that is a DDS specific setting. When converting a cube map file to one of these types it only outputs the first image.
Some good reading information to help pick what you need.
https://www.reedbeta.com/blog/understanding-bcn-texture-compression-formats/
https://wiki.beyondskyrim.org/wiki/Arcane_University:NIF_Data_Format#Texture_Slots
https://learn.microsoft.com/en-us/windows/win32/direct3d10/d3d10-graphics-programming-guide-resources-block-compression
https://learn.microsoft.com/en-us/windows/win32/direct3d11/texture-block-compression-in-direct3d-11
Options
- The resolution options consist of the "Original Size" check box, Max width and height text boxes, and Original Aspect ratio check box. They should be fairly self explanatory but here goes.
- The original size check box disables the other options as the tool will use the resolution from the input file.
- The max width and height boxes are used for the target resolution so long as the input file has a higher resolution than the requested settings. In short it will only shrink resolution not enlarge it.
- If the original aspect ratio check box is selected then the tool identifies the longer side of the original file. It then uses the resolution specified for that same side as the output. It computes the other side to be the same aspect ratio maintaining a power of 2 size as required by the DDS spec.
- The "Generate Mips" check box identifies whether to auto generate mip maps.
- The "Output Format" is exactly that. For the non file type options they are compression settings. Rather then putting in the entire exhaustive list of 75 that the texconv backend tool supports. I've elected to only use the most common that are known supported by Bethesda games.
- The "Xbox" checkbox will tell the tool to output in the Xbox specific format. Make sure if you manually package your BSA/BA2 archives to use the Xbox variants of those as well.