


How to Refit Armor for HIMBO
In this tutorial, I will cover how to convert armor mods that are intended for vanilla body into HIMBO body with HIMBO sliders.
For this purpose, I will use Toughened Traveler armor by QuarantineCouture who has kindly made their armor assets free-to-use.

Setting Up Mod Organizer 2
First install the mod you want to refit.
If it has a BSA, you need to unpack it to access the meshes, but you can delete the unpacked files afterwards because your BodySlide file should still be able to read from BSAs (but Outfit Studio cannot).
First, right click below the armor mod you want to refit in MO2, and create an empty mod.

Give it an appropriate name.

If it hasn't already, drag the new empty mod under the original mod and activate it.

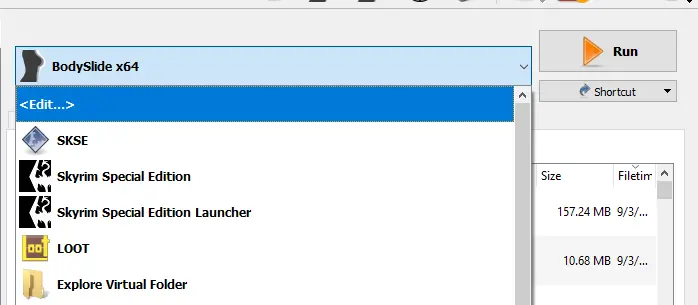
Expand the drop-down next to the Run button of MO2 and choose Edit.
Tick Create files in mod instead of overwrite; open the drop down and select the empty mod you just created.
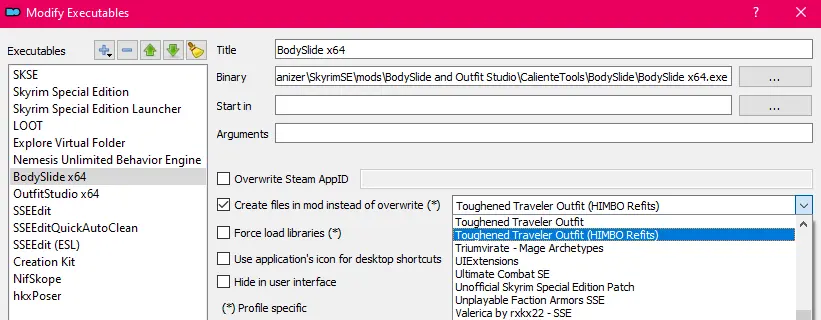
This will ensure every files created by BodySlide goes to that folder. You may do the same thing to Outfit Studio; if you'd prefer. But opening Outfit Studio from BodySlide will ensure this as already (unless you indepently run Outfit Studio not from the button on BodySlide). After you're completely finished with your refit, remember to set this to blank again so you don't build your entire future outfits from other mods into your mod folder.
Now you can launch BodySlide.
Setting Up BodySlide & Outfit Studio
A couple things here.
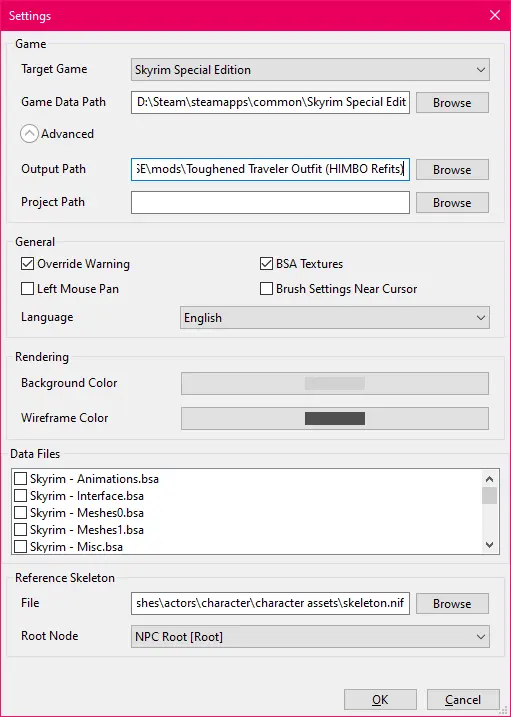
Expand Advanced tab, set Output Path to your mod folder. This will set Bodyslide to build the outfits you made into your mod folder. Again, after you're completely finished with your refit, remember to set this to blank again so you don't build your entire future outfits from other mods into your mod folder.
Also, in the Reference Skeleton, browse to the skeleton.nif inside your MO2 mods folder. The path should be at :
your directory\ModOrganizer\SkyrimSE\mods\XP32 Maximum Skeleton Special Extended\meshes\actors\character\character assets\This is important for SOS-based meshes, or you'll get gaps in your mesh.Refitting Process
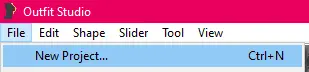
Click the Outfit Studio button on the bottom-right corner of BodySlide window.

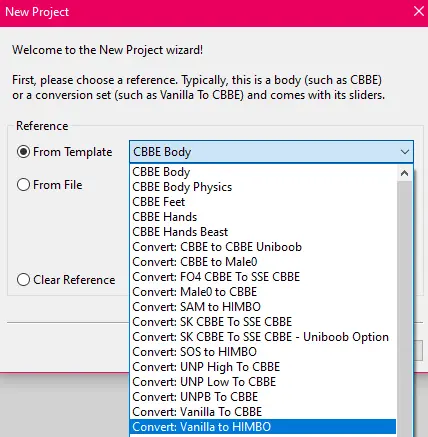
Start a New Project.
Choose From Template, expand the drop down, select Convert: Vanilla to HIMBO.
If you're refitting armor from SAM or SOS, pick the appropriate one instead.
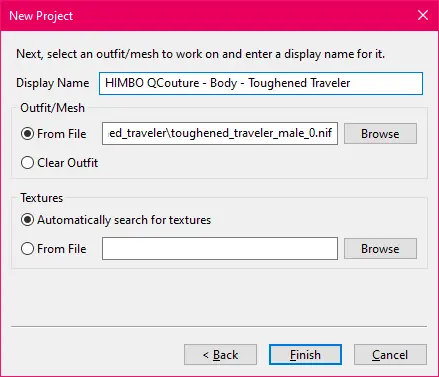
Enter the Display Name you prefer. This is what will show up in BodySlide's Outfit/Body drop-down; and if you're as organized as I am with your files, you want to name them appropriately. I usually followed the format of :
HIMBO "Author's name/Series" - "Body Part" - "Armor Name"
But obviously, you can name it whatever you like as long as you're consistent.
Below it, tick From File, and navigate to the original mod folder in MO2 and choose the _0 mesh. If the armor is a single-weight mesh, you may pick that one as well. When working with HIMBO, do not pick the _1 mesh, unless you know what you're doing.
Hit Finish when you're done.
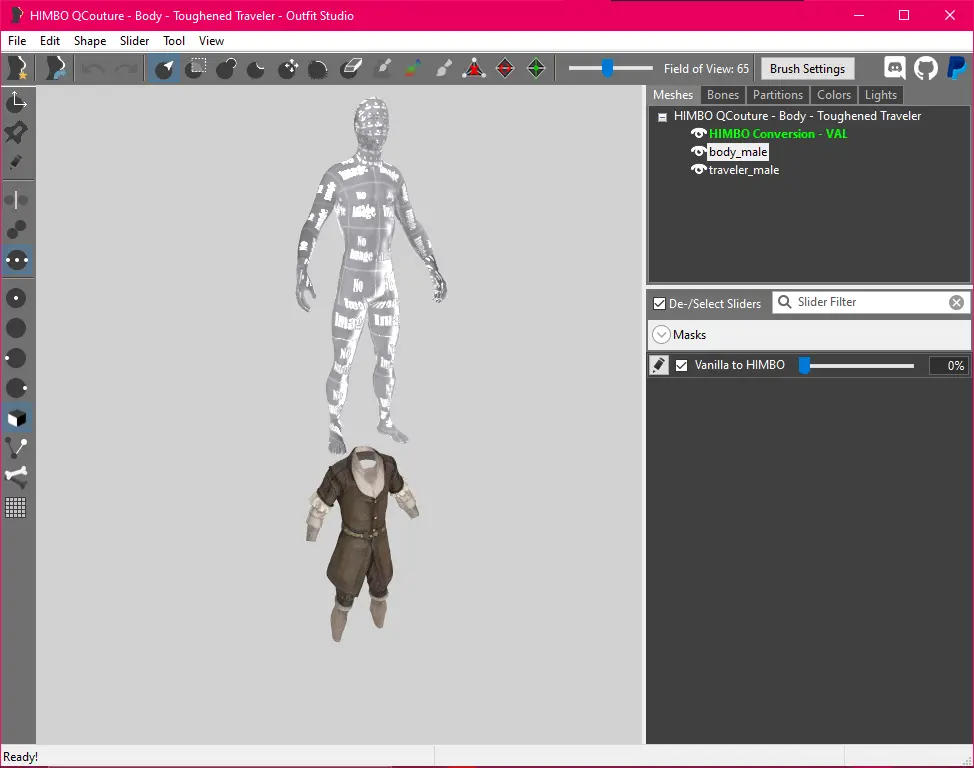
If you're lucky, the armor will stay in place with the reference body. If you're not, the imported armor will be under the reference.
When that happens, right click on each of the meshes and click Properties.
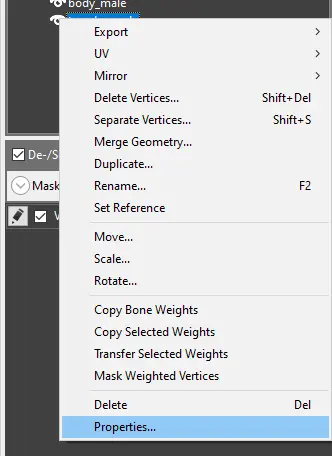
Go to Coordinates tab, uncheck Recalculate geometry's coordinates.
These numbers worked for me, hopefully it works with yours.
Major kudos to dldrzz000 on Ousnius' discord for this solution.

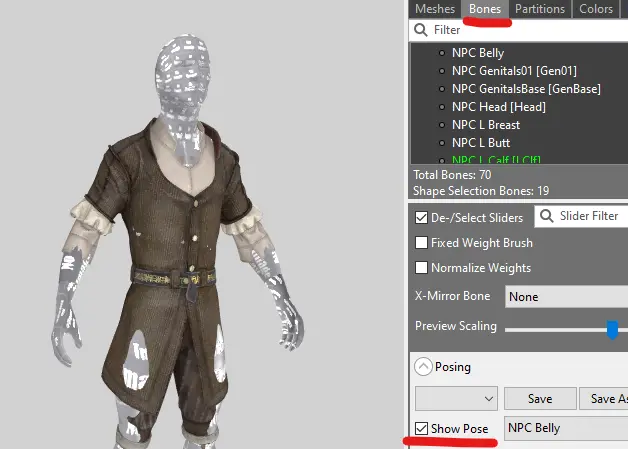
To confirm you did it correctly, go to the Bones tab and tick Show Pose. The mesh shouldn't stay in place and doesn't move at all.
If the meshes float above your reference despite you doing every previous step correctly, drop me a comment and a link to the mod/nif in question so I can help you figure it out. From most my tests, this method alone should resolve that already unless there's another variable I did not account for.
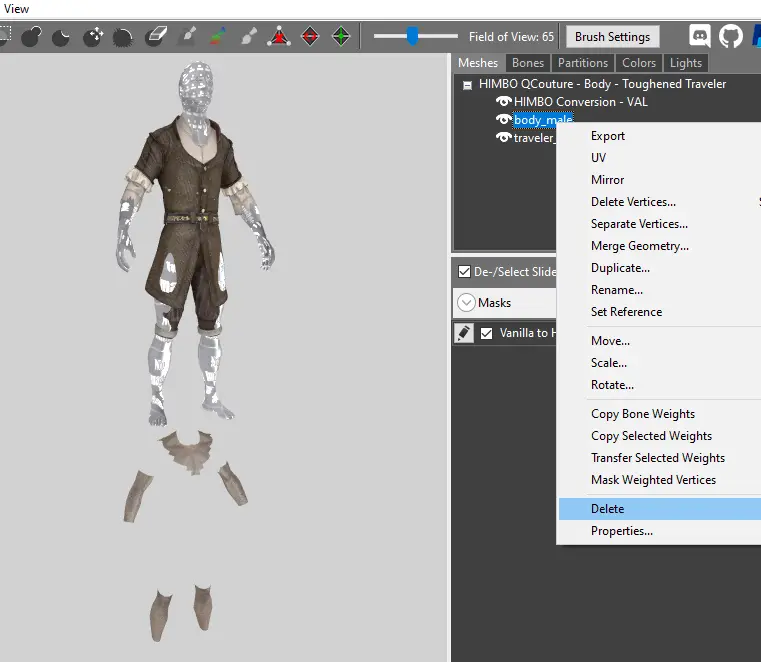
I personally never see the need for the base body that's visible under the skin and would rather replace that with HIMBO body. As such, you may delete it. Though do remember its position on the mesh list. In my case, the nude body is on the first slot and the clothing is on second slot (obviously not counting the conversion reference since those will not be part of the final bodyslide).
> You want to keep this consistent when working with armors/clothing that has texture variants using TextureSet (TXST) formid, as they will 'break' if the order is different.
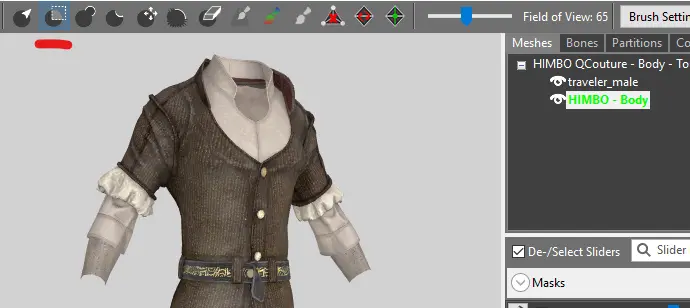
Use the main five brushes underlined on the image below to brush your armor. The goal here is to make sure the armor covers the reference body, so that there are no body parts poking through the mesh.
Ensure that you are brushing the armor by having the armor mesh selected; and not the reference itself.

Another alternative method offered by kamicane on Ousnius' discord :
- Import the vanilla male body with PyNifly.
- Select the armature, import the armor with PyNifly.
Until PyNifly supports normals we also need an obj from Outfit Studio, to not lose the original normals.
- Open the armor with outfit studio, file -> export obj -> say NO if you get a prompt.
- Import the obj in blender (Y Forward, Z Up).
- Scale the obj 10x (press n -> info -> scale), apply scale.
The nif and the obj should match in size, location and scale.- Select the obj armor, the nif armor, then the male body.
- Press N, go to info tab.
- Right click location -> copy all to selected.
- Right click rotation (if any) -> copy all to selected.
The obj, the nif, and the male body should now have the same position.
- Click the nif object, click auto smooth in object data properties -> normals
- click the nif object, add data transfer modifier in modifier properties
- Source -> the obj object, face corner data -> custom normals, mapping: topology
- Apply the modifier
- The nif now has correct normals
- You can now delete the obj object
- (optional) Select the nif object and import the tris with PyNifly, to import BodySlide sliders as shape keys.
- Select the nif object and export with PyNifly.
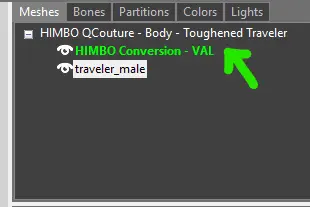
If it's not already so, set the conversion reference as the Reference. Right click the reference, and choose Set Reference.

A reference is indicated by the green color on the name.
> Note that if you accidentally made the wrong mesh as reference, clicking the Set Reference again will undo the process.
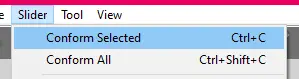
Next, with your mesh selected, go to Slider > Conform Selected. If you have more than one meshes, you could also use Conform All.
The default settings should cover most armor shapes but for those armors that have poking horns, large shapes, or capes/skirt, it might need some manual adjustments.
Once the process is finished, click the pencil icon on the conversion slider. The Armor should morph to HIMBO shape, along with the reference body and the slider would be highlighted in purple. At this point, feel free to inspect your mesh, look around and see if there are some abnormalities in shape.
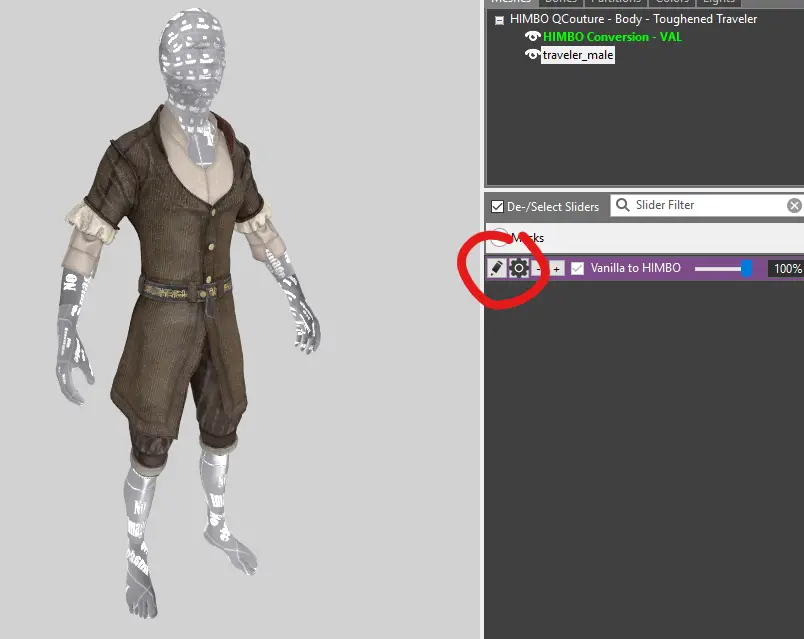
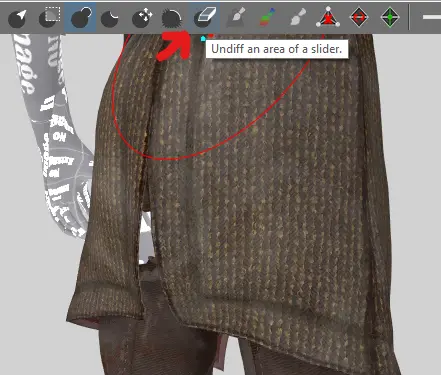
If there's any undesireable area that doesn't look right when conformed, you might want to use the Undiff Brush to reduce/eliminate the slider strength and reverting its shape. Do note that Undiff Brush can only be used when a slider is activated (highlighted in purple color).
Once you're happy with the conversion, finalize it by going to Slider > Set Base Shape.
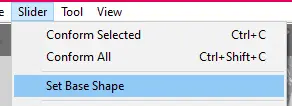
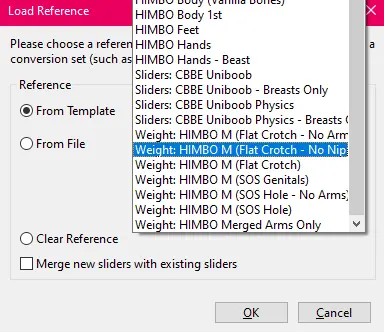
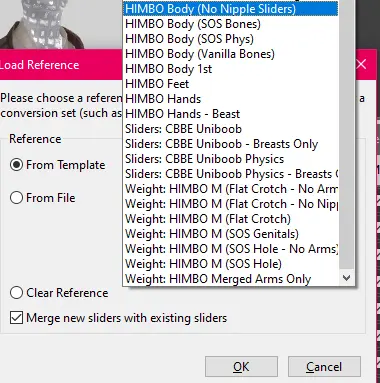
Immediately after, go to File > Load Reference to bring in the full HIMBO reference.

I included a couple and here's their differences, but most of the time, you want to pick the one that has the suffix "Flat Crotch - No Nipple Sliders" (Unfortunately, visibility might be a problem due to how small the box is. There's nothing I can do about it)
As of HIMBO V5 Update, these references have been renamed. They now have been given "Refit: HIMBO" prefix.
- Refit: HIMBO Cloak is for cloak
- Refit: HIMBO Dress A and B is for robes and dress, kinda like CBBE UniCurtain. Dress A has cone-y shape while B has hourglass-y shape. This is an experimental reference so it's not perfect; especially with the bigger sliders like "SamuelLike" and "BodyMass", so take good care to check on those again. Note that when refitting with Dress reference, sometimes the belly-to-pelvis area got enlarged further than the pants, so I added an extra reference named "Addon: HIMBO Body Gap Cover-up", which is just a circular black plane facing downwards meant as a gap hole-hider (tweak as necessary to fit your mesh).
- Refit: HIMBO SOS Genitals have merged penis; for revealing outfits with meshes around the penis (the only use for this is probably that SOS cockrings)
- Refit: HIMBO SOS Hole have crotch-holes. Have yet to think what this could be use for. Probably for revealing outfits too. I only included it for completionist's sake.
- Refit: HIMBO Vanilla is what you will use most of the time.
- The last three have V5-only sliders if you want to update V4 sliders to V5. Before loading them, make sure to have "De-/Select Sliders" (in the sliders tab) and "Merge Zaps/Sliders" (in the dialogue box) ticked to keep old zaps and sliders.
The old conversion reference would be removed and replaced with the new one. The old conversion slider should also be automatically replaced by HIMBO sliders.
Once again, go to Slider > Conform Selected to attach the new slider morphs to the outfit. Like before, default settings should suffice; if not, adjust as necessary.
Review the sliders to your hearts content to check if the sliders are correctly conformed. If not, activate the slider you want to edit by clicking the pencil icon and use the brushes to adjust them to your liking.
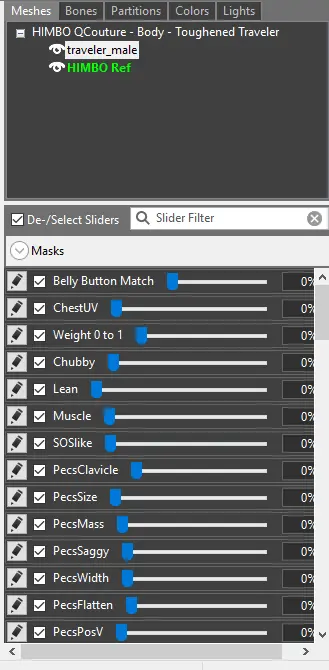
Once you're done, go to File > Load Reference again and bring in the actual HIMBO body.
On the meshes list, select HIMBO - Body and then click the Mask brush.
The goal here is to mask areas of the body that would be hidden under the clothing to prevent them from poking through the outfit mesh.
In case it isn't obvious, masked area is indicated by the darkened color.
You can toggle the visibility of the mesh by clicking the eye icon next to the meshes name on the Meshes list. Another helpful hotkey is T (View > Enable Textures) which will turn off textures that could obscure visibility.
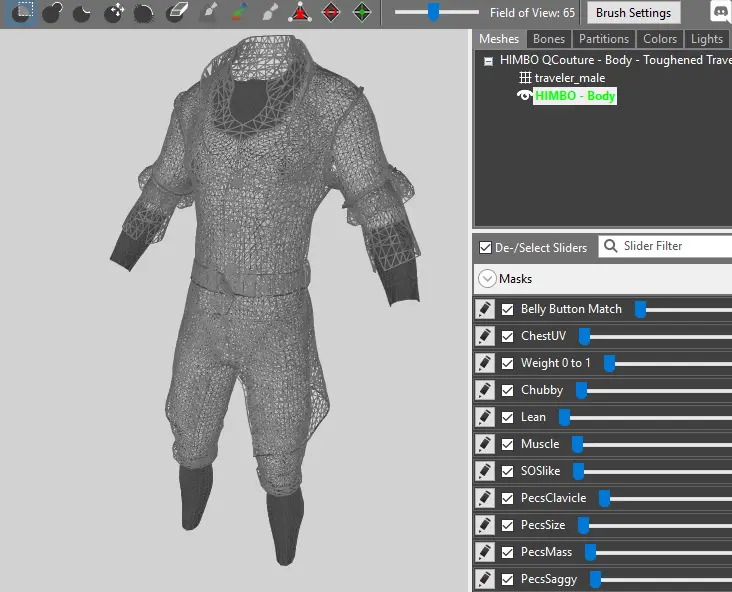
The hotkey Q also highlights the individual vertices of the mesh. Green vertices means they are unmasked, red vertices means they are masked.
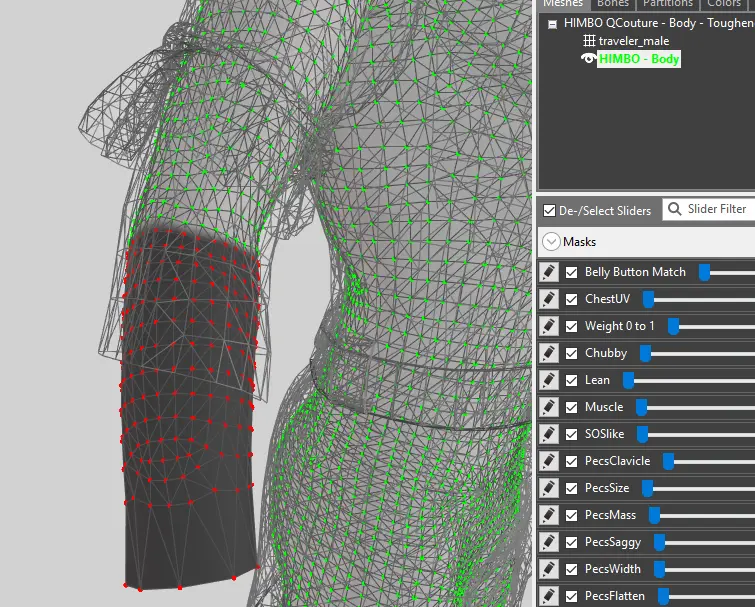
Tips : Be a little generous around the opening of the clothing so there won't be visible gaps when the armor/clothing is viewed from certain angles.
As you can see on the image above, I brushed the area above the sleeves a little bit more than the sleeves covering.
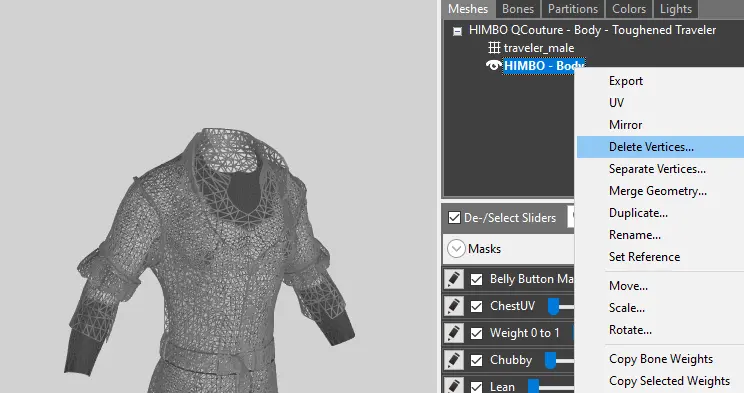
Once you're done, right click the HIMBO - Body mesh, and select Delete Vertices; which will remove unmasked area of the meshes.
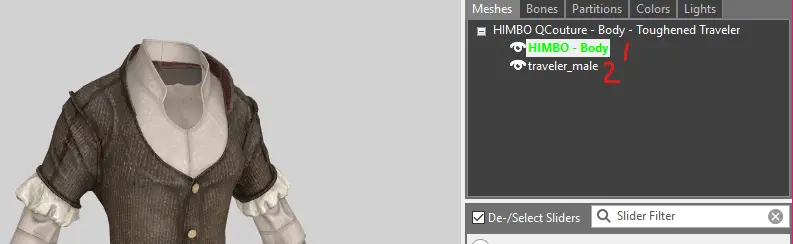
Once you're done, remember the mesh's original order when we first started. Since the outfit is on second slot and the body is on first slot, drag the body mesh above the outfit (or drag the outfit below the body, whichever works). Again, this is important for armor that has TextureSet variants as they replace textures based on the order of the meshes.
Afterwards, you can save your project. Assuming you're following this guide precisely from start to finish, the 2nd and 3rd forms should be automatically filled for you (Output File Name and Output Data Path). Otherwise, you need to fill those exactly as the original meshes was named and placed in the directory.
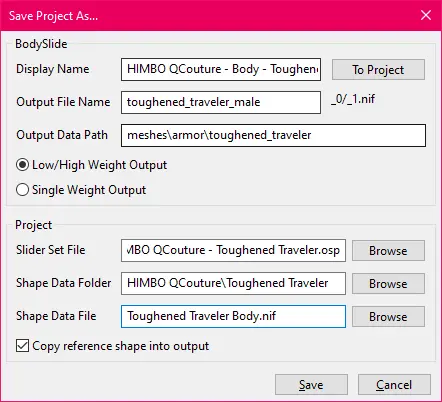
The Display Name could be anything, and hitting the To Project button would automatically fill the Slider Set File, Shape Data Folder and Shape Data File accordingly.
Tick Low/High Weight Output or Single Weight Output accordingly. If the meshes are single weight, they will be built by BodySlide without _0/_1 suffix.
As for me, I usually have a format that I follow for my entire Outfit Studio setup for consistency and organization purpose, which is :
Display Name : HIMBO "Author's name/Series" - "Body Part" - "Armor Name"
Slider Set File : HIMBO "Author's name/Series" - "Armor Name".osp
Shape Data File : HIMBO "Author's name/Series" \ "Armor Name"
Shape Data File : "Armor Name" - "Body Part".nif
Obviously, this is just a suggested convention. Feel free to name them anyhow you like.
The only part that matters in the game is the Output File Name, Output Data Path, and whether the armor is Low/Weight or Single Weight; so it is imperative that you got those part right.
Once you're done, close Outfit Studio; and if you're using MO2, close and relaunch BodySlide to refresh the drop down list.
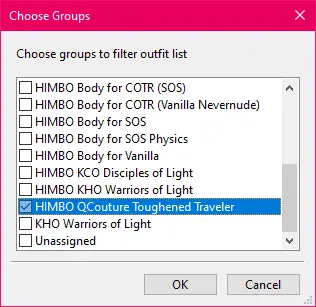
In BodySlide, click the Group Manager button.

Make two new groups, and name one HIMBO. You can name the other one anything you like, but I usually name the second one similar to how I name my other projects; in this case, it would be :
HIMBO "Author's name/Series" "Armor Name"
Type the name HIMBO, click Add Group; type the second name group, and click Add Group again; so you have two new groups.
Select one of the Groups tab on the left, then on the Outfit Filter list, locate your newly made project, and hit Add to add it into the group. Do this for both groups.
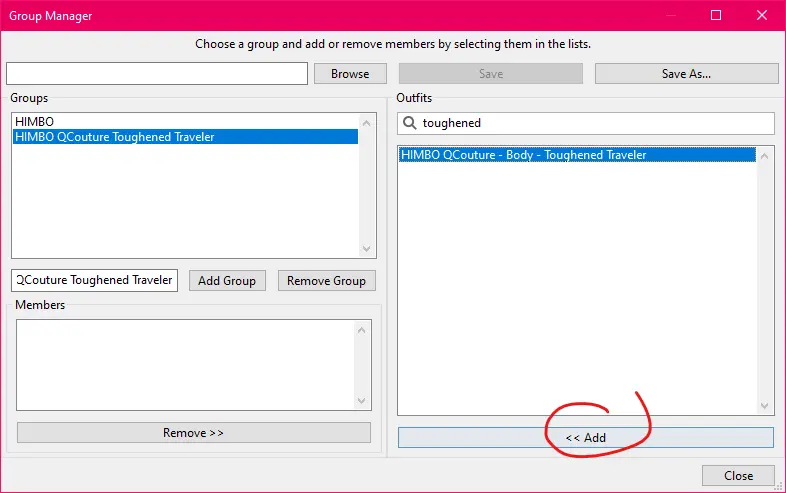
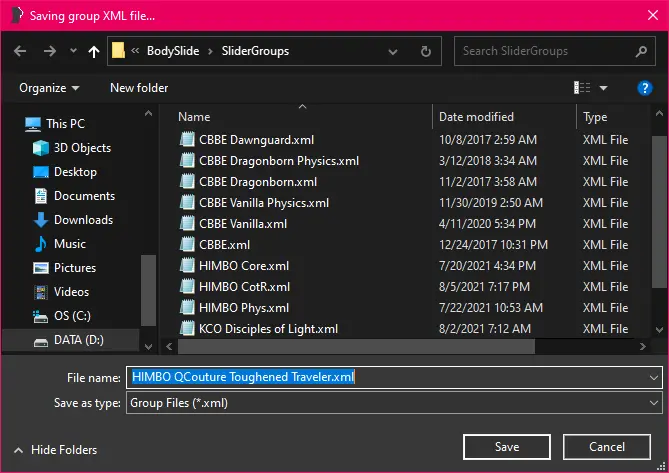
Hit Save As... to save your newly made groups setup.

It will automatically open save dialogue directly to SliderGroups folder of BodySlide. Name them accordingly then hit Save.
If you're using MO2, close and relaunch BodySlide.
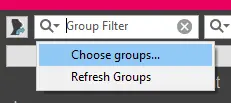
Assigning the HIMBO group would make the outfit conform to just HIMBO Presets, and not getting mixed up with CBBE/UNP Presets. If you noticed, armors not assigned to HIMBO group can still peruse CBBE/UNP Presets when you open the Preset dropdown in BodySlide which might lead to weird shapes (though I ensure within my best capabilities to make sure they don't)
The second group would make the armor visible from the Outfit Filter for easier Batch Building process without touching other armor groups (and ended up rebuilding them).

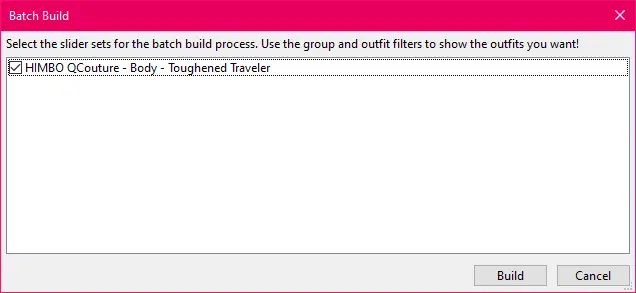
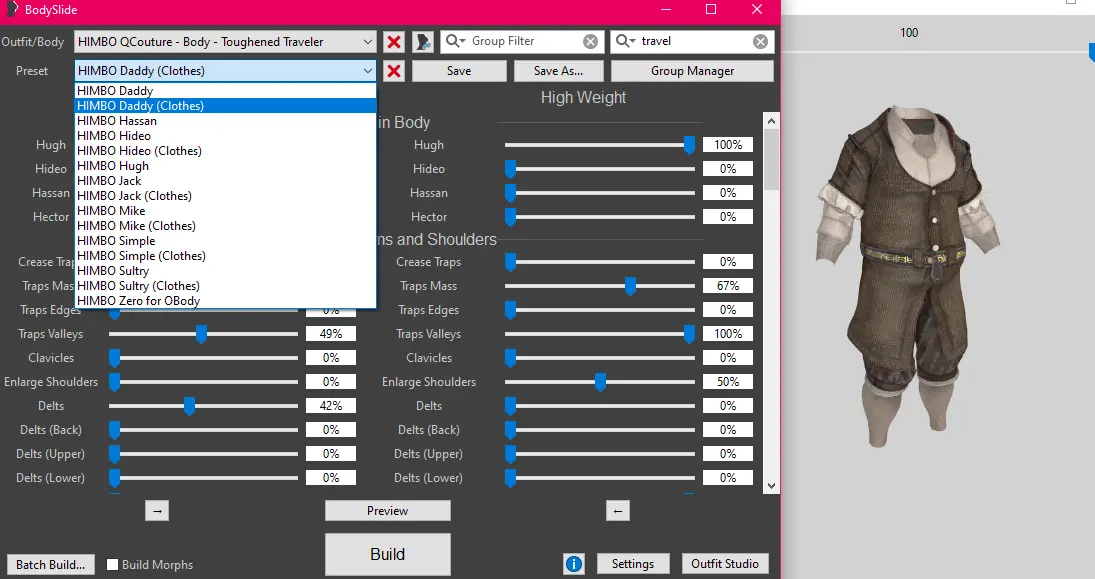
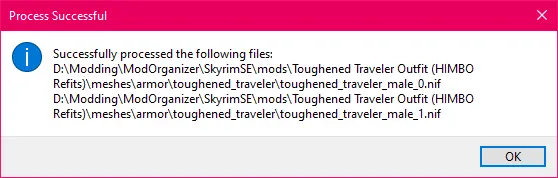
With this, you can Build your armor and enjoy it in the game with HIMBO Slider ready.
For OBody users, remember you need to build it with HIMBO Zero presets.
Once you're finished, don't forget to clear out the Output Path in BodySlide as to not interfere with your future BodySlide usage.

Finishing Up
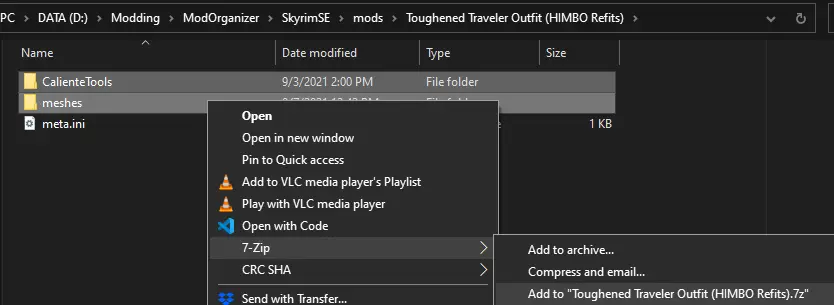
Now you can close BodySlide, and go back to MO2. Locate your refit mod, right click and select Show in Explorer.
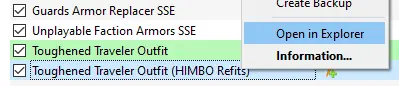
Ensure all files are in the correct folders.
NIF and OSD files should be in your ShapeData folder.

The outfit groups XML should be in your SliderGroups folder.

The OSP should be in your SliderSets folder.

Once you're ready, now you can zip them up (remember to exclude MO2's INI file) and publish them on Nexus!
And that's it for this tutorial.
If you have any questions,
64 comments
So after "Set Base Shape" we can skip this: "Immediately after, go to File > Load Reference to bring in the full HIMBO reference." and instead directly go to "go to File > Load Reference again and bring in the actual HIMBO body." (there is no option to 'merge new sliders with existing sliders' and that's fine)
Once the body is loaded sliders still have to be conformed using "Slider > Conform Selected".
Do you know how to correct that error ?
Now, I just gotta know how to work/add the physics since it's the only thing missing lol