If a mod is hosted on the Nexus, you can add it to MO2 in two ways. One is to click Download With Manager under the file on the Nexus, and this will download it directly to your mod manager. The other is to click the Manual Download button, and this will download it to your download folder. See below for specific instructions.
GENERAL TIPS: If you don't have a premium account, your mods from the Nexus will only download at 1MB per second. This isn't a big problem if you plan for it by downloading the mods you will need in advance. I tend to have about five mods downloading at any one time.
Sometimes the mod is named differently on the download than its named on the Nexus, but it will share the name found on the files page of the mod (almost always), so check there to see what to look for if your struggling to find it.
You may want to keep an untouched copy of any mods you use, because it's not unknown for mod authors to hide them temporarily, or even remove them completely.
DOWNLOAD WITH MANAGER: When you first launch MO it will ask you if you want to set it up to use nxm links, which means do you want to be able to use the Download With Manager button. Click yes.
To sign into the Nexus with MO, click on the screwdriver, and spanner symbol (configure settings, and workarounds) on the main top left tool bar. Click the Nexus tab, type in your Nexus user name and password, and click the box that says automatically login to the Nexus. It will automatically login for you when you press the Download With Manager button.
If you did click yes, and you want to choose where MO stores the mod, click on the screwdriver, and spanner symbol, click the Paths tab, and point the downloads to a folder of your choosing. To do this click the tab with three dots opposite downloads, and navigate from there. It could be useful if you want the mods to be stored on your HDD, rather than your SDD, to save space.
MANUAL DOWNLOAD: To add a mod to MO that you downloaded manually, click the computer and CD symbol (Install a new mod from an archive) on the main top left tool bar, navigate to where your mod is located, and double click it.
INSTALLATION: Once a mod has been added it will appear in the left panel. Click the box next to it to install it. If it contains a plugin, it will then also appear in the right panel, which is your load order.
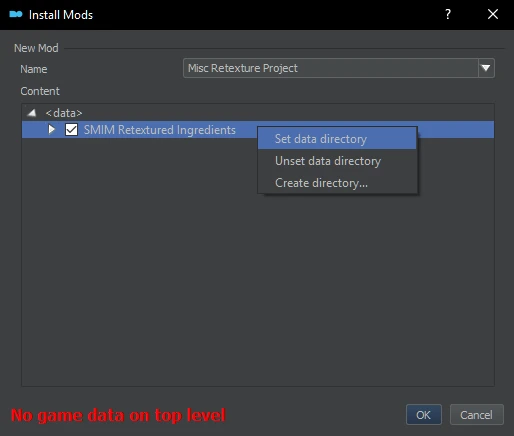
When installing a mod with MO, it may say 'No game data on top level', and a screen will pop up. If it does, double click the mod in the pop up screen, right click the Data folder, and set it to data directory. Sometimes the Data folder will already be showing.
To uninstall, un-tick the box you ticked to install it. If you want to remove it completely, right click it, and select remove.
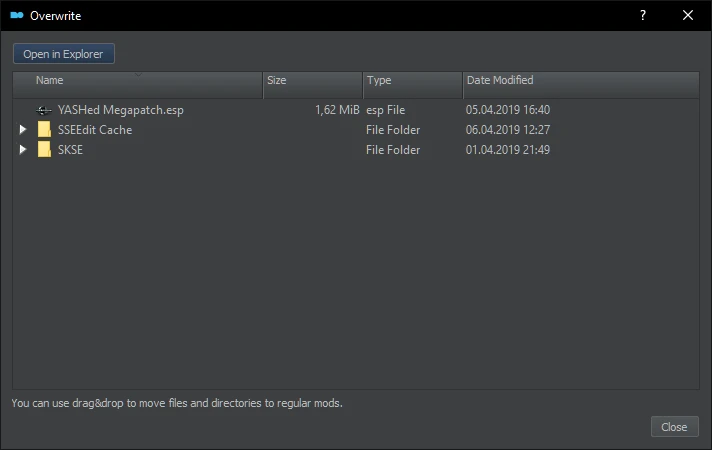
OVERWRITE FOLDER: The overwrite folder is found at the bottom of the left pane, and is used to store files MO doesn't recognise, because it doesn't know where to place them. These files are typically newly created files, usually generated by an external mod tool (i.e. Wrye Bash, xEdit, FNIS, ...). Creation Club ESL files will also end up here when downloaded. Any files in Overwrite will take top priority when loading your mod files and will always overwrite any other mod in your profile. What you do with them depends on what type of file it is. Double clicking it will bring up the main folder it contains, but to access the contents, you need to right click Overwrite, and select open with Explorer.
Keep an eye out for the triangle containing an exclamation mark near the top right corner turning red, and a number appearing. This will let you know the Overwrite contains files.
SEEEdit: When you clean your masters it will place a back up of the original plugins into the Overwrite Folder. If you want to keep them you can create a folder elsewhere, and drag it into that. Or copy, and paste it into it, and delete the original from the Overwrite.
Another option would be to right click the Overwrite Folder, and select create mod. The folder will be removed from Overwrite, and appear in the left pane. If you do this, don't activate it.
The easiest option is to just delete the back up, as you don't really need to keep them.
FNIS, SKSE AND EVERYTHING ELSE: Any log files created by these that appear in the Overwrite need to be moved into the different folder. The easiest way is to create new mod (right click -> All mods -> Create empty mod) and move everything from Overwrite folder there. At the end, you need to activate the folder in left panel.
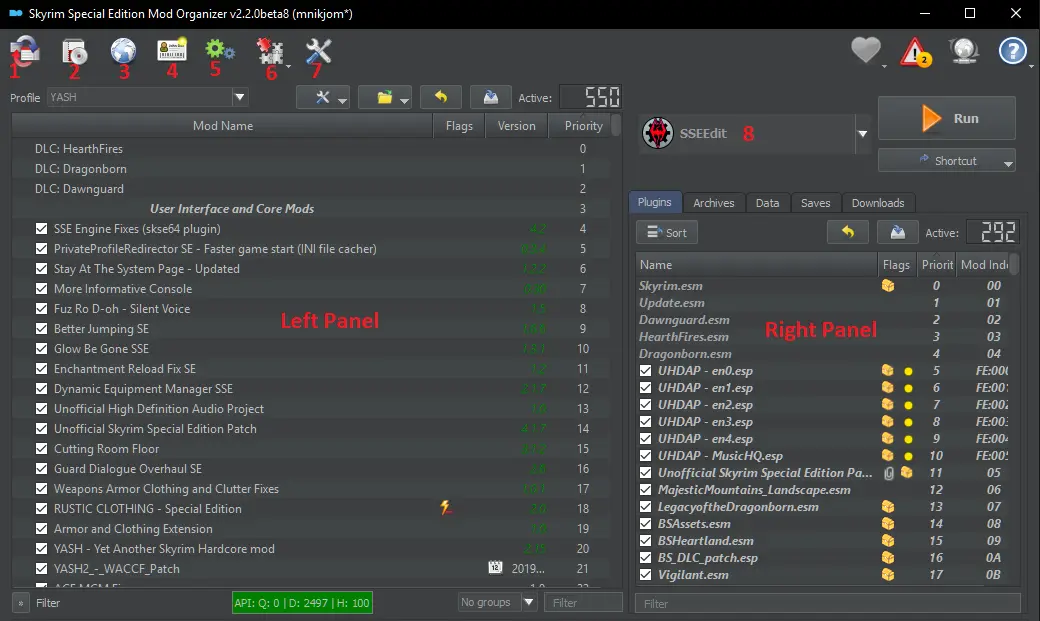
1. You can use MO2 to manage other games! Yay!
2. Manual installation of mods.
3. Link to Nexus.
4. Game profiles. You can have more than one mod profile with MO2!
5. Executables. You can add new or modify existing ones.
6. INI editor. Here you'll need to edit official game ini files.
7. Settings.
8. Drop-down menu, where you can add new executables and run the existing ones.

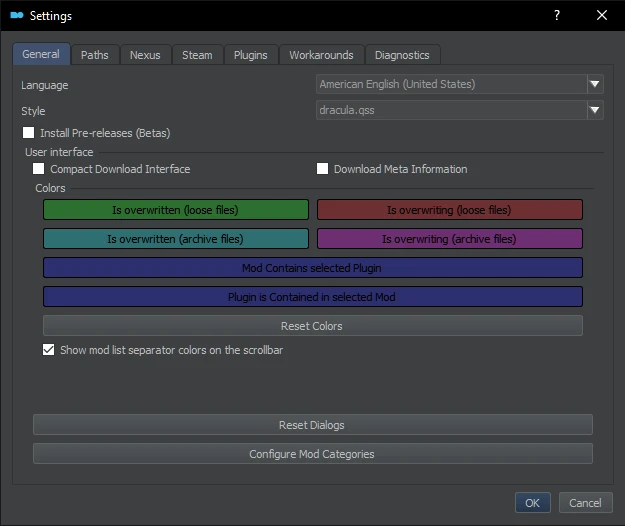
In General tab you can change MO2 Language, Style (I recommend dracula) and colors.
You may want to tick Show mod list separator colors on the scrollbar option.
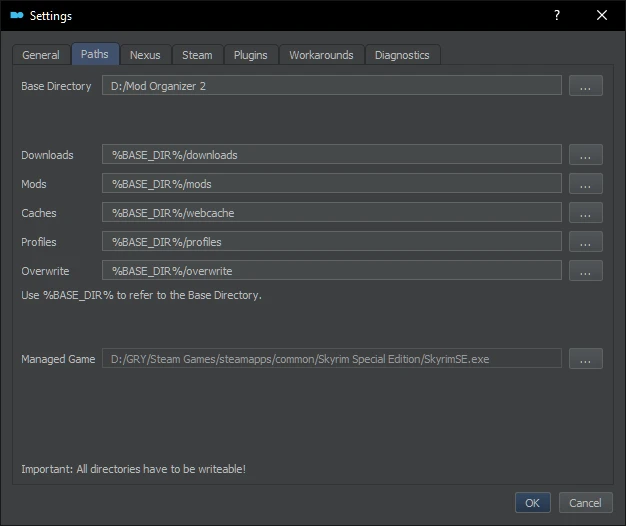
In the Paths tab you can change paths to all MO2 folders. You don't want to change anything here, unless you want to do something specific - like having Downloads folder in other place.
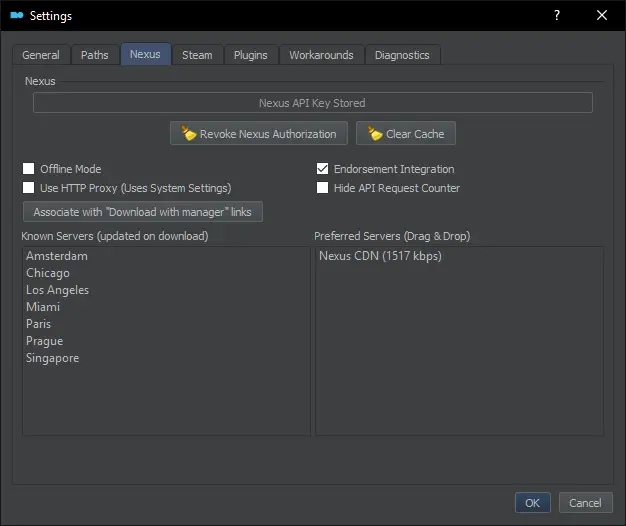
In the Nexus tab make sure that you have Endorsement Integration ticked.
If you haven't done it earlier, click Associate with "Download with manager" links.
Here you have also possibility to change servers from where you download mods and add/revoke Nexus API.
You don't need to change anything in other tabs.
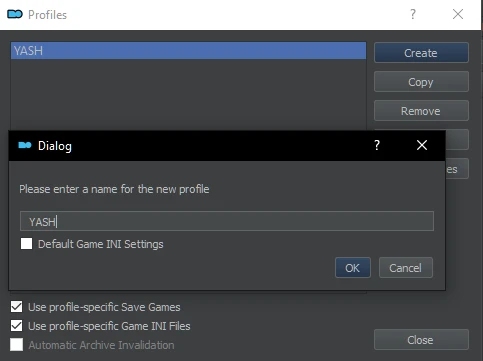
When you're starting from scratch, it's always a good idea to create new Profile. You can have more than one Profile in future (for example - main profile, profil for testing mods, etc.). In this guide, you need only ONE profile.

Click Create. Name your profile and click OK. Don't tick the Default Game INI Settings! It prevents MO2 from importing your edited INIs!
Select your profile and then check User profile-specific Save Games.
Also make sure that Use profile-specific Game INI Files is ticked.
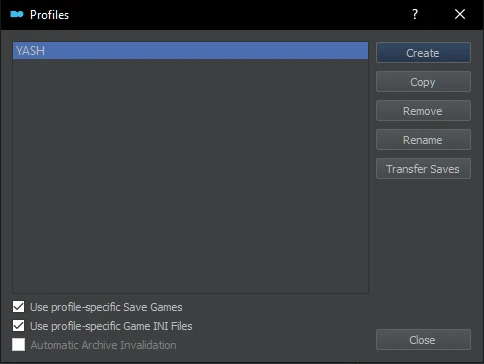
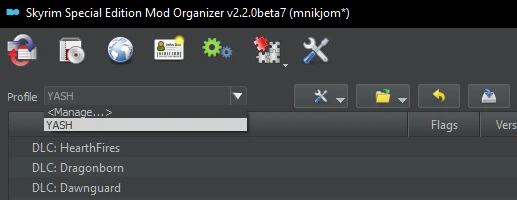
Close the Profiles window and select your new profile from the drop-down menu.
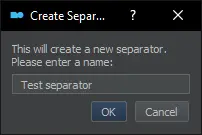
Separators are one of the best features of MO2. It will sort out your mods and it will keep your left panel clean. You can also select color for them, so they will be more visible.
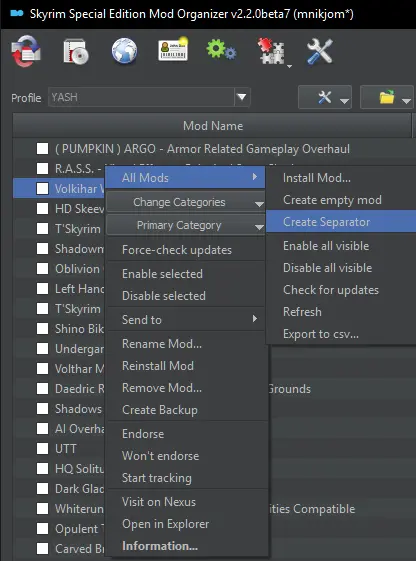
Name your separator.
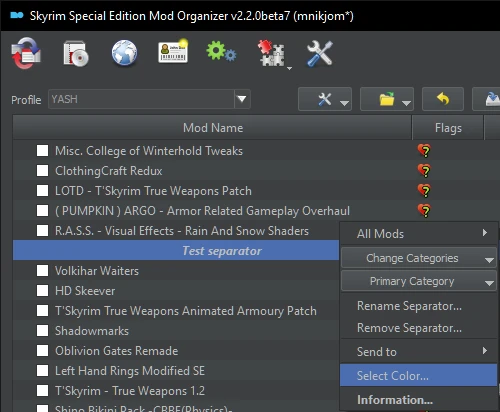
You can right-click on new separator to Select Color.
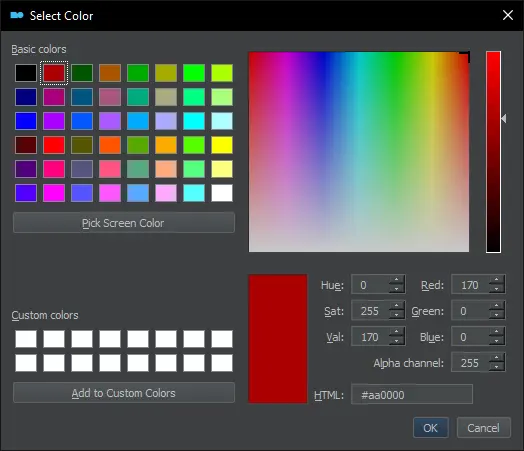
Here you can change the color.
As you can see, separator is now Red. It's also visible in scroll bar.

PRO TIP: Always sort your mods by Priority (simply left-click on it).
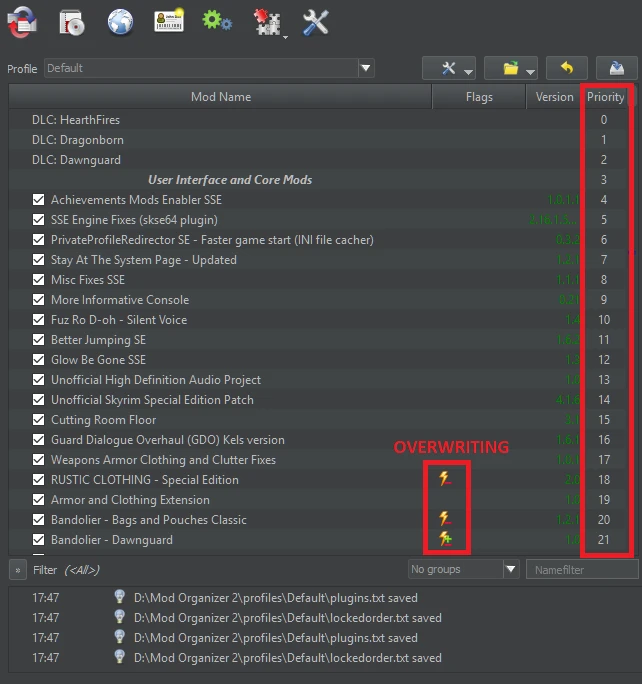
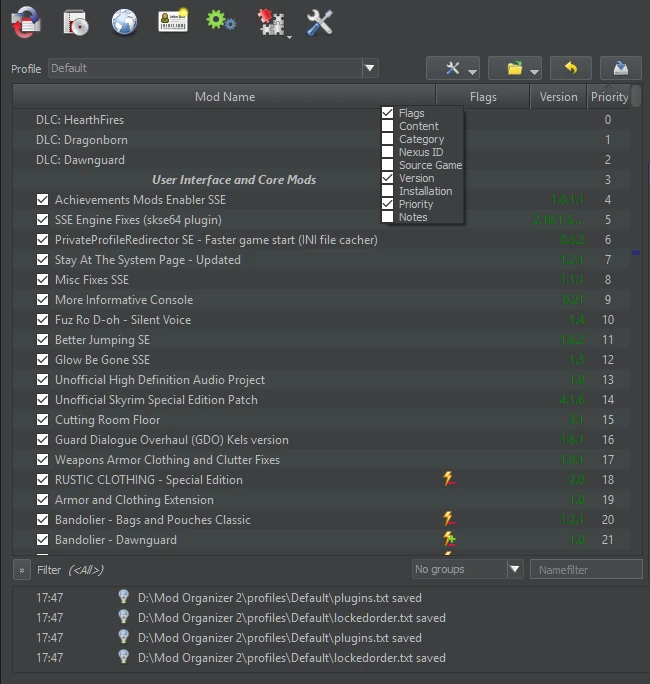
You can change which table you want to see. Right-click on "Mod Name" table and tick Flags, Version and Priority boxes. Optionally, you can use Notes. You don't need the rest.
Also, NEVER click the Sort button. It's like LOOT, but even worse. NEVER click this!
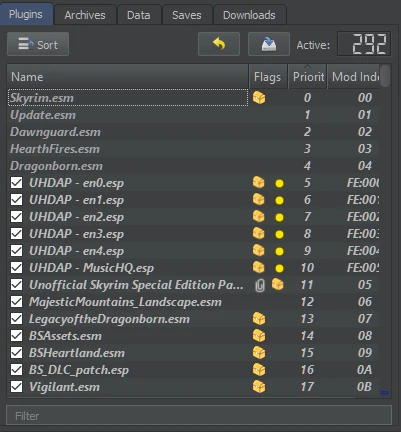
Bold names = .esm files and .esp files flagged as .esm.
Italic names = files flagged as .esl.
Yellow dot = files flagged as .esl.
Box = there is a .bsa connected with this file.
Clip = there is a .ini connected with this file.
Priority works in the same way as Left Panel. Files that are higher, are overwriten by these below.
Mod Index:
"Normal" numbers are hexadecimal. This is your plugins count, that exclude .esl and .esl flagged files.
Numbers after FE are decimal. This is your plugins count for .esl and .esl flagged files.
Thanks to the amazing MO2 devs, we no longer need to manually check total number of plugins! Just hover the cursor on your Active files count. It will show you everything that you need to know.
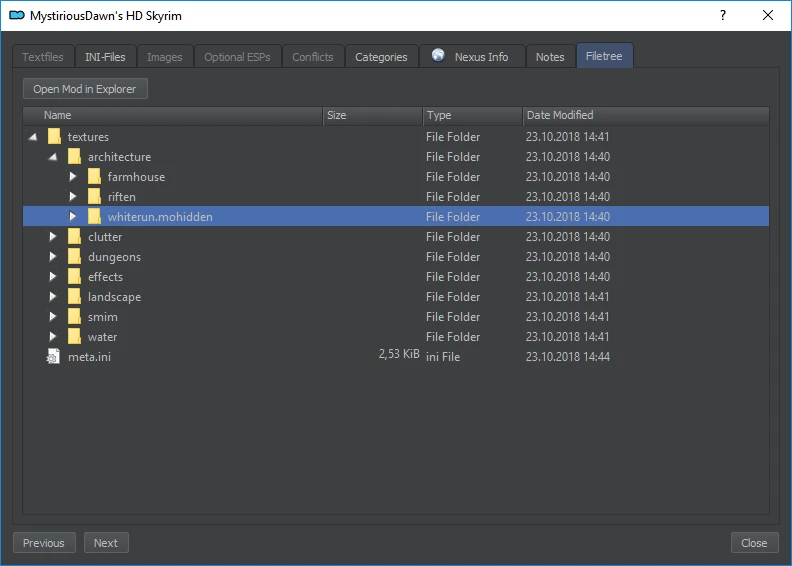
Hiding files is one of the best features in Mod Organizer. Thanks to it, you can hide all files that you don't want, without deleting them. It's also really simple:
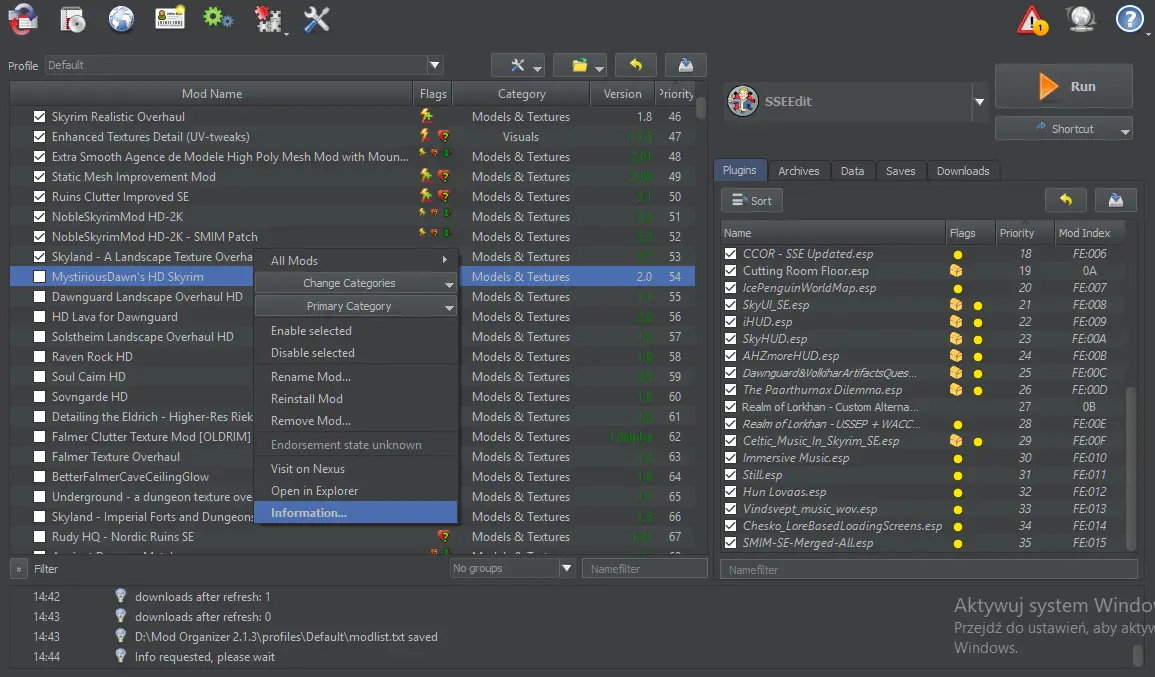
Go to the Filetree.
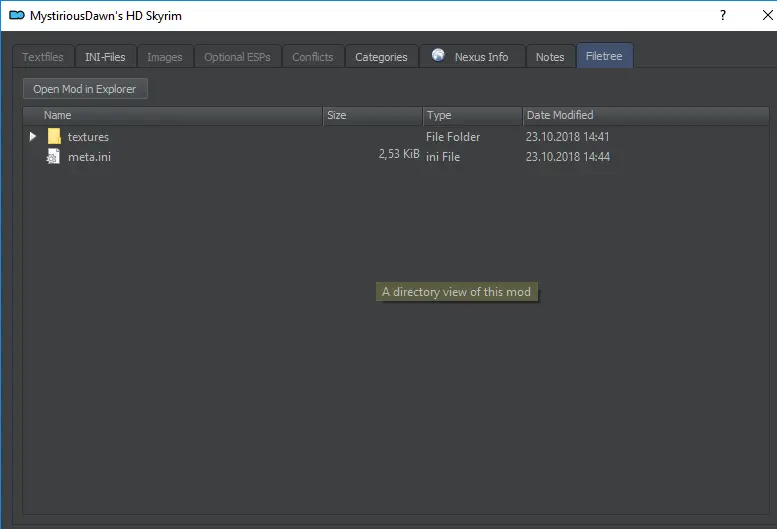
Find file that you want to hide (in this case folder with textures for Whiterun), right-click on it and select Hide.
GOOD TO KNOW: You can use Hide option on everything that you want - folder, esp, esm, only one mesh or texture, etc.
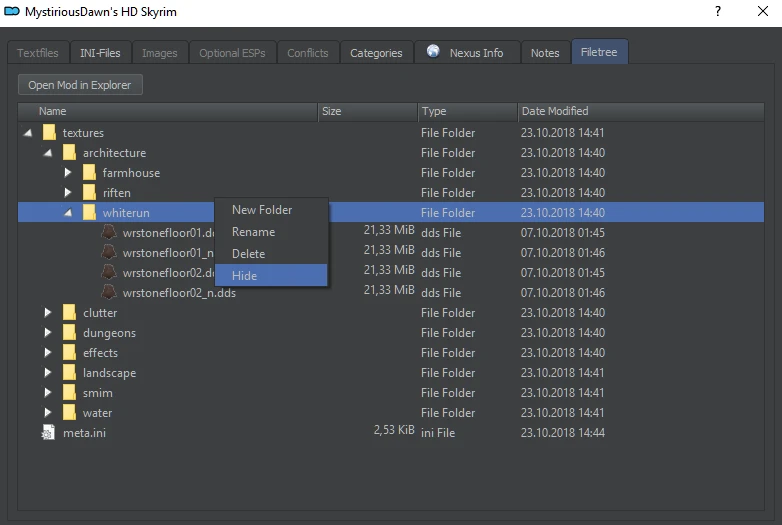
Now, it should look like this. In the same way you can unhide files.
