


0 of 0


About this mod
A long forgotten evil is on the verge of its return. Venture into the voids of Darela to stop a madman who threatens to plunge the lands into the depths of chaos. Will you spare the world from wrath or watch it burn in ruin?
- Requirements
- Permissions and credits
-
Translations
- Spanish
A long forgotten evil is on the verge of its return. Venture into the voids of Darela to stop a madman who threatens to plunge the lands into the depths of chaos. Will you spare the world from wrath or watch it burn in ruin?

An ominous trio known only as the Ascended has journeyed to the lands of Skyrim. Unsure of their reasons the Dovahkiin must piece together clues of their intent to ultimately unearth a malice plot which if achieved will ignite all of Tamriel into flame.
Included in this mod are:
Two Short Self-Guided Missions (these missions are not quest scripted. There are no markers, quest starters, or quest updates. Only through journal entries and books will you be able to complete this mod.)
Challenging Boss Battles
Powerful Summons and Spells
A Unique Companion
The only requirement for this mod is Skyrim (latest version recommended). All actors included within this mod use default hair and are not standalone. No outside mods (skin, hair, clothes, and etc.) are included within this mod. Depending on the mods you have installed the look of the actors included within this mod will vary.
You cannot autosave inside the Sphere of Darela. It's important you save before each battle.

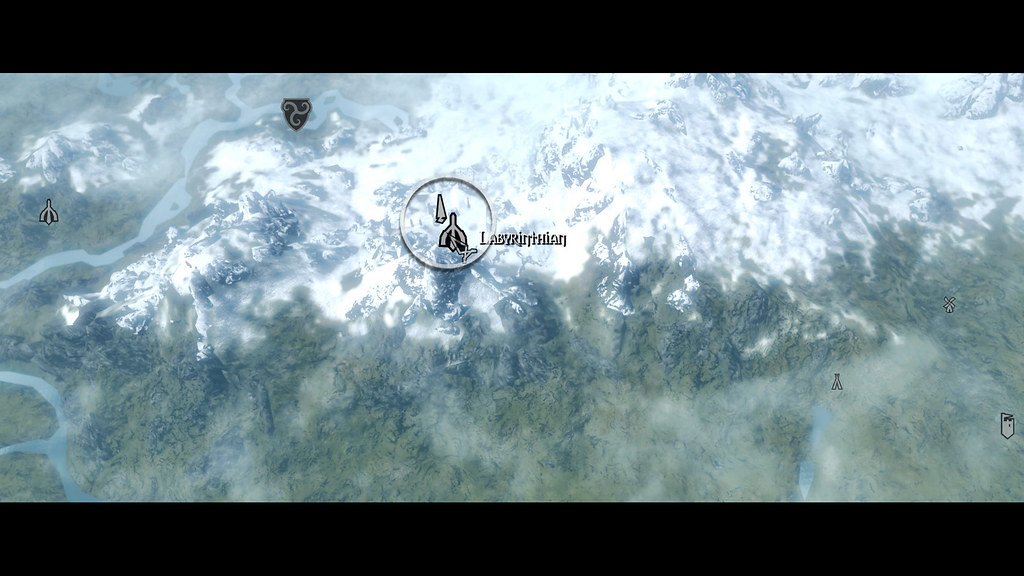
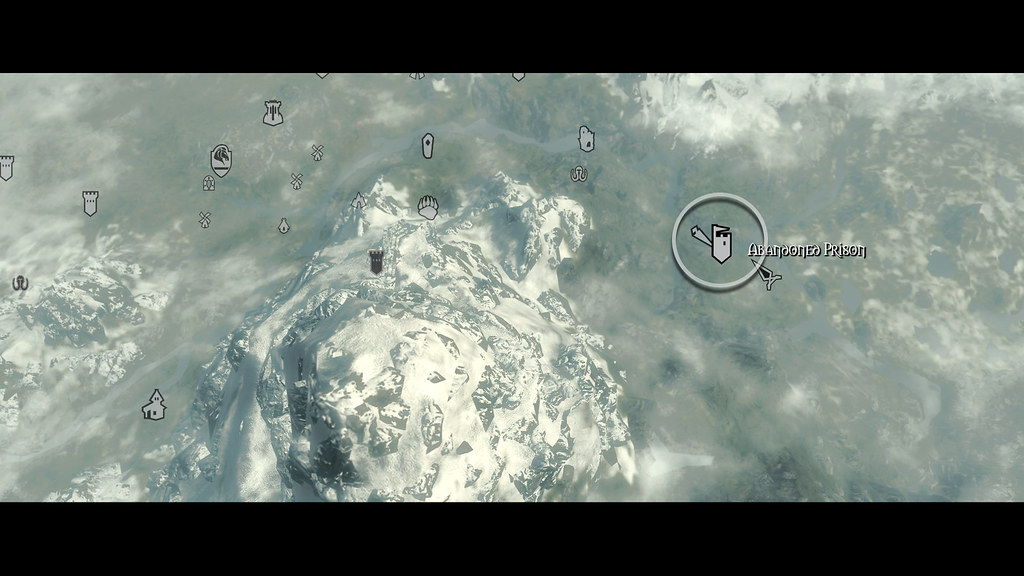
Your journey begins in Labyrinthian (you will need to travel to this location). A figure will be awaiting your arrival near the main entrance (the area where you encounter the frost troll near the stairwell). After dealing with this individual one way or the other make sure to search their body for clues to your next location (the Abandoned Prison, near Fort Amol).

IMPORTANT: Make sure to download the "Facegendata" File in addition to the main file. This will get rid of any grey faces you may see on certain members of the Ascended.
Install using the Nexus Mod Manager or download manually and unzip the file using a program, which allows you to unpack files (WinRAR, 7-zip, etc).
Extract the contents of the file to a memorable location and either copy or drag the now extracted folder (the outside folder called Data) into the Skyrim folder. Depending on how your game was installed the file will be in varying locations:
C:Program Files (x86)SteamSteamAppsCommonSkyrimData
C:Program FilesSteamSteamAppsCommonSkyrimData
C:GamesSteamSteamAppsCommonSkyrimData
Do not forget to activate the esp using the Skyrim Launcher or Nexus Mod Manager. This mod should be placed at the bottom of your load order to prevent possible issues. To remove this mod and its contents you will need to either deactivate and uninstall with the Nexus Mod Manager or manually remove:
BALFER.ESP
TEXTURES (ALL ASSOCIATED FILES)
Actors: BlackSkull, Balfer, Frosdrag, Zomdragon, Spiderdesatfire, Lavawraith, and Dagonhound
Clothes: Psijjicevil
Books (Images): Alcdragoncloc and Vokulloc
MESHES (ALL ASSOCIATED FILES)
Bones: Humanskullstatic
Book: Book02mg03lowpoly
Common: All Scrolls: 01,04,05,and 06
Quest: Sigilstone
Soulgem: Soulgemblack
Sigilstonestatic
Magic: To remove meshes for magic I strongly suggest looking at the associated file before installing. There are quite a few, but they should not have an effect on your game if you choose not to delete them. The only reason they are not posted in this section is because of limited space. If you are interested in a list of the meshes send me a message in the comment section and I will provide a list.
SCRIPTS (ALL ASSOCIATED FILES)
DFWolfmeat: All Scripts
Gotoscript and Gotolocation
ReturnScript and Returnlocationcript
TIF__02020FEA
As with any mod I always recommend having a clean save as a backup in case of issues that may occur before and after installation.

When casting a specific spell within this mod you may encounter a glitch where the attached sound will continuously play even when the spell is no longer active. To resolve this issue simply change the spell in your hands to a different type and the problem should subside.
Due to the amount of effects on the follower sometimes dialogue options will not be able to be selected after the follower engages in longwinded combat, this problem can be fixed by creating a save and reloading or merely entering a new cell (cave, house, tavern, etc).
One of the spells has a visual effect that is very glitchy. Sometimes the visual effect will occur and other times it will not. To address this issue you may need to cast the spell a couple of times for the animation to take effect.
IMPORTANT: The follower uses a script, which removes their base location. So when dismissing the follower they will not return to where you first encountered them. You should dismiss the follower in an area you will remember (house, guild hall, tavern, etc) as they will not move from the location you dismiss them until you instruct them to follow once again.
Due to the amount of visual effects included within this mod it is possible that you will experience slow frame rate or a crash to desktop depending on the processing speed of your computer. That being said if you are running a low-end computer then use your best judgment when attempting to download this mod.
If you encounter any additional issues please send me a message in the comment section and once confirmed I will update this section accordingly.

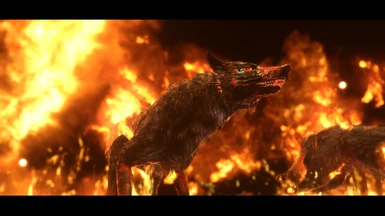
This mod and its contents are not compatible with mods that dramatically change the meshes for the Black Wolf, Frostbite Spider, Default Dragon, Blood Dragon, and the Skeleton enemy model.
If you encounter any additional incompatibilities please send me a message in the comment section and once confirmed I will update this section accordingly.

Without careful preparation many will find the boss encounters in this mod not only challenging, but downright impossible. Fortunately I have included a guide, which provides a brief rundown of the bosses and all the tips and tricks you will need to know to be triumphant in battle.

No matter how you choose to start your venture. You will need to clash with Dolan if you hope on attaining any information regarding the current situation you now find yourself in. First of the Ascended his specializations in the elements of lightning and electricity grant him the ability to outmaneuver and out speed his opponents in battle. Luckily for you his low health and easily avoidable attacks do not make for much of a threat let alone a challenge as he can be put down fairly easy provided you know what to watch for. He has four abilities on which he uses throughout battle:
Roaring Spark: A ball of electricity that causes mass amounts of damage once it explodes. Although lethal, the speed of the projectile is extremely slow. You should be able to easily maneuver through its firing enough to close the gaps between you and Dolan.
Static Burst: This spell has a real kick to it and more than likely it will completely catch you off guard. There is no true way of avoiding damage from this, serving as a commendable obstacle as it makes Dolan almost completely untouchable in close combat, your best chance of overcoming this spell are shouts like Become Ethereal and attacks which damage from a far.
Lightning Veil: A veil of electricity, which shields the user from harm. Almost instantaneously Dolan will activate this spell once you engage him in combat. The shielding is magically strong but not physically sturdy as a few good blows will cut through his life providing you can get close enough to land a hit.
Spatial Healing: Using the fabrics of space to heal his wounds Dolan will continuously cast this spell once his health reaches low. Unless you like the idea of extending this fight you will need to hinder him from casting this spell as much as possible. Any form of Unrelenting Force works wonders, as it will give you enough time to tie up any loose ends and quickly go in for the kill.


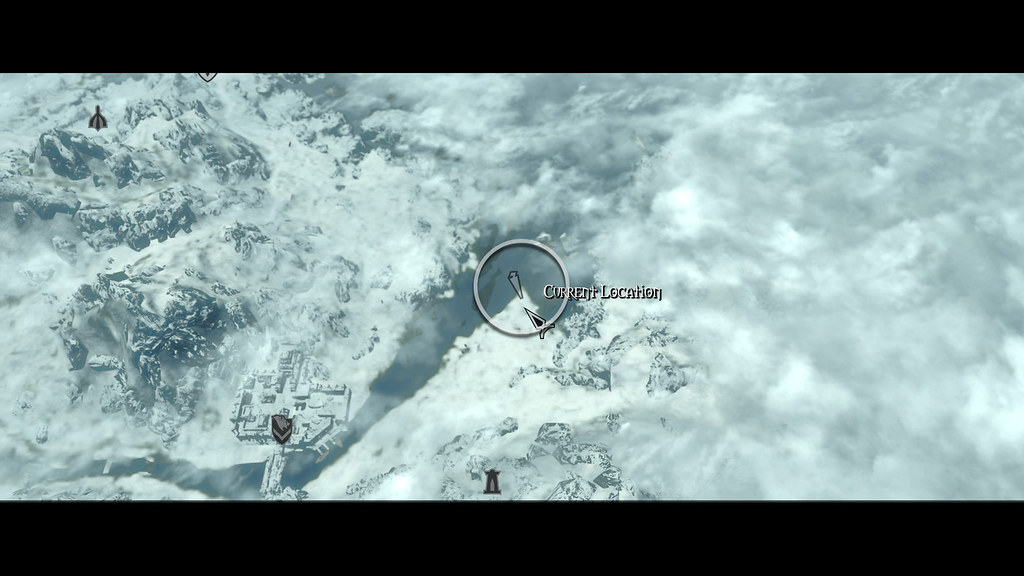
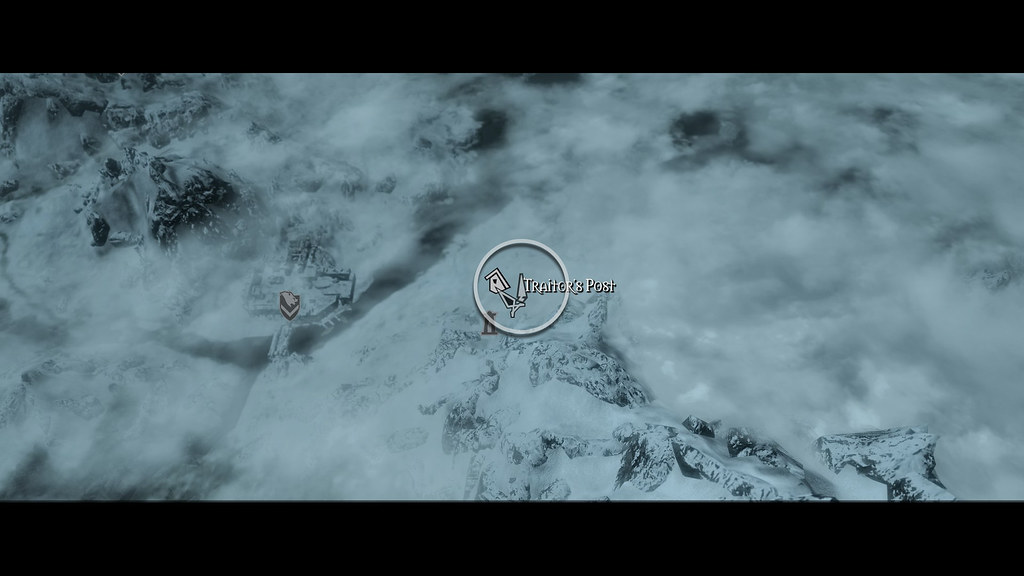
Callous as she is cruel Ferna is a dark elf with the power of frost and ice at her disposal. She is the second of the Ascended and right-hand of the Great Mage himself. Once the modest wife of a farmhand she endured a terrible fate at the hands of Argonian mercenaries, leaving her blinded in both eyes and her husband and son drawing their final breaths as they slowly died in her arms. Awaiting her foreseeable demise she was saved from the edge of death by the Great Mage who trained her in the paths of destruction. She wields her spells in a chilling rage turning all who cross her into shatters of ice. She can be found near Traitor's Post (east of Hollyfrost Farm). Her attacks are incredibly fast and difficult to dodge. If not careful she will finish you off before the battle even has time to begin. Her attacks consist of:
Frost Armor: A protective shell of ice, which shields Ferna from the harshest of blows. It strengths her defense and makes her an almost impenetrable force on the battlefield. If you got the muscle you can crack through her shields with the slightest of efforts. Shouts like Marked For Death are a good way of breaking through this otherwise impassable barrier.
Weighted Rime: A debilitating blast of ice that will quickly bring your stamina to a crawl. This projectile moves with such swiftness and speed that it is merely impossible to evade. Bring plenty of potions that restore stamina, as you will need quite a few to maintain your pace throughout battle.
Frost Bind: A whirling ball of frost that envelops its victims in an icy shroud. When dealing with this spell it is best you pack potions and equip armor that reduces damage done by frost. With careful planning and the appropriate gear you can easily learn to avoid its fury.

With an endless pool of magicka and godlike spells at his beck and call the battle with the Great Mage is far from easy. Like his comrades he is immune to almost all magic and teleports in and out of battle when taking damage. His attacks are not only deadly but some are completely unavoidable and will strike you down in a matter of seconds. His spells are as followed:
Timeless Angel: Despite its name this attack is far from heavenly. Its mass size and sluggish pace serve to limit your movements and set you up for far more devastating blows. You will need speed on your side if you hope on avoiding this spell as it can quickly overtake you in terms of numbers.
Timeless God: A destructive beam of light that damages anything in its path, its hit ratio is extremely poor so expect a constant stream of hit and miss. Despite this fact the spell is still a pain to deal with. You may need to slow time itself if you hope on not meeting an abrupt end from its assault.
Unbound Realm: Completely unavoidable the Unbound Realm drains magic, stamina, and depending on how close you are to Samel when this ability goes off, life itself. It will deplete all three bars in a matter of seconds and leave you open for a quick finishing blow. The trick to minimizing the damage is to put distance between you and him, as this will cut back on your pools being ravaged by this effect. Bring plenty of potions to restore all three attributes, as you will definitely be using them throughout this battle.
Time Split: Time Split grants Samel the ability to create a temporary clone to distract you in battle while he pulls himself out of the fight to mend his wounds. Stay on your toes to avoid the combined spells of the two and continue your entourage of attacks once the clone has subsided.
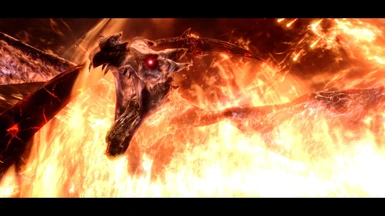
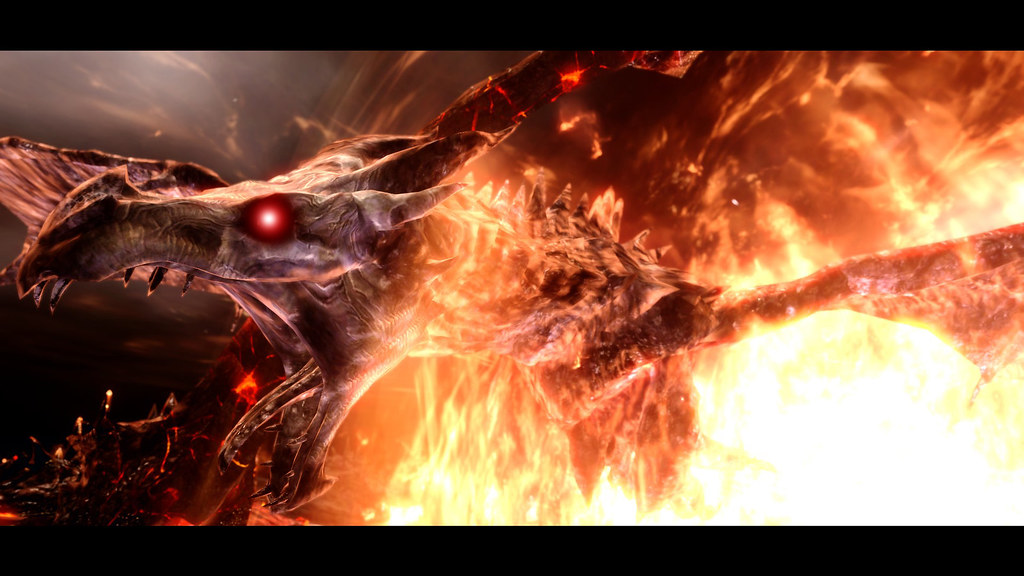
Gorel: With its ruinous fireballs and streams of fire Gorel is a form of wraith unlike any you have encountered throughout Skyrim. Landing almost any physical hits on this creature will be tough as it can levitate to a height on which the player cannot reach. To add salt to the wound it has a terrifying ability known as Blood Clone. When a creature with this ability bites its victim they create a clone of themselves from the blood of their foes. Combined with an inherent Twin Souls perk this combination can get deadly quite fast. As an unavoidable effect run for cover and wait for the summoning of Gorel to expire when things start getting chaotic. Remember fire resistance items are a godsend against this formidable foe.

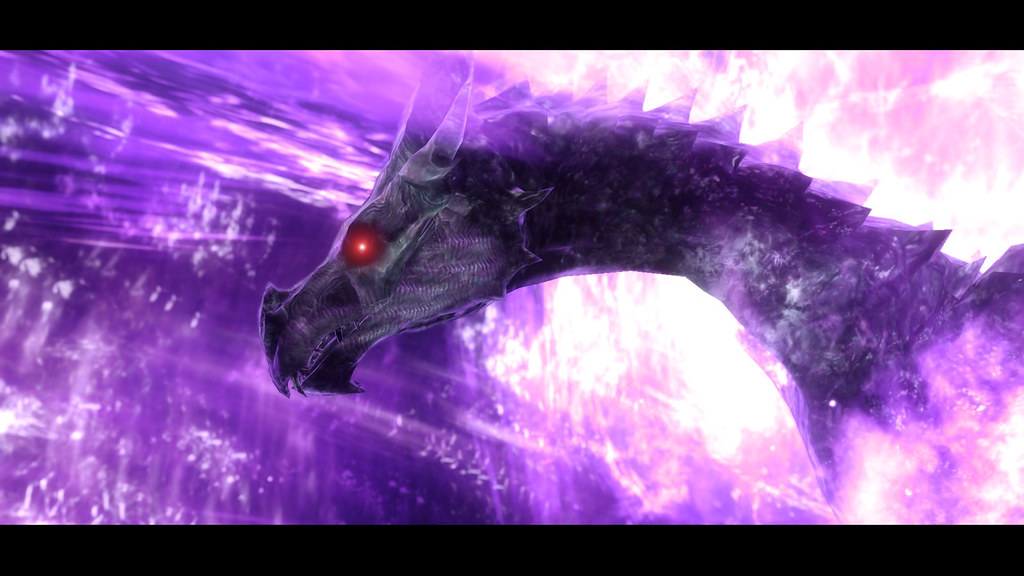
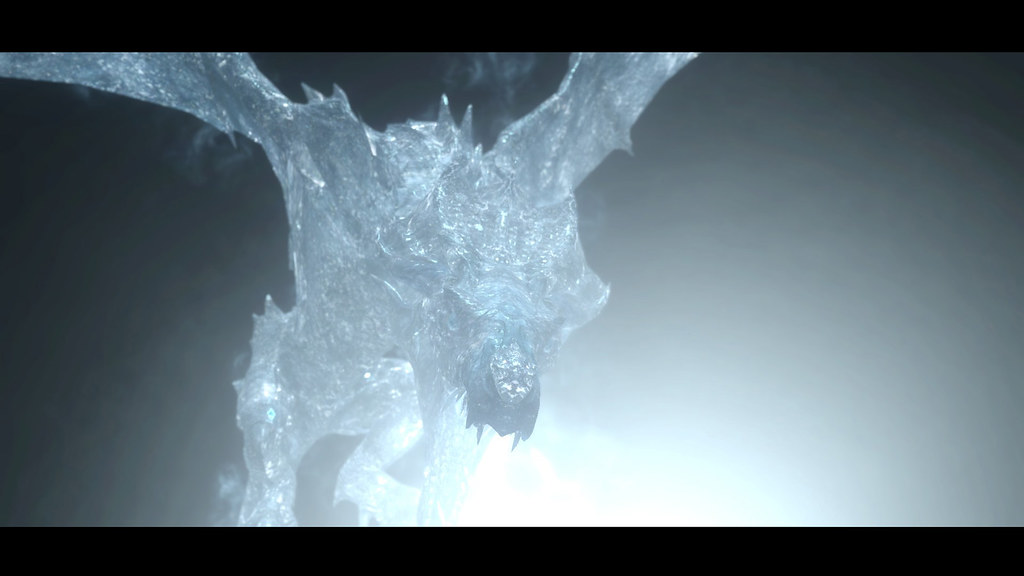
Unknown of its origin this is a being, which is not to be trifled with. Its potent ice and deadly frost can bring even the mightiest of warriors to their knees. Its attacks are as followed:
Frost Shroud: As a form of defense the dragon will shield itself in a field of frost. This frigid veil will cause damage to any who attempt to get close. Potions, that resist frost work well on reducing damage sustained from its wrath.
Shard Shot: A flurry of ice, which strikes with such impact that the victim is virtually rendered helpless with each shot, you will need to be fast on recovery and healing after suffering a blow from this barrage.
Frigid Force: A force of ice so strong it will knock you to your feet if you happen to get caught in its blast, prevent the usage of this ability by employing ranged spells and attacks as confronting the dragon head-on will result in this potent power being used.
Frost Wave: An advanced form of frost bind. It will toss you through the air with the slightest of ease. Keep an eye on your health as this attack can easily wreak havoc on it. Healing spells and a high enough armor rating of 300 or more will help soften its heavy blows.
Frigid Fang: With its frigid fangs the Alchemic Dragon unleashes a brutal blast of ice. Keeping a good distance between you and the dragon helps reduce damage from this vicious bite.

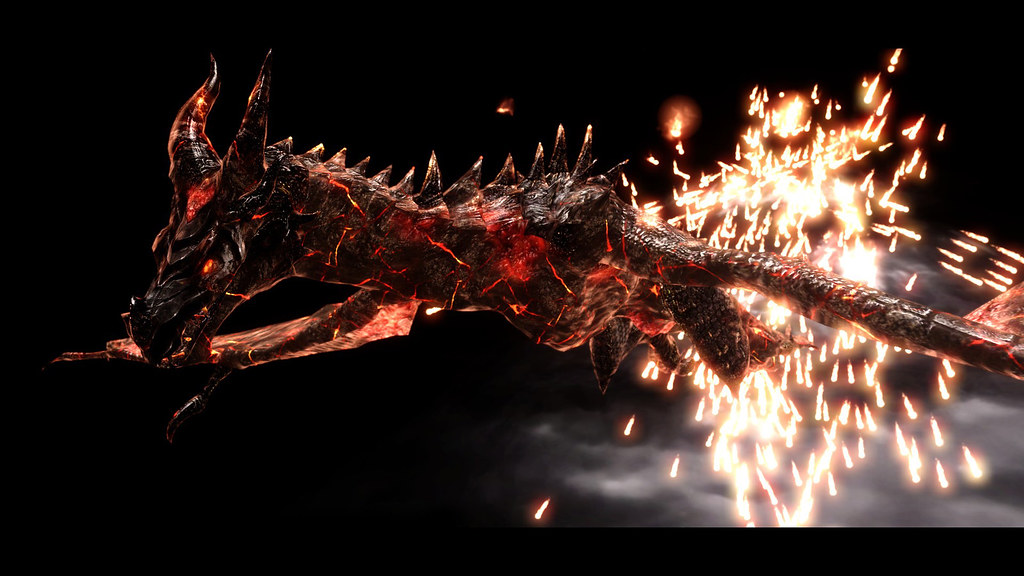
May his soul devour those who fall in the midst of battle. Perhaps the toughest encounter you will come across in this mod Aaldu is a primordial dragon that guards the inner sanctums of the Sphere of Darlera. Appointed sentry of this realm he reeks of death and the countless souls whom dare test his will. With towering health and attacks, which specifically target the souls of his victims, this enigmatic being is terror in its purest form. Aaldu has a total of six attacks:
Harvester: A destructive burst of energy that not only hurls you to the ground, but drains your health while leaving your spirit open to further damage. If its speed does not frighten you its frequency will as Aaldu favors this attack amongst all else. Avoid using frontal assaults, as there is a 50/50 chance this attack will be the next thing coming your way.
Reaper Volley: True to its name Reaper Volley is an attack that should be avoided at all cost. You will be spending a good majority of the battle merely dodging this attack and with good reason. It brings immediate death if more than one orb makes contact with the player. The best way to evade this barrage is to use the surrounding environment for coverage. Whirlwind Sprint, Become Ethereal, and Slow time based shouts and spells work well when trying to put distance between you and the dragon. Use shout reducing items like the Amulet of Talos or the Dragon Aspect shout (Dragonborn exclusive) to help in reducing the cool downtime on these abilities.
Soul Disruption: Get close enough to the dragon and you will experience this attack first hand. Soul Disruption goes off like a bomb, instantly causing area of effect damage to whatever happens to get caught in its fire. In addition to inflicting damage it will drain a good portion of your health depending on how close you are to the blast. Your best option and chance of avoidance is to minimize on frontal assaults, as this attack is absolutely devastating up close. Attacking the dragon from a far or centering your attacks to his wings are good ways to avoid being caught in the blast.
Soul Disperse: With the slam of his tail Aaldu can release the collected energy from the souls it devours as a form of attack. There is no avoiding this ability, as the range is set too far to evade. Bring an ample supply of health potions if you wish to recover from the blow.
Devour: Ever hungry for souls Aaldu will attempt to pull the spirit straight from your body. Left uninterrupted this ability will put a damper on your health while slowly dragging you closer to death. Become Ethereal or a powerful enough blast to disrupt the dragon is your best bet in terms of survival.
Summon Soul: With the flap of his wings Aaldu can summon the soul of his once former self to aid him in the heat of battle. Don’t be deceived. The soul of this dragon is not as difficult to deal with as your main concern. Enchantments and potions, which reduce frost and magic, will allow you to make quick work of this apparition so you can return focus to your main foe.

Fighting your way to the Great Mage is no walk in the park and more than likely you are going to get stumped with the many twist and turns along the way. Fear not fellow adventurers. I have included a complete walkthrough of the entire mod. From dodging dragons to sharpening your sword all can be found within the guide below.

The journey begins in Labyrinthian. There you will find a mysterious figure by the name of Dolan wandering the grounds near the main entrance. He is the first of three mages you need to tackle if you hope on progressing the story.
Once defeated make sure to search his body for clues to the next location (the Abandoned Prison, near Fort Amol) as well as a mysterious tome known as a Xamnant. Xamnants are ancient tomes, which hold powerful magic within their pages. After collecting the Xamnant and taking if for a test drive, head over to the Abandoned Prison (near Fort Amol) to find a man lying dead with a strange creature lingering nearby. If you search the old man’s body you will find a note that simply states "the wolf".
As vague as those words may be, they hold some meaning. Ask to trade with the wolf, and you will find a strange book he is bearing in his inventory. Flip through the pages and you will find two locations, which are pictured with the images of dragons.

These are clues on where you need to go. You can either choose to travel to the first location near Windhelm to investigate the first dragon or if you are feeling strong enough you can head to the second dragon, which will provide the ultimate challenge.

Once you arrive at the location you will need to search the area a bit to find a man and his daughter lying dead on the shore. If you happen to search the man's body you will discover that he was attempting to resurrect the soul of his daughter within the flesh of a dragon, and though he achieved this feat he could not live with the overwhelming pain, ultimately bringing his life to an end.
Even in death the soul of his daughter cries out in pain. The Alchemic Dragon flies over the lands, its horrid cries a requiem of its soul. It's up to you to put an end to the beast and quell the angered spirit, which inhabits its body. Come prepared, as this fight is in no way a walk in the park.
After defeating the dragon make sure to search its body. Due to it not being a true dragon there is no soul to absorb. However make sure when you search the body to grab the Soul of Hollia. This will allow you to summon the Alchemic Dragon as long as you got the magic for it. To find the Soul of Hollia in your inventory navigate to the tome section, activate the spell, and there you go. You can now call upon the mighty Alchemic Dragon to bring a chilling end to your foes.
With a powerful new ally in your hands you have either two options. You can choose to confront Ferna near the Traitor’s Post (which is not too far from your location), or you can investigate the location of the second dragon, located near Kynesgrove.

If you choose to fight Ferna come prepared as her powerful ice spells will completely catch you off guard. Once defeated you will find a note detailing some failed plans on her corpse as well as another Xamnant to add to your collection.

Two down one to go. Make your way to Kynesgrove and prepare for a fight as this will be a true test of will. Once you arrive at the designated area you will find two dead Psijjic mages who have lost their lives at the hands of Samel. Upon searching their bodies you will find two more Xamnants, a book detailing the dragon, Vokulvokun and a note, which sheds some light on the corrupted mage’s plans.

With that, walk up to the glowing sphere and enter the realm of Darlera. Once inside you will catch the eye of Samel who is attempting to venture deeper into the sanctums of this realm in hopes of further completing his plans. This is the ultimate battle as not only will you need to stay focused throughout the fight, but you will need to truly be on your guard as your health cannot withstand many of his deadly blows. When he is good and dead make sure to search his body as even more Xamnants along with a strange skull to summon the creature Gorel can be recovered here.
Remember all items can be found in the tome area in your inventory.
Now all that's left is to venture further into the sphere. So look for the sphere named the "Inner Sanctum" and choose to enter. You will find yourself on a desolate island with an eerie feel to it. Don't admire the scenery for too long as a terrible dragon guards this area and he won't let you anywhere near the Sphere of Imprisonment without getting through him first.
You can either fight the dragon or you can let Vokulvokun do it for you. Rush pass the dragon and quickly grab the orb that is located near one of the pillars. Navigate to your tome inventory section, select the Sphere of Imprisonment, and release the powerful Vokulvokun for quite the show.
Though freed Vokulvokun is not enough to put this dragon down as you will still have quite a fight on your hands. Though once vanquished make sure to search the creature’s body for the last two Xamnants of this mod, the Xamnant of Light and the Xamnant of Darkness.
With rewards in hand its time to head home, now you are a true force to be feared as not only can you bring forth the Alchemic Dragon, but the mighty Vokulvokun is now added to your arsenal. Be careful though, these dragons pack quite a punch. Now go ahead and enjoy that long nap you earned it.
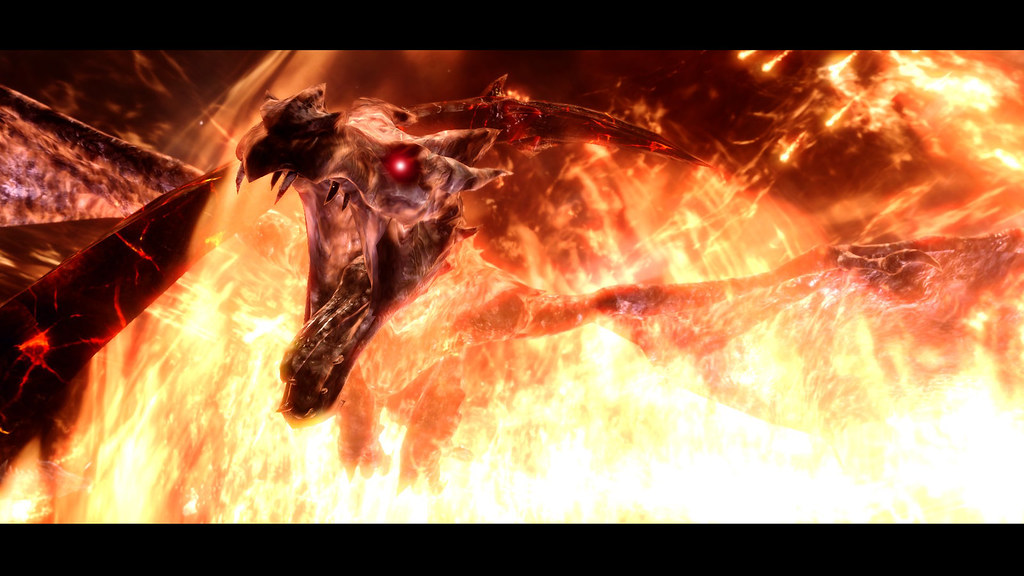
The dragon, Aaldu will respawn every couple of days within the inner sanctum of Darlera. So if you are ever up for some dragon slaying you now know where to look.

Question: What level is recommended for this mod?
Answer: Due to its difficulty it is recommended that you are at least level 30 before beginning.
Question: Where is the Abandoned Prison?
Answer: The Abandoned Prison is a pre-existing location found in Skyrim. It is a watchtower just north of Fort Amol near a house that collapsed along a river.
Question: I read the message from the old man about "the wolf". Where do I go from here?
Answer: Speak to the wolf and ask to trade items. He will have a book sitting in his inventory which will contain additional information to complete the quest.
Question: Why did I just kill one of the dragons and it did not drop a soul?
Answer: This is purposely implemented as these dragons belong to a faction, on which dragons do not drop souls on death. This will not affect dragons that are not part of this mod.
Question: Does this mod affect the leveled list?
Answer: Each enemy is hand placed within the world. So no issues should arise regarding this mod having an effect on leveled list.
Question: Will you be adding these enemies to a leveled list?
Answer: As of right now I do not plan on releasing or allowing these enemies to be implemented into a leveled list. I would like for them to stay unique. Perhaps I will release some other designs for this very reason but as of right now, I have no plans of doing this anytime soon.
Question: Will you decrease the difficulty of this mod?
Answer: I will take this is into consideration as some of the boss battles are quite unfair. If enough people voice a concern I will perhaps release a less difficult version.
Question: Why is the quest so short?
Answer: The mod is meant to be a short adventure similar to a small quest you may find in Skyrim not the entirety of a dlc. I may possibly expand on this in the future.
Question: Why did you not include quest markers?
Answer: This mod was created as an attempt to create a quest on which the user would not require quest markers to meet their goal. I felt quest markers made the mod too easy and took you out of the immersion. I also felt that books and notes needed to be incorporated in a bigger role rather than one time skill bonuses. Perhaps in future updates this will be included depending on how much I expand on the mod itself, but personally I am not a fan of heavy scripting.
Question: Why do I keep crashing to the desktop when attempting to start this mod?
Answer: If this is a continuous problem please send me a list of the mods you currently have installed and I will try to diagnose what is possibly conflicting.
Question: What does the future hold for this mod?
Answer: I plan on fixing any issues that may arise through updates, and perhaps implementing a few more dragons and enemies into the fray. Currently I am working with a couple of well-known modders for a massive quest which will contain an array of enemies and puzzles.
Question: Is this mod compatible with mods such as Deadly Dragons, Enhanced Mighty Dragons, and Dragon Combat Overhaul?
Answer: Yes, however load this mod last to avoid possible issues. When loaded with Dragon Combat Overhaul the mod will overwrite some of the tail attacks for dragons included within this mod.

V1.0: Inferno: Advents of Flame Released
05-24-2013: Harvest Rage Fire Added

Harvest Rage Fire: The player can collect the fireballs the dragon Vokulvokun drops from his attacks, store them in their misc inventory, and drop them to create massive explosions in the surrounding area. Best to use around enemies. Simply select "Take Rage Fire" when the attack is being launched. Use with caution on low-end computers, dropping too many at one time can potentially freeze your game. However, a simple restart will fix the issue.
05-25-2013: Added to Steam Workshop
Inferno: Advents of Flame is now available on the Steam Workshop.
Inferno: Advents of Flame
05-27-2013: Complete Walkthrough for Inferno: Advents of Flame is now available on the Skyrim Nexus
Unlock the secrets of the Inferno with the complete walkthrough guide. Now available on the Skyrim Nexus.
05-28-2013: "Draw a Dragon" feature added (nexus exclusive)
Show your creative side with "Draw a Dragon"
06-25-2013: Envoys of End Announced


Good News! Inferno: Envoys of End is here for you to download! Click the link below to be taken to its page!
Inferno Envoys of End
Inferno Envoys of End

This mod and its contents may not be posted and distributed without my permission. If you wish to use contents from this mod please send me a message in the comments for consideration. I will try and get back to all replies as soon as possible.

Many thanks to DARKF0X127 whose videos aided me throughout the creation of this mod. If you are ever on YouTube check out some of his videos. I would also like to thank JOSH37 for the use of his ENB, and Zairaam and Natterform for the tribunal robes I used for the screenshots (not included in this mod).
DARKF0X127: DARKFOX127
Vibrant Fantasy ENB (JOSH37): Vibrant Fantasy ENB
Tribunal Robes and Masks (Zairaam and Natterform): Tribunal Robes and Masks
Inferno Envoys of End
Check back on this page for future updates regarding this mod and thanks for downloading. Don't forget to leave an endorsement (and) or comment. It's a small gesture which means a lot.