


0 of 0


About this mod
My implementation of Organic Factions in Skyrim.
- Requirements
- Permissions and credits
- Changelogs
Summary
This is my personal set of Organic Factions which I have built in Skyrim. For information on "what an Organic Faction IS", see the [main Framework page]. This mod contains several unique enemies and weapons / armor / items.
Be sure to install the newest version of the [Organic Factions] framework, v1.4+.
You must start a new game for this update.
External Imgur gallery [here]. See Change Log for minor details.
Quick video summaries:

Darklight Tower Cabal
Mid-Forest Werewolves and Silver Hand
Mistwatch Crime Syndicate
Labyrinthian
Independent Adventuring Factions: High Plains Reavers
Sneak Peeks (WIP)
ElderGleam Druid Faction
Glenmoril Werewolf Faction
Bthardamz
Arcwind Point
Deepwood Redoubt Catacombs
The First Dragonborn Faction
The Lost Valley with Multiple Leaders
Preparation for the Death Knight Organic Faction
Civil War
Deepwood Vale
SKSE
None of the components of my mods rely on SKSE.
Requirements
Compatibility
This mod ONLY applies AI and Actor changes to the specific Actors in and around a few key locations -- it does NOT alter AI elsewhere in the game. If anything, other AI overhauls have a chance of impacting the AI used in this mod.
This specific mod edits the contents and navmeshes of several Cells. These edits must take precedence over others in these locations:
Permissions
See full permissions in all underlying mods (EAI Framework and Organic Factions).
Users may use these materials if and only if they:
1. Give full credit for these underlying components in their main mod description, and provide a link to the Organic Factions mod page on the Nexus (and eventually Steam, if applicable).
2. Share the source code for any new features they design that reference any piece of this material.
If subsequent modders use or reference any code provided by prior contributors, they must also credit and link the prior contributors as cited above, and similarly share their source code.
Long Term Goals
Extras
YouTube Channel on AI:
[https://www.youtube.com/playlist?list=PL-U2vBF9GrHGORYfnj6DOAFN1FgEzy9UA]
This is my personal set of Organic Factions which I have built in Skyrim. For information on "what an Organic Faction IS", see the [main Framework page]. This mod contains several unique enemies and weapons / armor / items.
Be sure to install the newest version of the [Organic Factions] framework, v1.4+.
You must start a new game for this update.
External Imgur gallery [here]. See Change Log for minor details.
Quick video summaries:
Darklight Tower Cabal
Spoiler:
Show
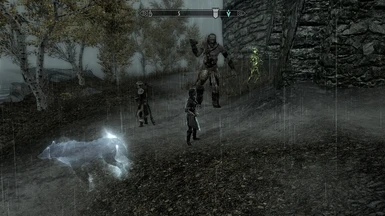
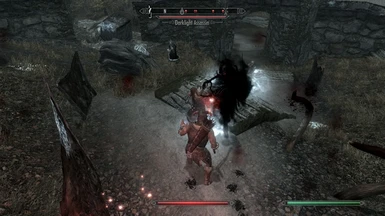
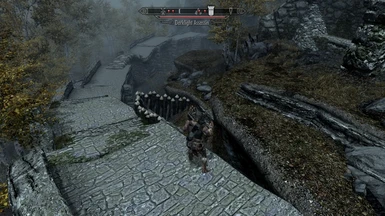
Sinister forces are gathering in the Rift. The heavy autumn air writhes with profane chants; cries are heard in the dead of night, followed by a hollow, hungry silence.
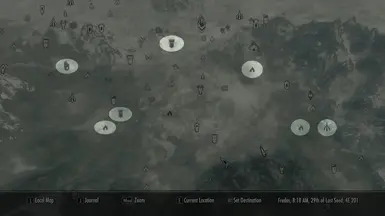
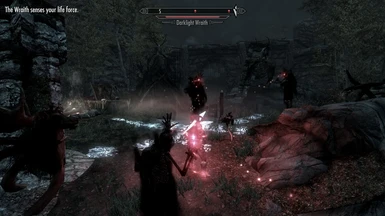
Silvia's cabal based in Darklight Tower will slowly gain power. They will send out a patrol to bully local bandits, scare off rivals, and find new victims for sacrifice. There is a chance to encounter the patrol at any of the following locations:
The patrol will grow as the player gains levels, gradually adding on new members.
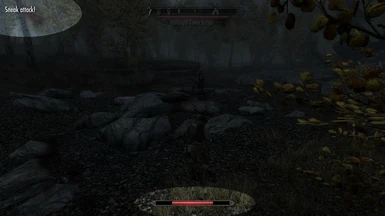
Note that the archer may use invisibility potions to get Sneak Attack damage -- Sneak Attack only works if the attacker was just recently invisible, and player is not blocking when hit. Keep your guard up!
Sentient members of the patrol will do their best to stay alive -- when low on health, they will use crafty means to escape, leaving the undead and spider behind.
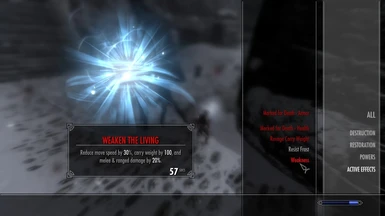
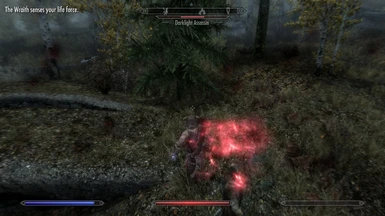
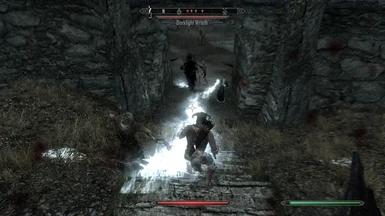
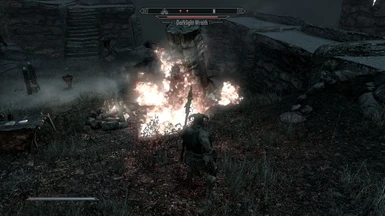
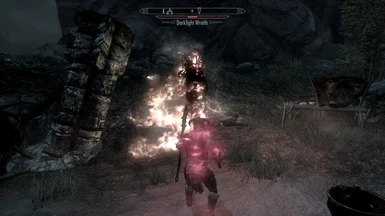
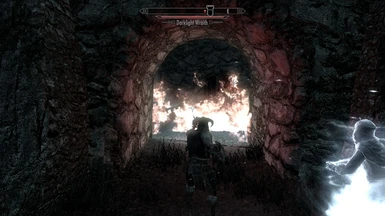
Wraiths are a new type of enemy that devour the life force of their victims. They are very resistant to most kinds of damage, but quite vulnerable to others -- it's up to the player to experiment and look for clues for what might be the most effective. They also have the ability to detect living creatures -- though undead, such as vampires, can evade their senses.
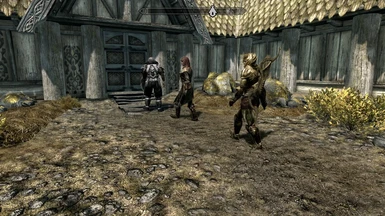
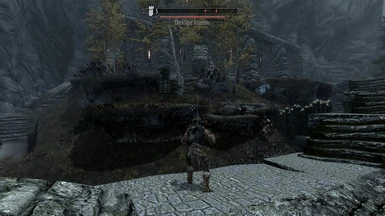
The Darklight Tower base area will also go through a series of improvements as the faction gains power:
Similar to the patrol members, NPCs at the gate will do their best to stay alive -- they will be aggressive or fall back depending on their health.
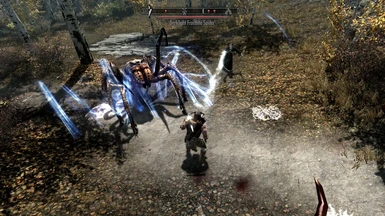
Zphenx is a potent archer and alchemist. She will use potions to buff her archery damage, as well as heal herself. Underestimating this wiry Khajiit has been the last mistake many bandits have made.
Both Zphenx and the giant Frostbite Spider are resource providers for the faction -- the former with a broad selection of potions, and the latter with Frostbite Venom. Neutralizing / killing the former and killing the latter will remove a considerable amount of potency from the faction. Note that the faction will eventually replace the spider, but Zphenx is a unique NPC and will stay dead.
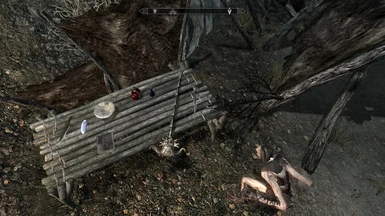
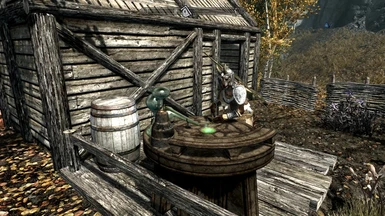
Not only does Zphenx provide potions directly to other faction members, she also keeps a decent stock of them near her alchemy equipment just inside the tower door. Players may be tempted to leave the faction alive to raid this valuable cache.
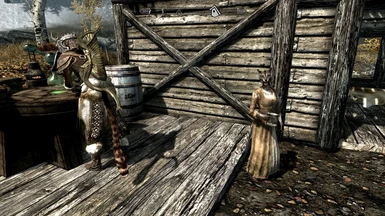
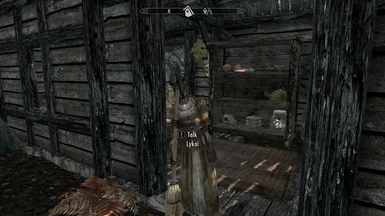
Zphenx serves the Darklight Faction out of obligation, not loyalty. You can occasionally find her at the Alchemist's Shack, vigilantly watching over her younger sister, Lykoi. The latter is a small-scale vendor for locally grown ingredients. When not under the expectant eye of Darklight Tower faction members, Zphenx will be neutral to others, and will not attack unless provoked.
Evidence of Zphenx's wavering allegiance can be found by inquisitive players. If the player brings her down to her "bleedout" stage but does not kill her, then Zphenx will flee to the Alchemist's Shack, never to return to Darklight Tower. Her former comrades will consider her a traitor and will try to kill her on sight.
Alternatively, if the player manages to kill Silvia, then Zphenx will disavow herself from the faction and leave. Once Silvia is dead, all members of the Organic Faction can never respawn.
If Zphenx survives her escape, she will join her sister Lykoi in the Alchemist's Shack. She will then also become a merchant and provide a bountiful selection of potions.
Lastly, the upper portion of Darklight Tower will also undergo changes as the faction gains power. The most obvious are two unique artifacts which can only be created if Silvia and her faction are allowed to reach the apex of their strength.
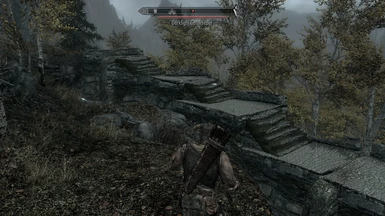
Note that the final fight area upgrades are completely separate from the front gate upgrades. As bizarre rituals atop the tower are completed, the player may sense something ominous when they approach.
Both weapons can be found on the table where Silvia prepares her instruments for the sacrifice.
Note that reaching the top of the tower may not be as easy as the player might think. Staying vigilant will pay dividends.
Silvia's cabal based in Darklight Tower will slowly gain power. They will send out a patrol to bully local bandits, scare off rivals, and find new victims for sacrifice. There is a chance to encounter the patrol at any of the following locations:
- The Shadow Stone
- The bridge and riverbed between Darklight Tower and Largashbur
- Avanchnzel
- The southern end of the bridge to the east of Treva's Watch
- The southern end of the bridge to the northwest of Treva's Watch
- The Ruins of Bthalft
- Autumnwatch Tower
The patrol will grow as the player gains levels, gradually adding on new members.
- Khajiit Archer
- Giant Frostbite Spider
- Skeleton
- Necromancer
- Wraith
Note that the archer may use invisibility potions to get Sneak Attack damage -- Sneak Attack only works if the attacker was just recently invisible, and player is not blocking when hit. Keep your guard up!
Sentient members of the patrol will do their best to stay alive -- when low on health, they will use crafty means to escape, leaving the undead and spider behind.
Wraiths are a new type of enemy that devour the life force of their victims. They are very resistant to most kinds of damage, but quite vulnerable to others -- it's up to the player to experiment and look for clues for what might be the most effective. They also have the ability to detect living creatures -- though undead, such as vampires, can evade their senses.
The Darklight Tower base area will also go through a series of improvements as the faction gains power:
- Phase 1 will feature one or more of: a skeleton archer, a Wraith, or a unique Actor, Zphenx -- more on her below.
- Phase 2 will feature an assassin, and significant improvements to the outer walls. The assassin will use both potions and poisons as available. If the assassin turns invisible, their next strikes will do Sneak Attack damage unless the player is blocking. Keep your guard up!
- Phase 3 will feature a necromancer, and will harden many points of ingress with spikes and other surprises. The necromancer will also use potions to their advantage, as available.
Similar to the patrol members, NPCs at the gate will do their best to stay alive -- they will be aggressive or fall back depending on their health.
Zphenx is a potent archer and alchemist. She will use potions to buff her archery damage, as well as heal herself. Underestimating this wiry Khajiit has been the last mistake many bandits have made.
Both Zphenx and the giant Frostbite Spider are resource providers for the faction -- the former with a broad selection of potions, and the latter with Frostbite Venom. Neutralizing / killing the former and killing the latter will remove a considerable amount of potency from the faction. Note that the faction will eventually replace the spider, but Zphenx is a unique NPC and will stay dead.
Not only does Zphenx provide potions directly to other faction members, she also keeps a decent stock of them near her alchemy equipment just inside the tower door. Players may be tempted to leave the faction alive to raid this valuable cache.
Zphenx serves the Darklight Faction out of obligation, not loyalty. You can occasionally find her at the Alchemist's Shack, vigilantly watching over her younger sister, Lykoi. The latter is a small-scale vendor for locally grown ingredients. When not under the expectant eye of Darklight Tower faction members, Zphenx will be neutral to others, and will not attack unless provoked.
Evidence of Zphenx's wavering allegiance can be found by inquisitive players. If the player brings her down to her "bleedout" stage but does not kill her, then Zphenx will flee to the Alchemist's Shack, never to return to Darklight Tower. Her former comrades will consider her a traitor and will try to kill her on sight.
Alternatively, if the player manages to kill Silvia, then Zphenx will disavow herself from the faction and leave. Once Silvia is dead, all members of the Organic Faction can never respawn.
If Zphenx survives her escape, she will join her sister Lykoi in the Alchemist's Shack. She will then also become a merchant and provide a bountiful selection of potions.
Lastly, the upper portion of Darklight Tower will also undergo changes as the faction gains power. The most obvious are two unique artifacts which can only be created if Silvia and her faction are allowed to reach the apex of their strength.
Note that the final fight area upgrades are completely separate from the front gate upgrades. As bizarre rituals atop the tower are completed, the player may sense something ominous when they approach.
- Phase 1: Increased challenge.
- Phase 2: Increased challenge, and a unique profane dagger.
- Phase 3: Increased challenge, and a unique horrific staff.
Both weapons can be found on the table where Silvia prepares her instruments for the sacrifice.
Note that reaching the top of the tower may not be as easy as the player might think. Staying vigilant will pay dividends.
Mid-Forest Werewolves and Silver Hand
Spoiler:
Show
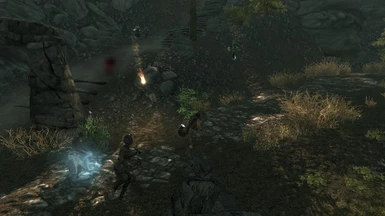
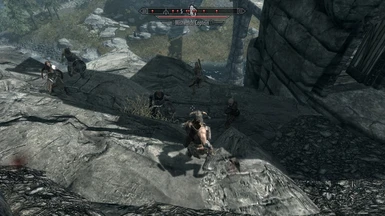
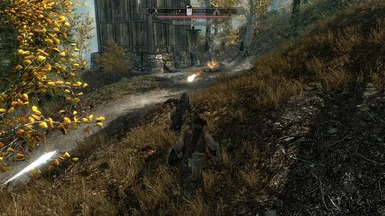
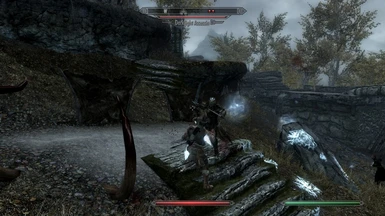
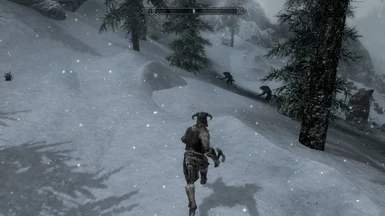
As forewarned by many tales throughout Skyrim, the player may encounter feral werewolves -- this initial pack can be found in the forest anywhere between Whitewatch Tower and the Lord Stone. This includes the edge of the Loreius Farm, Heljarchen Hall, Volunruud, and all around Stonehill Bluff. Normal wolves that prowl the woods are known to attract their more fierce brethren when chasing their prey.
The Silver Hand also patrols the same general area, relentlessly pursuing their quarry. A seasoned captain is joined by a host of hunters to fell the savage beasts.
These are all meant to be mid-level encounters, with most Actors between level 6 - 10; similarly, not all Actors will spawn at once, they'll stagger in as the player advances between level 3 - 12. The feral werewolves are significantly weaker than their Glenmoril Coven counterparts, but should still be taken seriously in a fight.
If the player advances the Companion's Quest "Proving Honor" to or beyond Stage 40 ("Return to Jorrvaskr"), then the feral werewolves may increase in number. In turn, the Silver Hand will allocate more hunters to the same area to run them down.
Note that if the player approaches the feral werewolves in Beast Form, they will not attack; similarly, if the leader is slain and the player is level 9 or higher, then the packmates will follow the player as the new leader. Just don’t' wander too far from them, and be careful where you travel -- they'll expect you to lead them to fresh prey...
Mistwatch Crime Syndicate
Spoiler:
Show
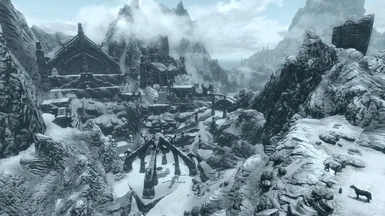
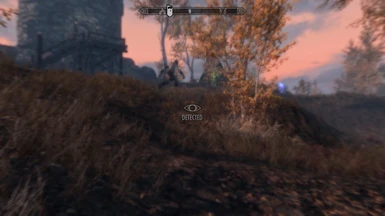
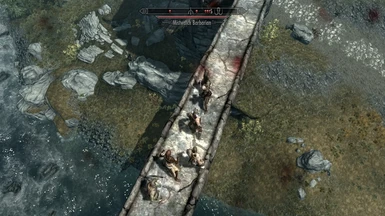
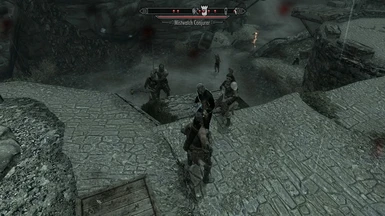
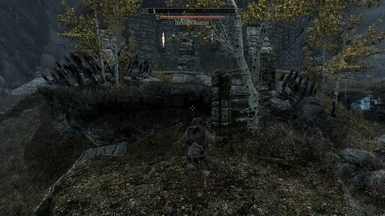
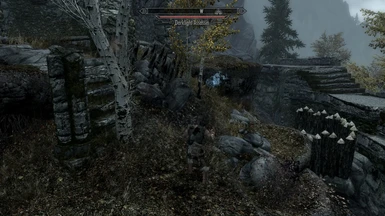
In the wake of the Civil War, the bandits at Mistwatch have made their move to consolidate power. They have recruited a set of seven captains around their stolen fortress in the following locations:
Each Captain will contribute a minion to either guard the gate of Mistwatch, or to patrol their turf. Patrols can show up at any of the Captain locations, as well as any of these spots (13 total):
Killing a Captain means their minions cannot respawn until a new Captain is recruited. However, if the player kills more than 3 Captains, they will earn the special attention of the organization, and may be targeted for assassination -- be careful when walking the streets of Windhelm.
Similar to the player, assassins will use speed and stealth, and can even get a Sneak Attack bonus if they strike when invisible and the target isn't blocking. Watch your back out there!
If you wait long enough between murders, then their ire will slowly subside.
However, the syndicate isn't all bad news -- to help fund their criminal activities, Mistwatch has their own Merchant Fence which will appear in the following locations:
The entire organization is all run by Fjola in Mistwatch. Killing her will dissolve the syndicate, and all members will eventually permanently die off. It's your call if her influence is more of a help or a hindrance.
Note: If you're upgrading from version 1.06, this should be totally fine to update mid-playthrough!
- Cragslane Cavern
- Ansilvund
- Cragwallow Slope
- Morvunskar
- Fort Amol
- Lost Knife Hideout
- Valtheim Towers
Each Captain will contribute a minion to either guard the gate of Mistwatch, or to patrol their turf. Patrols can show up at any of the Captain locations, as well as any of these spots (13 total):
- Northwind Mine
- Shor's Watchtower
- Steamcrag Camp
- Kynesgrove
- Broken Limb Camp
- Hilgrund's Tomb
Killing a Captain means their minions cannot respawn until a new Captain is recruited. However, if the player kills more than 3 Captains, they will earn the special attention of the organization, and may be targeted for assassination -- be careful when walking the streets of Windhelm.
Similar to the player, assassins will use speed and stealth, and can even get a Sneak Attack bonus if they strike when invisible and the target isn't blocking. Watch your back out there!
If you wait long enough between murders, then their ire will slowly subside.
However, the syndicate isn't all bad news -- to help fund their criminal activities, Mistwatch has their own Merchant Fence which will appear in the following locations:
- Windhelm (turn right at the main gate): 75%
- Kynesgrove: 50%
- Shor's Stone: 50%
The entire organization is all run by Fjola in Mistwatch. Killing her will dissolve the syndicate, and all members will eventually permanently die off. It's your call if her influence is more of a help or a hindrance.
Note: If you're upgrading from version 1.06, this should be totally fine to update mid-playthrough!
Labyrinthian
Spoiler:
Show
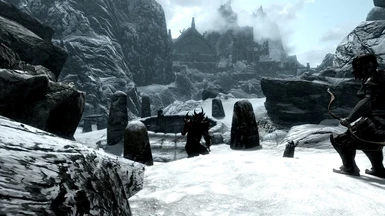
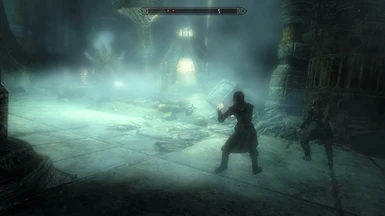
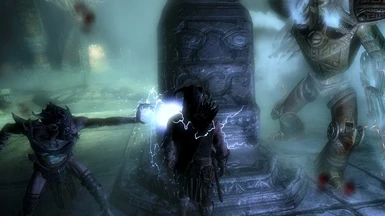
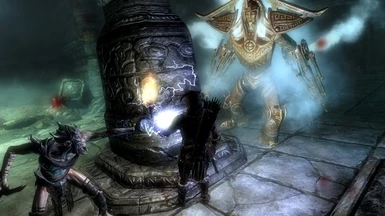
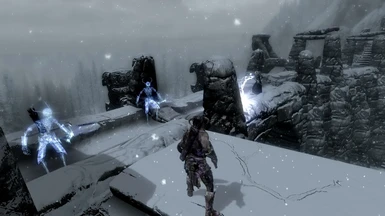
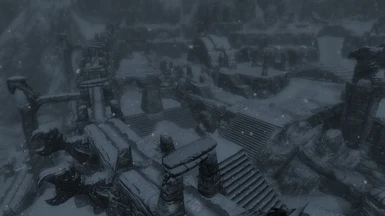
Necromancers now roam the frozen tombs of Labyrinthian, and new horrors have come crawling alongside them. Hulking shadows slip between the icy columns and mingle among the parapets.
A secretive group of Thalmor have taken up residence in Morthal, and have a keen interest in the city. What could they be after?
Whether you play as a hunter of the undead, an ally or enemy of the Thalmor, a rival practitioner of the necromantic arts, or a daring thief after some juicy payoffs, there are plenty of new goodies to find in the beautiful tactical layout of the city, as well as both Lost Valkygg and Shalidor's Maze.
Players on a Vampire or Necromancer playthrough might find some of the new, unique items / creatures here quite appealing -- especially if they can seize control of the new necromantic minions.
Independent Adventuring Factions: High Plains Reavers
Spoiler:
Show
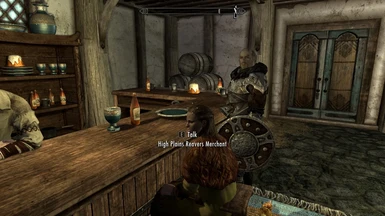
The player isn't the only one exploring out in Skyrim -- in fact, there are many others who make their fortunes, and some that meet unfortunate ends. When the latter happens near Whiterun, a group known as the High Plains Reavers might get hired to find out what happened to a lost adventurer, and at least salvage their equipment.
The player can tag along with this group if you wish -- they're based out of Honningbrew Meadery, just outside of the city. It's a great way for those just starting a playthrough to tag along with seasoned professionals and "learn the ropes".
Note this group is unscaled, meaning they will be of most help to players early on. The group will start out with a single expedition leader (level 25), and will eventually grow to include an archer (level 15) and mage (level 25) as the player gains levels.
Locations are as follows:
Note that two locations yield unique items:
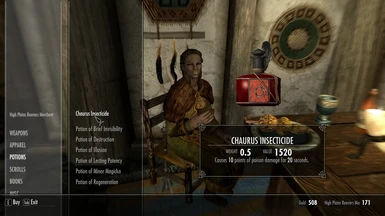
ShimmerMist Cave
This location has items specifically designed to kill Falmer and Chaurus.
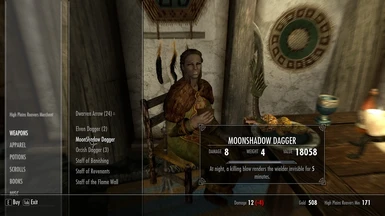
Silent Moons Camp
This location has items specifically to help those that fight under the cloak of night, especially against mages.
All other loot is based on Leveled Lists, meaning they'll provide the player with a steady stream of goodies over time. Once the leader obtains the equipment from the fallen adventurer, they will return it to the merchant in Honningbrew Meadery -- you can watch them have a brief conversation where he'll give her the catalog of items, and then she'll have them available for purchase. Like Belethor, she'll buy and sell anything.
This breathes continual life into areas that might otherwise be visited only once, as well as encourages the player to enjoy / explore the great outdoors as the Reavers make their way to each location. Once more, players that prefer a more "support" role (healing, sniping, turning undead, summoning, etc.) can thrive with someone else on the front lines. In addition, this presents an interesting choice for the player:
To tag along, just Fast Travel to Honningbrew Meadery -- the Reavers will spawn outside on the west end of the building. If the expedition leader heads inside, then there are no jobs for that day -- just leave the Meadery area and wait 24 hours before returning.
If you see 'em heading out, follow and see where the road takes you!
Note: If you approach the Meadery without using Fast Travel, be aware that the leader may embark on a mission while still a considerable distance from the player. Keep a sharp eye out to spot the Reavers in the crowd along the road, they usually travel at a fast pace.
As per above: once an expedition is over, head into the Meadery and let the leader drop off the goods with the merchant.
Note: To prevent item-farming of specific locations, each spot has a minimum 1-day timer before items are allowed to respawn. Waiting a day or two between expeditions will help keep the item rotation fresh.
The player can tag along with this group if you wish -- they're based out of Honningbrew Meadery, just outside of the city. It's a great way for those just starting a playthrough to tag along with seasoned professionals and "learn the ropes".
Note this group is unscaled, meaning they will be of most help to players early on. The group will start out with a single expedition leader (level 25), and will eventually grow to include an archer (level 15) and mage (level 25) as the player gains levels.
Locations are as follows:
- ShimmerMist Cave
- Halted Streams Camp
- Silent Moons Camp
- Swindler's Den
Note that two locations yield unique items:
ShimmerMist Cave
This location has items specifically designed to kill Falmer and Chaurus.
- Chaurus Insecticide: 10 damage for 20 seconds
- Chaurus Frenzy Poison: Frenzy up to level 99
- Falmer Frenzy Poison: Frenzy up to level 99
Silent Moons Camp
This location has items specifically to help those that fight under the cloak of night, especially against mages.
- MoonShadow Dagger: At night, on a killing blow, wielder is invisible for 5 minutes.
- StarFire Sword: At night, targets take 10 damage for 2 seconds to Health and Magicka, stacking based on current Magicka value (>0 / >100 / >200)
- StarFire Greatsword: At night, targets take 10 damage for 2 seconds to Health and Magicka, stacking based on current Magicka value (>0 / >100 / >200)
All other loot is based on Leveled Lists, meaning they'll provide the player with a steady stream of goodies over time. Once the leader obtains the equipment from the fallen adventurer, they will return it to the merchant in Honningbrew Meadery -- you can watch them have a brief conversation where he'll give her the catalog of items, and then she'll have them available for purchase. Like Belethor, she'll buy and sell anything.
This breathes continual life into areas that might otherwise be visited only once, as well as encourages the player to enjoy / explore the great outdoors as the Reavers make their way to each location. Once more, players that prefer a more "support" role (healing, sniping, turning undead, summoning, etc.) can thrive with someone else on the front lines. In addition, this presents an interesting choice for the player:
- If the player tags along, they'll get the loot from all the other dungeon denizens for free -- the Reavers have a job to do, and aren't distracted by small change.
- However, there's always the temptation to sprint ahead at the last minute to loot the body without being caught -- that might mean getting trapped in a boss fight. Worse yet -- if the leader witnesses the player looting the body, he's authorized to use force to reclaim the gear.
- If the expedition leader dies, then it'll take between 5 - 25 days to replace them. Players should carefully consider the cost of letting a leader expire, or killing them for the loot. Or course, leaders can also perish on their own -- it is a hazardous job, after all...
To tag along, just Fast Travel to Honningbrew Meadery -- the Reavers will spawn outside on the west end of the building. If the expedition leader heads inside, then there are no jobs for that day -- just leave the Meadery area and wait 24 hours before returning.
If you see 'em heading out, follow and see where the road takes you!
Note: If you approach the Meadery without using Fast Travel, be aware that the leader may embark on a mission while still a considerable distance from the player. Keep a sharp eye out to spot the Reavers in the crowd along the road, they usually travel at a fast pace.
As per above: once an expedition is over, head into the Meadery and let the leader drop off the goods with the merchant.
Note: To prevent item-farming of specific locations, each spot has a minimum 1-day timer before items are allowed to respawn. Waiting a day or two between expeditions will help keep the item rotation fresh.
Sneak Peeks (WIP)
Spoiler:
Show
While I was out on [hiatus], I still had the urge to create -- just not a lot of energy or ability to do so. Nevertheless, I managed to put together some light little "sketch worlds" in the engine. They're not finished, don't have full navmeshes, etc. -- but folks might have fun running around and checking out the design. If you find them interesting, I'd love to hear how and why!
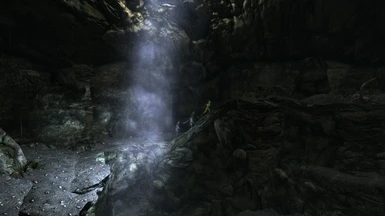
Forgotten Canyon and Chapel
An area I modeled after the Forgotten Vale -- features several outdoor arenas, narrow choke points, and strategically placed gateways ideal for tough combat situations. The Chapel is dark and foreboding, and has some mysterious hints scattered around that paint a picture of what went on centuries prior. There is a single Snow Elf Ghost, along with some hidden treasures (if you can find them!).
If I were to flesh this out, it would be the "home base" for an entire ghostly Snow Elf Organic Faction, with a connection to the Lost Vale and Skyrim -- allowing them to invade both.
Green Valleys
While I really like Skyrim's vast landscape, I found that there were few situations where the player found themselves hemmed in by steep cliffs, stuck in deep ravines, or otherwise put in situations that would be incredibly difficult during a dragon attack. This map is full of sharp turns, unexpected twists, and hidden nooks and crannies.
If I were to flesh this out, it would be the "home base" for a fresh new Dragon Cult. However, would they be aggressive to the player, or possibly friendly? There could be several other inhabitants of the valleys -- perhaps if the player helped out, they could make peace with the returning tide of wyrms? This would connect to Skyrim, allowing any Factions to travel / invade between them.
There are no in-game ways to get to these worlds -- instead, you can use console commands:
coc OrgFacExtForgottenCanyon01WorldExterior01
coc OrgFacExtGreenValleys01Exterior01
ElderGleam Druid Faction
Spoiler:
Show
There are some major quests in Skyrim that open up the possibility for the player to become a Werewolf or a Vampire -- each has their own special storyline and series of mini-quests, some of which are have limited availability depending on the player's chosen path.
There are very few "upsides" to abstaining from either of these choices -- in fact, there is a significant amount of "walled off" content that the player can only experience by joining one of these groups. That begs the question: What reason would the player ever have to not stay a member of one of these factions? So long as they don't do obvious stuff like transforming or killing in public, the player will never be detected -- even Vigilants will walk right past.
Rather than change the entire mechanics of the game, what if there were a faction that balanced that out? Once more, what if there were a faction that could help if you were in the right place at the right time, but wasn't there as another "cardboard cut-out" for the player to enlist / activate in their game?
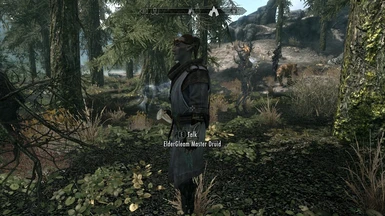
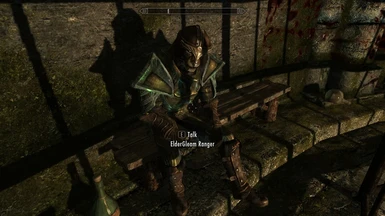
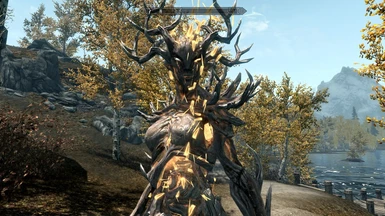
The ElderGleam faction has several Druids which move around to various locations, fighting bandits, vanquishing vampires, breaking up dog fighting rings, and pursuing the interests of the natural world. Each will garner their own type of followers (Giants, Spriggans, or Wolf Spirits), and distribute them among their allies; slaying one Druid not only reduces the power of the Faction, but means that their particular type of natural ally will not respawn until a replacement Druid is anointed. When a Druid is slain, the differing members of their unit will return to either the ElderGleam Sanctuary exterior, or to Clearspring Tarn Cave.
Note that Druids are more vulnerable when they invade the interior of a location, since only a few of their allies can enter (Spriggans and Rangers). The player can come to their aid, or use these high-risk situations to take them out.
Each Druid has their own special type of spells and powers, as suggested by their names. Their patrols can be found in-game on the notes given by the leader -- "spoilers" are as follows:
Druid of the Northern Lights
Specializes in fighting undead, and is responsible for calling Giants to their cause. Their patrol path is as follows:
Druid of the Tempest
Specializes in using lightning and calling thunderstorms, and is responsible for calling Spriggans to their cause. Their patrol path is as follows:
Druid of the North Wind
Specializes in using frost and calling blizzards, and is responsible for calling Wolf Spirits to their cause. Their patrol path is as follows:
The player must beware if they are a Werewolf or Vampire, as the Druids will be able to detect the unnatural taint of Hircine or Molag Bal in their blood. Similarly, if the player is attacked by any natural creature, the Druids and their allies will join in -- survival of the fittest, after all.
Lastly, the player can become a friend of the faction by finishing Kyne's Sacred Trials, and equipping Kyne's Token. The Druids and their allies will see that the player is worthy of respect, and will no longer join in the attack on the player if a natural beast selects them as prey. Of course, they won't help the player in that fight, either -- they'll let Nature run its course.
There are very few "upsides" to abstaining from either of these choices -- in fact, there is a significant amount of "walled off" content that the player can only experience by joining one of these groups. That begs the question: What reason would the player ever have to not stay a member of one of these factions? So long as they don't do obvious stuff like transforming or killing in public, the player will never be detected -- even Vigilants will walk right past.
Rather than change the entire mechanics of the game, what if there were a faction that balanced that out? Once more, what if there were a faction that could help if you were in the right place at the right time, but wasn't there as another "cardboard cut-out" for the player to enlist / activate in their game?
The ElderGleam faction has several Druids which move around to various locations, fighting bandits, vanquishing vampires, breaking up dog fighting rings, and pursuing the interests of the natural world. Each will garner their own type of followers (Giants, Spriggans, or Wolf Spirits), and distribute them among their allies; slaying one Druid not only reduces the power of the Faction, but means that their particular type of natural ally will not respawn until a replacement Druid is anointed. When a Druid is slain, the differing members of their unit will return to either the ElderGleam Sanctuary exterior, or to Clearspring Tarn Cave.
Note that Druids are more vulnerable when they invade the interior of a location, since only a few of their allies can enter (Spriggans and Rangers). The player can come to their aid, or use these high-risk situations to take them out.
Each Druid has their own special type of spells and powers, as suggested by their names. Their patrols can be found in-game on the notes given by the leader -- "spoilers" are as follows:
Druid of the Northern Lights
Specializes in fighting undead, and is responsible for calling Giants to their cause. Their patrol path is as follows:
- 1st - 5th Broken Limb Camp
- 6th - 10th Cradlecrush Rock
- 11th - 15th Mara's Eye Pond exterior
- (12th Mara's Eye Pond interior)
- 16th - 20th Steamcrag Camp
- 21st - 25th Cronvangr Cave exterior
- (22nd Cronvangr Cave interior)
- 26th - 31st Guldun Rock exterior
Druid of the Tempest
Specializes in using lightning and calling thunderstorms, and is responsible for calling Spriggans to their cause. Their patrol path is as follows:
- 1st - 5th Clearspring Tarn Cave interior
- 6th - 10th Autumnshade Clearing
- 11th - 15th Faldar's Tooth exterior
- (12th Faldar's Tooth interior)
- 16th - 20th Redwater Den exterior
- (17th Redwater Den interior)
- 21st - 31st Riften Watchtower
Druid of the North Wind
Specializes in using frost and calling blizzards, and is responsible for calling Wolf Spirits to their cause. Their patrol path is as follows:
- 1st - 5th Cragslane Cavern exterior
- (2nd Cragslane Cavern interior)
- 6th - 10th Shor's Watchtower
- 11th - 15th Fort Greenwall exterior
- (12th Fort Greenwall interior)
- 16th - 20th Fallowstone Cave exterior
- (17th Fallowstone Cave interior)
- 21st - 31st Tolvald's Cave exterior
The player must beware if they are a Werewolf or Vampire, as the Druids will be able to detect the unnatural taint of Hircine or Molag Bal in their blood. Similarly, if the player is attacked by any natural creature, the Druids and their allies will join in -- survival of the fittest, after all.
Lastly, the player can become a friend of the faction by finishing Kyne's Sacred Trials, and equipping Kyne's Token. The Druids and their allies will see that the player is worthy of respect, and will no longer join in the attack on the player if a natural beast selects them as prey. Of course, they won't help the player in that fight, either -- they'll let Nature run its course.
Glenmoril Werewolf Faction
Spoiler:
Show
Speaking of unnatural forces, the Glenmoril Coven has become more ambitious in its quest for power and domination. New Crones and werewolf patrols can be found near the Roadside Ruins, Hunter's Rest, and Gjukar's Monument.
These groups will only start to appear once the player reaches level 10. However, as the player gains levels, the Faction will increase its challenge not by simply "buffing up" its own members to match the player's level -- instead, different Actors with different combat roles will begin to appear. These will complement existing members, so their contingent is more "well-rounded", similar to how teams pick their roles in competitive games like Overwatch. This can include archers that can become werewolves for a short period of time, storm mages, or even trolls.
Note that these new members aren't simply mindless die-hard fodder. The more intelligent members will flee the scene if grievously hurt, or if the local Crone Captain is slain. They will return to Glenmoril Coven exterior, awaiting a new Crone Captain to be appointed for their designated area.
This creates a "trade-off" challenge for the player -- if they take the "easy" option of slaying only the Captain at each location, then taking out the leader at the Glenmoril Coven will become more difficult. If they want to prevent this "snowball" effect, the player will either have to break off combat to ensure that no enemies escape, or head straight for the heart of the Glenmoril Coven, dodging all the patrols along the way.
This Faction is intended to be a nice early-to-mid tier challenge:
This group will continue to spawn through the late game, though they will not be nearly so daunting as the Forsworn of the Lost Valley. However, I may opt to spawn other horrors from the same base location at a later date. <Insert evil laughter here.>
These groups will only start to appear once the player reaches level 10. However, as the player gains levels, the Faction will increase its challenge not by simply "buffing up" its own members to match the player's level -- instead, different Actors with different combat roles will begin to appear. These will complement existing members, so their contingent is more "well-rounded", similar to how teams pick their roles in competitive games like Overwatch. This can include archers that can become werewolves for a short period of time, storm mages, or even trolls.
Note that these new members aren't simply mindless die-hard fodder. The more intelligent members will flee the scene if grievously hurt, or if the local Crone Captain is slain. They will return to Glenmoril Coven exterior, awaiting a new Crone Captain to be appointed for their designated area.
This creates a "trade-off" challenge for the player -- if they take the "easy" option of slaying only the Captain at each location, then taking out the leader at the Glenmoril Coven will become more difficult. If they want to prevent this "snowball" effect, the player will either have to break off combat to ensure that no enemies escape, or head straight for the heart of the Glenmoril Coven, dodging all the patrols along the way.
This Faction is intended to be a nice early-to-mid tier challenge:
- Captains are only level 20, and new minions are around that level (15 - 30).
- The leader is only level 40, and new minions are around that level (30 - 40).
- New enemies are only added until the player reaches level 30.
- Certain abilities, such as the Totem of Terror howl, only affect opponents that are level 20 or under.
This group will continue to spawn through the late game, though they will not be nearly so daunting as the Forsworn of the Lost Valley. However, I may opt to spawn other horrors from the same base location at a later date. <Insert evil laughter here.>
Bthardamz
Spoiler:
Show
Many players have experienced the haunting beauty of [Bthardamz] as part of [The Only Cure] Daedric Quest. One major point of frustration is that players can't gain entrance to this level until they jump through several hoops to advance the related Quest. To rectify this problem, the exterior barrier has been disabled, and a new on has been created just before the final boss.
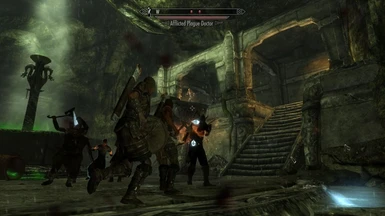
Enemies in the first zone within Bthardamz have been granted an augmented squad AI. In addition, two new bosses have been added to the level -- the first is the Plague Doctor, who uses area affect spells to accelerate the Afflicted disease in his allies. Not only does this slowly heal them and make them slightly faster, it also causes a rabid frenzy in the targets of their vomit spray. The player won't lose control, but will "see red" as they fight against the urge to mindlessly kill.
While this reckless use of the Blessing of Peryite can grant some short-term gains, it can also overwhelm the bodies of those affected. If grievously wounded, the blessing may simply cause them to explode in a shower of feculence. The same can happen from a fatal blow when their bodies are flush with the disease.
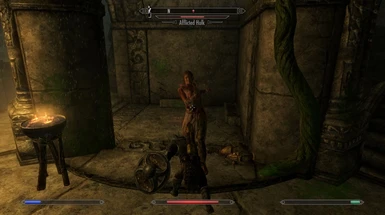
The second mini-boss is an Afflicted Hulk. The disease has accelerated her growth beyond normal human bounds -- though she packs a punch, she is also slower on her feet. Once wounded below half health, her battle fever explodes in bouts of rage -- not only will she gain a burst of speed, but even her light punches will send targets staggering. Only the strongest of warriors can shrug them off and avoid the crushing uppercut that follows.
Enemies in the first zone within Bthardamz have been granted an augmented squad AI. In addition, two new bosses have been added to the level -- the first is the Plague Doctor, who uses area affect spells to accelerate the Afflicted disease in his allies. Not only does this slowly heal them and make them slightly faster, it also causes a rabid frenzy in the targets of their vomit spray. The player won't lose control, but will "see red" as they fight against the urge to mindlessly kill.
While this reckless use of the Blessing of Peryite can grant some short-term gains, it can also overwhelm the bodies of those affected. If grievously wounded, the blessing may simply cause them to explode in a shower of feculence. The same can happen from a fatal blow when their bodies are flush with the disease.
The second mini-boss is an Afflicted Hulk. The disease has accelerated her growth beyond normal human bounds -- though she packs a punch, she is also slower on her feet. Once wounded below half health, her battle fever explodes in bouts of rage -- not only will she gain a burst of speed, but even her light punches will send targets staggering. Only the strongest of warriors can shrug them off and avoid the crushing uppercut that follows.
Arcwind Point
Spoiler:
Show
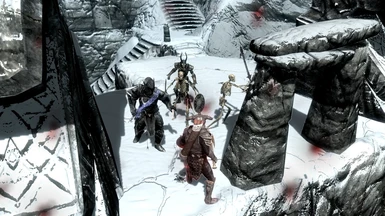
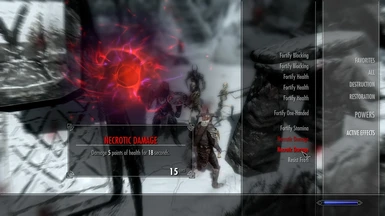
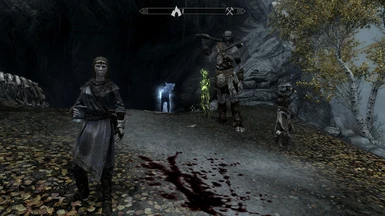
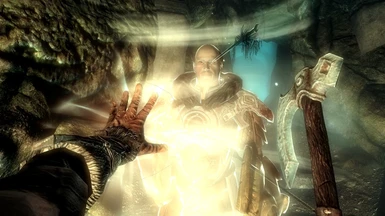
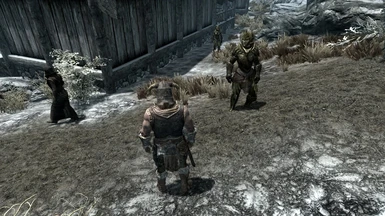
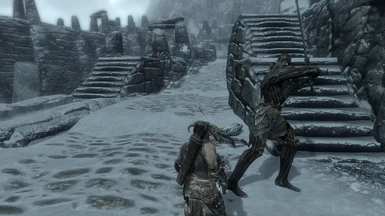
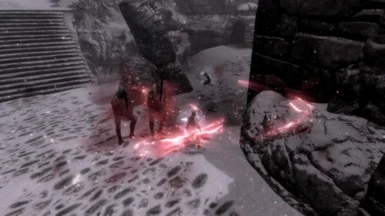
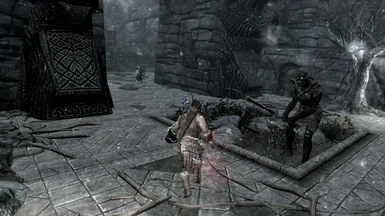
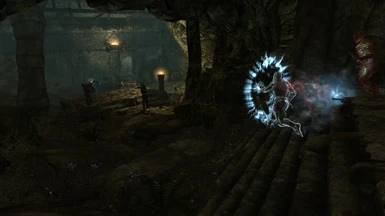
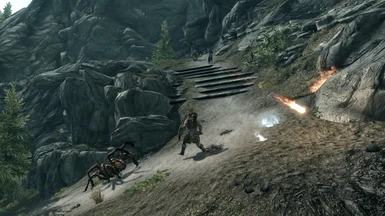
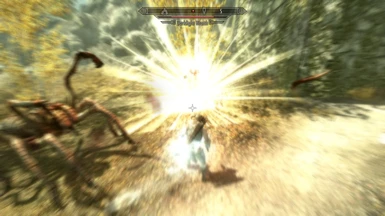
The first Death Knight has been installed in the tower beyond the long staircase.While he carries a sword of Absorb Health at his side, his favored weapon is a Bound Blade, augmented by his mysterious cursed ring. This grants all Bound weapons the power of Necrotic Damage, which will slowly destroy the life force within the target. Victims of the Death Knight may laugh off the slight sting from his sword, only to find their body later crumbling as the lethal effects build within them.
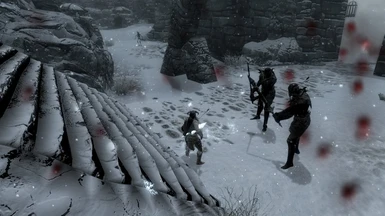
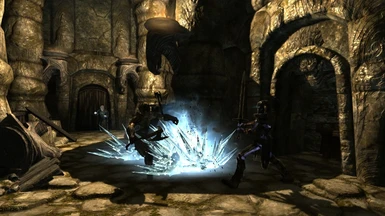
The Death Knight may summon a fast-moving Loathsome Spirit to provide ranged support. Lastly, the Death Knight is adept in the arts of necromancy, and can raise the dead to fight at their side; unlike most necromancers, the unholy power of the Death Knight prevents his raised targets from disintegrating -- so long as bodies lie nearby, he can raise them over and over again to fight on his behest.
Lastly, killing a Death Knight is harder than one might imagine. Only those that have faced them know what this warning truly means.
If the player proves victorious, then the ring and remaining gear are theirs. Those that equip the ring will find that bound weapons will start with a bonus of 4 damage for 6 seconds -- but this stacks with Perks like Necromancy and NecroMage for a maximum of 5 damage for 18 seconds. But beware! The life-draining power of the ring lowers the health of its wearer by 50 points.
Deepwood Redoubt Catacombs
Spoiler:
Show
Long-forgotten corridors deep within Deepwood Redoubt have been opened by the Forsworn. Though the dead remain sleeping, who knows what may emerge as they keep digging? Stay tuned for future releases!
The First Dragonborn Faction
Spoiler:
Show
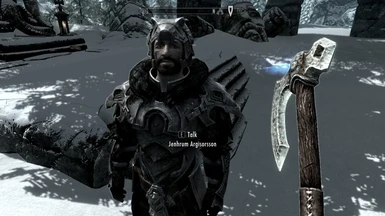
The first Dragonborn Faction has emerged! The player must complete the quest [Dragon Rising], where their identity as the Dragonborn is first revealed. Word will spread, and soon new followers will worship Talos at the [Weynon Stones] at the end of the week -- the player can greet them there and ask them to join. Each follower will have a limited amount of days per week that they can help the player, after which they will return to their normal duties.
These followers will level on their own, and gain power and abilities as they do so. They will all start at level 20, and randomly advance roughly 10 levels per in-game week, reaching maximum power at level 90. Note that these followers cannot level while accompanying the player, so the player must choose between extra allies and letting them gain power. Followers will carry a handful of limited-use items, like Scrolls. Once used, the follower must return to their normal duties to replenish their stock.
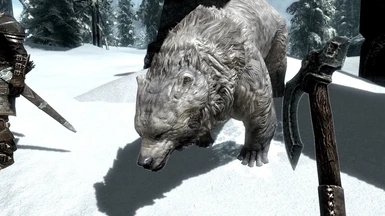
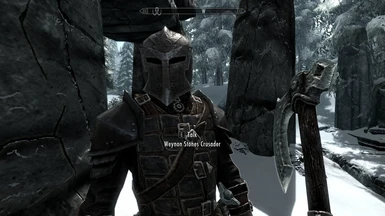
Followers also have individual conditions that impact their ability to serve. For example, if Mishka (the bear) is killed, then Jenhrum can spare less time for questing. If the player is a vampire, the Crusader will sense the taint of undeath; if you say you want to repent, he will help you for a short while -- but if you say you're out to conquer the world, he won't help at all.
Note that two of the three members -- Jenhrum and Mishka -- are unique individuals, and will "stay dead" if killed. The Crusader will respawn after at least 25 days, as another Vigilant of Stendarr will come to take their place. If respawned, the Crusader will start again at Level 20.
Since this is the first Dragonborn Organic Faction, I need feedback as I build out the rest. Suggestions on characters and abilities are welcome in the Posts section!
These followers will level on their own, and gain power and abilities as they do so. They will all start at level 20, and randomly advance roughly 10 levels per in-game week, reaching maximum power at level 90. Note that these followers cannot level while accompanying the player, so the player must choose between extra allies and letting them gain power. Followers will carry a handful of limited-use items, like Scrolls. Once used, the follower must return to their normal duties to replenish their stock.
Followers also have individual conditions that impact their ability to serve. For example, if Mishka (the bear) is killed, then Jenhrum can spare less time for questing. If the player is a vampire, the Crusader will sense the taint of undeath; if you say you want to repent, he will help you for a short while -- but if you say you're out to conquer the world, he won't help at all.
Note that two of the three members -- Jenhrum and Mishka -- are unique individuals, and will "stay dead" if killed. The Crusader will respawn after at least 25 days, as another Vigilant of Stendarr will come to take their place. If respawned, the Crusader will start again at Level 20.
Since this is the first Dragonborn Organic Faction, I need feedback as I build out the rest. Suggestions on characters and abilities are welcome in the Posts section!
The Lost Valley with Multiple Leaders
Spoiler:
Show
A large Organic Faction is located in and around the Lost Valley, between Markarth and Falkreath. For the full list of features, please see the notes file.
If the starting Forsworn Barbarian leader is killed, a Sorceress leader will take over in ~10-30 days. She will have different minions than the Barbarian leader:
If the Sorceress is killed, then the system will randomize if the next leader is a Barbarian or Sorceress.
Markarth Siege Sub-Faction
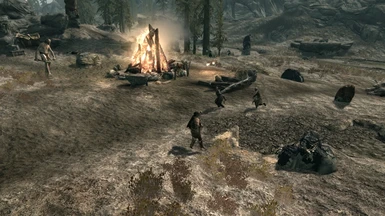
If the Barbarian leader is alive in the Lost Valley, he will train a small strike force to lay siege to Markarth. They will camp outside the city to wait for reinforcements, which will include a Giant, a Mammoth, or both.
When they attack the city, they will kill every guard at the gate, but leave all civilians alone -- the Forsworn want to show they are "liberators", not wanton murderers.
While the small strike team may not be able to push past the gates, the player will have to be extremely careful when approaching Markarth.
If the starting Forsworn Barbarian leader is killed, a Sorceress leader will take over in ~10-30 days. She will have different minions than the Barbarian leader:
- A Witch Captain at Tier 02, who uses Frenzy and enhanced tactics.
- Two Hagraven Queens in Cradlestone Tower instead of the Warden of the Umbra.
If the Sorceress is killed, then the system will randomize if the next leader is a Barbarian or Sorceress.
Markarth Siege Sub-Faction
If the Barbarian leader is alive in the Lost Valley, he will train a small strike force to lay siege to Markarth. They will camp outside the city to wait for reinforcements, which will include a Giant, a Mammoth, or both.
When they attack the city, they will kill every guard at the gate, but leave all civilians alone -- the Forsworn want to show they are "liberators", not wanton murderers.
While the small strike team may not be able to push past the gates, the player will have to be extremely careful when approaching Markarth.
Preparation for the Death Knight Organic Faction
Spoiler:
Show
In the next installment, I will release a Death Knight Organic Faction based at Arcwind Point. I have made significant modifications to this area -- feel free to check things out and share your thoughts. Be sure to check out the album on [Imgur].
This will tie in to some hidden quests in other areas occupied by the current Organic Factions. Stay tuned!
This will tie in to some hidden quests in other areas occupied by the current Organic Factions. Stay tuned!
Civil War
Spoiler:
Show
Two new Organic Faction Civil War camps have been added in the Reach. These groups will:
Life is dangerous in the army; soldiers have a significant % chance to be killed in random encounters while performing their duties, including camp commanders. If a commander is killed, then no new recruits will reinforce the camp -- nor can the player ask for an escort.
- Patrol / ambush enemies of their Faction, including the player.
- Once the war ends, the player can request an escort in the reach. Up to 3 guards will accompany the player until they enter an area officially part of another hold, or the player dismisses them with their commander.
- Eventually seek to overrun the camp of the opposing Faction. If the Strike Team succeeds in killing the enemy commander, then it will take a long time (25+ days) for a new one to show up.
Life is dangerous in the army; soldiers have a significant % chance to be killed in random encounters while performing their duties, including camp commanders. If a commander is killed, then no new recruits will reinforce the camp -- nor can the player ask for an escort.
Deepwood Vale
Spoiler:
Show
There have been modifications to Deepwood Redoubt to further fortify the Organic Faction based in Deepwood Vale.
SKSE
None of the components of my mods rely on SKSE.
Requirements
- All DLC
- The [Enhanced AI Framework]
- The [Organic Factions Master]
Compatibility
This mod ONLY applies AI and Actor changes to the specific Actors in and around a few key locations -- it does NOT alter AI elsewhere in the game. If anything, other AI overhauls have a chance of impacting the AI used in this mod.
This specific mod edits the contents and navmeshes of several Cells. These edits must take precedence over others in these locations:
- Deepwood Redoubt and surrounding external areas
- Lost Valley areas
- Cradle Stone Tower areas
- Arcwind Point areas
Permissions
See full permissions in all underlying mods (EAI Framework and Organic Factions).
Users may use these materials if and only if they:
1. Give full credit for these underlying components in their main mod description, and provide a link to the Organic Factions mod page on the Nexus (and eventually Steam, if applicable).
2. Share the source code for any new features they design that reference any piece of this material.
If subsequent modders use or reference any code provided by prior contributors, they must also credit and link the prior contributors as cited above, and similarly share their source code.
Long Term Goals
Extras
YouTube Channel on AI:
[https://www.youtube.com/playlist?list=PL-U2vBF9GrHGORYfnj6DOAFN1FgEzy9UA]