


0 of 0


About this mod
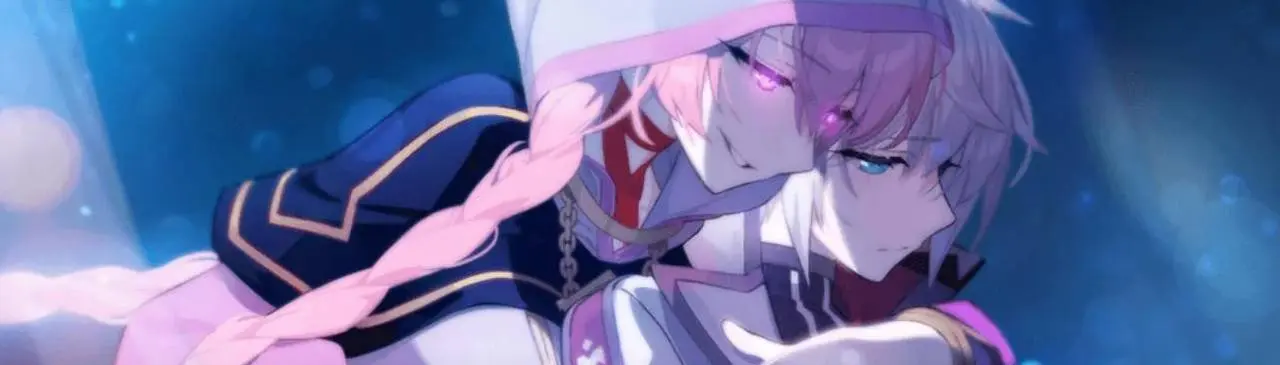
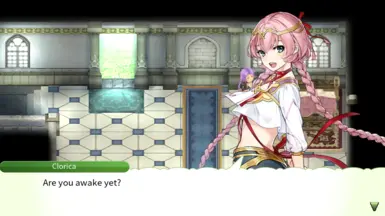
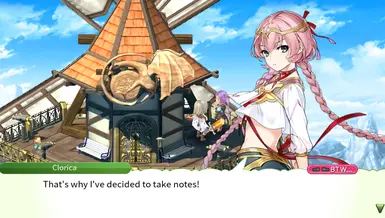
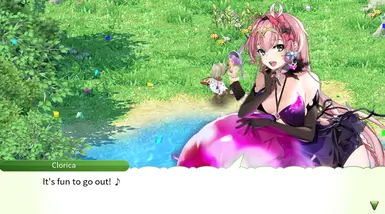
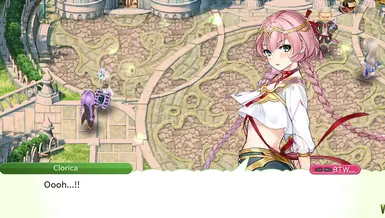
Change Clorica's model with Tenebria from Epic 7! Changed portraits include versions for her regular outfit, swimwear, sleepwear, and a wedding outfit
- Permissions and credits
Hey hey,
This is my second mod for texture swapping and spent more time on it that I would have liked tbh.
Unlike the Ras mod, this includes portrait changes for all Clorica's outfits (Normal, Sleepwear, Swimwear, Wedding).
Unzip contents to C:\Program Files (x86)\Steam\steamapps\common\Rune Factory 4 Special\Bundle or your equivalent path
Don't mind if the folder name is called elysia swap. That was just my naming convention!
Sprites are from here.
Mod Help:
Where did you get the textures?
First things first!
- Using the tool mbundleExtractor by darkxex
- From the git website, look for the uppermost area with the latest version and look for a link called Source Code (zip)
- Unzip/Extract this file anywhere and go to the folder Rune-Factory-4-Special-Mbundle-Extractor-1.1\mbundle extractor\bin\Debug
- You should now see two files, mbundleExtractor.exe and a pdb file. Take note of the exe file we will use this to extract the textures.
But where are the textures?
- Let's open C:\Program Files (x86)\Steam\steamapps\common\Rune Factory 4 Special\Bundle or your equivalent path
- Do you see a bunch of mbundle files? This is basically the contents of the game. What we want for now is the file bundleMain.mbundle
- Careful as this is a pretty big file, we copy the bundleMain.mbundle file to Rune-Factory-4-Special-Mbundle-Extractor-1.1\mbundle extractor\bin\Debug
- Now your debug folder should have 3 files! mbundleExtractor.exe, mbundleExtractor.pdb, and bundleMain.mbundle
Now what?
Now that we have the mbundle file and an extractor.. let's extract!
- Drag and drop the bundleMain.mbundle to the mbundleExtractor.exe file. Just like dropping a file to a folder!
- What should have happened is a command line would have popped up showing a lot of messages looks pretty scary if you don't know what's happening!
- Just wait until it finishes and if it does, you should have a new folder generated called BundleMain.
- Now all the textures that you want are mostly here! The first thing you would see would be a bunch of .bfskl but ignore those and scroll down until you see some .texture files.
What am I looking for?
- The first texture file you should see, should be 00_PLAYER_M_body_00.texture. This file is the default BODY portrait for LEST
- The second texture file is 00_PLAYER_M_body_01_sp1.texture. This file is the special1 BODY portrait for LEST, so if he's like raising his hand? This is that image.
- So if you want to change Lest's body/face portraits, you just need to copy all the texture files that refer to LEST, which are all 00_PLAYER_M!
- Don't worry they are all placed together.
- So for me I wanted to change Clorica so I just had to look for her texture files, which the first one is 02_CLORICA_body_00.texture
Hope that's clear!
What IS a texture?
- This is basically just an image like a png or jpeg but this is how the game reads the image
Extracting and Converting textures
Now since we can't open texture files, we have to extract them.
Honestly I just recommend this video by Realidad Scans on how to do it as it really helped me out!
Ah but if you're still confused after the video I can just write up another step by step guide if you liked how I did the first bit.
So you got the textures you wanted, saved it on a folder somewhere? Alright let's keep going...
How do I extract the images from the .texture files?
- Same as above, download this other extractor, this is different from the mbundle one, this extracts the textures.
- Download the Source Code (zip) again, extract the folder and go to Rune-Factory-4-Special-Texture-Extractor-1.2\RF4STextureExtractor\bin\Debug
- This time you should be seeing 2 exe files. RF4STextureExtractor.exe is for extracting one file at a time, and the other one is for multiple ones at a time in folders.
- Drag and drop a texture file to the RF4STextureExtractor.exe
- For example I drag 00_PLAYER_M_face_005_SHY.texture to RF4STextureExtractor.exe then a file called 00_PLAYER_M_face_005_SHY_0.dds is created next to the texture file. It is suggested to move the texture file in the same folder as the extractor so you don't get confused.
- Edit the dds file to whatever image you want to replace!
And we're done!
Or are we...?
The weird part
What's a dds file? I can't open it?
We can use various tools to open this image, some people use photoshop or nvidia texture tool exporter
But if you can't a free alternative is Paint.net the 5.02 version that's for free includes the tool for saving dds files.
So after you edited your photo and placed it on paint.net or if you edited it here. You'll have to save it as DirectDraw Surface (DDS) (*.dds) file.
Before you save, there's a prompt setting that asks for stuff like BC1 whatever, you need to choose BC7, either of the two should work.
Saving is as something else will distort the image when you extract it back as a texture file.
Converting a DDS file to a texture file:
I really recommend this video by Realidad Scans if you're confused on how to do it.
Some things I noticed
One face rules all
Unfortunately, if you want to use different skins for your character swap, you can only use one face. You can't make different faces per costume. It all uses the faces for the default outfit for all.