I will not be able to do much with this mod, due to a career move I have recently had the opportunity to make. I will be gone until June of next year. I apologize for having to leave when I've only just gotten started. I hope that you all keep enjoying my mod and that it stands the test of time. However, I will be back! Until then, KEEP BEING GREAT!
My friend, I come with information: DLSS Tweaks nifty little program by emoose. Let's you change DLSS to DLAA and newer nvngx_dlss.dll file. For instance I set DLL override to use the nvngx_dlss.dll from RDR1 (version 3.7.0.0) and now the game looks amazing with these settings: dlsstweaks.ini
Spoiler:
Show
; DLSSTweaks by emoose - https://github.com/emoose/DLSSTweaks
; Wrapper DLL that can force DLAA onto DLSS-supported games, along with tweaking the scaling ratios & presets used by them
; DLSSTweaks now offers two ways of loading itself in, to help with systems that had issues with the older method:
; - Leaving the DLL filename as "nvngx.dll" will let it wrap the nvngx.dll DLSS module, usually has the best chance of working since it requires less code hooks to be installed.
;However this method does need a registry change to be applied first to stop DLSS from checking the nvngx.dll signature.
;The included "EnableNvidiaSigOverride.reg" file can handle this for you, just double-click -> Run -> Yes to all prompts
;(This only affects Nvidia specific signature checks, not anything to do with Windows)
;In case it wasn't included, reg file can also be found at https://github.com/emoose/DLSSTweaks/blob/master/EnableNvidiaSigOverride.reg
; - Alternatively, a legacy method can be used by renaming the DLSSTweaks "nvngx.dll" to one of the following names instead, without any signature override needed.
;(different games may require certain filenames to load in properly, and some games may have issues with this method altogether, the nvngx.dll method above is recommended)
;- XInput1_3.dll
;- XInput1_4.dll
;- XInput9_1_0.dll
;- dxgi.dll
;- XAPOFX1_5.dll
;- X3DAudio1_7.dll
;- winmm.dll
; If you find a DLSS2/DLSS3-supported game that doesn't work with either of these methods please let me know at https://github.com/emoose/DLSSTweaks!
[DLSS]
; ForceDLAA: forces all DLSS quality modes to act as DLAA instead, making the game render in full-res while DLAA anti-aliasing is applied over it
;  To use this just enable any DLSS quality in the game, with this tweak enabled they'll all render at full resolution instead
;  The game might change mip biasing depending on the quality level however, so feel free to experiment with them!
;  Notes:
;  - if DLSSQualityLevels section is enabled then ForceDLAA won't be applied, and ratios will be used from that section instead
;  - you can check if DLAA is active using the OverrideDlssHud tweak below, overlay text should mention both render resolution & upscaled resolution, if they match then DLAA is active
;  - if game has problems running with full-res DLAA it could be worth tweaking the ResolutionOffset setting in Compatibility section below
;  - DLSS Preset F is recommended for use with DLAA by Nvidia, but usually won't be set by default, instead you can set that in the DLSSPresets section below
ForceDLAA=true
; OverrideAutoExposure: allows forcing DLSS auto-exposure to be enabled/disabled/left at default
;  Certain DLSS2 titles may have an "AutoExposure" option in-game, which might fail to activate with DLSS3.1
;  In that case you can force it to enable here
;  Some early titles released before auto-exposure might also benefit from having it forced (reducing ghosting issues in certain titles)
;  More info about auto-exposure at https://github.com/emoose/DLSSTweaks/issues/53
;  Set to 0 to leave it at default, 1 to force enable, or -1 to force disable
OverrideAutoExposure=-1
; OverrideSharpening: allows overriding the DLSS sharpening applied to the image
;  This only affects pre-2.5.1 DLSS versions, v2.5.1 and later versions removed sharpening from DLSS (use sharpening available in NV control panel instead)
;  Value can be from -1.0 to 1.0, negative numbers will apply a softening filter, while positive ones will sharpen
;  (eg. setting to 0.64 will apply 64% sharpening filter)
;  Can usually be changed during gameplay fine, by simply editing the INI file
; (you may need to set a value to this first before starting game though, in order for the DLSS sharpening flag to be set)
;  Usage:
;  - Set to a value from -1.0 to 1.0 to apply softening or sharpening
;  - Set to 0 to disable softening/sharpening (will leave any DoSharpening DLSS flag in place though, which may still affect image)
;  - Set to "disable" to completely force the sharpening flag to be disabled (this will prevent changing OverrideSharpening during gameplay)
;  - Set to "default" (or comment out the line) to prevent this override from applying, leaving the value at whatever game sets for it
OverrideSharpening=disable
; OverrideDlssHud: allows force enabling/disabling the DLSS debug display HUD overlay
;  The HUD will display on bottom left of screen in-game when enabled, though some titles may draw effects on top of it
;  For those it's recommended to try disabling any post-process effects
;  Should work with both release & dev DLSS DLL types
;  Set to 0 to leave it at default, 1 to force enable, or -1 to force disable
;  (if overlay doesn't seem to draw try setting this to 2 instead to make it use a slightly different method)
OverrideDlssHud=0
; DisableDevWatermark: removes the on-screen watermark shown when using dev DLL
;  Can also remove watermark on certain versions of DLSSG/FrameGeneration
;  Only useful if you're using a dev version of DLSS, most won't need this
DisableDevWatermark=false
; VerboseLogging: increases DLSSTweaks log level & prints extra log entries into dlsstweaks.log file
VerboseLogging=false

[DLLPathOverrides]
nvngx_dlss=E:\SteamLibrary\steamapps\common\Red Dead Redemption\nvngx_dlss.dll

; DLLPathOverrides: allows overriding the path that a DLL will be loaded from based on the filename of it
;  This can be useful if you're prevented somehow from changing any of the game files, stopping you from changing DLSS DLLs easily
;  (eg. RGL launcher which always overwrites DLSS with an older version)
;  Can also be useful if you use a global injector setup & want every game to use a single DLSS DLL
;  Format of this section is the following:
;  (";" indicates the line is a comment, remove it for DLSSTweaks to use that line)
;[DLL name] = [path to load from]
;  For example:
;nvngx_dlss = nvngx_dlss_new.dll
;  Full paths can also be specified too, including spaces (no need to use double-quotes around it):
;nvngx_dlss = C:\Users\Username\Desktop\DLSS Releases\3.1.11\rel\nvngx_dlss.dll
;  Other DLLs such as DLSS FrameGen (nvngx_dlssg) can also be overridden using this too:
;nvngx_dlssg = C:\Users\Username\Desktop\DLSS Releases\DLSS FrameGen\3.1.10\nvngx_dlssg.dll
[DLSSQualityLevels]
; DLSSQualityLevels: allows overriding the ratios that DLSS uses for each quality level
;  Note that enabling this section will disable the ForceDLAA setting above
Enable=false
; Ratios/multipliers applied to each axis of screen resolution
;  Set to 1.0 to force this quality level to use full resolution (ie. DLAA)
;  Values are limited to range 0.0 - 1.0
;  Alternatively you can specify a resolution directly in the form "WIDTHxHEIGHT", eg. "Quality = 1920x1080"
UltraPerformance=0.33333334
Performance=0.5
Balanced=0.58
Quality=1
UltraQuality=0

; UltraQuality: certain games may allow this level to be picked if uncommented (remove the ";" at the start) and set to non-zero value
;  Very few titles actually allow using this though, but a small few may show an option for it once enabled, giving you an extra DLSS level to choose from
;UltraQuality = 0.77
[DLSSPresets]
; DLSS preset overrides for each quality level: set to Default to leave the preset set to whatever game/DLSS decided for it
;  Or set to A / B / C / D / F to try forcing that preset instead.
;  Presets were added in DLSS 3.1, these are essentially the different kinds of DLSS 2.x DLL versions, all merged into 3.1 as these presets
;  (so eg. instead of picking the best quality DLSS DLL for your game, you'd just find the right preset for it instead)
;  For descriptions of each preset see https://www.reddit.com/r/nvidia/comments/10z2ra9/nvidia_publishes_dlss_super_resolution_sdk_31/j81f9te/
;  (OverrideAppId should no longer be needed to use this section, any overrides should just work without needing anything else enabled)
;  (in case the presets here aren't being applied for you the OverrideAppId tweak can still be enabled in Compatibility section below)
DLAA=Default
UltraPerformance=Default
Performance=Default
Balanced=Default
Quality=Default
UltraQuality=Default

[Compatibility]
; ResolutionOffset: offsets both resolution axes by this value when DLAA is being applied
;  Some games might not function well with full-resolution DLAA for whatever reason
;  Subtracting a tiny amount from the resolution first may help with them though
;  This offset is only applied to DLAA modes (either from ForceDLAA, DLSSQualityLevels 1.00, or the game setting DLAA itself)
;  Titles known to require this for DLAA to work:
; - RE Engine titles (set to -1)
; - Crysis 3 Remastered (set to -1)
ResolutionOffset=0
; DynamicResolutionOverride: if DLSS scales are customized, we'll also override the dynamic resolution min/max range that DLSS returns to the game
;  Very few games actually make use of this dynamic resolution min/max, but the ones that do previously could ignore our custom resolution & use the dynamic res range DLSS would return instead.
;  This just overrides the dynamic res to the same as the customized res
;  Recommend leaving this enabled unless game seems to have issues
DynamicResolutionOverride=false
; DynamicResolutionMinOffset: some games seem to check the returned dynamic res min/max and make sure they're different
;  (eg. Assetto Corsa Competizione will forcibly disable DLSS if dynamic res min/max are equal to each other)
;  This setting will just apply a small offset to the dynamic-res minimum that we return to the game
;  However, certain games like Forspoken might make use of dynamic res but don't actually require min/max to be different
;  In those cases you could try setting this to 0, to make sure dynamic res uses the full DLSS scale value instead.
DynamicResolutionMinOffset=-1
; DisableIniMonitoring: if set to true, prevents DLSSTweaks from checking for updated INI during gameplay
;  By default DLSSTweaks will ask Windows to be notified whenever the INI file is updated, and will then try applying any updated settings to the game during runtime
;  Not every setting can be applied during gameplay though, most will require game to be relaunched, depends on the game which settings can be changed
;  (DLSSPresets should work on almost every title though - you can use OverrideDlssHud to confirm)
;  INI monitoring should have almost no cost to performance, but may possibly cause issues with certain games depending how they're installed
;  In case game fails to launch with DLSSTweaks in place, you can try disabling the INI update code here
DisableIniMonitoring=true
; OverrideAppId: previously this was required to be set in order to override DLSS3.1 presets on certain games
;  However in newer DLSSTweaks a different solution has been found, which can now let presets be overridden without needing any app ID changes
;  That method could stop working on future titles/DLSS versions though
;  So in case game doesn't seem to apply DLSSPresets section for you at all, you can try seeing if OverrideAppId can still help
;  (in majority of cases this likely won't be needed however)
OverrideAppId=false

[DLSSTweaks]
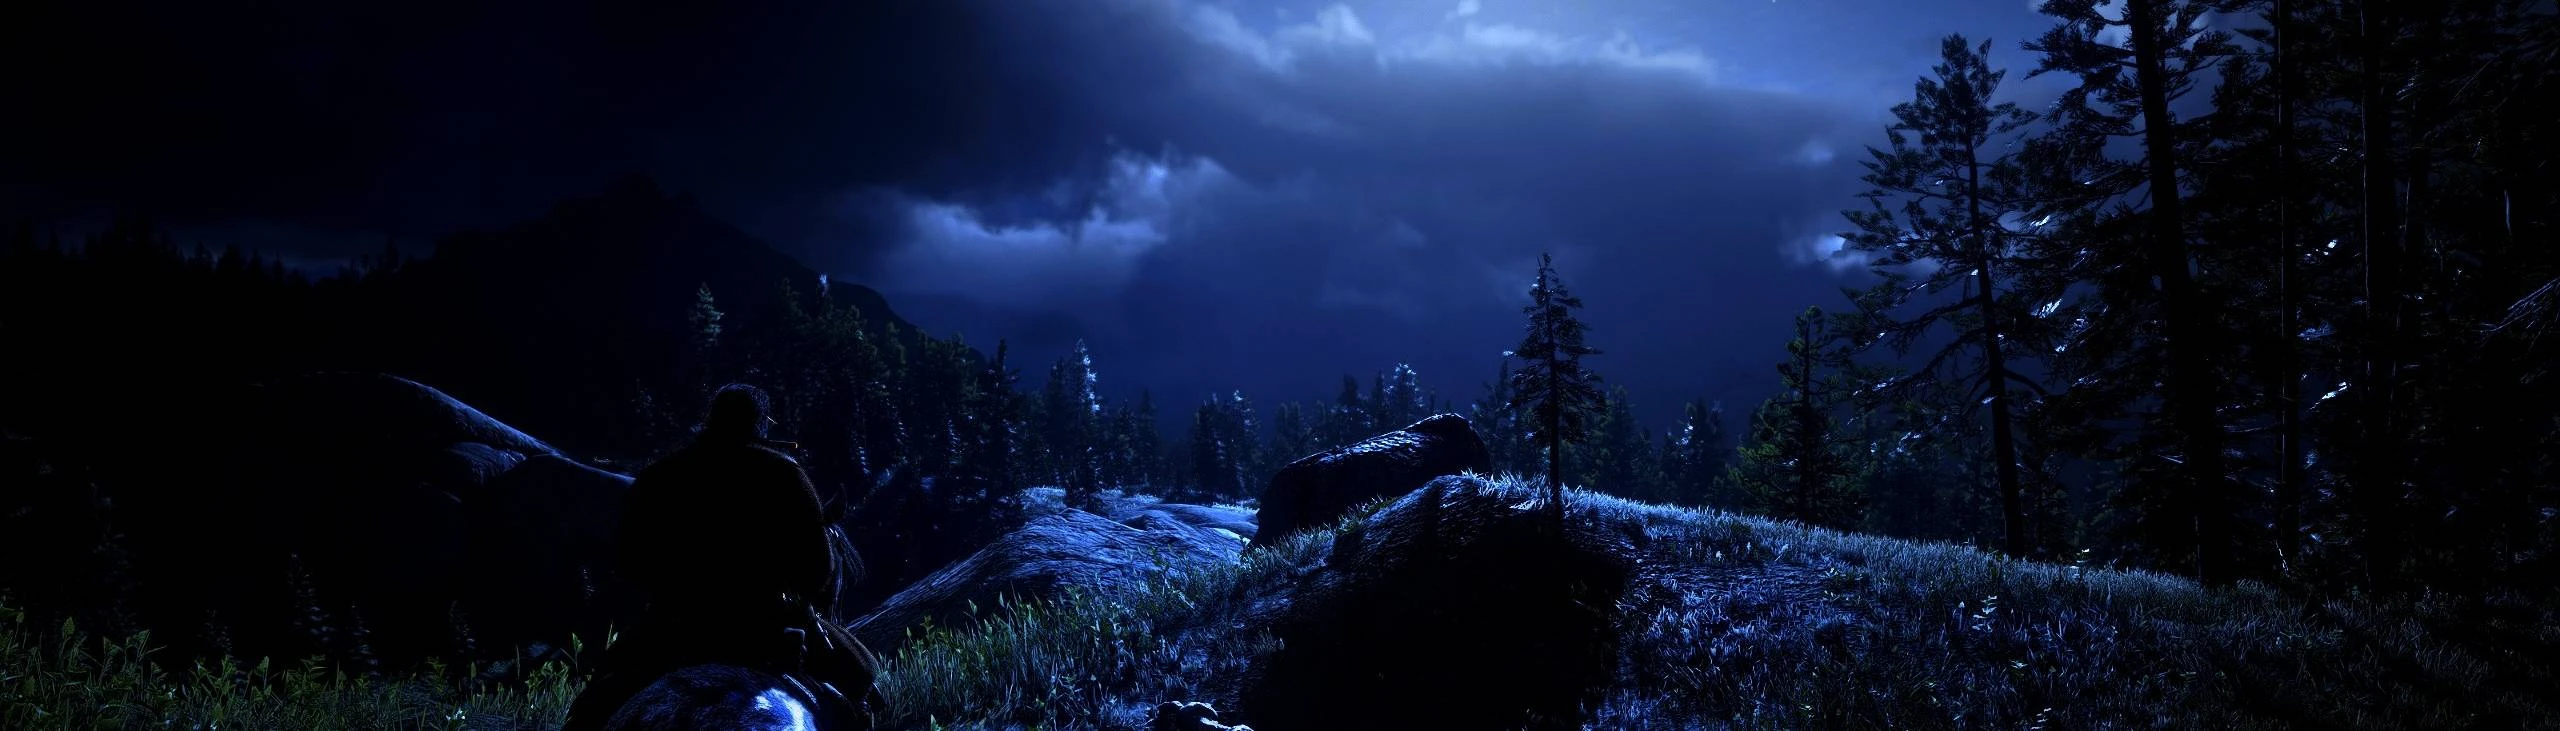
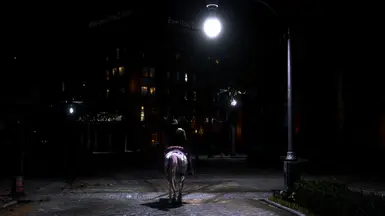
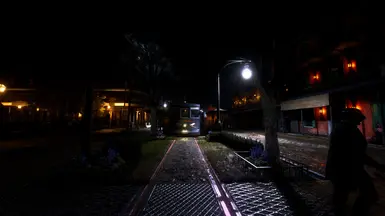
Much better than using the TAA mods, take out your pocket watch and observe no ghosting.
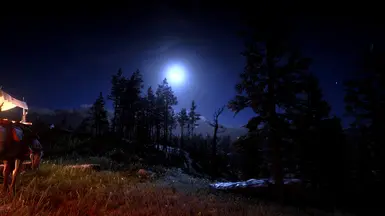
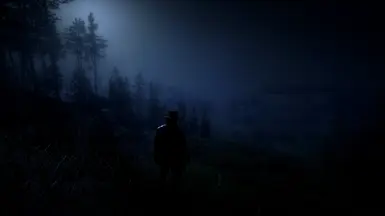
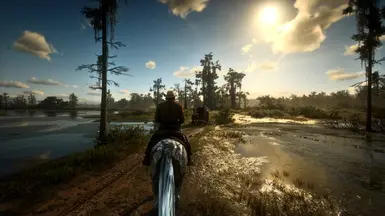
Got mine to work and it looks amazing but I cant help to notice that the sky is way to bright unlike yours that it shows the blues when its not cloudy. Also there's this weird thing where the game has the images sharp and goes back to being blurry for a second then goes back to the reshaded version again. I'm also confused on the "Best TAA" mod where it says that there should be an TAA antialiasing option but I dont see it in mine.
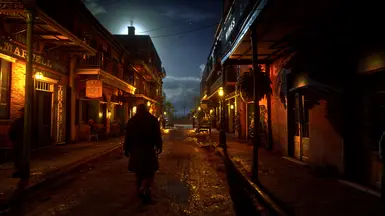
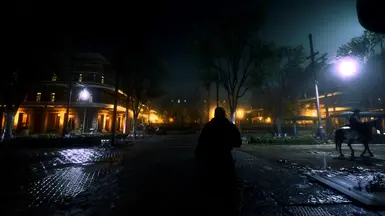
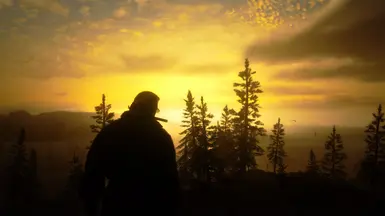
It could be your monitor or game brightness calibration. Also, some weathers provide different affects. Use a mod like Rampage Trainer to set the weather to sunny/clear and let me know how it looks. Other than that. If you followed my instructions, I don't know why it would look any different. I also put my graphics settings in the file, to help with getting as close to my game as possible. If all fails, you can easily go into the lightroom option in the Reshade menu and adjust the brightness and whites as desired. You can also turn off the bloom in that menu.
Hey I'm a little confused, I downloaded everyfing correctly but I don't know why you tell us to download another reshade " Natural Colors Vision' we can use them both ? if not what do i do ? (I never used reshade before)
Reread the "Readme" within my file. It will tell you exactly what you're using from that mod. It states that you're not using the actual reshade; you're only using the texture file provided by the mod author.
So I installed everything properly but the game looks extremely bright and wayyyy oversaturated. I even tuned my settings down to match yours but it still looks weird. Do I need to delete all the other shaders I have?
Try this (the textures folder should be located in "Red Dead Redemption 2\reshade-shaders"):
completely remove the texture file you already have and put it somewhere like your desktop (this will allow you to go back to the texture setup you had before, at any moment). Then, plug in the texture file from Reshade Natural Vision (you're only using the texture file and nothing else from that mod).
Also, Make sure your texture and effect paths are going to the right location. They should look something like this.
Sounds silly and it probably is. But I want to know if you're referring to: Reshade Natural Vision 1.5 Natural Colors Vision Natural Vision Lite Version Reshade Natural Vision 1.0
I am using the 1.5 textures and overwriting the files, as per instructions. I couldn't help but notice, when comparing, that they we're the exact same file size and image.
Makes me believe I must be using the wrong reshade.
Hey thanks for the reply unfortunately it still looks strange and now it takes 3 minutes to load in for some reason, used to take 20 seconds. Not blaming you or anything, looks like a really cool mod. I must have some conflicts
Looking to download this and not sure about performance. What are your specs and what’s your average fps? Do the higher resolution and texture altering mods affect performance?
No, you do not have to delete it. However, because there are texture edits within the required mods, it will change the way any previously downloaded shaders will look. They could look better or they could look worse. And to answer your last question, there is a readme included in the download because I built my reshader around a specific mod combo that edits textures. I also included my own graphics settings to help those who may have trouble getting in-game to look like the screenshots.
If you only download my reshader, there is no point in you using it. all mods listed are necessary to get the intended outcome. If you follow the readme, by the end of the process you will have edited textures, weather, and a reshader. It all works together for a desired end.
About you disabling your reshader. Click this link and at 2:40 he shows you how to open up the in-game shader menu. At 3:02 (that drop-down menu he clicks) is where you switch to my shader. You just find "That Extra Umph.ini" and click it. That's how you change shaders.
I will give a go and I will come back. One last thing. In my directory, I have a folder from the current shader I have with shaders and textures inside. Do I need to delete those from my directory or is it enough if I just disable it through reshade app?
1. drag and drop the required textures and whatever needs to be replaced replace it. This will create a mixture of the textures you already have and the textures from Reshade Natural Vision, allowing the latter to take priority. However, doing this will cause results that I can't account for, because this was made for a specific set of textures. Mixing with other textures may result in different results, some better, some worse.
2. completely remove the texture file you already have and put it somewhere like your desktop (this will allow you to go back to the texture setup you had before, at any moment). Then, plug in the texture file from Reshade Natural Vision. In this case, you will have the most accurate and expected outcome.
antisocialkidskg, I think it is because you put all of the files from Reshade Natural Vision into your game. You were only supposed to use the texture file from that mod, as stated in the readme #5. Find it in "Red Dead Redemption 2\reshade-shaders\Shaders"; it should be the 2 "SMAA" files. Not the best way to do it, but it'll get the error to stop appearing. The best way would be to completely delete Reshade and start over.
You're right. I compared the two and the one you sent is crystal clear with TAA on high. I only used the visualsettings.dat file and it looks noticeably better. I'll test it on a couple weathers and timing conditions. Thanks for that. I don't know how I would merge them since I don't know each individual edit the mod author made. I'll probably make it to where you'll just have to replace that one file with the one from The Perfect TAA.


38 comments
dlsstweaks.ini
; DLSSTweaks by emoose - https://github.com/emoose/DLSSTweaks
; Wrapper DLL that can force DLAA onto DLSS-supported games, along with tweaking the scaling ratios & presets used by them
; DLSSTweaks now offers two ways of loading itself in, to help with systems that had issues with the older method:
; - Leaving the DLL filename as "nvngx.dll" will let it wrap the nvngx.dll DLSS module, usually has the best chance of working since it requires less code hooks to be installed.
;However this method does need a registry change to be applied first to stop DLSS from checking the nvngx.dll signature.
;The included "EnableNvidiaSigOverride.reg" file can handle this for you, just double-click -> Run -> Yes to all prompts
;(This only affects Nvidia specific signature checks, not anything to do with Windows)
;In case it wasn't included, reg file can also be found at https://github.com/emoose/DLSSTweaks/blob/master/EnableNvidiaSigOverride.reg
; - Alternatively, a legacy method can be used by renaming the DLSSTweaks "nvngx.dll" to one of the following names instead, without any signature override needed.
;(different games may require certain filenames to load in properly, and some games may have issues with this method altogether, the nvngx.dll method above is recommended)
;- XInput1_3.dll
;- XInput1_4.dll
;- XInput9_1_0.dll
;- dxgi.dll
;- XAPOFX1_5.dll
;- X3DAudio1_7.dll
;- winmm.dll
; If you find a DLSS2/DLSS3-supported game that doesn't work with either of these methods please let me know at https://github.com/emoose/DLSSTweaks!
[DLSS]
; ForceDLAA: forces all DLSS quality modes to act as DLAA instead, making the game render in full-res while DLAA anti-aliasing is applied over it
; To use this just enable any DLSS quality in the game, with this tweak enabled they'll all render at full resolution instead
; The game might change mip biasing depending on the quality level however, so feel free to experiment with them!
; Notes:
; - if DLSSQualityLevels section is enabled then ForceDLAA won't be applied, and ratios will be used from that section instead
; - you can check if DLAA is active using the OverrideDlssHud tweak below, overlay text should mention both render resolution & upscaled resolution, if they match then DLAA is active
; - if game has problems running with full-res DLAA it could be worth tweaking the ResolutionOffset setting in Compatibility section below
; - DLSS Preset F is recommended for use with DLAA by Nvidia, but usually won't be set by default, instead you can set that in the DLSSPresets section below
ForceDLAA=true
; OverrideAutoExposure: allows forcing DLSS auto-exposure to be enabled/disabled/left at default
; Certain DLSS2 titles may have an "AutoExposure" option in-game, which might fail to activate with DLSS3.1
; In that case you can force it to enable here
; Some early titles released before auto-exposure might also benefit from having it forced (reducing ghosting issues in certain titles)
; More info about auto-exposure at https://github.com/emoose/DLSSTweaks/issues/53
; Set to 0 to leave it at default, 1 to force enable, or -1 to force disable
OverrideAutoExposure=-1
; OverrideSharpening: allows overriding the DLSS sharpening applied to the image
; This only affects pre-2.5.1 DLSS versions, v2.5.1 and later versions removed sharpening from DLSS (use sharpening available in NV control panel instead)
; Value can be from -1.0 to 1.0, negative numbers will apply a softening filter, while positive ones will sharpen
; (eg. setting to 0.64 will apply 64% sharpening filter)
; Can usually be changed during gameplay fine, by simply editing the INI file
; (you may need to set a value to this first before starting game though, in order for the DLSS sharpening flag to be set)
; Usage:
; - Set to a value from -1.0 to 1.0 to apply softening or sharpening
; - Set to 0 to disable softening/sharpening (will leave any DoSharpening DLSS flag in place though, which may still affect image)
; - Set to "disable" to completely force the sharpening flag to be disabled (this will prevent changing OverrideSharpening during gameplay)
; - Set to "default" (or comment out the line) to prevent this override from applying, leaving the value at whatever game sets for it
OverrideSharpening=disable
; OverrideDlssHud: allows force enabling/disabling the DLSS debug display HUD overlay
; The HUD will display on bottom left of screen in-game when enabled, though some titles may draw effects on top of it
; For those it's recommended to try disabling any post-process effects
; Should work with both release & dev DLSS DLL types
; Set to 0 to leave it at default, 1 to force enable, or -1 to force disable
; (if overlay doesn't seem to draw try setting this to 2 instead to make it use a slightly different method)
OverrideDlssHud=0
; DisableDevWatermark: removes the on-screen watermark shown when using dev DLL
; Can also remove watermark on certain versions of DLSSG/FrameGeneration
; Only useful if you're using a dev version of DLSS, most won't need this
DisableDevWatermark=false
; VerboseLogging: increases DLSSTweaks log level & prints extra log entries into dlsstweaks.log file
VerboseLogging=false
[DLLPathOverrides]
nvngx_dlss=E:\SteamLibrary\steamapps\common\Red Dead Redemption\nvngx_dlss.dll
; DLLPathOverrides: allows overriding the path that a DLL will be loaded from based on the filename of it
; This can be useful if you're prevented somehow from changing any of the game files, stopping you from changing DLSS DLLs easily
; (eg. RGL launcher which always overwrites DLSS with an older version)
; Can also be useful if you use a global injector setup & want every game to use a single DLSS DLL
; Format of this section is the following:
; (";" indicates the line is a comment, remove it for DLSSTweaks to use that line)
;[DLL name] = [path to load from]
; For example:
;nvngx_dlss = nvngx_dlss_new.dll
; Full paths can also be specified too, including spaces (no need to use double-quotes around it):
;nvngx_dlss = C:\Users\Username\Desktop\DLSS Releases\3.1.11\rel\nvngx_dlss.dll
; Other DLLs such as DLSS FrameGen (nvngx_dlssg) can also be overridden using this too:
;nvngx_dlssg = C:\Users\Username\Desktop\DLSS Releases\DLSS FrameGen\3.1.10\nvngx_dlssg.dll
[DLSSQualityLevels]
; DLSSQualityLevels: allows overriding the ratios that DLSS uses for each quality level
; Note that enabling this section will disable the ForceDLAA setting above
Enable=false
; Ratios/multipliers applied to each axis of screen resolution
; Set to 1.0 to force this quality level to use full resolution (ie. DLAA)
; Values are limited to range 0.0 - 1.0
; Alternatively you can specify a resolution directly in the form "WIDTHxHEIGHT", eg. "Quality = 1920x1080"
UltraPerformance=0.33333334
Performance=0.5
Balanced=0.58
Quality=1
UltraQuality=0
; UltraQuality: certain games may allow this level to be picked if uncommented (remove the ";" at the start) and set to non-zero value
; Very few titles actually allow using this though, but a small few may show an option for it once enabled, giving you an extra DLSS level to choose from
;UltraQuality = 0.77
[DLSSPresets]
; DLSS preset overrides for each quality level: set to Default to leave the preset set to whatever game/DLSS decided for it
; Or set to A / B / C / D / F to try forcing that preset instead.
; Presets were added in DLSS 3.1, these are essentially the different kinds of DLSS 2.x DLL versions, all merged into 3.1 as these presets
; (so eg. instead of picking the best quality DLSS DLL for your game, you'd just find the right preset for it instead)
; For descriptions of each preset see https://www.reddit.com/r/nvidia/comments/10z2ra9/nvidia_publishes_dlss_super_resolution_sdk_31/j81f9te/
; (OverrideAppId should no longer be needed to use this section, any overrides should just work without needing anything else enabled)
; (in case the presets here aren't being applied for you the OverrideAppId tweak can still be enabled in Compatibility section below)
DLAA=Default
UltraPerformance=Default
Performance=Default
Balanced=Default
Quality=Default
UltraQuality=Default
[Compatibility]
; ResolutionOffset: offsets both resolution axes by this value when DLAA is being applied
; Some games might not function well with full-resolution DLAA for whatever reason
; Subtracting a tiny amount from the resolution first may help with them though
; This offset is only applied to DLAA modes (either from ForceDLAA, DLSSQualityLevels 1.00, or the game setting DLAA itself)
; Titles known to require this for DLAA to work:
; - RE Engine titles (set to -1)
; - Crysis 3 Remastered (set to -1)
ResolutionOffset=0
; DynamicResolutionOverride: if DLSS scales are customized, we'll also override the dynamic resolution min/max range that DLSS returns to the game
; Very few games actually make use of this dynamic resolution min/max, but the ones that do previously could ignore our custom resolution & use the dynamic res range DLSS would return instead.
; This just overrides the dynamic res to the same as the customized res
; Recommend leaving this enabled unless game seems to have issues
DynamicResolutionOverride=false
; DynamicResolutionMinOffset: some games seem to check the returned dynamic res min/max and make sure they're different
; (eg. Assetto Corsa Competizione will forcibly disable DLSS if dynamic res min/max are equal to each other)
; This setting will just apply a small offset to the dynamic-res minimum that we return to the game
; However, certain games like Forspoken might make use of dynamic res but don't actually require min/max to be different
; In those cases you could try setting this to 0, to make sure dynamic res uses the full DLSS scale value instead.
DynamicResolutionMinOffset=-1
; DisableIniMonitoring: if set to true, prevents DLSSTweaks from checking for updated INI during gameplay
; By default DLSSTweaks will ask Windows to be notified whenever the INI file is updated, and will then try applying any updated settings to the game during runtime
; Not every setting can be applied during gameplay though, most will require game to be relaunched, depends on the game which settings can be changed
; (DLSSPresets should work on almost every title though - you can use OverrideDlssHud to confirm)
; INI monitoring should have almost no cost to performance, but may possibly cause issues with certain games depending how they're installed
; In case game fails to launch with DLSSTweaks in place, you can try disabling the INI update code here
DisableIniMonitoring=true
; OverrideAppId: previously this was required to be set in order to override DLSS3.1 presets on certain games
; However in newer DLSSTweaks a different solution has been found, which can now let presets be overridden without needing any app ID changes
; That method could stop working on future titles/DLSS versions though
; So in case game doesn't seem to apply DLSSPresets section for you at all, you can try seeing if OverrideAppId can still help
; (in majority of cases this likely won't be needed however)
OverrideAppId=false
[DLSSTweaks]
Much better than using the TAA mods, take out your pocket watch and observe no ghosting.
(I never used reshade before)
completely remove the texture file you already have and put it somewhere like your desktop (this will allow you to go back to the texture setup you had before, at any moment). Then, plug in the texture file from Reshade Natural Vision (you're only using the texture file and nothing else from that mod).
Also, Make sure your texture and effect paths are going to the right location. They should look something like this.
Sounds silly and it probably is.
But I want to know if you're referring to:
Reshade Natural Vision 1.5
Natural Colors Vision
Natural Vision Lite Version
Reshade Natural Vision 1.0
I am using the 1.5 textures and overwriting the files, as per instructions. I couldn't help but notice, when comparing, that they we're the exact same file size and image.
Makes me believe I must be using the wrong reshade.
Solid 45
Do I need to delete it completely from my directory to use your mod? and also delete it from the Reshade app?
Also an installation guide for your mod?
Also, how can I temporarly disable my current shaders from reshade so I can try yours? I don't want to mix them.
Thank you!
About you disabling your reshader. Click this link and at 2:40 he shows you how to open up the in-game shader menu. At 3:02 (that drop-down menu he clicks) is where you switch to my shader. You just find "That Extra Umph.ini" and click it. That's how you change shaders.
One last thing. In my directory, I have a folder from the current shader I have with shaders and textures inside. Do I need to delete those from my directory or is it enough if I just disable it through reshade app?
Thank you for being kind and replying.
1. drag and drop the required textures and whatever needs to be replaced replace it. This will create a mixture of the textures you already have and the textures from Reshade Natural Vision, allowing the latter to take priority. However, doing this will cause results that I can't account for, because this was made for a specific set of textures. Mixing with other textures may result in different results, some better, some worse.
2. completely remove the texture file you already have and put it somewhere like your desktop (this will allow you to go back to the texture setup you had before, at any moment). Then, plug in the texture file from Reshade Natural Vision. In this case, you will have the most accurate and expected outcome.
Do you have any idea what that means? it's on SSAO.fx and it says failed to compile.