


0 of 0
About this mod
NOTE: This mod very early in development, and it currently only supports textures.
Allows overwriting of game texture files by placing files into the outward_data directory.
- Permissions and credits
- Changelogs
Note: Sinai has made a better sideloader, so go use that one: https://www.nexusmods.com/outward/mods/96, it has more features and is being updated more than this one.
This mod is in beta and it ONLY supports TEXTURES right now
=== Preamble ===
I want to point out that because this mod is in beta, that means that it very well might be unstable. Also, in case it wasn't obvious, this is a MODDER'S utility. It allows (currently) modders to replace/create textures much easier than using UBAE's whole packaging thing.
We are working on being able to sideload other aspects of the game, so please keep the banal requests to a minimum, k?
Now that's over with, on to the interesting stuff!
=== Installation ===
First off, this is a BepInEx and Harmony mod, which means you need both of those installed (although Harmony comes with BepInEx so you don't actually have to worry about that.)
1) Go to https://builds.bepis.io/bepinex_be and download the latest build whose name starts with BepInEx_Legacy_x64. Click on view artifacts to see builds.
2) Extract the zip archive to the Outward installation directory.
3) Extract the mod zip archive from the files section to the root Outward install directory, which also contains Outward.exe for reference.
4) Configure your desired amount of EXTRA quickslots in Outward\BepInEx\config\com.Ashnal.Outward.ExtendedQuickslots.cfg
5) Run the game and enjoy!
Once you have those installed drop the Sideloader.dll into Outward/BepInEx/plugins folder and you'll be good to go.
If you're not a modder, that's all you have to do, congrats, go download whatever mod linked you here.
Assuming that you are a modder, here's how to actually use this thing.
=== Usage ===
The very short version is:
BUT the really important thing is making sure your texture has the same name as an already existing texture.
I recommend AssetStudio, since you can filter by Texture2D and then also search by name, so it makes things pretty easy to find.
Whatever tool you use, here's an example of replacing the deerAlpha texture:
Find the original texture (This is AssetStudio)

Now extract it (or don't, it's not really required, but I recommend it.) You now have a PNG file that has the proper name and everything. You can, if you want, drop this file into Resources/Texture2D and the sideloader will load it and you will notice exactly nothing different because it's the same file.
But edit this file and put it in the folder and then you'll see a difference.

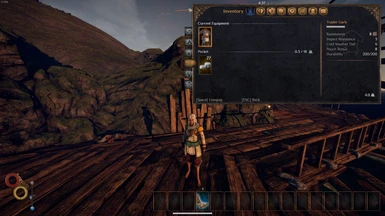
(You can see my testing where I replaced the Trader's Armor with the Scholar's Armor texture.)
Unfortunately, I haven't figured out where the normal maps are used inside Unity's Rendering pipeline, so if anyone knows how that works hit me up.
Another note, you can't change the UV mapping right now, which means that you (I am pretty sure) have to keep the texture size the same, so no bumping all the textures in the game up to 4k just yet or whatever.
The source is on Github if you want to look at it or submit a pull request or do issues there, whatever.
=== Credits ===
This mod is in beta and it ONLY supports TEXTURES right now
=== Preamble ===
I want to point out that because this mod is in beta, that means that it very well might be unstable. Also, in case it wasn't obvious, this is a MODDER'S utility. It allows (currently) modders to replace/create textures much easier than using UBAE's whole packaging thing.
We are working on being able to sideload other aspects of the game, so please keep the banal requests to a minimum, k?
Now that's over with, on to the interesting stuff!
=== Installation ===
First off, this is a BepInEx and Harmony mod, which means you need both of those installed (although Harmony comes with BepInEx so you don't actually have to worry about that.)
1) Go to https://builds.bepis.io/bepinex_be and download the latest build whose name starts with BepInEx_Legacy_x64. Click on view artifacts to see builds.
2) Extract the zip archive to the Outward installation directory.
3) Extract the mod zip archive from the files section to the root Outward install directory, which also contains Outward.exe for reference.
4) Configure your desired amount of EXTRA quickslots in Outward\BepInEx\config\com.Ashnal.Outward.ExtendedQuickslots.cfg
5) Run the game and enjoy!
Once you have those installed drop the Sideloader.dll into Outward/BepInEx/plugins folder and you'll be good to go.
If you're not a modder, that's all you have to do, congrats, go download whatever mod linked you here.
Assuming that you are a modder, here's how to actually use this thing.
=== Usage ===
The very short version is:
- Make a folder in Outward/Outward_Data/Resources/Texture2D
- Drop your texture file (.png only right now, sorry) that has the same name as an existing resource in here and you're done.
BUT the really important thing is making sure your texture has the same name as an already existing texture.
I recommend AssetStudio, since you can filter by Texture2D and then also search by name, so it makes things pretty easy to find.
Whatever tool you use, here's an example of replacing the deerAlpha texture:
Find the original texture (This is AssetStudio)
Now extract it (or don't, it's not really required, but I recommend it.) You now have a PNG file that has the proper name and everything. You can, if you want, drop this file into Resources/Texture2D and the sideloader will load it and you will notice exactly nothing different because it's the same file.
But edit this file and put it in the folder and then you'll see a difference.
(You can see my testing where I replaced the Trader's Armor with the Scholar's Armor texture.)
Unfortunately, I haven't figured out where the normal maps are used inside Unity's Rendering pipeline, so if anyone knows how that works hit me up.
Another note, you can't change the UV mapping right now, which means that you (I am pretty sure) have to keep the texture size the same, so no bumping all the textures in the game up to 4k just yet or whatever.
The source is on Github if you want to look at it or submit a pull request or do issues there, whatever.
=== Credits ===
- Thanks to Ellie on Discord for pointing me in the right direction for the code. (I'm sure this will not be the only reason she's on here in the future)