


0 of 0


About this mod
This mod changes many things such as Graphics, Movement Speed, Amount/Length of Batteries/Bandages, Night Vision and much more. EPILEPTIC VERSION INCLUDED
- Permissions and credits
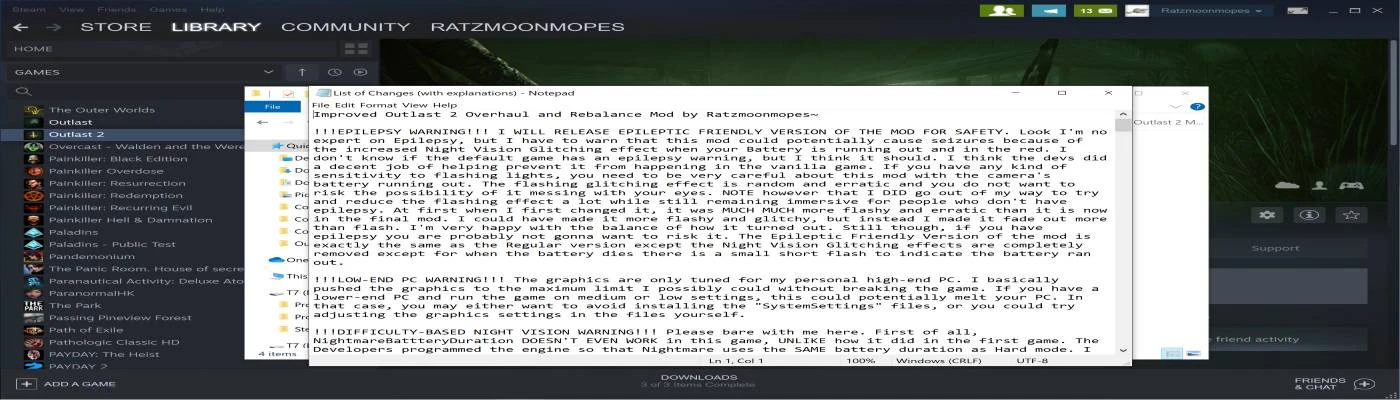
Improved Outlast 2 Overhaul and Rebalance Mod by Ratzmoonmopes~
My Outlast 1 Mod Here: https://www.nexusmods.com/outlast/mods/8
UPDATE: I might potentially make a Version 1.1 of this mod someday in the future. There's a few things I could/want to go back to tweak and clean up. If I ever do make a version 1.1, it will be whenever I feel like playing and modding Outlast again.
!!!EPILEPSY WARNING!!! I WILL RELEASE EPILEPTIC FRIENDLY VERSION OF THE MOD FOR SAFETY. Look I'm no expert on Epilepsy, but I have to warn that this mod could potentially cause seizures because of the increased Night Vision Glitching effect when your Battery is running out and in the red. I don't know if the default game has an epilepsy warning, but I think it should. I think the devs did a decent job of helping prevent it from happening in the vanilla game. If you have any kind of sensitivity to flashing lights, you need to be very careful about this mod with the camera's battery running out. The flashing glitching effect is random and erratic and you do not want to risk the possibility of it messing with your eyes. NOTE however that I DID go out of my way to try and reduce the flashing effect a lot while still remaining immersive for people who don't have epilepsy. At first when I first changed it, it was MUCH MUCH more flashy and erratic than it is now in the final mod. I could have made it more flashy and glitchy, but instead I made it fade out more than flash. I'm very happy with the balance of how it turned out. Still though, if you have epilepsy you are probably not gonna want to risk it. The Epileptic Friendly Version of the mod is exactly the same as the Regular version except the Night Vision Glitching effects are completely removed except for when the battery dies there is a small short flash to indicate the battery ran out.
!!!LOW-END PC WARNING!!! The graphics are only tuned for my personal high-end PC. I basically pushed the graphics to the maximum limit I possibly could without breaking the game. If you have a lower-end PC and run the game on medium or low settings, this could potentially melt your PC. In that case, you may either want to avoid installing the "SystemSettings" files, or you could try adjusting the graphics settings in the files yourself.
!!!DIFFICULTY-BASED NIGHT VISION WARNING!!! Please bare with me here. First of all, NightmareBattteryDuration DOESN'T EVEN WORK in this game, UNLIKE how it did in the first game. The Developers programmed the engine so that Nightmare uses the SAME battery duration as Hard mode. I would have made 3 different versions, 1 for Normal, 1 for Hard and 1 for Nightmare/Insane, but I can't. I can only do 2. There is nothing I can do about this. Not my fault. Blame them not me. The other annoying flaw with this that requires me to release different versions in the first place is that for the Night Vision Glitching effect to start happening, it has to be set to start at a certain specific time, but this timer is UNIVERSALLY applied to ALL difficulties and there is no way to make each difficulty have it's own separate timer, except for making separate files. So I have to make 2 separate versions where the timer is set to 2 different values. 1 for Normal and 1 for Hard/Nightmare/Insane. So basically if you want the Night Vision Glitching to start at the correct time (5th beep on Normal, 1st beep on Hard) on all difficulties, you're going to need to install the different version of the mod each time you want to change difficulties. This shouldn't be too bad though because the mod is so small and it only takes a few seconds to install it's no big deal.
INSTALL / DIY MODDING INSTRUCTIONS AT BOTTOM OF THE PAGE
Introduction/Explanation:
Keep in mind this is basically my personal version of the game you are downloading.
Every single one of these adjustments are subjectively what ~I~ personally felt was best after several hours/playthroughs of testing and constantly going back and changing these values dozens upon hundreds of times. I spent enough time and patience doing this. If you disagree with any of these things; if you feel certain things are too fast or too slow, if you feel certain things are too easy or too difficult, feel free to change any and all of it yourself.
As far as I know, and in my opinion, no parts of the game are "broken" or "ruined" by this mod. If you disagree that's fine. Some things might be a little easier, but I don't believe I made it any more or less imperfectly balanced than the vanilla game already was. Although I am much less familiar with Outlast 2 than Outlast 1, so if you notice anything broken or off that I didn't, I apologise.
My goal is neither to make the game easier OR harder. Personally I care a lot less about how challenging games are, and care a lot more about how satisfying and enjoyable they feel to play. For example, when I increase the movement speed for walking/running, it's not because I'm trying to make the chases easier, it's because I'm trying to increase how satisfying it feels to walk/run around in general. When I increase/decrease the amount/length of batteries/bandages, it's not to make the game easier, but to make the game feel more immersive/realistic in my personal opinion.
If there is anything I did not change and you are wondering why, the answer is either A) I didn't feel like it or B) I didn't know how. There are many things I could have changed but didn't feel like messing with it for one reason or another, and there are certain things I wish I could have changed but don't know how to. For example, whenever you walk up or down a slope, the camera automatically shifts and adjusts itself up/down and I hate that, I wish I could remove that but I don't know how.
Modding Outlast 2 was much more difficult and frustrating, more complex and complicated, and took much more time than the first game, but I still had a fun great time doing it. I learned and improved a lot and it was worth it to me.
Graphics Improvements:
Notable Changes:
- FOV Increased
- Film Grain and Chromatic Aberration Disabled
- Camera Depth Of Field Completely Removed When Battery Has Charge
- Camera Depth Of Field Heavily Increased When Battery Is Depleted
- High Quality Player Model Enabled
- Draw Distance Increased
- Extra Anti-Aliasing Enabled
- High Quality Ambient Occlusion Enabled
- Texture Quality Resolution Increased For Several Things
- All High Quality Shadows Enabled
- All Fog Enabled- All Environment Reflections Enabled + Resolution Increase
- Footstep Decals Increased
- Night Vision Depth Of Field Heavily Altered
- Night Vision Glitching/Depleted Effects Heavily Altered
!!!WARNING!!! !!!SHADOW RESOLUTION WARNING!!! DO NOT CHANGE SHADOW RESOLUTION VALUES AT ALL OR SHADOWS WILL GLITCH, FLICKER AND DISAPPEAR. It took me a while to figure out this problem.
FOV Increased:
(Default FOV is ALWAYS too low in every first person game ever. This adjustment is a huge improvement. I like and kept the idea that the camcorder has a lower FOV than the naked Human eyeballs. I didn't make it too high because I don't like distorted fish-eye FOVs and still wanted to retain the claustrophobic vibe.)
BaseFOV=90 > 110
DefaultFOV=90 > 110
RunningFOV=100 > 130
CamcorderNVMaxFOV=75 > 101
CamcorderMaxFOV=75 > 101
YoungBlakeFOV=Nothing > 120 (This actually wasn't there in the file by default, but I wanted it so bad I took a shot in the dark and thought to add it myself and it worked.)
- Film Grain disabled by pressing F8 at any time (must be done every time you boot the game)
(I looked all over and found 0 people talking about film grain anywhere online for Outlast 2. I can't believe so few people on the internet talk about this, it boggles my mind. So because this game uses the same engine and files as the first game, I just hoped and prayed that it would work the same way as the mod for the first game and thankfully it did.)
- AllowChromaticAberration=True > False
(In the first game, I did NOT want to remove the chromatic aberration because it was actually intelligently well designed, because it ONLY appeared on the camcorder when it was raised. When you put down the camera, the chromatic aberration should disappear. It was correct in the first game. But in this game they changed it and ruined it. Somehow somebody on the development team thought the human eyeball naturally has chromatic aberration, but it doesn't and shouldn't. So I removed it entirely. But in my headcanon, if you think about it, I actually believe it adds more to the immersion because the camcorder in this game is supposed to be newer and higher quality than the one in the first game. The lack of aberration adds to the feeling of the camera being an "upgrade" in the 2nd game.)
- bAllowRedBarrelsDOF=True > False
- HighQualityAmbientOcclusion=False > True
- bAllowPostprocessFXAA=False > True
- FogVolumes=False > True
- VolumetricFogHighResolutionTranslucencyVolume=False > True
- HighQualitySkin=False > True
- MaxDrawDistanceScale 2.0 > 5.0
- NumFootstepDecals=12 > 50
- DecalLifeSpan=10.0 > 99999.0
- DecalCullDistanceScale 2.0 > 5.0
- HighQualityShadowFilter=False > True
- bEnableForegroundSelfShadowing=False > True
- AllowImageReflections=False > True
- Environment Reflections Increased 512 > 2048
-TEXTUREGROUP_ProcBuilding_Face 1024 > 4096
-TEXTUREGROUP_ProcBuilding_LightMap 256 > 1024
-TEXTUREGROUP_Weapon=(MinLODSize=256,MaxLODSize=1024 > 2048
-TEXTUREGROUP_WeaponNormalMap=(MinLODSize=256,MaxLODSize=1024 > 2048
-TEXTUREGROUP_WeaponSpecular=(MinLODSize=256,MaxLODSize=1024 > 2048
-TEXTUREGROUP_Vehicle=(MinLODSize=256,MaxLODSize=2048 > 4096
-TEXTUREGROUP_VehicleNormalMap=(MinLODSize=256,MaxLODSize=2048 > 4096
-TEXTUREGROUP_VehicleSpecular=(MinLODSize=256,MaxLODSize=1024 > 2048
Controls Adjustments:
Notable Changes:
- Mouse Smoothing Disabled
- Removed Pointless Ledge Peeking Timer/Cooldown
- Movement Speed Slightly Increased/Decreased For Many Different Actions
- Sprint Speed Heavily Reduced, Feels More Natural Like Outlast 1
(I could have removed the whole "sprint" thing completely by making both the Run Speed and Sprint Speed the exact same value, but I think the way I have it set up here feels better because I like the feeling of having a slight acceleration to the run. It is barely noticeable though, I think it feels very natural. I hope you agree this feels much better than vanilla. If you disagree, feel free to change it yourself. Also I did a lot testing to find the right running/sprint speed, I am very satisfied with how it turned out. The vanilla default Sprint speed was WAAAAAY too fast, idk what the devs were thinking or why they did that. Now it feels a lot closer to the first game. It might still be a little too fast for some people's liking, if so again you can change it if you want.)
bEnableMouseSmoothing=true > false
(In the first game, I didn't feel the need to disable mouse smoothing; it felt great to me with it on, but in this game it was actually horrible so I did disable it and it's much better.)
NormalWalkSpeed=200 > 192.25
NormalRunSpeed=450 > 477.5
StaminaDepletedRunSpeed=250 > 302.5
SprintSpeed=650 > 530
CrouchedSpeed=75 > 95
ShallowWaterWalkSpeed=150 (unchanged)
ShallowWaterRunSpeed=275 (unchanged)
WaterWalkSpeed=100 > 102.5
WaterRunSpeed=200 > 202.5
FoliageWalkSpeed=180 (unchanged)
FoliageRunSpeed=350 (unchanged)
LimpingWalkSpeed=87.243 (unchanged)
HobblingWalkSpeed=140 (unchanged)
HobblingRunSpeed=250 (unchanged)
BeamWalkSpeed=80 (unchanged)
BeamRunSpeed=160 (unchanged)
YoungBlakeWalkSpeed=140 > 150
YoungBlakeRunSpeed=300
FreeCrawlSpeed=85 > 90
ConstrainedCrawlSpeed=50 > 55
CrawlChasedSpeed=65 > 70
HiddenUnderwaterSpeed=35 > 40
JumpClearanceWalking=200 > 210
JumpClearanceRunning=300 > 310
JumpClearanceOnBeam=140 > 150
SmallLandingPenaltyDuration=0.75 > 1.0
HardLandingPenaltyDuration=1.5 > 2.0
SprintDelay=2.0 > 1.5
SpeedPenaltyBackwards=0.35 > 45
SpeedPenaltyStrafe=0.2 > 0.25
CrawlStrafeSlowDown=0.5 > 0.25
FreeCrawlBackwardsSlowDown=0.5 > 0.45
CrawlRotationCorrectionRate=120.0 > 500.0
PairedWalkMovingRotationRate=125.0 > 500.0
PairedWalkTurnOnSpotRotationRate=125.0 > 500.0
PairedWalkBackwardsSlowDown=0.35 > 0.20
PairedWalkStrafeSlowDown=0.30 > 0.15
LedgeHangPeekMaxDuration=3.0 > 9999.0
LedgeHangPeekRestDuration=4.0 > 0.0
Rebalancing Adjustments:
Notable Changes:
- Health Regen Heavily Reduced
- Max # of Batteries and Bandages Same On All Difficulties
- Battery Length Different On Normal vs Hard/Nightmare/Insane Difficulties
- Max Stamina Increased
- Stamina Consumption Rate Reduced
- Stamina Regen Rate Heavily Increased
- Jumping Does Not Cost Stamina
- Fall Damage Height Slightly Increased
I know the stamina system is controversial. There are a lot of games where I personally don't like stamina and want to and have removed the stamina system entirely, such as Skyrim, or Dead Island and Dying Light. I COULD have easily removed the Stamina system in this game by just giving 99999 stamina, but I did not WANT to do that. In this particular game I like the idea that your character gets more tired and breathes harder and gets slower over time, I personally think it works naturally and like how it adds to the immersion in this particular game. I would much rather just make it more TOLERABLE than completely removing it. If you want infinite stamina, go ahead and open the OLGame file and change it to 99999 yourself.
Why did I reduce the Health Regen so much, you ask? Because just like with the first game, I felt the vanilla game's regen was WAAAAY too easy and forgiving, even for "bad" players. I feel that by reducing it, it makes taking damage more realistic, immersive and meaningful, as well as makes bandages more useful.
If you are wondering Why I made the number of Batteries and Bandages the same on all difficulties, it is simply due to the pocket size. Personally, I don't care about the difficulty or challenge in this case, what I care about most is the realism/logic of the pocket size. The pockets are clearly visually designed to hold a specific number. I don't want the player to A) have more batteries/bandages than are able to physically appear in your pockets or B) not be allowed to pick up more when you can CLEARLY see that you have room for holding more. If you want to make the game harder by having less stuff, change the numbers yourself.
HealthRegenDelay=10.0 > 22.5
HealthRegenRate=10.0 > 1
BandageUsedHealthRegenRate=15.0 > 1
NrmMaxNumBandages=3 > 4
HardMaxNumBandages=3 > 4
NightmareMaxNumBandages=3 > 4
DefaultNumBatteries=1 > 2
NrmMaxNumBatteries=8 > 10
HardMaxNumBatteries=8 > 10
NightmareMaxNumBatteries=8 > 10
LowBatteryWarningThreshold=0.15 > 0.10
EasyBatteryDurationNV=260.0 > 260.0
NrmBatteryDurationNV=200.0 > 175.0
HardBatteryDurationNV=180.0 > 90.0
NightmareBatteryDurationNV=Nothing > 75.0 (DOESN'T WORK)
EasyBatteryDurationMicrophone=260.0 > 500.0 (DOESN'T WORK)
NrmBatteryDurationMicrophone=180.0 > 300.0 (DOESN'T WORK)
HardBatteryDurationMicrophone=150.0 > 150.0 (DOESN'T WORK)
NightmareBatteryDurationMicrophone=Nothing > 75.0 (DOESN'T WORK)
MaxBatteryEnergyForReload=0.3 > 0.99
StaminaMaxStamina=100.0 > 200.0
StaminaMinStaminaForReplenished=50.0 > 5.0
StaminaMaxSpeedForReplenish=225.0 > 10.0
StaminaIdleReplenishRate=7.5 > 25.0
StaminaSwimmingIdleReplenishRate=0.0 (unchanged)
StaminaReplenishRate=7.5 > 25.0
StaminaNormalDepleteRate=4.0 > 4.0
StaminaFoliageDepleteRate=7.0 > 6.0
StaminaSwimmingIdleDepleteRate=0.8 (unchanged)
StaminaSwimmingFastDepleteRate=4.0 (unchanged)
StaminaDepletionEffectStart=20.0 > 25.0
StaminaEyeFocusDistance=150.0 > 300.0
AdrenalineFadeTime=3.0 (unchanged)
AdrenalineBoostDurationOnHit=3.0 (unchanged)
JumpStaminaReplenishRate=20.0 > 0.0
JumpStaminaUsePerJump=20.0 > 0.0
MinFallHeightForDamage=300 > 400
MaxFallHeightForDamage=800 > 1200
MaxFallHeightForWaterDeath=800 > 1500
Loudness Adjustments:
Notable Changes:
- Increased/Decreased Loudness Of Various Actions
DoorOpenInstantLoudness=1.5 > 1.25
DoorOpenPartialLoudness=0.3 > 0.35
DoorCloseFastLoudness=1.5 > 1.25
DoorEnterLockerLoudness=0.2 > 0.25
DoorExitLockerLoudness=0.2 > 0.25
DoorRunThroughLoudness=2.0 (unchanged)
NumFootstepsForFullLoudness=3.5 > 3.0
RunDurationForFullLoudness=2.0 > 3.0
WalkingLoudness=0.3 > 0.32
CrawlingLoudness=0.1 > 0.12
CrouchLoudness=0.1 > 0.12
RunningLoudness=1.0 > 1.25
WalkingWaterLoudness=0.45 > 0.5
CrouchWaterLoudness=0.1 > 0.25
FallingHighLoudness=2.0 (unchanged)
FallingMedLoudness=1.0 (unchanged)
FallingLowLoudness=0.2 > 0.5
HobblingWalkLoudness=0.4 (unchanged)
HobblingRunLoudness=1.0 > 1.25
LandingBigLoudness=0.8 > 1.25
LandingSmallLoudness=0.3 > 0.75
LandingBigWaterLoudness=1.0 > 2.0
LandingSmallWaterLoudness=0.5 > 1.0
DoorUnlockLoudness=0.3 > 0.2
DoorLockLoudness=0.3 > 0.2
WindowOpenLoudness=1.0 > 0.75
WindowCloseLoudness=0.6 > 0.75
TripDamageLoudness=0.5 (unchanged)
TrippingLoudness=2.0 (unchanged)
EnterBarrelLoudness=0.2 > 0.25
ExitBarrelLoudness=0.2 > 0.25
EnterWardrobeLoudness=0.2 > 0.25
ExitWardrobeLoudness=0.2 > 0.25
ExitSlidingSlopeLoudness=0.6 > 0.75
DoorChimesLoudness=0.8 > 1.5 (I don't recall ever seeing/hearing any door chimes anywhere in this game. Possibly a cut feature.)
NumCamcorderBeepsForFullLoudness=5.0 > 1.0
LowBatteryLoudness=0.45 > 0.5
Night Vision Changes:
Notable Changes:
- Night Vision Glitching Heavily Altered (!!!EPILEPSY WARNING!!!)
- Night Vision Depth Of Field Completely Removed When Battery Has Charge
- Night Vision Depth Of Field Heavily Increased When Battery Is Depleted
- Night Vision Brightness Heavily Reduced When Battery Depleted
I did my best to time it so that the glitching effect would start on the 5th beep when the battery starts dying on Normal mode, and the 1st beep in Hard/Nightmare/Insane mode. The glitching effect is randomized every second interval, and the glitching effects will be randomized and uniquely different every time your battery dies. It can be a quick flicker, a series of flickers, a short fade out or a long fade out. Each glitch can last anywhere between 0.1 and 15 seconds.And when the battery dies, the lowered brightness and increased depth of field make it feel A LOT more like the first game's camera/night vision.
NVGlitchTimeThreshold=25.0 > 77.8325 (easy) 48.4726 (normal) 26.85 (hard/nightmare/insane)
NVGlitchMaxDelayStart=8.0 > 0.5
NVGlitchMaxDelayEnd=5.0 > 1.5
NVGlitchMinDuration=0.5 > 0.1
NVGlitchMaxDuration=3.0 > 15.0
NVGlitchMaxLevel=0.5 > (unchanged)
DarkLightBrightnessEVFatalitized=-6.0 > -0.2
- NormalNVLightSettings=
DepthOfFieldFocusInnerRadiusZoomedOut=800.0 > 99999DepthOfFieldFocusInnerRadiusZoomedIn=700.0 > 99999DepthOfFieldFocusDistanceZoomedOut=700.0 > 99999DepthOfFieldFocusDistanceZoomedIn=3200.0 > 99999
- InteriorNVLightSettings=
DepthOfFieldFocusInnerRadiusZoomedOut=400.0 > 99999DepthOfFieldFocusInnerRadiusZoomedIn=400.0 > 99999DepthOfFieldFocusDistanceZoomedOut=300.0 > 99999DepthOfFieldFocusDistanceZoomedIn=800.0 > 99999
- PassiveNVLightSettings=
DepthOfFieldFocusInnerRadiusZoomedOut=200.0 > 250.0DepthOfFieldFocusInnerRadiusZoomedIn=200.0 > 250.0DepthOfFieldFocusDistanceZoomedOut=50.0 > 100.0DepthOfFieldFocusDistanceZoomedIn=200.0 > 250.0
Miscellaneous:
MinCosAngleForPickup=0.98 > 1.0 (come on, really? why is this a thing)
That's all I can remember changing, I'm not perfect and may have accidentally forgotten to include some things in the list. There also may have been things I wanted to change but forgot about. Oh well, if I did it couldn't have been a very big deal. If you have any questions feel free to ask.
Things I Wanted To Change But Couldn't:
- Demo Cliff Falling Animation Restoration (If you don't know what this means, look up the Outlast 2 Demo and you will see that at the beginning of the Demo there is a cutscene where Blake tumbles down a cliff and his glasses fall off and he looks around for them like Velma. This is the "fall" Lynn refers to when we first meet up with her. I HATE that the developers cut this from the final game. I wish I could bring it back but I have no idea how.
- Bring Back Microphone Using Battery Power (I HATE that the developers removed this in a patch and did not keep it as an option for people that do want it. I want to bring this back so bad but don't know how.)
- Increase Cutscene FOV (Just like the first game, I would like to but don't know how to change this.- Certain Button Prompts/Hints (I would like to disable certain prompts, the biggest one being "Press E To Put Down" whenenever you pick up and read notes, as well as "Press R to Reload" batteries. I hate that a lot, but I don't know how to get rid of it. I'm aware that there is the "Show Common Prompts" Option in the menu but I tried that and DO NOT like it. If you like it, go ahead and use it.)
- Sloped Camera Angle Correction (I hate that whenever you're walking up or down a sloped path the camera automatically shifts itself. I really wish I could disable that but don't know how.)
Things I Didn't Feel Like Changing:
- Microphone Detection Radius (Part of me wanted to experiment and see if I could make it so the detection radius is 360 degrees all around so you don't have to aim at specific places to hear, you could hypothetically just hear EVERYTHING around you louder, but doing this might not be possible and would require a LOT of time to figure out that I DO NOT feel like spending any time soon. Hopefully if someone else out there has the desire to change the way the microphone works, that would be cool more power to you.)
Installation Instructions/Tutorial:
1. Download Version of Mod you want
2. Open Mod with Winrar or 7Zip
3. Open Installed Game Directory - (Example: Program Files(x86) > Steam > steamapps > common > Outlast 2)
4. Backup Vanilla Config Files In A Backup Folder
4. Copy and Paste Mod Contents into Game Directory Folder and Click Replace
5. Enjoy Mod
6. If you want to edit the files yourself, just open any of them with Notepad and change whatever you want.
7. If you ever want to uninstall, simply just go to Steam > right click Outlast 2 > click properties > click Local Files > click "verify integrity of game files"
DIY Modding Tutorial:
1. This is literally the simplest and easiest mod to make/install ever. Just open the files with notepad and edit anything you understand and want to change. It's very easy to figure everything out yourself. Just be very careful and keep track of what you changed in case you mess up and want to go back.
My PC Specs:
Processor: AMD Ryzen 5 3600 6-Core 3.60 GHz
GPU: Nvidia GeForce RTX 3060 Ti
RAM: 16GB