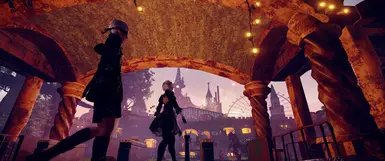
The most comprehensive and complete guide to successfully modding NieR Automata to the state of "Definitive Edition" - The most enjoyable and upgraded experience for NieR Automata.
Permissions and credits
Author's instructions
DONATIONS:
THIS MOD IS FREELY DISTRIBUTED, AND I GIVE PERMISSION TO ANYONE TO DO ANYTHING WITH IT :)
File credits
This author has not credited anyone else in this file
Donation Points system
This mod is opted-in to receive Donation Points
Changelogs
Version 2023/09/18
[FILE \\ ADDED] --- Added "Bande Desinee (2021)" to the "Optional Files section in the [FILES] tab.
[FILE \\ REMOVED] --- Removed "Bande Desinee (Re-Vamped)" from the "Optional Files section in the [FILES] tab.
[FILE \\ REMOVED] --- Removed "Bande Desinee - Re-Vamped". Users have reported the UI to not work with this mod installed and it prevents anyone from playing the game, so I am removing it until I have the time to update it or make it playable (if I can).
[MOD \\ REMOVED] --- Removed Mod ""Bande Desinee - Re-Vamped", due to a buggy launch (sorry all). Will fix and re-add later.
Version 2023/01/14
[FILE \\ ADDED] --- Added "Bande Desinee - Re-Vamped" to the MISCELLANEOUS FILES
[MOD \\ ADDED] --- Added Mod: "Bande Desinee - Re-Vamped" to the [VISUAL ENHANCEMENTS] mod section.
[MOD \\ REMOVED] --- Removed Mod ""Bande Desinee", due to it not working anymore.
Version 2023/01/08
[FILE \\ UPDATED] --- "Preparation Files" updated to support only a LOCAL Special K installation" ------ Old file moved to "Old Files" section in the FILES TAB and renamed to: "Preparation Files (Global Installation)".
[GUIDE \\ UPDATED] --- Updated the guide to utilize a LOCAL installation of Special K rather than Global due to newer ReShade versions not working with SK Global installations. Revised various sections and mod instructions to that end.
[GUIDE \\ UPDATED] --- REMOVED SUPPORT FOR INSTALLING SPECIAL K GLOBALLY. I did however, leave Global-specific instructions intact for those who still wish to use Special K globally.
[FILE \\ UPDATED] --- "Support Files (Updated D3dx.ini)" updated to "Support Files (Updated D3dx and ShaderFixes)" ------ to the "Miscellaneous Files" section in the FILES TAB.
[FILE \\ REMOVED] --- Removed "Base Admin Files". Packaging these files for use with this mod guide is now obsolete; replaced with actual user instructions in their appropriate sections.
[GUIDE \\ UPDATED] --- REMOVED SUPPORT FOR INSTALLING SPECIAL K LOCALLY. I Left local-specific instructions intact for those who still wish to use Special K locally.
[MOD INSTRUCTIONS \\ UPDATED] --- Cleared the INCOMPATIBILTY FLAGS for "Wolf's Limit Break - File Size Limit Patch" + "Automata Lod Mod" --- They both work together as reported by several users.
[MOD \\ ADDED] --- Added Mod: "DS4 Button Prompts" to the (O N L Y for PlayStation Dual Shock 4 Controller Users) Mod, inside the [FIXES & QUALITY OF LIFE (QOL) IMPROVEMENTS] mod section.
[MOD \\ ADDED] --- Added Mod: "Halo Engery Sword and Gravity Hammer" to the [VISUAL ENHANCEMENTS] mod section.
[MOD \\ ADDED] --- Added Mod: "Home Menu Texture Compression Fix" to the [VISUAL ENHANCEMENTS] mod section.
[MOD \\ MOVED] --- Moved: "Grid Overlay + Film Grain Removal" into the [FIXES & QUALITY OF LIFE (QOL) IMPROVEMENTS] Mod Section
[MOD \\ MOVED] --- Moved: "Home Menu Texture Compression Fix" into the [FIXES & QUALITY OF LIFE (QOL) IMPROVEMENTS] Mod Section
Version 2021/07/18
[MOD INSTRUCTIONS \\ UPDATED] --- "NA Partial LOD Fix" --- Updated instructions for author's change of files.
[MOD \\ ADDED] --- Added Mod: "Song of Broken Pines" to the [VISUAL ENHANCEMENTS] mod section.
[MOD \\ ADDED] --- Added Mod: "2V Cyberpunk Outfit" to the [VISUAL ENHANCEMENTS] mod section.
[MOD \\ ADDED] --- Added Mod: "NVO (NieR Visual Overhaul) 2.0" to the [POST-PROCESSING] mod section.
[MOD \\ REMOVED] --- Removed OUTDATED MOD "Video Upscaled FullHD AI Gigapixel 60fps Interpolated" due to the new patch having mostly-fixed / corrected the game's videos. Will consider re-adding it when the author makes the necessary updates with all new videos from the new patch.
[MOD \\ REMOVED] --- Removed OUTDATED MOD "NieR Automata Re-Encoded Videos" due to the new patch having mostly-fixed / corrected the game's videos. Will consider re-adding it when the author makes the necessary updates with all new videos from the new patch.
[MOD \\ REPLACED] --- Replaced OUTDATED MOD "NieR: Automata DualShock 4 Button Prompts" with the one created by user: "M&M" in the [FIXES & QUALITY OF LIFE (QOL) IMPROVEMENTS] section of the guide.
[MOD \\ REPLACED] --- Replaced OUTDATED MOD "NieR Automata Grid Overlay Removal" with "Grid and Bunker Grain Removal" created by user: "ChaserJZX" in the [VISUAL ENHANCEMENTS] section of the guide.
Version 2021/07/17
[GUIDE \\ UPDATED] --- Created "NEW" guide in response to the July 15th, 2021 patch to NieR:Automata. I have left the "OLD" guide still available and in it's own section.
[MOD \\ ADDED] --- Added Mod: "Automata LodMod" to the [DEEP MODIFICATION] mod section.
Version 2021/05/08
[MOD INSTRUCTIONS \\ UPDATED] --- Updated installation instructions for Mod: "Nier Automata - Texture Pack" following the recent update by GPUnity, and renamed the mod: "Nier Automata - HD Texture Pack V1.0".
[MOD INSTRUCTIONS \\ UPDATED] --- Updated installation instructions for Mod: "Wolf's Limit Break - File Size Limit Patch" to better serve U L T R A W I D E screen users.
Version 2021/05/07
Cumulative changes made from early April to May 07th, 2021:
- Made some changes to the readability of instructions to the FAR installation process.
- Added a new Base Admin Files file that I updated with the new FAR (v 0. 8 5) but that file somehow ended up making some people's existing modded installation of N:A not work with some mods.
- REVERTED the main file back to "Base Admin Files (ReShade 4.7.0) - Better Compatibility" file.
- Revised several instructions in the FAR installation process.
- Revised the instructions for each ReShade preset.
- Other minor changes to the guide.
Version 2021/01/05
[FILE \\ ADDED] --- "Support Files (ReShade 4.9.1)" to the "Miscellaneous Files" section in the FILES TAB.
[FILE \\ UPDATED] --- "Base Admin Files updated to FAR v 0.8.5 (previously FAR v 0.7.0.14) and updated to utilize ReShade 4.9.1
[GUIDE SECTION \\ UPDATED] --- Updated the guide's [PREPARATION] section; Added (1) more bullet point --- "You need to know that the mod's TITLES are the [Links] to the mods themselves. You have to CLICK a mod's title in order to get to the mod's page."
[MOD \\ ADDED] --- Added "Bunker In Color" to the [FIXES & QUALITY OF LIFE (QOL) IMPROVEMENTS] section of the guide.
[MOD \\ ADDED] --- Added "Wolf's Limit Break - File Size Limit Patch" to the [DEEP MODIFICATION] section of the guide.
[MOD INSTRUCTIONS \\ UPDATED] --- Updated installation instructions for Mod: "FAR Mod - Fix (NieR) Automata Resolution" --- Updated instructions for Pirated Copy users
Version 2021/01/02
[MOD INSTRUCTIONS \\ UPDATED] --- Revised the instructions for the mod: "CONFIGURE "F.A.R." MOD"; Under [STEP 3: SET FRAME RATE SETTINGS] under [ADVANCED], changing the frame rate tolerance to: "0.350"..
Version 2020/11/25
[GUIDE SECTION \\ UPDATED] --- Updated the guide's [F A Qs / Frequently Asked Questions] section; Revised the question and answers for PIRATED COPY users.
[MOD INSTRUCTIONS \\ UPDATED] --- Revised the newly created instructions for PIRATED COPY users, under [FAR MOD - Fix (NieR) Automata Resolution].
Version 2020/11/24
[FILE \\ ADDED] --- "Support Files (Silencer711)" to the "Miscellaneous Files" section in the FILES TAB.
[MOD INSTRUCTIONS \\ UPDATED] --- Added instructions for PIRATED COPY users, under [Bande Desinée].
Version 2020/11/23
[GUIDE SECTION \\ UPDATED] --- Updated the guide's [F A Qs / Frequently Asked Questions] section; Added: (1) more question to the list helpful to PIRATED COPY users.
[MOD INSTRUCTIONS \\ UPDATED] --- Added instructions for PIRATED COPY users, under [FAR MOD - Fix (NieR) Automata Resolution].
Version 2020/11/17
[GALLERY \\ UPDATED] --- Replaced several outdated photos of the FAR mod's configuration and subsequently revised the instructions for the mod: "CONFIGURE "F.A.R." MOD"; in accordance with the NEW gallery photos.
[MOD INSTRUCTIONS \\ UPDATED] --- Revised the instructions for the mod: "CONFIGURE "F.A.R." MOD"; Under [STEP 3: SET FRAME RATE SETTINGS] setting the limit to 61fps, and making it optional to change the frame rate tolerance.
Version 2020/11/08
[GUIDE SECTION \\ UPDATED] --- Updated the guide's [F A Qs / Frequently Asked Questions] section; Made some readability changes throughout the section and added more steps to follow for the white screen issue.
Version 2020/11/05
[GUIDE SECTION \\ UPDATED] --- Updated the guide's [F A Qs / Frequently Asked Questions] section; Added: (1) more question to the list.
[MOD INSTRUCTIONS \\ UPDATED] --- Added an instruction for when the user cannot proceed with SKIM due to SKIM saying the game is not installed, under [FAR MOD - Fix (NieR) Automata Resolution].
Version 2020/10/31
[FILE \\ ADDED] --- "Support Files (Updated D3dx.ini)" to the "Miscellaneous Files" section in the FILES TAB.
[MOD INSTRUCTIONS \\ UPDATED] --- Revised the instructions for the mod: "Bande Desinée".
Version 2020/10/19
[MOD INSTRUCTIONS \\ UPDATED] --- Revised the instructions for the mod: "CONFIGURE "F.A.R." MOD"; Added additional instructions under [STEP 3: SET FRAME RATE SETTINGS] enabling FAR's built-in framerate limiter and setting the limit to 60fps.
Version 2020/9/30
[GUIDE SECTION \\ UPDATED] --- Updated the guide's [F A Qs / Frequently Asked Questions] section; Added: (2) more questions to the list.
[GUIDE SECTION \\ UPDATED] --- Updated the guide's [DEEP MODIFCATION] section; Changed the priority of (2) mods to "Optional" (Y E L L O W)-colored.
[GUIDE \\ GENERAL UPDATES] --- Made some minor visual changes to a few mods' instructions.
Version 2020/9/28
[MOD \\ RE-STRUCTURED] --- Moved: "NieR Automata Input Overhaul Mod (NAIOM)" into sub-section of: "(O N L Y for Keyboard & Mouse Users)" to clarify that the mod serves Keyboard + Mouse Users.
[MOD PRIORITY \\ CHANGED] --- Changed: "NieR Automata Grid Overlay Removal" from a GREEN mod to a YELLOW mod since it is a personal preference type mod.
Version 2020/9/27
[MOD \\ ADDED] --- Added "Dual Shock 4 Button Prompts" to the [FIXES & QUALITY OF LIFE (QOL) IMPROVEMENTS] section of the guide, suggested by user PsychoHedgie.
[MOD INSTRUCTIONS \\ UPDATED] --- Re-Revised the instructions for the mod: "Clean Preset" for the mod's "Complete Package" update.
[MOD INSTRUCTIONS \\ UPDATED] --- Revised the instructions for the mod: "Configure FAR Mod" to correct the names of certain sections and corresponding actions.
Version 2020/9/26
[MOD INSTRUCTIONS \\ UPDATED] --- Changed the instructions for the mod: "Clean Preset" for the mod's newest update.
Version 2020/7/28
[MOD INSTRUCTIONS \\ UPDATED] --- Changed the version of the FAR MOD to download (from "v7.0.20") to: "v7.0.14" under [FAR MOD - Fix (NieR) Automata Resolution]. This version is the most effective version of the FAR mod to date.
Version 2020/6/29
[FILE \\ ADDED] --- "Support Files (ReShade 4.7.0)" to the "Miscellaneous Files" section in the FILES TAB.
[GUIDE SECTION \\ UPDATED] --- Updated the guide's [FIXES & QOL IMPROVEMENTS] section; Changed: "(O N L Y for U L T R A W I D E S)" mod section to reflect the new files added.
Version 2020/5/10
[MOD INSTRUCTIONS \\ UPDATED] --- Clarified instructions for the "dinput8.ini" file under section [FAR MOD - Fix (NieR) Automata Resolution].
Version 2020/5/7
[MOD INSTRUCTIONS \\ UPDATED] --- Added instructions to change "dinput8.ini" as as a step for [FAR MOD - Fix (NieR) Automata Resolution].
Version 2020/5/6
[MOD INSTRUCTIONS \\ UPDATED] --- Added "FAR p.4 - Enable Re-Shade (Official) as a Plugin" as STEP 4 of [CONFIGURE "F.A.R." MOD].
Version 2020/5/4
[MOD INSTRUCTIONS \\ UPDATED] --- Updated "A2, "9S", & "2B" to include specific instructions for the new files structure (Petrarca's May 1st update).
Version 2020/5/02
[MOD INSTRUCTIONS \\ UPDATED] --- Corrected the 3DMigoto steps to reflect using the "x64" version of the files (instead of the "x32" version) since NieR Automata is a 64-bit game (DUH!) and 3DMigoto won't inject whilst using the 32-bit files. Thanks to user: "bkragnarok" for pointing this out.
Version 2020/4/28
[FILE \\ UPDATED] --- "FAR - My Mods folder" updated to use only the specific ReShade version 4.6.1 files required for the NieR Experience ReShade.
[FILE \\ RENAMED] --- "FAR - My Mods folder" renamed to "My Mods Folder"
[FILE \\ ADDED] --- File "Shaders" uploaded to the Optional Files category. These are ALL of the main ReShade 4.6.1 shaders as well as the custom repository ones. This file is optional if anyone wants the FULL amount of shaders no longer provided in the Main File.
Version 2020/4/27
[MOD INSTRUCTIONS \\ ADDED] --- "CONFIGURE 'F.A.R.' MOD" to the [FIXES & QUALITY OF LIFE (QOL) IMPROVEMENTS] section.
Version 2020/4/25
[MOD INSTRUCTIONS \\ UPDATED] --- "2B" to include specific instructions for the new files (Petrarca's 20-APR-2020 update).
CORRECTIONS / BUG FIXES --- Fixed a critical typo in "Androids Remastered" & "2B - Butterfly Retexture" --- where if the user did not have the DLC they had to Rename the files ""pl000d.dtt" & "pl000d.dat" inside the data\pl folder from the mod, to "pl0000.dtt" & "pl0000.dat" (respectively).
MOD INSTRUCTIONS UPDATED --- "FAR Mod - Fix (NieR) Automata Resolution" --- Updated to replace files with version 7.0.20 (originally v 7.0.8).
MOD ADDED --- "Ultrawide-screen NieR HUD Fix" by Wide Screen Gaming Forums (WSGF) ADDED to the [Fixes & Quality of Life (QOL Improvements] section.
FILE MOVED --- "NieR Experience ReShade" --- Changed to "NieR Experience ReShade (DSR 4K Only)" and moved to Miscellaneous Files --- Since this was my old profile with NVIDIA DSR @4K.
Version 2020/4/16
FILE UPDATED --- "FAR - My Mods folder" updated to use ReShade version 4.6.1 (Fixes the ReShade errors from previous files.)
GUIDE UPDATED --- "9S" Mod (from Androids Remastered) MOVED to [VISUAL ENHANCEMENTS] section.
CORRECTIONS / BUG FIXES --- Added a (missing) step for 3DMigoto's installation procedures: When replacing all with 3DMigoto files --- use the x32 files. (Thanks to user: "Understandable")
CORRECTIONS / BUG FIXES --- Added a (missing) step for Zero's Blade installation procedures --- Extract the "data" folder to your NieRAutomata directory.
MOD INSTRUCTIONS UPDATED --- Added a new mod file under MOD Petrarca's Pods for "Normandy" to be installed alongside "Wheatley v2".
PERSONAL COMMENTS --- "I honestly don't know how I missed certain steps for certain mods and general procedures. If you're reading this and you went through the guide early on --- I'm sorry" :)
Version 2020/4/15
CORRECTIONS / BUG FIXES --- Added a (missing) step for NieR Automata Input Overhaul Mod (NAIOM)'s installation procedures.
FAQ UPDATED --- Updated the guide's FAQ section for the white screen issue.
GRAMMAR/SPELLING --- Fixed a minor typo with the name of the main file for MOD "2B - Butterfly Retexture".
GUIDE UPDATE --- Made a MASSIVE amount of changes to the FAR Mod's installation procedures and updated the [POSTS] tab to reflect these changes.
GUIDE UPDATE --- Made readability improvements all across the page.
MOD INSTRUCTIONS UPDATED --- Improved the installation procedures for MOD "Bande Desinée".
MOD ADDED --- "9S" (from Androids Remastered) ADDED to as a new sub-section under MOD Androids Remastered.
Version 2020/4/14
FILE UPDATED --- Re-uploaded "FAR - My Mods folder" with a few missing shaders and a typo in the readme corrected.
Version 2020/4/12
FAQ UPDATED --- Added FIX --- Onscreen on initial launch it says "stereo disabled" message on the bottom of the screen. You get rid of it by editing 'hunting=1' to hunting=0' in d3dx.ini.
FAQ UPDATED --- Added FIX --- Disable the in-game's Anti-Aliasing completely, to "OFF" (The game's AA is overwhelmingly taxing on any system and should be disabled, while using some other AA via ReShade instead). Every other setting is up to you.
MOD ADDED --- "Captain 8B" by Kekoulis ADDED to the [Visual Enhancements] section.
MOD ADDED --- "2B - Butterfly Retexture" by Petrarca22 ADDED to the [Visual Enhancements] section.
DISCLAIMER: The mods included here are not ALL the mods that can, and/or could be included in your own personal pursuit of a "Definitive Experience". This mod list and guide represents only the ones I have included in my own modded playthrough. I implore you to explore all of the available MODS for NieR:Automata because there are other beautiful works of creation (that others poured vast amounts of time into creating) that have been created after the last major update of this list or have not been added due to my personal, real-life time constraints. Feel free to use this guide as a BASE in which to build your own modded experience upon.
I N T R O D U C T I O N :
Hello and welcome to your personal guide on how to make your Nier:Automata™ experience — the Definitive one you deserve. Unfortunately, Square Enix / Platinum Games did a shitty job when they made the PC version of the game. In an AMAZING MIRACLE, Square Enix pushed out a NEW patch to the game on July 15th, 2021 that fixed a TON of things. Even Ultrawide users can rejoice since the game now has NATIVE Ultrawide support. Though this patch fixed a lot of things, they didn't touch a lot of the low-resolution textures that still makes the game look less-than-stellar. Just follow this Guide and you'll be experiencing this beautiful game exactly as we all should have experienced it if the developers + Square Enix just did their jobs correctly the first time. Thanks to our modding community, this version is STILL the de-facto version to play.
The Official
Modding Discord server.
HE L P F U L S U G G E S T I O N S :
Spoiler:
Show
1 — Please for the love of all that is good in this world - follow my exact instructions and do NOT just SKIM sections (unless you like the bad life) - you will have a B R O K E N and/or INCOMPLETE™ Experience.
Spoiler:
Show
I have already exhausted countless (probably like around 30 hours now, really) amounts of time trying different combinations and orders of installation (of mods) and I have ended up quite simply wasting all of that time just ruling out what does NOT work. Please allow me to save you this same amount of time in testing, diagnosing, and confirming theories.
2 — Green Mods. These are mods you MUST install in order to achieve the Definitive™ Experience. 3 — Yellow Mods. (Optional) but heavily recommended. These are mods you SHOULD install in order to achieve the Definitive™ Experience. 4 — R-E-A-D the Official Mods' Descriptions to know what a specific mod does and how it functions in the game. Without these modders and their voluntary works you'd have been better off buying this game on console. So I ask that you please endorse their work if you like what they made so that they can feed their children and remain off the streets.... kthx 5 — BACKUP / MAKE A FULL COPY of your original (vanilla) game folder in case you mess something up and want to return to a fresh install quickly.
Spoiler:
Show
I've messed up my installation quite a few times while trying different combinations and orders of installation (of mods) and you know what I had to show for it? (Approx.) 30 hours of my life gone. Thankfully, I had a full copy of the original game installation backed up on another drive. I will not bat an eye if you don't adhere to this and you "accidentally" rendered your game inoperable. If you mess up, just start over again --- this guide does not take very long to complete.)
6 — Always follow my EXACT instructions. Then once you have the game right where you want it (AKA achieved the Definitive™ Experience), repeat step 5 and BACKUP / MAKE A FULL COPY of the *MODDED* game folder so you won't have to do this all over again :)
F A Qs / Frequently Asked Questions :
Spoiler:
Show
1 — TEST"
Spoiler:
Show
— TEST
You will need the following items in order to proceed with this guide:
A decent computer that can run this game.
You need to know that the mod's TITLES are the [Links] to the mods themselves. You have to CLICK a mod's title in order to get to the mod's page.
Attention to Detail. You have to start the game oncebefore beginning this guide. Also you must start the game immediately after installing Special K, so it can generate some files we need. That is a critical step. It is critical to go through this process very carefully because for one reason or another unless you do everything I say step by step, you'll encounter stupid stuff like the white screen issue (almost as if the game is wondering what the eff is going on with it's files) — so please pay attention to detail.
Nier:Automata™ — You need the STEAM version of this game NOT the GAMEPASS version (GAMEPASS FILES WILL NOT ALLOW MODDING). I have the STANDARD version of the game (NO DLC), but ANY version of the game works here.
Start the game once, in Vanilla form, prior to beginning this guide.
Create a Folder named: "textures" on your desktop. (I'll explain why later)
Download "Preparation Folders" under the FILES TAB. Extract the contents into your NieR Automata install directory --- Steam\steamapps\common\NierAutomata. Alternatively --- you could manually do it:
Spoiler:
Show
Create these folders: — Folder named: "pl" inside "data" folder — It should look like this: (NierAutomata\data\pl) — Folder named: "wp" inside "data" folder" — It should look like this: (NierAutomata\data\wp) — Folder named: "SK_Res" inside of your NieR Automata install directory --- Steam\steamapps\common\NierAutomata. — Folder named: "inject" inside "SK_Res" folder — It should look like this: (SK_Res\inject\) — Folder named: "textures" inside "inject" folder — It should look like this: (SK_Res\inject\textures)
Replaces the default pre-rendered cutscenes with 4K or 1440p resolution AI upscaled from lossless originals using a fully lossless codec until the final encode. ULTRA-QUALITY 4K/1440 --- For the BEST VISUAL QUALITY.
FIRST make a copy/backup of your NierAutomata\data\movie folder. You should have made a copy/backup of NieR Automata before beginning this guide as is stated in STEP #5 in the "HELPFUL SUGGESTIONS" section of the guide. This way, if you ever need to return NieR Automata to it's original state - Steam won't make you re-download 24 GB of data. If you don't do this, it will be your own fault if you have to "verify files" on Steam and it makes you download basically the whole game again. You have been warned.
***** ONLY INSTALL (1) VIDEO MOD *****
Download either the "4K\30fps" (in the main files) -OR- the "1440p\30fps" (in the optional files).
[WINDOWS] "Right-click" on each file that finished downloading, click "properties", click "unblock" (If you see it, lower-right hand corner).
Extract the contents of the movie folder in each file to the NierAutomata\data\movie folder.
4K & 1080p videos upscaled using Proteus and Chronos AI and built using FFmpeg, utf_tab, MPEG Sofdec, CRI Movie.
FIRST make a copy/backup of your NierAutomata\data\movie folder. You should have made a copy/backup of NieR Automata before beginning this guide as is stated in STEP #5 in the "HELPFUL SUGGESTIONS" section of the guide. This way, if you ever need to return NieR Automata to it's original state - Steam won't make you re-download 24 GB of data. If you don't do this, it will be your own fault if you have to "verify files" on Steam and it makes you download basically the whole game again. You have been warned.
***** ONLY INSTALL (1) VIDEO MOD *****
Download all (8) of the (MAIN) Files on this page AND the OPTIONAL FILE: "LodMod.ini".
[WINDOWS] "Right-click" on each file that finished downloading, click "properties", click "unblock" (If you see it, lower-right hand corner).
Extract the contents of each file to the NierAutomata\data\movie folder.
These videos have been reconverted from the originals into lower bit-rate files that the game handles better. This was done to remove the game's stutter during videos playing in-game. With these videos, virtually no discernible visual fidelity is lost AND the game performs BETTER during cut-scenes.
FIRST make a copy/backup of your NierAutomata\data\movie folder. You should have made a copy/backup of NieR Automata before beginning this guide as is stated in STEP #5 in the "HELPFUL SUGGESTIONS" section of the guide. This way, if you ever need to return NieR Automata to it's original state - Steam won't make you re-download 24 GB of data. If you don't do this, it will be your own fault if you have to "verify files" on Steam and it makes you download basically the whole game again. You have been warned.
***** ONLY INSTALL (1) VIDEO MOD *****
Download the Main File.
[WINDOWS] "Right-click" on the file you just downloaded, click "properties", click "unblock" (If you see it, lower-right hand corner).
Extract all files to the NierAutomata\data\movie folder.
Patched game executable to increase some file size and VRAM limits that have been predefined. THIS DOES NOT AFFECT PERFORMANCE ITSELF; it only increases some limits to allow you to have multiple large mods (4K textures yay!).
Download the Main File "0 - Wolf's Limit Break - Patched EXE" (DO NOT DOWNLOAD THE ULTRAWIDE ONE, this has been patched by Square Enix in the main .exe)
(WINDOWS) Right-click on the downloaded zip file, click properties, then click "unblock" in lower-right hand corner(if it exists).
Extract the .exe file inside the zipped file, into your NierAutomata game directory --- Steam\steamapps\common\NierAutomata..
This is the mod that allowed us to say the game on PC was not shitty anymore. Hands down a MUST install STILL, especially if you want to upgrade the game's textures and models, etc. Read more about it here.
For this guide, a LOCAL installation of Special K is the community-preferred method due to the ability to use ReShade alongside it with no problems. You can either install SPECIAL K locally (runs within the game's installation directory) as is written in the guide -OR- install SPECIAL K globally using it's installer (however you are on your own with this method since the guide is not designed around it). — Reference / Official Instructions —
I recommend following the Wiki directly on Special K (info on installing it as well as using it together with ReShade) as the steps are clearly laid out. This way it is always up to date: for "Special K": https://wiki.special-k.info/SpecialK/Custom/FAR for "ReShade": https://wiki.special-k.info/en/SpecialK/ReShade#nier-automata Pay close attention though, the method you choose to install SPECIAL K depends on whether or not you will be utilizing RESHADE for post-processing effects. — Guide-specific Instructions —
Download the latest public-release Special K "archive": HERE.
The absolutelatest version can always be found within the Special K Discord Server, inside the #nightly-builds channel (at the bottom --- download: "SpecialK64.dll").
(WINDOWS) Right-click on the downloaded zip file, click properties, then click "unblock" in lower-right hand corner(if it exists).
Double-click on the file to open it.
Select: "SpecialK64.dll" and drag it / extract it into your NieRAutomata game directory --- Steam\steamapps\common\NierAutomata.
Rename: "SpecialK64.dll" to: "dxgi.dll"
Done.
— IF YOU WILL BE USING RESHADE:
Spoiler:
Show
INSTALLING SPECIAL K (WITH RESHADE) / LOCALLY:
Download the latest public-release Special K "archive": HERE.
The absolutelatest version can always be found in the #nightly-builds channel (at the bottom --- download: "SpecialK64.dll") within the Special K Discord Server.
(WINDOWS) Right-click on the downloaded zip file, click properties, then click "unblock" in lower-right hand corner(if it exists).
Double-click on the file to open it.
Select: "SpecialK64.dll" and drag it / extract it into your NieRAutomata game directory --- Steam\steamapps\common\NierAutomata.
Removes the grid overlay like the other mod, just for the new patch. Also can remove the grain seen in the Bunker.
Download either of the (3) Main Files.
Extractthe contents of: (SK_Res) into your [SK_Res\inject\textures] folder: — IF YOU INSTALLED SPECIAL K IN YOUR GAME FOLDER (LOCALLY): Steam\steamapps\common\NierAutomata
Yeah so the color banding was pretty damn bad. Fixed it up and used different compression.
Download the Main File.
Extractthe contents of the archive: "Main Menu.rar" into your [SK_Res\inject\textures] folder: — IF YOU INSTALLED SPECIAL K IN YOUR GAME FOLDER (LOCALLY): Steam\steamapps\common\NierAutomata
Done.
— (O N L Y for PlayStation Dual Shock 4 Controller Users)
DualShock4 Buttons for Nier Automata July 2021 Patch. Requires Special K.
Download the Main file: "DualShock4 Buttons".
(WINDOWS) Right-click on the downloaded zip file, click properties, then click "unblock" in lower-right hand corner(if it exists).
Copy the CONTENTS of the"0_DS4-Buttons" folder from the archive (DualSock4 Buttons.rar) to your [SK_Res\inject\textures] folder: — IF YOU INSTALLED SPECIAL K IN YOUR GAME FOLDER (LOCALLY): Steam\steamapps\common\NierAutomata
This replaces the Xbox controller prompts with the ones found in the PlayStation 4 version of the game.This is a hotfix towards the game update breaking the game's UI, due to the 4k UI. The compromise you'll be getting is that some additional UI elements are either gonna disappear or are gonna go back to being their 1080p (non-4K) variants.
Download the file ("MANUAL DOWNLOAD").
(WINDOWS) Right-click on the downloaded zip file, click properties, then click "unblock" in lower-right hand corner(if it exists).
Copy the "data" folder from the archive (automatads4prompts.7z) to "steamapps\common\NieRAutomata".
High Definition Texture Pack intended to upgrade low-quality assets used in the game.
Download either of the 2 Main Files: "NieR Automata - Texture Pack V1.03" -OR- "NieR Automata - Texture Pack V1.03 - Lite".
(WINDOWS) Right-click on the downloaded zip file, click properties, then click "unblock" in lower-right hand corner(if it exists). — Easy Method (Using Windows Powershell):
Spoiler:
Show
Inside the file you just downloaded, Extract the SK_Resto your desktop or somewhere you'll remember.
Launch "powershell.exe", located here: C:\Windows\System32\WindowsPowerShell\v1.0\powershell.exe.
Paste the command inside a text editor like notepad or something (or powershell if you know how to edit things inside the command prompt).
ReplacePATH A with the exact PATH to the "SK_Res" folder extracted from the Mod.
Now, Replace "PATH B" with the exact PATH to the "SK_Res" folder inside your NieR:Automata installation directory.
It should look something like this: Get-ChildItem -Path "C:\Users\YOUR_NAME\Desktop\SK_Res" -Recurse -File | Move-Item -Destination "C:\Steam\steamapps\common\NieRAutomata\SK_Res\inject\textures"
Copy the NEW, edited command and paste it into the powershell command window.
Press [ENTER].
It may slightly pause, and should tell you NOTHING before presenting you with another line (ready to accept another input). That line looks like this: PS C:\Windows\system32\WindowsPowerShell\v1.0> (IF) it gave you some RED-colored text like --- Get-ChildItem : Could not find a part of the path... after entering the command:
Spoiler:
Show
You did something wrong. GO BACK and make sure you copied and pasted everything correctly and make sure the PATHS are correct -AND- inside of the "" quotation marks. Read my instructions very carefully.
(IF) it gave you RED-colored text like --- Move-Item : The file exists. after entering the command:
Spoiler:
Show
ALL IS OK. It just means the files are already there. Go back to the \NieRAutomata\SK_Res\inject\textures folder and delete everything inside there and then re-run the command in powershell --- It should then move the files and complete successfully with no further action needed on your part.
Done.
— Manual Method (Do Everything Yourself):
Spoiler:
Show
Inside the file you just downloaded, Navigate to the \SK_Res\inject\textures\NieRAutomata.exe\GPUnity's Texture Pack V1.03
Extract all (5) folders to your desktop: "2B", "A2", "Environment", "Fonts & UI (by Triforceguard)", and "Machines".
Open the "textures" folder (the one you're supposed to have created on your desktop back in the [PREPARATION] section)
What you're going to do is go into each of these (5) folders --- and move every single file out of each sub-folder placing all of them inside the desktop "textures" folder --- just the files by themselves.
We do NOT want ANY folders inside the "textures" folder, only files.
When you're finished, COPY all the things (INSIDE the "textures" folder on your desktop) and PASTE everything inside your [SK_Res\inject\textures] folder: — IF YOU INSTALLED SPECIAL K IN YOUR GAME FOLDER (LOCALLY): Steam\steamapps\common\NierAutomata
Adds nearly-invisible dithering to the game's rendering. The application of this dithering removes banding artifacts, while making the image look smoother overall.
WARNING: NOT COMPATIBLE WITH HDR USERS
DownloadBande Desinee (2021) from the "Optional Files" section, placing all contents inside, into your NierAutomata game directory --- Steam\steamapps\common\NierAutomata
(NOT COMPATIBLE WITH "2BBE - Body Overhaul (with Physics)"
COLORBLIND USERS: (G R E E N) colored-mod
High-quality textures & models for 2B in both ORIGINAL -and- SOUL CALIBER 6 versions.
Choose what version of 2B you would like: Normal body style: 1. "2BS" (4K - Vanilla model.) — OR — Soul Caliber VI body style: 2. "2TS" (4K - Ported model from Soul calibur 6. It's bigger, thicker and has human body proportions.)
Download the Main -OR- Optional file of the one you chose
Navigate inside the downloaded archive to the SK_Res\inject\textures\NieRAutomata.exe\Androids Remastered folder and extract all the files there --- placing these inside your [SK_Res\inject\textures] folder: — IF YOU INSTALLED SPECIAL K IN YOUR GAME FOLDER (LOCALLY): Steam\steamapps\common\NierAutomata
REPLACE ALL (if asked).
Extract these (2) files from the data\pl folder (of the version you choose): "pl000d.dtt" & "pl000d.dat" --- placing these inside NieRAutomata\data\pl and REPLACE ALL (if asked).
READ ME — If you do NOT have the DLC for NieR Automata: Rename "pl000d.dtt" & "pl000d.dat" to "pl0000.dtt" & "pl0000.dat" (respectively).
2BBE is a complete model overhaul mod which gives 2B an actual full body underneath her clothing... serving as a base body for other costume mods. This mod has refitted 2B's default outfit and modified her self-destruct state (DLC and Armour outfits have been left untouched).
Download the main file: "1 - Nevernude" — You can choose any of the main files, but this is what I chose.
Navigate to data\pl folder inside the zipped file.
Extract all (2) files from that folder: "pl000d.dtt" & "pl000d.dat" --- placing these inside NieRAutomata\data\pl and REPLACE ALL (if asked).
READ ME — If you do NOT have the DLC for NieR Automata: Rename "pl000d.dtt" & "pl000d.dat" to "pl0000.dtt" & "pl0000.dat" (respectively).
Open the .7z file --- Choose between DIRTY -or- CLEAN version.
Navigate to SK_Res\inject\textures\NieRAutomata.exe\Androids Remastered from the folder of the version you choose.
Extract all (6) files from the folder: "C904DACB.dds" + "B08FE0A4.dds" + "A8A6B7E7.dds" + "669C85FD.dds" + "07C200C2.dds" + "4AC695AA.dds" --- placing these inside your [SK_Res\inject\textures] folder: — IF YOU INSTALLED SPECIAL K IN YOUR GAME FOLDER (LOCALLY): Steam\steamapps\common\NierAutomata
REPLACE ALL (if asked).
Navigate to data\pl from the data folder (of the version you choose).
Extract all (2) files from that folder: "pl010d.dtt" & "pl010d.dat" --- placing these inside NieRAutomata\data\pl.
REPLACE ALL (if asked).
READ ME — If you do NOT have the DLC for NieR Automata: Rename "pl010d.dtt" & "pl010d.dat" to "pl0100.dtt" & "pl0100.dat" (respectively).
Download the Main File: "PODS MANUAL INSTALL".
Open the .7z file.
Navigate to SK_Res\inject\textures\pod
Extract all (11) files from the folder --- placing these inside your [SK_Res\inject\textures] folder: — IF YOU INSTALLED SPECIAL K IN YOUR GAME FOLDER (LOCALLY): Steam\steamapps\common\NierAutomata
Download the Main File: "9S MANUAL INSTALLATION".
Open the .7z file --- Navigate to SK_Res\inject\textures\NieRAutomata.exe\Androids Remastered
Extract all (3) files from the folder: "F1904A20.dds" + "AD7701DA.dds" + "6CA5DB71.dds" --- placing these inside your [SK_Res\inject\textures] folder: — IF YOU INSTALLED SPECIAL K IN YOUR GAME FOLDER (LOCALLY): Steam\steamapps\common\NierAutomata
REPLACE ALL (if asked).
Open the .7z file --- Navigate to data\pl
Extract (2) files from the folder: "pl020d.dtt" & "pl020d.dat" --- placing these inside NieRAutomata\data\pl.
REPLACE ALL (if asked).
READ ME — If you do NOT have the DLC for NieR Automata: Rename "pl020d.dtt" & "pl020d.dat" to "pl0200.dtt" & "pl0200.dat" (respectively).
Brings the two inconic Halo melee weapons to Nier.
Download the Main File "Energy Sword and Hammer".
Extract the (4) files from the archive: "wp0003.dat", "wp0003.dtt", "wp0220.dtt", and "wp0220.dtt" --- placing these inside NieRAutomata\data\wp and REPLACE ALL (if asked).
(PARTIALLY COMPATIBLE WITH "A2" (ANDROIDS REMASTERED)
COLORBLIND USERS: (Y E L L O W) colored-mod
A complete overhaul mod that replaces A2 with a fully custom made model of the best Intoner (and the one responsible for the NieR Universe), Intoner Zero. Complete with her sword (a remake of the original Zero's Sword mod - replaces 2B's "Virtuous Contact") and a custom nude configuration if the Berzerker mode is activated (works like the Intoner Mode from Drakengard 3). This has only been made to support Steam + DLC versions of the game. Enable the Grimoire Weiss Pod DLC Skin for maximum emersion.
Download the main file "Intoner Zero". FOR JUST THE WEAPON — (FULLY COMPATIBLE):
Extract "wp" from the Zip file --- placing this folder inside your NierAutomata\data folder and REPLACE ALL (if asked).
Done. FOR THE WEAPON + INTONER ZERO — (NOT COMPATIBLE WITH ""A2" (ANDROIDS REMASTERED)"):
Extract both "wp" and "pl" from the Zip file --- placing these folders inside your NierAutomata\data folder and REPLACE ALL (if asked).
READ ME — If you do NOT have the DLC for NieR Automata: Rename these files inside of the "pl" folder ----- "pl010d.dtt" & "pl010d.dat" to "pl0100.dtt" & "pl0100.dat" (respectively).
(NOT COMPATIBLE WITH "2BBE - Body Overhaul (with Physics)"
COLORBLIND USERS: (Y E L L O W) colored-mod
Mod that replaces 2B's textures with a 2K/4K version sporting more details and new decorations.
Download the Main File "2BUTTERFLY".
Open the .7z file.
Navigate to the FAR_Res\inject\textures\NieRAutomata.exe\2B folder.
Extract everything inside this folder --- placing these inside your [SK_Res\inject\textures] folder: — IF YOU INSTALLED SPECIAL K IN YOUR GAME FOLDER (LOCALLY): Steam\steamapps\common\NierAutomata
REPLACE ALL (if asked).
OPTIONAL — If you do NOT want the feathers that are standard on the gloves for 2B: Extract the folder "data" --- placing this folder into your NieR Automata main directory --- Steam\steamapps\common\NierAutomata..
READ ME — If you CHOSE THE OPTIONAL FILE and do NOT have the DLC for NieR Automata: Rename the files ""pl000d.dtt" & "pl000d.dat" (inside the data\pl folder from the mod) to "pl0000.dtt" & "pl0000.dat" (respectively).
Done.
— (O N L Y for Installing ReShade)
Spoiler:
Show
COLORBLIND USERS: (G R E E N) colored-mod
ATTENTION: This mod is only necessary if you plan on using any Post-Processing in the game using ReShade.
— Reference / Official Instructions — I recommend following the Wiki directly on Special K (info on installing it as well as using it together with ReShade) as the steps are clearly laid out. This way it is always up to date: for "Special K": https://wiki.special-k.info/SpecialK/Custom/FAR for "ReShade": https://wiki.special-k.info/en/SpecialK/ReShade#nier-automata Pay close attention though, the method you choose to install SPECIAL K depends on whether or not you will be utilizing RESHADE for post-processing effects. — Guide-specific Instructions —
Spoiler:
Show
YOU MUST HAVE INSTALLED SPECIAL K IN YOUR GAME FOLDER (LOCALLY)!
— IF YOU DID:
Spoiler:
Show
Download the latest version of "ReShade" from reshade.me and run it.
Select NieR:Automata's .exe file, inside your NieR Automata install directory --- Steam\steamapps\common\NierAutomata.and click on "Direct 3D 10/11/12".
Follow the rest of the instructions in the installer to install ReShade for Nier:Automata.
(OPTIONAL) You can skip the installation of effect packages if you’re planning to use a premade preset from e.g. Nexusmods.
Open the Nier:Automata game directory --- Steam\steamapps\common\NierAutomata..
Rename "dxgi.dll" to "ReShade64.dll" --- inside your NieR Automata install directory --- Steam\steamapps\common\NierAutomata..
Rename: "SpecialK64.dll" to: "dxgi.dll"
Launch the game. It might hang with a white screen on the first launch, NO WORRIES --- close it again.
In the "dxgi.ini" file --- Find this section and edit the following (or add it if it does not exist): [Import.ReShade64] Architecture=x64 Filename=ReShade64.dll Role=ThirdParty When=Lazy
Launch the game again, Nier:Automata should now work with Special K + ReShade!
— IF YOU DID NOT:
Spoiler:
Show
Download the latest version of "ReShade" from reshade.me and run it.
Select NieR:Automata's .exe file, inside your NieR Automata install directory --- Steam\steamapps\common\NierAutomata.and click on "Direct 3D 10/11/12".
Follow the rest of the instructions in the installer to install ReShade for Nier:Automata.
(OPTIONAL) You can skip the installation of effect packages if you’re planning to use a premade preset from e.g. Nexusmods.
Open the Nier:Automata game directory --- Steam\steamapps\common\NierAutomata..
Rename "dxgi.dll" to "ReShade64.dll" --- inside your NieR Automata install directory --- Steam\steamapps\common\NierAutomata.
Install the required prerequisites for Special K: — Visual C++ 2015-2019 Redistributables (both 32-bit - AND - 64-bit) — DirectX End-User Runtime
Download the latest public-release Special K "archive": HERE.
The absolutelatest version can always be found within the Special K Discord Server, inside the #nightly-builds channel (at the bottom --- download: "SpecialK64.dll").
(WINDOWS) Right-click on the downloaded zip file, click properties, then click "unblock" in lower-right hand corner(if it exists).
Double-click on the file to open it.
Select: "SpecialK64.dll" and drag it / extract it into your NieRAutomata game directory --- Steam\steamapps\common\NierAutomata.
Rename: "SpecialK64.dll" to: "dxgi.dll"
Launch the game. It might hang with a white screen on the first launch, NO WORRIES --- close it again.
In the "dxgi.ini" file newly-created inside your NieRAutomata game directory (Steam\steamapps\common\NierAutomata\dxgi.ini) --- Find this section and edit the following (or add it if it does not exist): [Import.ReShade64] Architecture=x64 Filename=ReShade64.dll Role=ThirdParty When=Lazy
Launch the game again, Nier:Automata should now work with Special K and ReShade!
A reshade preset that aims to make the image appear crisp and clean while keeping the original aesthetics.
— Complete Package (uses ReShade 4.7.0):
Spoiler:
Show
Download Main File: "Complete Package (ReShade 4.7.0)".
Extract the contents from the folder: "reshade-shaders" (inside the archive) --- into this folder --- Steam\steamapps\common\NierAutomata\reshade-shaders, inside your game directory.
REPLACE ALL when asked.
Extract the (2) "CleanPreset_" files --- into your NieR Automata install directory --- Steam\steamapps\common\NierAutomata.
REPLACE ALL when asked.
Go into your "ReShade.ini" file --- inside your NieR Automata install directory --- Steam\steamapps\common\NierAutomata.
ADD this section to the VERY beginning (and a space between it and the next line of code): [APP]ForceVSync=0 ForceWindowed=0 ForceFullscreen=0 ForceResolution=0,0 Force10BitFormat=0
A fantasy-style ReShade preset that adds a new level of depth, color, and visual effects to the original NieR Automata graphics.
Download Main File.
Extract the contents from the folder: "Main Files" (inside the archive) --- placing them into Steam\steamapps\common\NierAutomata (your game directory).
Go into your "ReShade.ini" file --- inside Steam\steamapps\common\NierAutomata (your game directory).
ADD this section to the VERY beginning (and a space between it and the next line of code): [APP]ForceVSync=0 ForceWindowed=0 ForceFullscreen=0 ForceResolution=0,0 Force10BitFormat=0
Do you ever think that Nier Automata's washed colors and purplish tint are kinda ass? This will fix it for ya. :p
Download Main File.
Extract the contents inside the folder: "NieR Visual Overhaul 2.0" from the archive --- placing it into Steam\steamapps\common\NierAutomata (your game directory).
REPLACE ALL when asked.
Go into your "ReShade.ini" file --- inside Steam\steamapps\common\NierAutomata (your game directory).
ADD this section to the VERY beginning (and a space between it and the next line of code): [APP]ForceVSync=0 ForceWindowed=0 ForceFullscreen=0 ForceResolution=0,0 Force10BitFormat=0
Aemony — For their vast knowledge, work, and their personal time in writing so much of the how-to's pertaining to Special K & FAR, that you see on the internet. They are a beautiful person for doing this for everyone who this kind of work impacts.
ChaserJZX — For being super helpful to others in the comments section and in general. — Thanks, ChaserJZX!
Merle — For spending an great deal of time helping me quickly piece together where I needed to put several different files between Special K and ReShade files in order to have a global install like the old guide had. Even though it didn't work with my installation and had to scrap the idea in favor of a local ReShade install in the end.
Shinrad — For the Quality-of-Life Item: "Special K / 3DMigoto Batch File".
Jinthaz — For providing a Quality-of-Life powershell script for the "Easy Method" of the HD Texture Pack installation instructions.
Avokh32 — For the necessary feedback and resolution regarding the use of mod "NAIOM" in conjunction with local installation of special K.


")
")

")
")