


0 of 0


About this mod
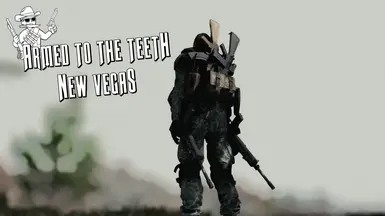
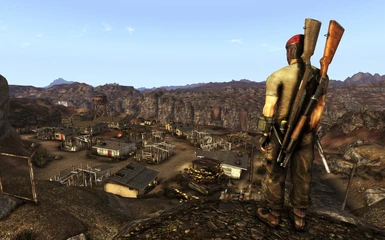
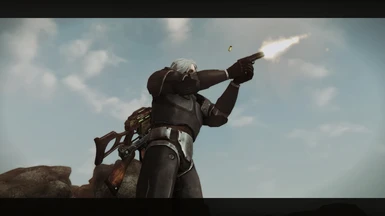
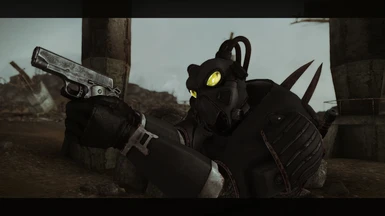
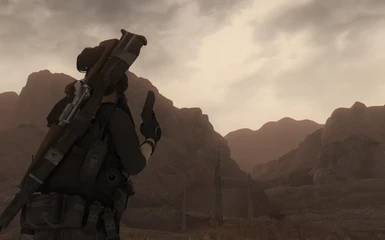
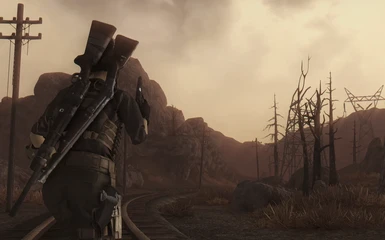
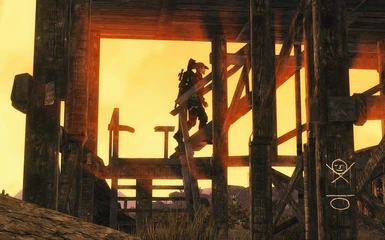
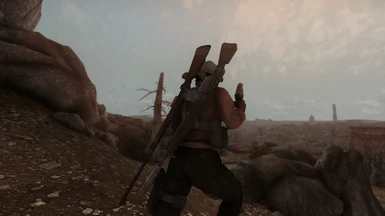
Allows you to holster up to 4 weapons on your body at once. Allows you to holster any weapon type in any of four locations on your body. No compatibility patches required. No biped slots used. Adds visible holsters to weapons.
- Requirements
- Permissions and credits
- Changelogs
- Donations
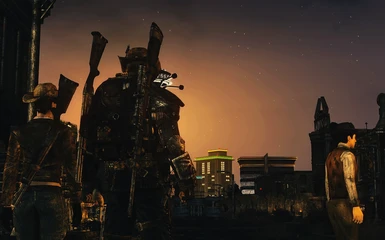
So here it is, Armed to the Teeth - New Vegas - Redux. No compatibility patches needed. No more rigged weapon meshes. No biped slots used. Out of the box compatibility with all weapons. Any weapon, in any of four locations on the player character, with an integrated visible holster system. All done through the power of xNVSE, kNVSE, Johnny Guitar and JIP. Integrated support for some of the most popular mods on the Nexus. Safe, clean scripting that won't break your save game or cause save bloat. Here's what Armed to the Teeth-Redux can do:

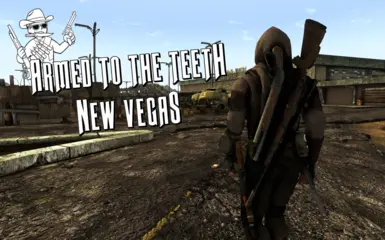
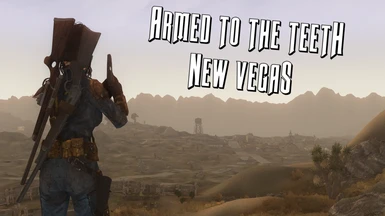
- Allows you to display/holster up to 4 weapons you have hotkeyed in your inventory on your player character, no matter what weapon you have equipped currently.
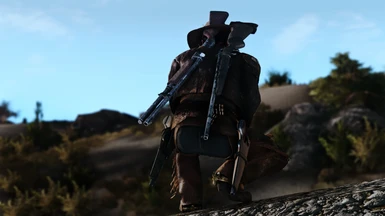
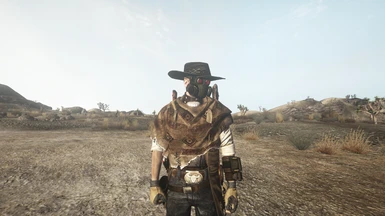
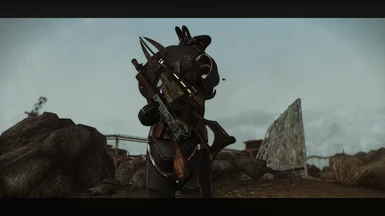
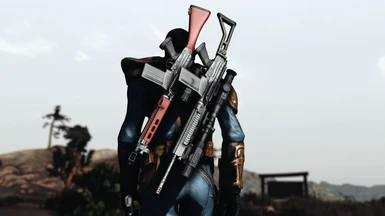
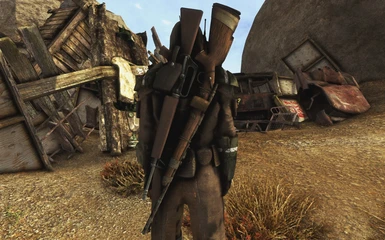
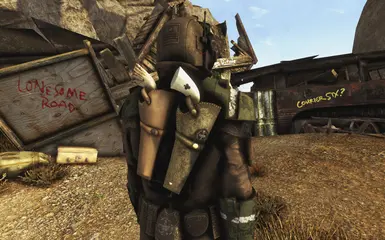
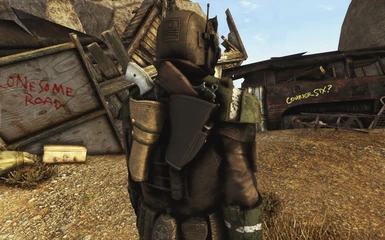
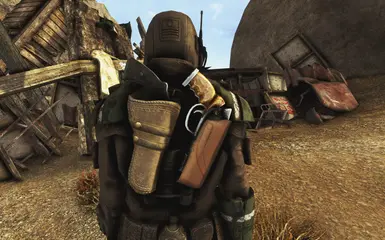
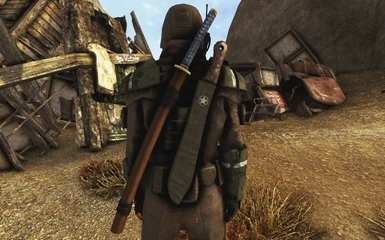
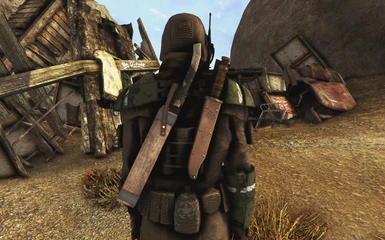
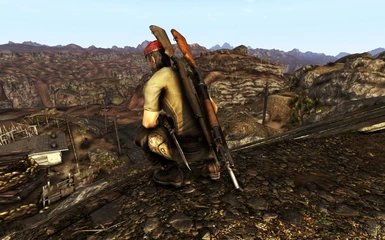
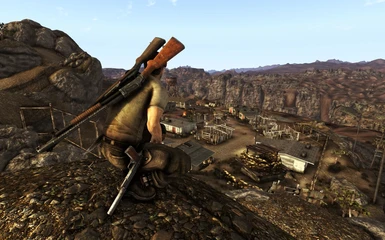
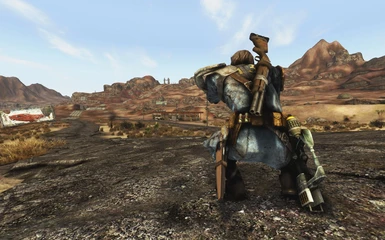
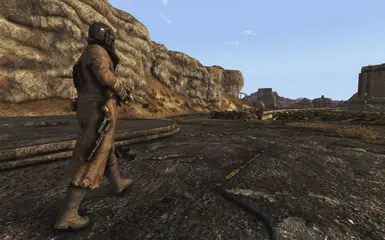
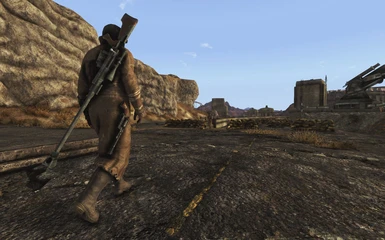
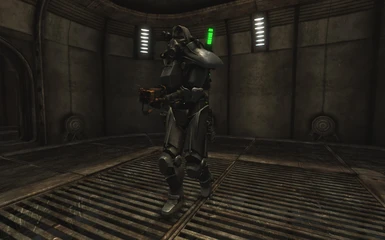
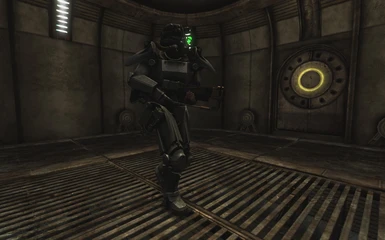
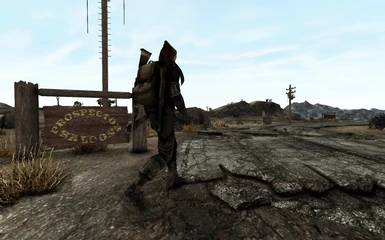
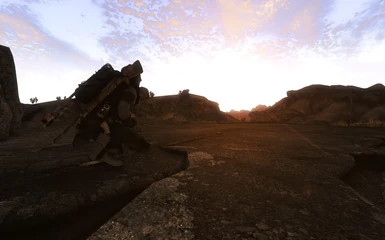
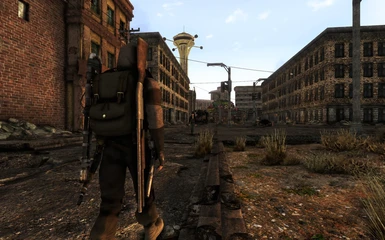
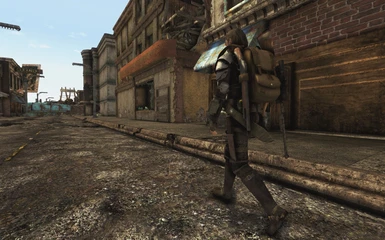
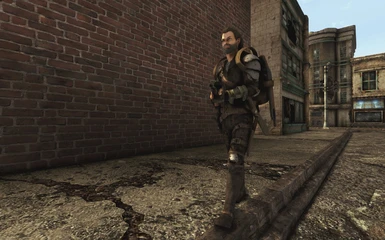
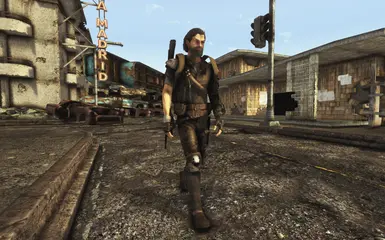
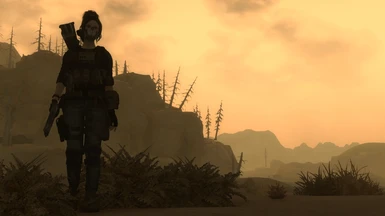
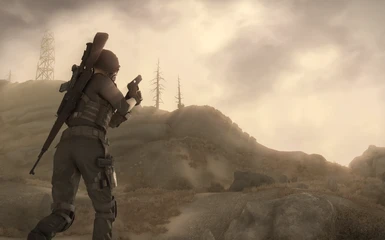
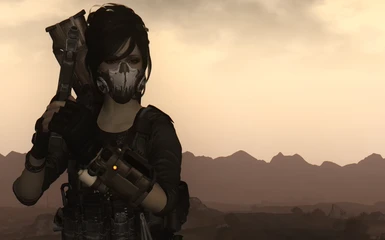
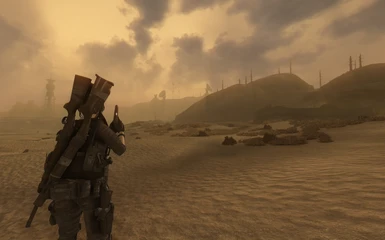
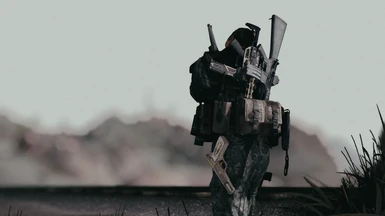
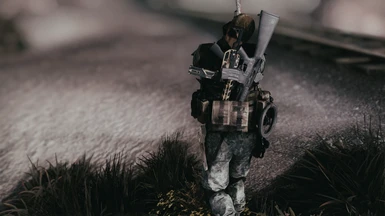
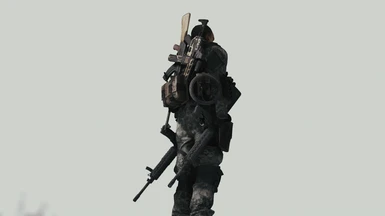
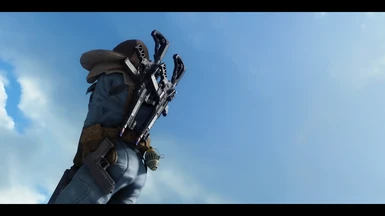
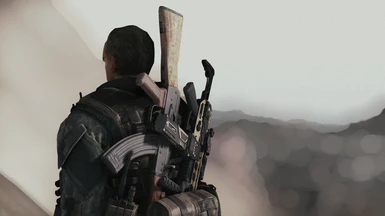
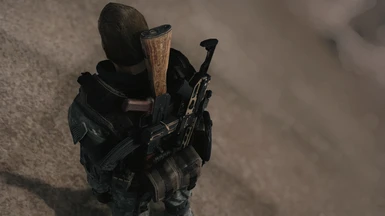
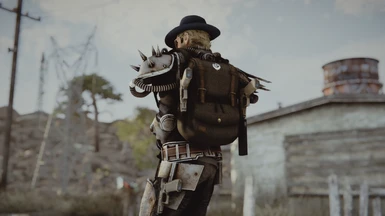
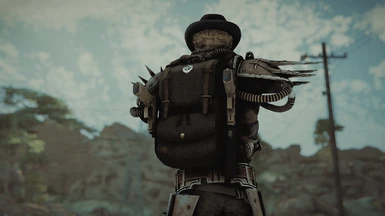
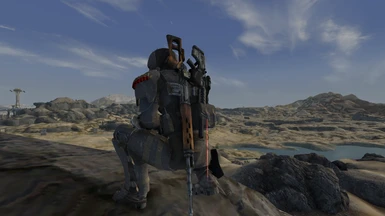
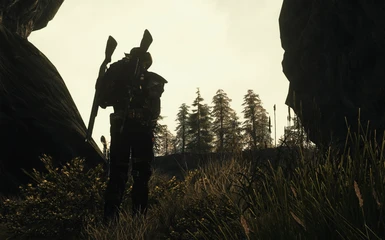
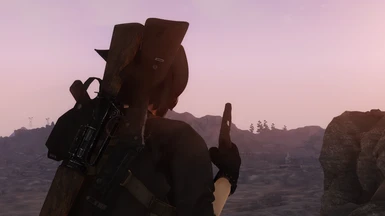
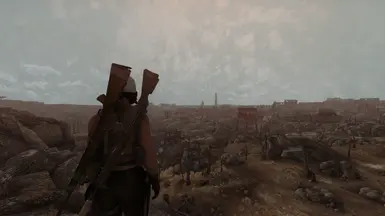
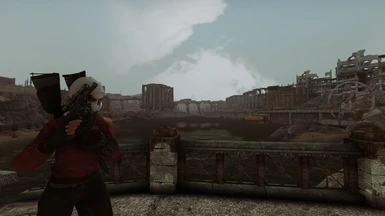
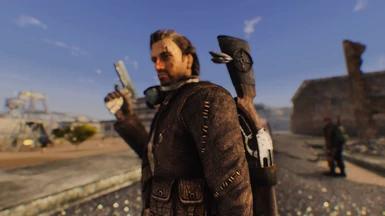
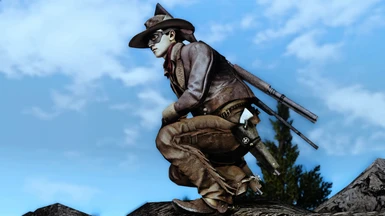
- Unequipped weapons can be holstered in any of four positions - Left Shoulder, Right Shoulder, Left Hip, and Right Hip.
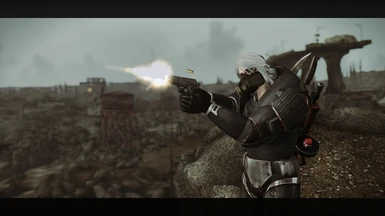
- Holstered weapons will be equipped and unequipped from their assigned holster positions, with custom equip and unequip animations included in the mod.
- All weapons from all mods are supported out of the box, no compatibility patches needed.
- All in game modifications for weapons (eg. Scope for Hunting Rifle, etc.) will show up on holstered weapons.
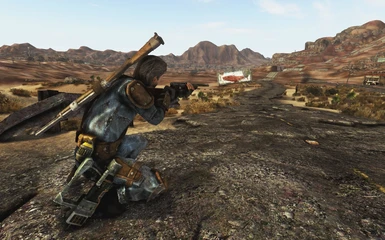
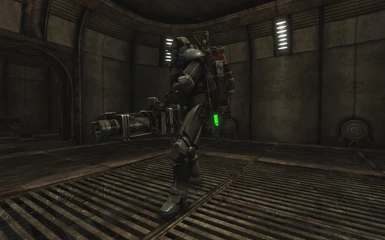
- Full support for vanilla Power Armor animations/holster positions.
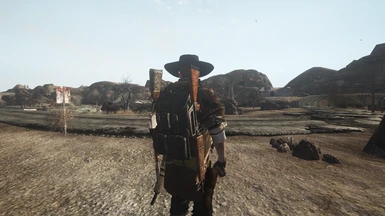
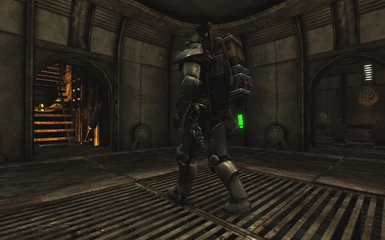
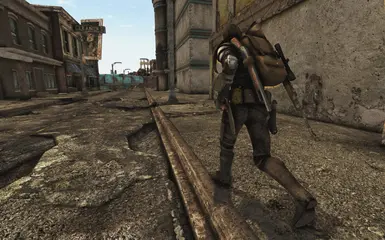
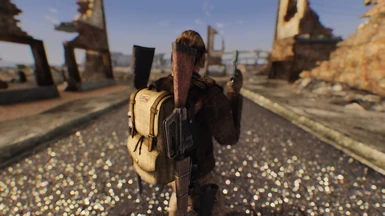
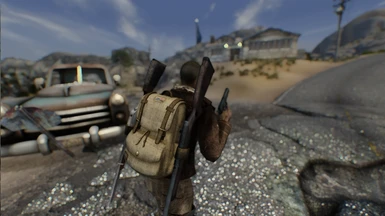
- New Backpack holster positions & animations. Left and right shoulder weapons will now be holsterd to the sides of backpacks, as shown in the screenshots section. This also occurs for holstered weapons when you have a weapon with a backpack (eg. the Minigun, Gatling Laser, Shishkebab, etc.) equipped.
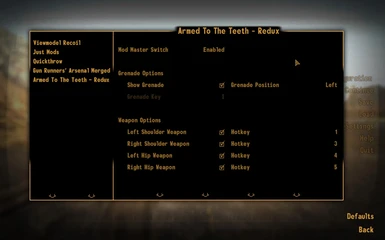
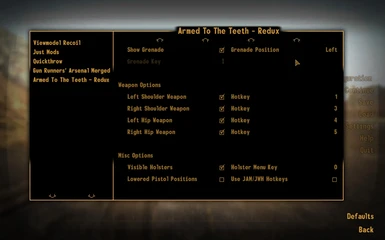
- Option to display a grenade/throwable weapon. The throwable can be placed on your left or right hip, chosen via MCM.
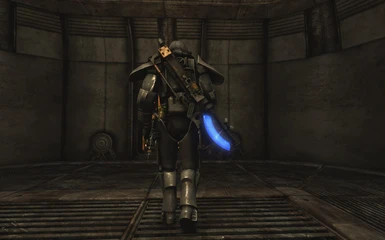
- The Shishkebab displays a custom backpack when you equip it in the base game. Armed to the Teeth takes this a step further - if you have the Shishkebab selected as a weapon to be holstered its backpack will also show up on your player character even when you don't have the Shishkebab equipped. This feature has also been added to the Shishkebab's unique variant, Gehenna.
- Optional lowered position for Pistols and Long Guns in the hip positions. This option uses the same position as One Handed Weapon Holster Replacer. This option is player only so if you want NPCs to also use the lowered positions you'll have to download the optional lowered pistol animation replacer in the downloads section. Please note that you must toggle the 'Lowered Pistols' option on in the MCM menu for this replacer to work without visual & animation inconsistencies.
- Full support for Xilandro's fantastic B42 Quickthrow mod.
- Full support for Yvile's similarly brilliant JAM - Just Assorted Mods/JWH - Just Weapon Hweel.
- Fully fleshed out MCM menu for customisation, courtesy of the incredibly talented and much appreciated Speedspaz. Every feature in the mod can be turned on or off in game from this menu. All holster slot hotkeys can also be configured or turned off entirely. The mod can also be completely turned off from this menu.
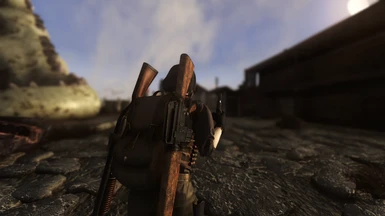
- Fully integrated holster system for showing visible holsters on your displayed weapons, gone are the days of floating ghost guns. Thanks to the incredibly talented QwibQwibMods, who spent a considerable amount of time, effort, and skill creating the absolutely beautiful holster models for this mod. Go check his other stuff out on his profile, he's great.
- No save baked changes are made to your game by the scripts in this mod. This means that this mod is 100% safe to be installed, uninstalled, re-installed, and updated at any point in your playthrough. Updates may require a clean save. If they do I will make it clear in the download & description sections of the mod page.

For legacy users, please note that this mod is completely unrelated to the old version of Armed to the Teeth in everything but name. Redux works completely differently, and as such, none of the issues the old version had are present in this version. This includes issues around biped slot usage, weapons breaking in first person, and a whole host of other issues and bugs. These issues are gone in Redux. The holstered weapons are no longer armor pieces and therefore rigging and biped slots are not required for this mod to function. Anyways, moving swiftly on:
Armed to the Teeth shoulder and hip slots are restricted to just the pistol, melee, launcher, and rifle categories of weapons. That means no two hand handle, no unarmed weapons, and no throwables in the shoulder/hip positions.
You can select up to 4 weapons to be displayed on your character's body at once. By default these weapons are chosen with the vanilla hotkeys 1, 3, 4, and 5, corresponding to your character's left shoulder, right shoulder, left hip, and right hip. So for example, if you put a hunting rifle in hotkey number 1, it will display on your character's left shoulder whether it is equipped or not. You will equip and unequip it to that position as well. You can put any pistol, melee, or rifle in any of your holster hotkeys and the weapon will show up in the hotkey holster position. This means that you can have a rifle on your hip, a knife on your back, and a pistol on your left hip, and they will all be equipped/unequipped from those positions, fully animated. Launchers can only be assigned to the right shoulder holster position. Please note that due to how bulky Launchers are in this game, there will be a lot of clipping if you have a Launcher on your right shoulder and another weapon on your left shoulder, that's just the way it goes I'm afraid.
If you have JAM - Just Assorted Mods or JWH - Just Weapon Hweel installed, Armed to the Teeth will detect it and you can select an option in the MCM menu to use the hotkey slots from Just Weapon Hweel instead of the vanilla hotkeys. Just Weapon Hweel's hotkeys are numbered 1-8 as well, so the MCM menu will work just the same with the Just Weapon Hweel option selected.
You can select a grenade or throwable to show up by equipping one and pressing the "grenade select button". This button is "i" by default, but can be customised in the MCM menu. You will hear a grenade sound and the throwable will appear on your waist. To change the visible throwable, select a different grenade and press the grenade select key again. To remove your displayed throwable entirely equip no weapon at all and press the grenade select key.
Grenades selected to show up on your player character will not display if no longer have any in your inventory. You can toggle which hip the grenade displays on via the MCM menu, or toggle the grenade display option off entirely if you wish.
If you use Xilandro's B42 Quickthrow mod Armed to the Teeth will detect Quickthrow in your load order and automatically display your chosen Quickthrow throwable on your character's hip.
Armed to the Teeth does not rely on JAM - Just Assorted Mods, JWH - Just Weapon Hweel, or B42 Quickthrow to function, they are not requirements, these are just compatability features. You do not need to download optional files for these features to work.
You can choose whether to show visible holsters for your weapons in the MCM menu of the mod. Armed to the Teeth uses a number of parameters to decide what holster model to show for a given weapon, including it's weapon type and reload animation. However, this system is not infallible, both due to the possibility of using non-standard weapon reload options with the use of kNVSE, and also because of size variations with mod weapons, etc. If the holster that ATTT chooses for your weapon doesn't suit it, or doesn't fit the weapon being holstered, or doesn't show a holster but you think it should, equip the problem weapon and open the Holster Menu with the Holster Menu button, "o" by default (o for orange, not the number).
The Holster Menu will show a list of all holsters included in the mod (apart from a few unique holsters that are exclusive to unique weapons), and you can select any of them to show up for the currently equipped weapon. You can also force the mod to not show any holster for the currently equipped weapon from this menu. If you don't want holsters to show for any weapons at all you can toggle them off in the MCM menu for the mod.

The Visible Holster system is a little involved, for those of you that just want the mod to work & don't care how it goes about it, feel free to skip this section of the mod description. All you need to know has already been outlined above. For those of you who wish to understand how it works for troubleshooting, or so you can add your own custom holsters to weapons using Armed to the Teeth, please expand the spoiler tag below:
Spoiler:
So, the Visible Holster system uses three separate methods to assign the correct visible holster to the correct weapons. These three methods work together in a hierarchical system as follows:
Think of this system as being the opposite of your mod load order, so formlists overwrite model detection, and both take precedence over the automatic assignment based on weapon type & reload animation. The system was set up like this because the holster menu adds weapons to the form lists. In this way the user has ultimate control over what weapons use what holsters. The form lists are as follows:
So adding a weapon to the Exlude list prevents a holster showing up for that weapon, and because form lists take precedence over any other method of holster assignment, the other methods do not overwrite it and add a holster to the weapon.
For examples of the holsters that correspond to each of these lists please see the list below:
So likewise adding a weapon to the QSATTTListRifleHolsterIncludeClassic Formlist will cause the weapon to use the same holster model the Hunting Rifle uses. These weapons are not all added to these lists, they are just examples of the visible holsters associated with those lists, for your reference. Examples above are shown in the screenshots section labeled with "Holster - ".
The next visible holster system in Armed to the Teeth is the automatic file detection system. This is for adding specific holsters to specific weapons manually in an espless manner. You can manually set a weapon to use a specific mesh by replicating the file location of the weapon's nif (relative to the meshes folder) within the "Data\Meshes\ArmedToTheTeeth\Holsters" folder. For example, in this mod the holster mesh for 'That Gun' is displayed in this manner. The vanilla file location for That Gun is: "Data\weapons\1handpistol\ThatGun.nif". Therefore, if you created a new custom holster for That Gun, you would make the mesh and name it "ThatGun.nif", and place it in the folder: "Data\Meshes\ArmedToTheTeeth\Holsters\weapons\1handpistol". Armed to the Teeth will then automatically detect this file and use it as a holster mesh for That Gun in game. There are a few examples of vanilla and DLC weapon holsters that are set up like this in the mod files.
Please note that if you intend on making a holster mesh for Armed to the Teeth, you will need to also create a 'Left Handed' mesh, which is done by simply mirroring the holster mesh once you are finished modeling it. This left handed version of the mesh must be named in line with the naming scheme of the mod, which you will see from the files means adding "-Left" to the end of the file name.
So, in conclusion, if you wish to add your own holsters for Armed to the Teeth, or if you want to make hard edits that permanently set a weapon to use a specific visible holster mesh, there are two methods of doing so:
I hope this little guide helped and if you have any questions about adding holsters or how the system works in more detail, please do not hesitate to contact me via the mod comments or by sending me a message on Discord.
Show
So, the Visible Holster system uses three separate methods to assign the correct visible holster to the correct weapons. These three methods work together in a hierarchical system as follows:
- Formlists - Adding a weapon to one of the formlists added by this mod causes it to use the visible holster associated with that formlist
- Automatic model detection
- Automatic holster assignment based on weapon type & reload animation
Think of this system as being the opposite of your mod load order, so formlists overwrite model detection, and both take precedence over the automatic assignment based on weapon type & reload animation. The system was set up like this because the holster menu adds weapons to the form lists. In this way the user has ultimate control over what weapons use what holsters. The form lists are as follows:
- QSATTTListHolsterExclude
- QSATTTListRifleHolsterIncludeClassic
- QSATTTListRifleHolsterIncludeTactical
- QSATTTListPistolHolsterIncludeClassic
- QSATTTListPistolHolsterIncludeClassicBig
- QSATTTListPistolHolsterIncludeTactical
- QSATTTListKatanaSheathInclude
- QSATTTListMacheteSheathInclude
- QSATTTListKnifeSheathInclude
- QSATTTList357MagHolsterInclude
- QSATTTListBroadSheathInclude
So adding a weapon to the Exlude list prevents a holster showing up for that weapon, and because form lists take precedence over any other method of holster assignment, the other methods do not overwrite it and add a holster to the weapon.
For examples of the holsters that correspond to each of these lists please see the list below:
- QSATTTListRifleHolsterIncludeClassic - Hunting Rifle, Caravan Shotgun, etc.
- QSATTTListRifleHolsterIncludeTactical - Service Rifle, Marksman Carbine, etc.
- QSATTTListPistolHolsterIncludeClassic - Police Pistol
- QSATTTListPistolHolsterIncludeClassicBig - 44 Magnum, Hunting Revolver, etc.
- QSATTTListPistolHolsterIncludeTactical - 9mm, .45 Auto Pistol, etc.
- QSATTTListKatanaSheathInclude - Katana
- QSATTTListMacheteSheathInclude - Machete (the one the Legion use)
- QSATTTListKnifeSheathInclude - Combat Knife
- QSATTTList357MagHolsterInclude - 357 Magnum
- QSATTTListBroadSheathInclude - Broad Machete
So likewise adding a weapon to the QSATTTListRifleHolsterIncludeClassic Formlist will cause the weapon to use the same holster model the Hunting Rifle uses. These weapons are not all added to these lists, they are just examples of the visible holsters associated with those lists, for your reference. Examples above are shown in the screenshots section labeled with "Holster - ".
The next visible holster system in Armed to the Teeth is the automatic file detection system. This is for adding specific holsters to specific weapons manually in an espless manner. You can manually set a weapon to use a specific mesh by replicating the file location of the weapon's nif (relative to the meshes folder) within the "Data\Meshes\ArmedToTheTeeth\Holsters" folder. For example, in this mod the holster mesh for 'That Gun' is displayed in this manner. The vanilla file location for That Gun is: "Data\weapons\1handpistol\ThatGun.nif". Therefore, if you created a new custom holster for That Gun, you would make the mesh and name it "ThatGun.nif", and place it in the folder: "Data\Meshes\ArmedToTheTeeth\Holsters\weapons\1handpistol". Armed to the Teeth will then automatically detect this file and use it as a holster mesh for That Gun in game. There are a few examples of vanilla and DLC weapon holsters that are set up like this in the mod files.
Please note that if you intend on making a holster mesh for Armed to the Teeth, you will need to also create a 'Left Handed' mesh, which is done by simply mirroring the holster mesh once you are finished modeling it. This left handed version of the mesh must be named in line with the naming scheme of the mod, which you will see from the files means adding "-Left" to the end of the file name.
So, in conclusion, if you wish to add your own holsters for Armed to the Teeth, or if you want to make hard edits that permanently set a weapon to use a specific visible holster mesh, there are two methods of doing so:
- Use an esp to add the weapon to the appropriate form list within Armed to the Teeth. You can do this safely via script with a script that runs once on game load/restart and uses ListAddForm. You can also safely use hard edits and manually add a weapon to a form list, as long as you warn any others that may be using the mod that they will have to create a merged patch for any other mods that also use hard edits to add holsters to weapons.
- By creating a holster mesh and saving it in the appropriate location for Armed to the Teeth to detect it and use it for the specified weapon.
I hope this little guide helped and if you have any questions about adding holsters or how the system works in more detail, please do not hesitate to contact me via the mod comments or by sending me a message on Discord.

This mod has some requirements created by some extremely talented and much valued members of the modding community, they are as follows:
- xNVSE Version 6.2.5 or later.
- JIP LN NVSE Plugin Version 56.42 or later.
- JohnnyGuitar NVSE Version 4.35 or later.
- kNVSE Animation Plugin Version 20 or later.

Mods that go with Armed to the Teeth like bread and butter:

This mod is compatible with everything as long as it doesn't mess with weapon equip/unequip animations. Even then it should only be a soft incompatibility and a patch could probably be made. Please report any potential compatibility issues in the Bug Reports section of the mod page, with an accompanying screenshot(s) to demonstrate the issue you are facing.
Any weapon you can equip in game, you can use with Armed to the Teeth Redux, no more messing about with weapon meshes and rigging and all that noise. It's all done with the power of JIP and kNVSE.
This mod is not compatible with the old Armed to the Teeth mod. If you have that mod installed read the Install Instructions section below to uninstall old ATTT before installing Redux. Do not install this mod on top of old ATTT.

If you do not have old Armed to the Teeth installed, all you need to do is make sure you have the latest versions of the mods outlined in the Requirements section installed before installing this mod.
Load order does not matter for this mod, you can put it anywhere in your load order as long as it is loaded before any other mods that require this mod.
Armed to the Teeth is fully safe to install, configure, or uninstall mid-playthrough. A new save is not required.
To update to the latest version from any version before 2.1, please first clean your save file of AttT esp data. To do this follow these instructions:
- Fully uninstall your current version of Armed to the Teeth - Redux with your mod manager or by deleting all AttT Redux files from your game directory if you installed manually.
- Make sure the old AttT Redux esp is deleted and is no longer present in your load order
- Open your game and save your game.
- Make sure your plugins (xNVSE, JIP, etc.) are up to date as outlined in the requirements section.
- Download and install the new version of Redux as you would any other mod.
If you have the old version of Armed to the Teeth installed, follow these instructions to upgrade to Redux:
- Open your game and unequip the holster armor piece.
- Drop the holster armor piece from your inventory.
- Open the console using the
~key, select the holster armor piece with your cursor. (Make sure it displays the name of the armor piece along the top of your screen. If it does not, scroll your mouse wheel until the correct name is displayed) - Type
Disableand hit enter, then exit the console by pressing~again. The armor piece should disappear. If it does not, reload your save and try again, repeating the whole process. - Once you have successfully disabled the armor piece, save your game and exit.
- Fully uninstall old ATTT with your mod manager or by deleting all ATTT files from your game directory if you installed manually.
- Make sure the old ATTT esp is deleted and is no longer present in your load order
- Open your game and save your game.
- This is called making a 'clean save', ie. a save that does not have the esp you just uninstalled present in it's data. Although the save isn't exactly 'clean' in the strictest sense of the word, thanks to the janky scripting & methods used in my old Armed to the Teeth mod, it's best to remove as much of a trace of the old version as possible before installing the new version.
- Make sure your plugins (xNVSE, JIP, etc.) are up to date as outlined in the requirements section.
- Download and install Redux as you would any other mod.

Mod doesn't work!
I assure you, it does. Make sure you have all requirements installed and up to date. Make sure you are launching the game with xNVSE enabled.
My weapon looks different when I equip/unequip it!
Weapons have 1st person and 3rd person textures in New Vegas. 3rd Person textures are generally lower resolution and are used on weapons placed in the game world, and on weapons used by NPCs. Normally you cannot see the minor difference in texture quality because the Player uses higher res 1st person textures. However, Armed to the Teeth uses 3rd person textures on holstered weapons, both for simplicity's sake, and because it is more performance friendly. If you are able to notice a difference in texture colour/style when you equip/unequip a weapon, it is because you have installed a texture mod for that weapon incorrectly, or there is a conflict between two of your texture mods that affect that weapon.
Grenade/Weapon is stuck on my player/not showing up!
This shouldn't happen, please report in the bug section tab of the mod page, along with a screenshot of the issue. A case-by-case fix is to toggle the mod off in the MCM menu, exit the menu and resume your game, then pause and re-enable the mod. If this does not work then save, exit your game, and boot your game again. ATTT makes no permanent changes to your save file and does not carry data across play sessions, every time you boot the game the scripts are pretty much fully re-initialised. Therefore turning your game off and on again is a legit method for fixing any visual bugs. If issues persist through play sessions please report this in your bug report.
Does this mod do x?
Read the description, I have included all features included the mod in the 'Features' section.
I have a request!
I welcome requests and ideas but please make sure it is reasonable and something directly related to this mod and it's existing features. Please leave any Armed to the Teeth feature requests in the comments.
I found a bug!
Please report it in the Bug Reports section of the mod page, not in the comments section. Please include a screenshot of the issue and as detailed a description as possible as to what you were doing before the issue occurred, what weapons you had equipped/in your Armed to the Teeth hotkeys when the issue occurred, as well as if the weapon the bug is happening to is equipped or unequipped when the issue occurred. Please also include the exact version numbers of the required plugins you have installed on your machine when you are experiencing this bug.
I wanna add a screenshot to the mod page!
Please do! I'll add all screenshots to the page if you upload them, and I'd love to see any that you guys would like to share


-Quicksliver500, 06/01/2022