


0 of 0


File information
Created by
Imp of the PerverseUploaded by
Imp of the PerverseVirus scan
Safe to use
About this mod
Roughly 20 mod kits for power armor, 4 working sets of UnderArmor, 3 custom skinned and scripted power armors, and a power armor HUD. Features exploding MicroFusion Packs, power armor recharging, and PA subcomponents. A Fallout 3 File of the Month and it's most endorsed power armor overhaul
- Requirements
- Permissions and credits
-
Translations
- Portuguese
Powered Power Armor
New Vegas Beta 3
***************************************************************
Updates
____________
Beta 3 Hotfix A Release 3/21/2011
This hotfix will prevent the switch from 3rd to 1st person when aiming, and restores binocular zoom.
Beta 3 Released 2/13/2011
New UI voice acting by Kungfubellydancer - More extensive verbal notifications
Configurable vision overhaul - Disable or enable components via the config menu
Better vision overhaul interface - Two vision hotkeys have been replaced by a single vision hotkey (default left shift) and the mouse wheel
Better Project Nevada compatibility - Will no longer cause problems with PN's dynamic crosshair, and PPA's scoped weapon adjustable zoom can be disabled if you prefer Project Nevada's system
Unified HUD Project support
http://www.newvegasnexus.com/downloads/file.php?id=38961
UHP is a utility put together by Gopher that simplifies the installation of HUD altering mods like this one - it handles the necessary editing of hud_main_menu.xml for you. Currently 4 of my mods are supported by it. It isn't required, but if you're daunted by PPA's installation instructions UHP is for you.
***************************************************************
Description
_____________
Powered Power Armor adds several upgrades that can be used with power armor, about 20 of them. See the included Power Armor Upgrades List for a complete list and what they do. Think of them as mod kits for power armor - they come in the form of miscellaneous items that can be scavenged in the Mojave or purchased from various vendors. When you put on power armor any upgrades in your inventory replace themselves with armor objects that automatically equip themselves. Some are weapons, some apply various stat changes, and some have more elaborate scripted effects. The Pipboy icon for each upgrade contains text discussing how the upgrade works (in proper Fallout pseudo-science technobabble), what it does, and what armors it works with.
In addition to the upgrades, power armor is treated more like the machinery that it is. Different armors have different power supplies with various advantages and disadvantages. Enclave Advanced Power Armors and T-51b power armors both run on effectively inexhaustible nuclear power supplies - MicroFusion Packs. T-45d armors, and any armors added by custom mods, get their power instead from superconducting ceramic ultracapacitors - meaning they require periodic recharging. There is an advantage to the ultracapacitors though - they are able to produce a much higher power output (nuclear reactors tend to get a bit testy when you run them too hot) and therefore allow you to install some of the cooler upgrades. Liquid cooling allows power armor to be run at a higher power output without overheating, meaning faster movement, higher carry weight, and more damage with melee and unarmed weapons. Thermal Regulation Override accomplishes the same effect by basically ignoring the usual high temperature warnings, letting you push the armor closer to the limit (and past it if you don't mind a little singed flesh.)
If you'd like to use these high powered upgrades with one of the nuclear armors, you have two options. One is to purchase and install an Ultracapacitor Conversion Kit, meaning your armor will now require periodic recharging. The other is to scavenge or purchase one of the rarer, considerably more expensive experimental high power microfusion packs. These will let you use any high power upgrade without having to recharge.
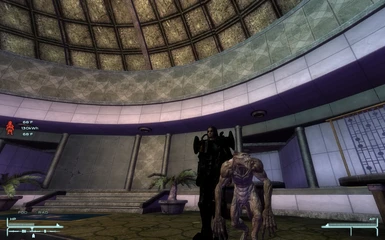
A new HUD element will be added to your screen upon equipping power armor - the vault boy in power armor indicates that you are wearing power armor. If the icon is green (or whatever your chosen HUD color is) you are wearing charged or nuclear power armor. If the icon is dark grey, your armor is uncharged, and will be slowing you down considerably. You can charge it by entering the Powered Power Armor config menu (default hotkey "P") and selecting the Field Recharge option. Any suitable power sources that you have in your inventory will be shown there (fission batteries, microfusion cells, energy cells, electron charge packs, and ceramic ultracapacitors). Your armor will carry up to 300 kilowatt-hours of charge. Your armor's charge, if applicable, is shown to the right of the power armor icon, though if you are wearing nuclear powered armor a radiation symbol will appear there instead. The whole cluster of indicators can be repositioned on your screen by holding the config menu key ("P") until the rest of the HUD disappears, and then using the arrow keys while continuing to hold down "P".
If you've installed the Thermal Regulation Override upgrade, there will also be temperature readouts above and below the charge indicator. They indicate the upper and lower temperatures of your armor, not so much the temperatures inside of the machinery but the temperature of what's in contact with your skin. If either temperature gets above 130 degrees Fahrenheit an alarm will sound, and above 135 degrees you'll begin to take damage. You can lower your temperature by either stopping, walking, lightening your load, or toggling TRO off (its default hotkey is "Q"). When TRO is engaged, the power armor icon will turn red. (By now you're probably beginning to see why you needed power armor training).
Another feature of this mod is working UnderArmor - what recon armor was originally meant to be, something that could be worn under your power armor. There are four sets at the moment, each with a different advantage. Insulating UnderArmor will allow you to tolerate armor temperatures of up to 150 degrees, as well as improving your fire resistance. UnderArmors are equipped more or less how you would think - put the UnderArmor on, then equip power armor.
T-51b power armor protects better than T-45d and imposes less of an agility penalty due to its high precision hydraulic drivetrain (versus the T-45d and APA's electric servomotors) but the hydraulics are incompatible with a few of the upgrades. The Regenerative Overload Capacitor and Upper and Lower Precision Phase Controllers are designed to work with servomotor armors only.
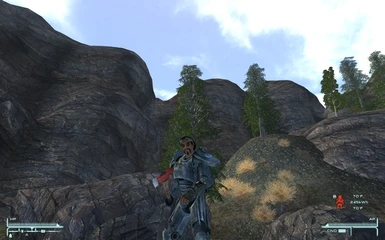
Speaking of armors, three custom skinned power armors are also added. Composite T-45d, Enclave Onyx Stealth Armor, and Hardened T-51b. Composite T-45d can be built from schematics found somewhere in the Mojave, and will occasionally be found on Legion Prime and Veteran soldiers. The other two are unique, and will be a little harder to find. These armors include scripted effects that make them truly unique (or, in the case of Hardened T-51b, slower).
In an attempt to balance out the enormous advantages offered by power armor, nearly all power armors will reduce your sneak skill by 100 (though some upgrades improve it a bit). Furthermore, Stealth Boys have been altered to only work effectively with non-power armors (just because you're partially invisible doesn't mean they can't hear you.) Composite T-45d is the only power armor suitable for use with Stealth Boys by virtue of its quiet, low power stealth drivetrain.
Let's see, what else. Oh yeah, other features:
!!! New to Beta 3 !!!
New UI Voice Acting by Kungfubellydancer - New verbal alerts will now tell you when your power armor or power armor helmet condition is below 10%, and when you've exited combat, in addition to the original verbal notifications (armor charge, cobat alert, armor initialization, upgrade optimization). I'm pretty happy with the change, but if you liked the old voice, the files are still there and can be selected by entering the console and typing "set PPAUISoundMode to 1", but keep in mind that you'll be losing some functionality. Verbal notifications can be disabled entirely by typing "set PPAUISoundMode to 0".
Vision Overhaul Changes - You can now disable components of the vision overhaul via the config menu. The two vision hotkeys have been replaced by a single hotkey and the mouse wheel - use the mouse wheel while aimed to zoom in and out. When not aimed, hold the vision hotkey (default left shift) and use the mouse wheel to adjust your unaimed FOV. Tap the vision hotkey to cycle through vision modes.
Improved Compatibility with Project Nevada - The vision overhaul code has been updated to enable compatibility with Project Nevada's dynamic crosshair. It is recommended that you disable PPA's adjustable zooming with scoped weapons (option 4) and use Project Nevada's adjustable zoom instead.
!!!!!!!!!!!!!!!!!!!!!
Vision Overhaul - The zoom that most unscoped weapons have is removed (optionally) unless you are wearing a power armor helmet, ranger combat helmet, or targeting monocle. If you have binoculars in your inventory, they will automatically be equipped if you hold down the aim/block button (default right mouse button). If you are wearing any of the listed pieces of headgear, you'll have the ability to adjust both your standing zoom and your aiming zoom separately. There are also three vision modes cycled via the left shift key - light amplification, thermal vision, and millimeter wave radar. The script that enables the adjustable zoom edits three Field Of View .ini settings via an NVSE function, so to let you retain control over your field of view a menu adjuster has been added. The field of view you select via the config menu will be the field of view used when you are not wearing any special headgear, and will be the farthest you'll be able to zoom out when you are wearing special headgear.
T-51b Enhancements - To balance T-51b's incompatibility with precision phase controller and regenerative overload capacitor upgrades, its thermal performance has been improved (it will heat up slower and cool down quicker than other armors) and it has been given its own upgrade, a High Pressure Hydraulics kit that will improve strength, melee/unarmed damage, and carryweight.
High Pressure Hydraulics Kit - Mentioned in the T-51b Enhancements above, this T-51b-only upgrade enhances strength without sacrificing thermal performance.
Liquid Ninja - If you have both Thermal Regulation Override and upper or lower liquid cooling installed, you'll also be able to install the Liquid Nitrogen Injection Aperature, or Liquid Ninja. It injects liquid nitrogen into your cooling system, instantly dropping your operating temperature by 100 degrees or so.
RobCo Cryogenic Compressor - The Liquid Ninja's liquid nitrogen cartridges can be saved and refilled with this compressor. Like the rechargers, it can be installed anywhere but is
HUD Initialization Sequence - Each time you put on power armor, there will be a graphical display that pops up showing you which upgrades are being installed, accompanied with sound.
Improved Environmental Thermal Responses - Snow, rain, and swimming will all help cool your armor.
Power Armor Deconstruction - Upon the death of its wearer, power armor may break down into its constituent components depending on its condition and how much damage the wearer's limbs took. You'll need the Power Armor Mechanic perk to recognize and loot these components, and reassemble them into working power armor. Otherwise, aim for the head. Reassembly takes place at workbenches and uses the crafting menu, and the perk requirements are: Level 6, 50 Science, 50 Repair. You can also break down power armor to use its parts to rebuild other, better armors, or to rebuild faction armors as their non-faction counterparts.
Power Armor Explosions - Power armor will explode if you score a direct hit to the power supply. Both nuclear and non nuclear armors can explode, though the nuclear explosions are considerably more fun. Any shot to the torso that causes sufficient damage has a remote chance of causing the armor to explode, but shots to the back will make it happen 100% of the time (given the way the combat AI is written this is harder than you would think.) Only the player can cause explosions at the moment, so don't worry about suddenly blowing up.
Power Armor Scaling - The player and any NPC wearing power armor will automatically be scaled up by about 15%. This features introduced a couple of bugs that have been addressed as thoroughly as possible, but if you're having any problems with this mod disable this feature via the options menu. It is disabled by default.
Recharging Stations - There are two of them, the RobCo Rapid Recharge Station and the RobCo Personal Breeder Reactor. The recharge station will recharge your armor any any ceramic ultracapacitors in your inventory instantly. The reactor will recharge depleted fission batteries, and it takes 10 game minutes. Both are heavy and expensive.
Armor Plating Scraps - If an armor is destroyed during combat, some of the armor plating may be salvageable, and can be used to repair power armor and helmets. Scraps or repair kits will also be available from some vendors. There are four kinds - ceramic (used for T-51b and APA armors), steel (used for T-45d armors), composite (used for Composite T-45d) and titanium (used for Hardened T-51b).
Quest Dependent Loot - Which upgrades are available for purchase is dependent in some cases upon which quests you've completed. Most of the better upgrades in fact require that you've done something for the vendor or their faction before they'll be available for purchase. The effected merchants include Gloria Van Graff, Contreras, Mick, Torres, and Dr. Schuler.
Jump Fall Fixer - Included in the download is the independent mod Jump Fall Fixer. It's a workaround for the invisible ledge that crops up when jump height is increased too much.
NPC Upgrades - Nearly all upgrades can be used by NPCs, and will be spawned at random in NPC inventories (other than companions). This includes the Energy Pulse Generator, an area of effect weapon that can burn you, mez you, paralyze you or send you flying.
Weapons - There are also three energy weapons in the works that consume your armor's charge for ammo, though they are not a part of this initial release. They are heavily scripted, with multiple firing modes and other goodies. Two were a part of the most recent Fallout 3 release of this mod, but there were a couple of bugs to work out so I've decided to save them for beta 2.
***************************************************************
Detailed Directions
____________________
Installing Upgrades:
Add the upgrade to your's or an NPC's inventory, equip power armor.
Uninstalling upgrades:
Unequip power armor. If you are trying to retrieve an upgrade from a companion, first remove their power armor. The armor upgrades will unequip themselves and become Misc. items. Remove them from your (or their) inventory, and place them in a container or on display (the models are pretty dull at the moment). Then re-equip your power armor. Star Paladin Cross's armor has been made playable to make uninstalling her upgrades possible.
Installing UnderArmor:
Put on the desired set of UnderArmor, then put on Power Armor.
Uninstalling UnderArmor:
Remove Power Armor, then unequip or change UnderArmor.
Recharging:
For a field recharge, enter the Power Armor menu by either pressing the hotkey (default "p") or by going to the armor section of your pipboy and clicking the "[PA] -Config-" item. If you have any suitable power sources, the first option in the menu will be "Field Recharge". Select it, then select the power source. Your suit's charge will be increased by the stated amount, up to the maximum of 300 kWh.
To use the RobCo Rapid Recharge Station, drop it from your inventory in a suitable area, activate it with the use key to install it, then activate the installed recharger and select the recharge option. The lights will dim, and your armor and ceramic ultracapacitors will be recharged instantly.
The RobCo Personal Breeder Reactor cannot recharge your armor directly, but it can be used to recharge the depleted fission batteries added to your inventory when you use fission batteries for a field recharge. Drop it from your inventory, install it, activate it, and select "Recharge". It will take one minute, but all of your batteries will be recharged at once. You'll be notified when it's done, but you'll need to return to the machine and activate it again to retrieve the batteries.
Thermal Regulation Override:
Press the toggle key (default "q") to turn it on or off. The power armor hud icon will turn red when the override is enabled. Running, particularly with a heavy load, will most likely cause you to overheat after about 10-15 seconds. Firing a heavy, big gun, or swinging a heavy melee weapon may also cause you to overheat, but its unlikely. If your upper or lower temperature hits 135F, you'll take damage (you'll hear it) and the temperature gauge will turn red. Stop what you're doing until its green again. You don't necessarily have to toggle the override back off to cool down, just stop running or swinging or whatever.
TRO's speed boost is configurable via the power armor menu (default "p" hotkey). The carryweight increase has also been increased to 1000, so what you can carry will be limited primarily by heat buildup. There is also a Strength Amplification Factor that can be used to vary the amount of weight carried by the armor versus by the player, though this will not come into play until the Imp's More Complex Needs patch has been released.
Energy Pulse Generator
The Energy Pulse Generator can be used to trigger an outburst of energy centered on the user, effecting any enemies within the blast radius. It has two (or more) parts, the Energy Pulse Generator, and the Energy Pulse Modulator(s). There are four different Pulse Modulators, each of which will allow a different kind of energy pulse to be generated. If you have an Energy Pulse Generator and at least one of the Energy Pulse Modulators, press the EPG key (default "C") to trigger an Energy Pulse. To switch pulse type, hold the EPG key. Your pulse type is shown by the pulse icon above and to the left of your HUD's power armor status icon. If the icon is red, the system is recharging, if it is green the pulse is ready to fire. Each pulse will discharge a significant portion of any Ultracapacitor powered armor's charge, but fusion powered armors will be able to fire indefinitely. Recharge times, however, will be significantly longer with fusion powered armors. Check the Energy Pulse Modulators in the Misc. section of your inventory to see which icon is associated with which pulse type. NPC's can and will use this weapon, so be careful if you give it to a companion.
Enclave Onyx Armor
Hold the crouch key for about a second to toggle the stealth field. Once on, you can stand back up by tapping the crouch key without disabling the field.
Composite T-45d Armor
The Stealth Boy effect has been reworked to remove most of the benefit of the stealth field if the user is wearing power armor. The exception to this is Composite T-45d Armor, which has quiet, low power servos made possible by the lower armor weight.
Power Armor Deconstruction
Enabled by default, this reduces the likelihood that the player will be able to salvage power armor intact. If the armor condition or limb condition of a power armor wearer is too low upon death, or if the power armor's power plant exploded, the power armor will break down into servos, a chassis, a powerplant, and either a shell (recoverable) or husk (non-recoverable) depending on the exact conditions. Rank 1 of the Power Armor Mechanic perk is required to recognize and salvage these parts. Rank 2 is required to reassemble them into working sets of power armor. They can be reassembled at a work bench or with the portable power armor repair kit, which should be dropped from the player's inventory and activated to initiate an assembly or disassembly.
Power Armor Explosions
In previous versions, power armor would explode if the wearer was killed via a shot to the torso. In the new system, power armor will no longer explode upon death, but can explode if a shot to the torso does more than 20 damage. The probability that it will explode is 100% if the target is shot in the back, but considerably lower if they are shot in the chest or side. The player will not explode as of this release, but companions might.
StimJak
This upgrade provides configurable health regeneration fueled by stimpaks. At 5 hp/sec or lower, the efficiency is greater than 1, meaning you will have more health restored than if you used the stimpak normally. At rates above 5 hp/sec, your health will be restored less. Rates can be set for combat and non-combat independently via the power armor menu (default "p" hotkey).
Catalytic Rebreather
Equip the rebreather like a backpack, along with charged power armor and a power armor helmet. You will be able to breath underwater until your power runs out.
Vision Upgrades - When wearing a power armor helmet and charged power armor, or a ranger combat helmet, or any of the targeting monocles, you will be able to zoom via the capslock key (configurable). Tap the key to zoom out, hold the key to zoom in. Cycle through the vision modes by tapping the shift key (also configurable).
Vision Adjustment - A number of Advanced Optics features are available when you are wearing a power armor helmet or targeting monocle. Use the mouse wheel while aiming to zoom in or out with scoped and unscoped weapons. Hold the vision hotkey (left shift by default) while not aiming and use the mouse wheel to adjust your unaimed field of view. Tap the vision hotkey to cycle through the three vision modes (night vision, thermal vision, millimeter wave radar).
**************************
Power Armor Upgrade List:
**************************
Standard Power Armor Statistics
*******************************
Upper Power Consumption: 0.1kW(base) 0.25kW(gun/unarmed) 0.4kW(melee/big gun)
Lower Power Consumption: 0.35kW(base) 3.8kW(walk) 8.2kW(run)
Upper Thermal Load: 0degF/s(base) 6degF/s(gun/unarmed) 10degF/s(melee/big gun)
Lower Thermal Load: 0degF/s(base) 3degF/s(walk) 10degF/s(run)
Ceramic Ultracapacitor
**********************
Weight: 3
Cost: 900
Effects: +300kWh (full system recharge)
Although originally outfitted with long lived nuclear power sources, including the TX-28 MicroFusion Pack, a growing trend among those fortunate enough to have access to power armor has been to replace the aging packs with more conventional electric power storage devices. The primary power storage unit of choice is an ultracapacitor constructed from lightweight, superconductive ceramics. The units are compact enough that multiple backup units can be carried, and offer significantly greater power density than their outdated (and often depleted) nuclear cousins. In addition to being lighter, these modern alternatives are less hazardous to service, and can be modified to increase power output without risking a thermonuclear event. The primary drawback is the need to frequently recharge, although several methods of field recharging have been developed, often out of urgent necessity.
Upper Liquid Cooling
********************
Upper Power Draw: +0.1kW(gun) +0.2kW(unarmed) +0.3kW(melee/big gun)
Upper Thermal Load: -10degF/s(base) 6degF/s(unarmed) 10degF/s(melee/big gun)
Weight: 3
Cost: 800
Effects:
+2 Unarmed Damage
+2 Melee Damage
+10 Guns
Upgrading your power armor's cooling system from forced air convection to liquid cooling improves sustainable power output. A more powerful upper body means improved melee and unarmed damage, and more sustainable accuracy with big guns.
Lower Liquid Cooling
********************
Lower Power Draw: +0.1kW(base) +1.1kW(walk) +3kW(run)
Lower Thermal Load: -20degF/s(base) +8degF/s(walk) +20degF/s(run)
Weight: 5
Cost: 1200
Effects:
+40 Speed
+45 Carrying Capacity
Ordinarily air cooled, your suit's polyphasic servo motor drivetrain is automatically restricted to sustainable power outputs to prevent overheating. Liquid cooling allows power output to be increased without threatening system stability. More powerful legs and lower torso lead to improved carrying capacity and speed.
Thermal Regulation Override
***************************
Upper Power Draw: +0.1kW(gun) +0.25kW(unarmed) +0.35kW(melee/big gun)
Lower Power Draw: +0.05kW(base) +1.9kW(walk) +5kW(run)
Upper Thermal Load: 0defF/s(gun) +1.5degF/s(unarmed) +2.3degF/s(melee/big gun)
Lower Thermal Load: 0degF/s(base) +2degF/s(walk) +6degF/s(run)
Weight: 0.25
Cost: 350
Effects:
+60% Speed
+70 Carrying Capacity
+2 Strength
+2 Unarmed Damage
+3 Melee Damage
+15 Big Guns
A cheap, effective way to increase your power armor's strength and speed, this chip replaces your suit's thermal monitoring hardware with upper and lower temperature gauges and a manual toggle. Ordinarily, the power consumption of your armor is restricted to prevent overheating, ensuring consistent, uninterrupted operation. Putting thermal regulation under manual control will allow you to increase the raw power of your armor, but at the risk of overheating. Monitor the upper and lower temperature gauges closely; if you overheat, you or your armor may take damage, and you could be left immobile for several seconds. This upgrade can be coupled with upper and lower liquid cooling systems for massive power output.
Neural Targeting Interface
**************************
Power Draw: 0.1kW(base)
Weight: 0.5
Cost: 1100
Effects:
+15 AP
+5% Critical Chance
The Neural Targeting Interface puts your brain, Pipboy, and Power Armor into a state of synergy, improving reaction times and leading to improved VATS targeting and a higher critical chance.
Upper Precision Phase Controller
********************************
Power Draw: 0.15kW(base)
Weight: 1
Cost: 1000
Effects:
+10 Small Guns
+10 Energy Weapons
More precise control over your arms and upper body leads to improved handling of guns and energy weapons. Coupled with the inherent stability of the heavy suit, experienced users will often see their accuracy improve while wearing power armor sporting this upgrade.
Lower Precision Phase Controller
********************************
Power Draw: 0.2kW(base)
Weight: 1.5
Cost: 800
Effects:
+5 Stealth
Power armor's assisted mobility is provided in most cases by an array of polyphasic servo motors distributed throughout the arms, legs, and torso. Upgrading these motors' phase controllers allows for more precise movement, reducing some of the noise associated with power armor and improving stealth.
Regenerative Overload Capacitor
*******************************
Weight: 2
Cost: 1100
Effects:
Dramatically reduced fall damage
Increased jump height (when coupled with Lower Liquid Cooling or Thermal Override)
One advantage of the polyphasic electric drivetrain is its ability to seamlessly transition from a power consuming array of motors to a power producing array of generators. Each time your leg impacts the ground, the electric motors take advantage of that force to generate power. This regenerative power can be shunted to other active motors, or stored, greatly improving efficiency. Under normal operation this system is more than adequate for absorbing the minor, repetitive shock of walking or running across uneven terrain, however the tremendous surge of energy produced when absorbing the impact after a long fall can overwhelm the system, causing the armor to lock up and potentially injure the wearer. A Regenerative Overload Capacitor will soak up that extra power, feed it back into the system at a manageable rate and greatly improve the suit's capacity to absorb the impact of long falls. When coupled with Lower Liquid Cooling and/or a Thermal Regulation Override, this will enable the user to power jump much higher than they would normally be able, without risking an injury.
Proximity Alert
***************
Power Draw: 250 Watts
Weight: 0.5
Cost: 900
Effects:
+2 Perception
Audible Combat Warning
A passive infrared optical scanner continuously monitors your surroundings for threats, which are reported via an audible alert when detected.
Advanced Power Armor (APA) Ultracapacitor Conversion Kit/
T-51b Ultracapacitor Conversion Kit
********************************************************
Weight: 4 (-5lb. installed)/4 (-7 installed)
Cost: 1300/1500
These kits can be used to convert Enclave produced Advanced Power Armor or T- 51b armor from their original MicroFusion Pack power sources to higher power output ultracapacitor based power. Although they require more frequent recharging, this will allow you to install high power upgrades like liquid cooling and Thermal Regulation Override.
Mark IV MicroFusion Pack/
TX-40e MicroFusion Pack
************************
Weight: 9 (0 installed)/11 (0 installed)
Cost: 2900/3200
Combining power outputs on par with ultracapacitor power sources with the unsurpassed longevity of a MicroFusion pack, these rare, experimental power sources will operate without refueling for half a century, while providing more than enough power to run any armor modification developed to date. The Mark IV Microfusion Pack is compatible with APA, while the TX-40e can be used to replace the T-51b's TX-28 MicroFusion Packs.
Environmental UnderArmor
************************
Weight: 15
Cost: 250
Effects:
+40 Radiation Resistance
+7 Damage Resistance
Lined with a neutron absorbing layer of heavy metals, this UnderArmor will substantially increase the radiation resistance of power armor.
MediBrace UnderArmor
********************
Weight: 22
Cost: 325
Effects:
+8 Medicine Skill
Ignore Crippled Limbs
+5 Damage Resistance
Though heavy and not especially protective, this armor houses a complex array of air bladders and aramid cables that will autmatically stabilize wrenched or broken limbs. The system must interface with your power armor's power source in order to function.
Aramid UnderArmor
*****************
Weight: 14
Cost: 300
Effects:
+15 Damage Resistance
Constructed from a thinner version of the bullet resistant fibers used for the popular Recon Armor, this underarmor can bolster the damage resistance of power armor significantly.
Insulating UnderArmor
*********************
Weight: 12
Cost: 300
Effects:
+15 Fire Resistance
+15 degree Overheat Temperature
+4 Damage Resistance
Popular with Thermal Regulation Override users, the thermally insulating fabric of this UnderArmor not only protects against damage from flame based weaponry, but also shields the wearer from the excessive heat produced by prolonged thermal regulation overrides.
NOTE: To equip UnderArmor, put on the desired set of UnderArmor, then put on Power Armor. To unequip, unequip power armor, then unequip or change UnderArmor. only one set of UnderArmor can be worn at a time.
Energy Pulse Generator
**********************
Weight: 3
Cost: 1700
Pulse Effects:
Electromagnetic: Temporarily disable (paralyze) robots and power armor wearers
Electrostatic: Knock back enemies in the area (dependent upon strength and endurance check, robots and power armor wearers are highly resistant)
Infrared: Ignite any enemy in the area
Mesmetronic: Mez any human or non-feral ghoul enemy in the area
The energy pulse generator can be used to generate one of four energy pulses, depending on which energy pulse modulators you have in your posession. Any enemies (or allies) within its blast radius will be effected. The pulses will expend your power armor's charge rapidly, and the system will need to recharge for several seconds before another pulse can be generated. Fusion powered armors can continue to generate pulses indefinitely, but their recharge time is significantly longer. The strength and effectiveness of any pulse is dependent upon the energy weapons skill of the user.
StimJak
**********************
Provides adjustable health regeneration fueled by stimpaks.
Catalytic Rebreather
**********************
Provides the abitlity to breath underwater indefiitely, provided charged power armor and a power armor helmet are worn.
Hardened T-51b Power Armor
************************
Truly a walking tank, this armor provides greatly increased damage resistance and armor durability at the expense of movement speed. It can only be repaired by titanium scrap, available from some vendors.
Composite T-45d Power Armor
************************
An attempt to sway the combat armor holdouts, this lightweight armor features reduce noise, low power servos for improved stealth characteristics. It is the only power armor able to draw the full benefit of Stealth Boys. It can only be repaired by Composite Repair Kits, available from some vendors. Due to its light weight, this armor is able to provide an increase in movement speed in spite of its low powered servos, partially making up for its lack of support for high power liquid cooling and TRO upgrades.
Enclave Onyx Power Armor
**********************
This armor features dual mode servos, capable of operating in fully functional high powered or low noise/low power modes, as well as an integrated stealth field generator. Engaging the stealth field will automatically switch the servos into low power mode, reducing speed by 25% and preventing the use of high power upgrades (liquid cooling and TRO).
Wasteland Sun MicroFusion Pack
**************************
An experimental high powered Microfusion Pack recovered by the Outcasts, it is able to convert any suit of T-45d to nuclear power, with access to all upgrades.
***************************************************************
Installation
______________
A Note About FOMM - If you're using Fallout Mod Manager (FOMM) you can either open up the zip file yourself and drag its contents into your data directory, or you can open up FOMM's Package Manager, click the Add Package button, and select the .7z file you downloaded. FOMM will automatically turn the download into a FOMod, which has a couple of advantages. FOMods are easier to uninstall (not sure why you'd want to do that though) but there's also a version metadata feature - the Nexus maintains a database of mod versions, and when FOMM creates a FOMod it uses the database to assign the FOMod a version number. Every time you open the package manager, FOMM will then check the database to see if updates are available for any of your installed FOMods. I like this feature because I tend to release updates for my mods frequently, and keeping more people up to date means fewer bug reports. If you install as a FOMod, activate the Powered Power Armor package that is created, and then skip to the HUD installation instructions (after installing NVSE.)
Installing with this method will automatically add all Powered Power Armor esps and esms into your load order, so if you do not plan to install Ambient Temperature.esm (a separate, optional mod) you will need to uncheck Ambient Temperature - PPA.esp.
Install NVSE:
http://nvse.silverlock.org/beta/nvse_1_beta6.zip
NVSE is still in its beta stages, and while this mod has not shown any issues during testing, there is still the chance for bugs. Back up all saves before installing. This is essentially a direct copy of a well tested FO3 mod, so the mod itself is no longer a beta, but the authors of NVSE have requested that any mods that require it be flagged as betas until NVSE is out of beta.
Also, this mod is so heavily dependent upon NVSE its absurd, so don't bother asking for a non-NVSE version :P
Once NVSE has been installed, copy the downloaded Powered Power Armor files into your data directory. In order to use the Ambient Temperature - PPA.esp file, which causes environmental temperatures to influence armor overheating, you will also need to install Ambient Temperature, a separate mod that can be downloaded here:
Ambient Temperature:
http://www.newvegasnexus.com/downloads/file.php?id=34814
Use the following load order (It isn't strictly necessary for these files to load after all of your other mods, but you should check that files loading later do not override any of PPA's changes):
FalloutNV.esm
(other .esms)
Ambient Temperature.esm(optional)
Inventory Access.esm(required)
(other .esps)
Powered Power Armor.esp(required)
Jump Fall Fixer.esp(optional but recommended)
Ambient Temperature - PPA.esp(optional, requires Ambient Temperature.esm)
HUD Installation:
_________________
NOTE: Gopher has put together a utility that will perform the following steps automatically for this and several other HUD altering mods. Download it here:
http://www.newvegasnexus.com/downloads/file.php?id=38961
There are a few extra steps for getting the HUD gauges to show up.
1. Browse to Data\menus\main, and see if hud_main_menu.xml is there.
2a. If it is, open it with a text editor. Scroll to the bottom, and just above the last line (<\menu>) add the line:
<include src="PPA\PPA_HUD.xml" />
3a. Save the file, and that should be it.
OR
2b. If the file is not there, browse to Data\menus\prefabs\PPA\main and move that copy of hud_main_menu.xml to the Data\menus\main folder (if the folder doesn't exist, create it).
If you install any mods that alter the HUD (like DarN's UI) after installing PPA, it is likely that they will overwrite the changes made to hud_main_menu.xml, and your PPA HUD icons will no longer show up. If you notice that they are suddenly missing, repeat steps 1 through 3a. Using Gopher's Unified HUD Project utility, linked above, can help avoid this.
DarN's UI is highly recommended - the PPA HUD was crafted with DUI compatiblity in mind, and will look much better if you have DUI installed. But install DUI before rather than after PPA.
http://ui.darnified.net/wip/DUIFONV/v1/DUINVv04.7z
***************************************************************
Uninstall
__________
!!!!!!!!!!!!!!!!!!!!!!!!!!!!!!!!!!!!!!!!!!!!!!!!!!!!!!!!!!!!!!!
IMPORTANT: You'll want to remove power armor, then save, before uninstalling this mod. This will ensure that the numeric game settings fJumpHeightMin and fJumpFallHeightMin are not permanently changed.
!!!!!!!!!!!!!!!!!!!!!!!!!!!!!!!!!!!!!!!!!!!!!!!!!!!!!!!!!!!!!!!
Delete Powered Power Armor.esp, Inventory Access.esm, and Jump Fall Fixer.esp, and delete the PPA folders from Data\Meshes, Data\textures, Data\Sounds\FX, and Data\Menus\Prefabs. Also open up Data\menus\main\hud_main_menu.xml, scroll to the bottom, and remove the line <include src="PPA\PPA_HUD.xml" />. Save and close.
***************************************************************
Compatibility
______________
!!!!!!!!!!!!!!!!!!!!!!!!!!!!
Project Nevada Users:
It is recommended that you enter the Powered Power Armor vision overhaul configuration menu and disable Option 4 - adjustable zoom with scoped weapons. Project Nevada provides its own (very polished) adjustable zoom feature. Also, you should no longer have to disable Project Nevada's dynamic crosshair, the PPA code has been updated to take it into account.
!!!!!!!!!!!!!!!!!!!!!!!!!!!!
This mod does not actually modify power armor in any way (well, almost, a few repair lists are respecified), so very little is overwritten. The upgrades and charging system will apply to any armor designated as power armor, and taking up the upper body slot, whether vanilla or added by a mod. All mod armors are treated as if they were T-45d (meaning they will require recharging).
The following changes can be resolve via merged patch:
Ingestible: Stealth Boy
Armor: ArmorPowerT51b (repair list)
Armor: ArmorPowerT51bHelmet (repair list)
Armor: ArmorPowerRemnantsHelmet (repair list)
Armor: ArmorPowerRemnantsTeslaHelmet (repair list)
Armor: ArmorGannonTeslaHelmet (repair list)
Form Lists: All power armor repair lists
Leveled Item: CondLegionArmorVeteran
Leveled Item: CondLegionArmorPrime
Base Effects: 4 MS13 mesmetron related effects
NPC: HVPaladinDead04
Terminal: REPCONHQPresidentTerminal
You may want to check things out in FNVEdit. Leveled item, form list, and armor stat conflicts should be resolved in your merged patch.
The bigger issue is the pair of numeric game settings used to increase jump height and reduce fall damage. They are adjusted via script is the potential for conficts with any mod that changes either of these values.
Numeric Game Setting: fJumpHeightMin
Numeric Game Setting: fJumpFallHeightMin
If you run into a conflict, let me know and I may put together a compatibility patch.
***************************************************************
Credits
________
Big thanks to The3rdType for making all of the custom Pipboy and HUD icons (though I'll have to find a new use for some of the pipboy icons, most have been replaced by text.) Also thanks to Joe Shrapnel for working with me to debug release 1.4 gold, the most recent FO3 release of this mod. Thanks to Kungfubellydancer for the UI voice acting.
***************************************************************
Use Info
_________
Contact me before using anything from this mod.
New Vegas Beta 3
***************************************************************
Updates
____________
Beta 3 Hotfix A Release 3/21/2011
This hotfix will prevent the switch from 3rd to 1st person when aiming, and restores binocular zoom.
Beta 3 Released 2/13/2011
New UI voice acting by Kungfubellydancer - More extensive verbal notifications
Configurable vision overhaul - Disable or enable components via the config menu
Better vision overhaul interface - Two vision hotkeys have been replaced by a single vision hotkey (default left shift) and the mouse wheel
Better Project Nevada compatibility - Will no longer cause problems with PN's dynamic crosshair, and PPA's scoped weapon adjustable zoom can be disabled if you prefer Project Nevada's system
Unified HUD Project support
http://www.newvegasnexus.com/downloads/file.php?id=38961
UHP is a utility put together by Gopher that simplifies the installation of HUD altering mods like this one - it handles the necessary editing of hud_main_menu.xml for you. Currently 4 of my mods are supported by it. It isn't required, but if you're daunted by PPA's installation instructions UHP is for you.
***************************************************************
Description
_____________
Powered Power Armor adds several upgrades that can be used with power armor, about 20 of them. See the included Power Armor Upgrades List for a complete list and what they do. Think of them as mod kits for power armor - they come in the form of miscellaneous items that can be scavenged in the Mojave or purchased from various vendors. When you put on power armor any upgrades in your inventory replace themselves with armor objects that automatically equip themselves. Some are weapons, some apply various stat changes, and some have more elaborate scripted effects. The Pipboy icon for each upgrade contains text discussing how the upgrade works (in proper Fallout pseudo-science technobabble), what it does, and what armors it works with.
In addition to the upgrades, power armor is treated more like the machinery that it is. Different armors have different power supplies with various advantages and disadvantages. Enclave Advanced Power Armors and T-51b power armors both run on effectively inexhaustible nuclear power supplies - MicroFusion Packs. T-45d armors, and any armors added by custom mods, get their power instead from superconducting ceramic ultracapacitors - meaning they require periodic recharging. There is an advantage to the ultracapacitors though - they are able to produce a much higher power output (nuclear reactors tend to get a bit testy when you run them too hot) and therefore allow you to install some of the cooler upgrades. Liquid cooling allows power armor to be run at a higher power output without overheating, meaning faster movement, higher carry weight, and more damage with melee and unarmed weapons. Thermal Regulation Override accomplishes the same effect by basically ignoring the usual high temperature warnings, letting you push the armor closer to the limit (and past it if you don't mind a little singed flesh.)
If you'd like to use these high powered upgrades with one of the nuclear armors, you have two options. One is to purchase and install an Ultracapacitor Conversion Kit, meaning your armor will now require periodic recharging. The other is to scavenge or purchase one of the rarer, considerably more expensive experimental high power microfusion packs. These will let you use any high power upgrade without having to recharge.
A new HUD element will be added to your screen upon equipping power armor - the vault boy in power armor indicates that you are wearing power armor. If the icon is green (or whatever your chosen HUD color is) you are wearing charged or nuclear power armor. If the icon is dark grey, your armor is uncharged, and will be slowing you down considerably. You can charge it by entering the Powered Power Armor config menu (default hotkey "P") and selecting the Field Recharge option. Any suitable power sources that you have in your inventory will be shown there (fission batteries, microfusion cells, energy cells, electron charge packs, and ceramic ultracapacitors). Your armor will carry up to 300 kilowatt-hours of charge. Your armor's charge, if applicable, is shown to the right of the power armor icon, though if you are wearing nuclear powered armor a radiation symbol will appear there instead. The whole cluster of indicators can be repositioned on your screen by holding the config menu key ("P") until the rest of the HUD disappears, and then using the arrow keys while continuing to hold down "P".
If you've installed the Thermal Regulation Override upgrade, there will also be temperature readouts above and below the charge indicator. They indicate the upper and lower temperatures of your armor, not so much the temperatures inside of the machinery but the temperature of what's in contact with your skin. If either temperature gets above 130 degrees Fahrenheit an alarm will sound, and above 135 degrees you'll begin to take damage. You can lower your temperature by either stopping, walking, lightening your load, or toggling TRO off (its default hotkey is "Q"). When TRO is engaged, the power armor icon will turn red. (By now you're probably beginning to see why you needed power armor training).
Another feature of this mod is working UnderArmor - what recon armor was originally meant to be, something that could be worn under your power armor. There are four sets at the moment, each with a different advantage. Insulating UnderArmor will allow you to tolerate armor temperatures of up to 150 degrees, as well as improving your fire resistance. UnderArmors are equipped more or less how you would think - put the UnderArmor on, then equip power armor.
T-51b power armor protects better than T-45d and imposes less of an agility penalty due to its high precision hydraulic drivetrain (versus the T-45d and APA's electric servomotors) but the hydraulics are incompatible with a few of the upgrades. The Regenerative Overload Capacitor and Upper and Lower Precision Phase Controllers are designed to work with servomotor armors only.
Speaking of armors, three custom skinned power armors are also added. Composite T-45d, Enclave Onyx Stealth Armor, and Hardened T-51b. Composite T-45d can be built from schematics found somewhere in the Mojave, and will occasionally be found on Legion Prime and Veteran soldiers. The other two are unique, and will be a little harder to find. These armors include scripted effects that make them truly unique (or, in the case of Hardened T-51b, slower).
In an attempt to balance out the enormous advantages offered by power armor, nearly all power armors will reduce your sneak skill by 100 (though some upgrades improve it a bit). Furthermore, Stealth Boys have been altered to only work effectively with non-power armors (just because you're partially invisible doesn't mean they can't hear you.) Composite T-45d is the only power armor suitable for use with Stealth Boys by virtue of its quiet, low power stealth drivetrain.
Let's see, what else. Oh yeah, other features:
!!! New to Beta 3 !!!
New UI Voice Acting by Kungfubellydancer - New verbal alerts will now tell you when your power armor or power armor helmet condition is below 10%, and when you've exited combat, in addition to the original verbal notifications (armor charge, cobat alert, armor initialization, upgrade optimization). I'm pretty happy with the change, but if you liked the old voice, the files are still there and can be selected by entering the console and typing "set PPAUISoundMode to 1", but keep in mind that you'll be losing some functionality. Verbal notifications can be disabled entirely by typing "set PPAUISoundMode to 0".
Vision Overhaul Changes - You can now disable components of the vision overhaul via the config menu. The two vision hotkeys have been replaced by a single hotkey and the mouse wheel - use the mouse wheel while aimed to zoom in and out. When not aimed, hold the vision hotkey (default left shift) and use the mouse wheel to adjust your unaimed FOV. Tap the vision hotkey to cycle through vision modes.
Improved Compatibility with Project Nevada - The vision overhaul code has been updated to enable compatibility with Project Nevada's dynamic crosshair. It is recommended that you disable PPA's adjustable zooming with scoped weapons (option 4) and use Project Nevada's adjustable zoom instead.
!!!!!!!!!!!!!!!!!!!!!
Vision Overhaul - The zoom that most unscoped weapons have is removed (optionally) unless you are wearing a power armor helmet, ranger combat helmet, or targeting monocle. If you have binoculars in your inventory, they will automatically be equipped if you hold down the aim/block button (default right mouse button). If you are wearing any of the listed pieces of headgear, you'll have the ability to adjust both your standing zoom and your aiming zoom separately. There are also three vision modes cycled via the left shift key - light amplification, thermal vision, and millimeter wave radar. The script that enables the adjustable zoom edits three Field Of View .ini settings via an NVSE function, so to let you retain control over your field of view a menu adjuster has been added. The field of view you select via the config menu will be the field of view used when you are not wearing any special headgear, and will be the farthest you'll be able to zoom out when you are wearing special headgear.
T-51b Enhancements - To balance T-51b's incompatibility with precision phase controller and regenerative overload capacitor upgrades, its thermal performance has been improved (it will heat up slower and cool down quicker than other armors) and it has been given its own upgrade, a High Pressure Hydraulics kit that will improve strength, melee/unarmed damage, and carryweight.
High Pressure Hydraulics Kit - Mentioned in the T-51b Enhancements above, this T-51b-only upgrade enhances strength without sacrificing thermal performance.
Liquid Ninja - If you have both Thermal Regulation Override and upper or lower liquid cooling installed, you'll also be able to install the Liquid Nitrogen Injection Aperature, or Liquid Ninja. It injects liquid nitrogen into your cooling system, instantly dropping your operating temperature by 100 degrees or so.
RobCo Cryogenic Compressor - The Liquid Ninja's liquid nitrogen cartridges can be saved and refilled with this compressor. Like the rechargers, it can be installed anywhere but is
HUD Initialization Sequence - Each time you put on power armor, there will be a graphical display that pops up showing you which upgrades are being installed, accompanied with sound.
Improved Environmental Thermal Responses - Snow, rain, and swimming will all help cool your armor.
Power Armor Deconstruction - Upon the death of its wearer, power armor may break down into its constituent components depending on its condition and how much damage the wearer's limbs took. You'll need the Power Armor Mechanic perk to recognize and loot these components, and reassemble them into working power armor. Otherwise, aim for the head. Reassembly takes place at workbenches and uses the crafting menu, and the perk requirements are: Level 6, 50 Science, 50 Repair. You can also break down power armor to use its parts to rebuild other, better armors, or to rebuild faction armors as their non-faction counterparts.
Power Armor Explosions - Power armor will explode if you score a direct hit to the power supply. Both nuclear and non nuclear armors can explode, though the nuclear explosions are considerably more fun. Any shot to the torso that causes sufficient damage has a remote chance of causing the armor to explode, but shots to the back will make it happen 100% of the time (given the way the combat AI is written this is harder than you would think.) Only the player can cause explosions at the moment, so don't worry about suddenly blowing up.
Power Armor Scaling - The player and any NPC wearing power armor will automatically be scaled up by about 15%. This features introduced a couple of bugs that have been addressed as thoroughly as possible, but if you're having any problems with this mod disable this feature via the options menu. It is disabled by default.
Recharging Stations - There are two of them, the RobCo Rapid Recharge Station and the RobCo Personal Breeder Reactor. The recharge station will recharge your armor any any ceramic ultracapacitors in your inventory instantly. The reactor will recharge depleted fission batteries, and it takes 10 game minutes. Both are heavy and expensive.
Armor Plating Scraps - If an armor is destroyed during combat, some of the armor plating may be salvageable, and can be used to repair power armor and helmets. Scraps or repair kits will also be available from some vendors. There are four kinds - ceramic (used for T-51b and APA armors), steel (used for T-45d armors), composite (used for Composite T-45d) and titanium (used for Hardened T-51b).
Quest Dependent Loot - Which upgrades are available for purchase is dependent in some cases upon which quests you've completed. Most of the better upgrades in fact require that you've done something for the vendor or their faction before they'll be available for purchase. The effected merchants include Gloria Van Graff, Contreras, Mick, Torres, and Dr. Schuler.
Jump Fall Fixer - Included in the download is the independent mod Jump Fall Fixer. It's a workaround for the invisible ledge that crops up when jump height is increased too much.
NPC Upgrades - Nearly all upgrades can be used by NPCs, and will be spawned at random in NPC inventories (other than companions). This includes the Energy Pulse Generator, an area of effect weapon that can burn you, mez you, paralyze you or send you flying.
Weapons - There are also three energy weapons in the works that consume your armor's charge for ammo, though they are not a part of this initial release. They are heavily scripted, with multiple firing modes and other goodies. Two were a part of the most recent Fallout 3 release of this mod, but there were a couple of bugs to work out so I've decided to save them for beta 2.
***************************************************************
Detailed Directions
____________________
Installing Upgrades:
Add the upgrade to your's or an NPC's inventory, equip power armor.
Uninstalling upgrades:
Unequip power armor. If you are trying to retrieve an upgrade from a companion, first remove their power armor. The armor upgrades will unequip themselves and become Misc. items. Remove them from your (or their) inventory, and place them in a container or on display (the models are pretty dull at the moment). Then re-equip your power armor. Star Paladin Cross's armor has been made playable to make uninstalling her upgrades possible.
Installing UnderArmor:
Put on the desired set of UnderArmor, then put on Power Armor.
Uninstalling UnderArmor:
Remove Power Armor, then unequip or change UnderArmor.
Recharging:
For a field recharge, enter the Power Armor menu by either pressing the hotkey (default "p") or by going to the armor section of your pipboy and clicking the "[PA] -Config-" item. If you have any suitable power sources, the first option in the menu will be "Field Recharge". Select it, then select the power source. Your suit's charge will be increased by the stated amount, up to the maximum of 300 kWh.
To use the RobCo Rapid Recharge Station, drop it from your inventory in a suitable area, activate it with the use key to install it, then activate the installed recharger and select the recharge option. The lights will dim, and your armor and ceramic ultracapacitors will be recharged instantly.
The RobCo Personal Breeder Reactor cannot recharge your armor directly, but it can be used to recharge the depleted fission batteries added to your inventory when you use fission batteries for a field recharge. Drop it from your inventory, install it, activate it, and select "Recharge". It will take one minute, but all of your batteries will be recharged at once. You'll be notified when it's done, but you'll need to return to the machine and activate it again to retrieve the batteries.
Thermal Regulation Override:
Press the toggle key (default "q") to turn it on or off. The power armor hud icon will turn red when the override is enabled. Running, particularly with a heavy load, will most likely cause you to overheat after about 10-15 seconds. Firing a heavy, big gun, or swinging a heavy melee weapon may also cause you to overheat, but its unlikely. If your upper or lower temperature hits 135F, you'll take damage (you'll hear it) and the temperature gauge will turn red. Stop what you're doing until its green again. You don't necessarily have to toggle the override back off to cool down, just stop running or swinging or whatever.
TRO's speed boost is configurable via the power armor menu (default "p" hotkey). The carryweight increase has also been increased to 1000, so what you can carry will be limited primarily by heat buildup. There is also a Strength Amplification Factor that can be used to vary the amount of weight carried by the armor versus by the player, though this will not come into play until the Imp's More Complex Needs patch has been released.
Energy Pulse Generator
The Energy Pulse Generator can be used to trigger an outburst of energy centered on the user, effecting any enemies within the blast radius. It has two (or more) parts, the Energy Pulse Generator, and the Energy Pulse Modulator(s). There are four different Pulse Modulators, each of which will allow a different kind of energy pulse to be generated. If you have an Energy Pulse Generator and at least one of the Energy Pulse Modulators, press the EPG key (default "C") to trigger an Energy Pulse. To switch pulse type, hold the EPG key. Your pulse type is shown by the pulse icon above and to the left of your HUD's power armor status icon. If the icon is red, the system is recharging, if it is green the pulse is ready to fire. Each pulse will discharge a significant portion of any Ultracapacitor powered armor's charge, but fusion powered armors will be able to fire indefinitely. Recharge times, however, will be significantly longer with fusion powered armors. Check the Energy Pulse Modulators in the Misc. section of your inventory to see which icon is associated with which pulse type. NPC's can and will use this weapon, so be careful if you give it to a companion.
Enclave Onyx Armor
Hold the crouch key for about a second to toggle the stealth field. Once on, you can stand back up by tapping the crouch key without disabling the field.
Composite T-45d Armor
The Stealth Boy effect has been reworked to remove most of the benefit of the stealth field if the user is wearing power armor. The exception to this is Composite T-45d Armor, which has quiet, low power servos made possible by the lower armor weight.
Power Armor Deconstruction
Enabled by default, this reduces the likelihood that the player will be able to salvage power armor intact. If the armor condition or limb condition of a power armor wearer is too low upon death, or if the power armor's power plant exploded, the power armor will break down into servos, a chassis, a powerplant, and either a shell (recoverable) or husk (non-recoverable) depending on the exact conditions. Rank 1 of the Power Armor Mechanic perk is required to recognize and salvage these parts. Rank 2 is required to reassemble them into working sets of power armor. They can be reassembled at a work bench or with the portable power armor repair kit, which should be dropped from the player's inventory and activated to initiate an assembly or disassembly.
Power Armor Explosions
In previous versions, power armor would explode if the wearer was killed via a shot to the torso. In the new system, power armor will no longer explode upon death, but can explode if a shot to the torso does more than 20 damage. The probability that it will explode is 100% if the target is shot in the back, but considerably lower if they are shot in the chest or side. The player will not explode as of this release, but companions might.
StimJak
This upgrade provides configurable health regeneration fueled by stimpaks. At 5 hp/sec or lower, the efficiency is greater than 1, meaning you will have more health restored than if you used the stimpak normally. At rates above 5 hp/sec, your health will be restored less. Rates can be set for combat and non-combat independently via the power armor menu (default "p" hotkey).
Catalytic Rebreather
Equip the rebreather like a backpack, along with charged power armor and a power armor helmet. You will be able to breath underwater until your power runs out.
Vision Upgrades - When wearing a power armor helmet and charged power armor, or a ranger combat helmet, or any of the targeting monocles, you will be able to zoom via the capslock key (configurable). Tap the key to zoom out, hold the key to zoom in. Cycle through the vision modes by tapping the shift key (also configurable).
Vision Adjustment - A number of Advanced Optics features are available when you are wearing a power armor helmet or targeting monocle. Use the mouse wheel while aiming to zoom in or out with scoped and unscoped weapons. Hold the vision hotkey (left shift by default) while not aiming and use the mouse wheel to adjust your unaimed field of view. Tap the vision hotkey to cycle through the three vision modes (night vision, thermal vision, millimeter wave radar).
**************************
Power Armor Upgrade List:
**************************
Standard Power Armor Statistics
*******************************
Upper Power Consumption: 0.1kW(base) 0.25kW(gun/unarmed) 0.4kW(melee/big gun)
Lower Power Consumption: 0.35kW(base) 3.8kW(walk) 8.2kW(run)
Upper Thermal Load: 0degF/s(base) 6degF/s(gun/unarmed) 10degF/s(melee/big gun)
Lower Thermal Load: 0degF/s(base) 3degF/s(walk) 10degF/s(run)
Ceramic Ultracapacitor
**********************
Weight: 3
Cost: 900
Effects: +300kWh (full system recharge)
Although originally outfitted with long lived nuclear power sources, including the TX-28 MicroFusion Pack, a growing trend among those fortunate enough to have access to power armor has been to replace the aging packs with more conventional electric power storage devices. The primary power storage unit of choice is an ultracapacitor constructed from lightweight, superconductive ceramics. The units are compact enough that multiple backup units can be carried, and offer significantly greater power density than their outdated (and often depleted) nuclear cousins. In addition to being lighter, these modern alternatives are less hazardous to service, and can be modified to increase power output without risking a thermonuclear event. The primary drawback is the need to frequently recharge, although several methods of field recharging have been developed, often out of urgent necessity.
Upper Liquid Cooling
********************
Upper Power Draw: +0.1kW(gun) +0.2kW(unarmed) +0.3kW(melee/big gun)
Upper Thermal Load: -10degF/s(base) 6degF/s(unarmed) 10degF/s(melee/big gun)
Weight: 3
Cost: 800
Effects:
+2 Unarmed Damage
+2 Melee Damage
+10 Guns
Upgrading your power armor's cooling system from forced air convection to liquid cooling improves sustainable power output. A more powerful upper body means improved melee and unarmed damage, and more sustainable accuracy with big guns.
Lower Liquid Cooling
********************
Lower Power Draw: +0.1kW(base) +1.1kW(walk) +3kW(run)
Lower Thermal Load: -20degF/s(base) +8degF/s(walk) +20degF/s(run)
Weight: 5
Cost: 1200
Effects:
+40 Speed
+45 Carrying Capacity
Ordinarily air cooled, your suit's polyphasic servo motor drivetrain is automatically restricted to sustainable power outputs to prevent overheating. Liquid cooling allows power output to be increased without threatening system stability. More powerful legs and lower torso lead to improved carrying capacity and speed.
Thermal Regulation Override
***************************
Upper Power Draw: +0.1kW(gun) +0.25kW(unarmed) +0.35kW(melee/big gun)
Lower Power Draw: +0.05kW(base) +1.9kW(walk) +5kW(run)
Upper Thermal Load: 0defF/s(gun) +1.5degF/s(unarmed) +2.3degF/s(melee/big gun)
Lower Thermal Load: 0degF/s(base) +2degF/s(walk) +6degF/s(run)
Weight: 0.25
Cost: 350
Effects:
+60% Speed
+70 Carrying Capacity
+2 Strength
+2 Unarmed Damage
+3 Melee Damage
+15 Big Guns
A cheap, effective way to increase your power armor's strength and speed, this chip replaces your suit's thermal monitoring hardware with upper and lower temperature gauges and a manual toggle. Ordinarily, the power consumption of your armor is restricted to prevent overheating, ensuring consistent, uninterrupted operation. Putting thermal regulation under manual control will allow you to increase the raw power of your armor, but at the risk of overheating. Monitor the upper and lower temperature gauges closely; if you overheat, you or your armor may take damage, and you could be left immobile for several seconds. This upgrade can be coupled with upper and lower liquid cooling systems for massive power output.
Neural Targeting Interface
**************************
Power Draw: 0.1kW(base)
Weight: 0.5
Cost: 1100
Effects:
+15 AP
+5% Critical Chance
The Neural Targeting Interface puts your brain, Pipboy, and Power Armor into a state of synergy, improving reaction times and leading to improved VATS targeting and a higher critical chance.
Upper Precision Phase Controller
********************************
Power Draw: 0.15kW(base)
Weight: 1
Cost: 1000
Effects:
+10 Small Guns
+10 Energy Weapons
More precise control over your arms and upper body leads to improved handling of guns and energy weapons. Coupled with the inherent stability of the heavy suit, experienced users will often see their accuracy improve while wearing power armor sporting this upgrade.
Lower Precision Phase Controller
********************************
Power Draw: 0.2kW(base)
Weight: 1.5
Cost: 800
Effects:
+5 Stealth
Power armor's assisted mobility is provided in most cases by an array of polyphasic servo motors distributed throughout the arms, legs, and torso. Upgrading these motors' phase controllers allows for more precise movement, reducing some of the noise associated with power armor and improving stealth.
Regenerative Overload Capacitor
*******************************
Weight: 2
Cost: 1100
Effects:
Dramatically reduced fall damage
Increased jump height (when coupled with Lower Liquid Cooling or Thermal Override)
One advantage of the polyphasic electric drivetrain is its ability to seamlessly transition from a power consuming array of motors to a power producing array of generators. Each time your leg impacts the ground, the electric motors take advantage of that force to generate power. This regenerative power can be shunted to other active motors, or stored, greatly improving efficiency. Under normal operation this system is more than adequate for absorbing the minor, repetitive shock of walking or running across uneven terrain, however the tremendous surge of energy produced when absorbing the impact after a long fall can overwhelm the system, causing the armor to lock up and potentially injure the wearer. A Regenerative Overload Capacitor will soak up that extra power, feed it back into the system at a manageable rate and greatly improve the suit's capacity to absorb the impact of long falls. When coupled with Lower Liquid Cooling and/or a Thermal Regulation Override, this will enable the user to power jump much higher than they would normally be able, without risking an injury.
Proximity Alert
***************
Power Draw: 250 Watts
Weight: 0.5
Cost: 900
Effects:
+2 Perception
Audible Combat Warning
A passive infrared optical scanner continuously monitors your surroundings for threats, which are reported via an audible alert when detected.
Advanced Power Armor (APA) Ultracapacitor Conversion Kit/
T-51b Ultracapacitor Conversion Kit
********************************************************
Weight: 4 (-5lb. installed)/4 (-7 installed)
Cost: 1300/1500
These kits can be used to convert Enclave produced Advanced Power Armor or T- 51b armor from their original MicroFusion Pack power sources to higher power output ultracapacitor based power. Although they require more frequent recharging, this will allow you to install high power upgrades like liquid cooling and Thermal Regulation Override.
Mark IV MicroFusion Pack/
TX-40e MicroFusion Pack
************************
Weight: 9 (0 installed)/11 (0 installed)
Cost: 2900/3200
Combining power outputs on par with ultracapacitor power sources with the unsurpassed longevity of a MicroFusion pack, these rare, experimental power sources will operate without refueling for half a century, while providing more than enough power to run any armor modification developed to date. The Mark IV Microfusion Pack is compatible with APA, while the TX-40e can be used to replace the T-51b's TX-28 MicroFusion Packs.
Environmental UnderArmor
************************
Weight: 15
Cost: 250
Effects:
+40 Radiation Resistance
+7 Damage Resistance
Lined with a neutron absorbing layer of heavy metals, this UnderArmor will substantially increase the radiation resistance of power armor.
MediBrace UnderArmor
********************
Weight: 22
Cost: 325
Effects:
+8 Medicine Skill
Ignore Crippled Limbs
+5 Damage Resistance
Though heavy and not especially protective, this armor houses a complex array of air bladders and aramid cables that will autmatically stabilize wrenched or broken limbs. The system must interface with your power armor's power source in order to function.
Aramid UnderArmor
*****************
Weight: 14
Cost: 300
Effects:
+15 Damage Resistance
Constructed from a thinner version of the bullet resistant fibers used for the popular Recon Armor, this underarmor can bolster the damage resistance of power armor significantly.
Insulating UnderArmor
*********************
Weight: 12
Cost: 300
Effects:
+15 Fire Resistance
+15 degree Overheat Temperature
+4 Damage Resistance
Popular with Thermal Regulation Override users, the thermally insulating fabric of this UnderArmor not only protects against damage from flame based weaponry, but also shields the wearer from the excessive heat produced by prolonged thermal regulation overrides.
NOTE: To equip UnderArmor, put on the desired set of UnderArmor, then put on Power Armor. To unequip, unequip power armor, then unequip or change UnderArmor. only one set of UnderArmor can be worn at a time.
Energy Pulse Generator
**********************
Weight: 3
Cost: 1700
Pulse Effects:
Electromagnetic: Temporarily disable (paralyze) robots and power armor wearers
Electrostatic: Knock back enemies in the area (dependent upon strength and endurance check, robots and power armor wearers are highly resistant)
Infrared: Ignite any enemy in the area
Mesmetronic: Mez any human or non-feral ghoul enemy in the area
The energy pulse generator can be used to generate one of four energy pulses, depending on which energy pulse modulators you have in your posession. Any enemies (or allies) within its blast radius will be effected. The pulses will expend your power armor's charge rapidly, and the system will need to recharge for several seconds before another pulse can be generated. Fusion powered armors can continue to generate pulses indefinitely, but their recharge time is significantly longer. The strength and effectiveness of any pulse is dependent upon the energy weapons skill of the user.
StimJak
**********************
Provides adjustable health regeneration fueled by stimpaks.
Catalytic Rebreather
**********************
Provides the abitlity to breath underwater indefiitely, provided charged power armor and a power armor helmet are worn.
Hardened T-51b Power Armor
************************
Truly a walking tank, this armor provides greatly increased damage resistance and armor durability at the expense of movement speed. It can only be repaired by titanium scrap, available from some vendors.
Composite T-45d Power Armor
************************
An attempt to sway the combat armor holdouts, this lightweight armor features reduce noise, low power servos for improved stealth characteristics. It is the only power armor able to draw the full benefit of Stealth Boys. It can only be repaired by Composite Repair Kits, available from some vendors. Due to its light weight, this armor is able to provide an increase in movement speed in spite of its low powered servos, partially making up for its lack of support for high power liquid cooling and TRO upgrades.
Enclave Onyx Power Armor
**********************
This armor features dual mode servos, capable of operating in fully functional high powered or low noise/low power modes, as well as an integrated stealth field generator. Engaging the stealth field will automatically switch the servos into low power mode, reducing speed by 25% and preventing the use of high power upgrades (liquid cooling and TRO).
Wasteland Sun MicroFusion Pack
**************************
An experimental high powered Microfusion Pack recovered by the Outcasts, it is able to convert any suit of T-45d to nuclear power, with access to all upgrades.
***************************************************************
Installation
______________
A Note About FOMM - If you're using Fallout Mod Manager (FOMM) you can either open up the zip file yourself and drag its contents into your data directory, or you can open up FOMM's Package Manager, click the Add Package button, and select the .7z file you downloaded. FOMM will automatically turn the download into a FOMod, which has a couple of advantages. FOMods are easier to uninstall (not sure why you'd want to do that though) but there's also a version metadata feature - the Nexus maintains a database of mod versions, and when FOMM creates a FOMod it uses the database to assign the FOMod a version number. Every time you open the package manager, FOMM will then check the database to see if updates are available for any of your installed FOMods. I like this feature because I tend to release updates for my mods frequently, and keeping more people up to date means fewer bug reports. If you install as a FOMod, activate the Powered Power Armor package that is created, and then skip to the HUD installation instructions (after installing NVSE.)
Installing with this method will automatically add all Powered Power Armor esps and esms into your load order, so if you do not plan to install Ambient Temperature.esm (a separate, optional mod) you will need to uncheck Ambient Temperature - PPA.esp.
Install NVSE:
http://nvse.silverlock.org/beta/nvse_1_beta6.zip
NVSE is still in its beta stages, and while this mod has not shown any issues during testing, there is still the chance for bugs. Back up all saves before installing. This is essentially a direct copy of a well tested FO3 mod, so the mod itself is no longer a beta, but the authors of NVSE have requested that any mods that require it be flagged as betas until NVSE is out of beta.
Also, this mod is so heavily dependent upon NVSE its absurd, so don't bother asking for a non-NVSE version :P
Once NVSE has been installed, copy the downloaded Powered Power Armor files into your data directory. In order to use the Ambient Temperature - PPA.esp file, which causes environmental temperatures to influence armor overheating, you will also need to install Ambient Temperature, a separate mod that can be downloaded here:
Ambient Temperature:
http://www.newvegasnexus.com/downloads/file.php?id=34814
Use the following load order (It isn't strictly necessary for these files to load after all of your other mods, but you should check that files loading later do not override any of PPA's changes):
FalloutNV.esm
(other .esms)
Ambient Temperature.esm(optional)
Inventory Access.esm(required)
(other .esps)
Powered Power Armor.esp(required)
Jump Fall Fixer.esp(optional but recommended)
Ambient Temperature - PPA.esp(optional, requires Ambient Temperature.esm)
HUD Installation:
_________________
NOTE: Gopher has put together a utility that will perform the following steps automatically for this and several other HUD altering mods. Download it here:
http://www.newvegasnexus.com/downloads/file.php?id=38961
There are a few extra steps for getting the HUD gauges to show up.
1. Browse to Data\menus\main, and see if hud_main_menu.xml is there.
2a. If it is, open it with a text editor. Scroll to the bottom, and just above the last line (<\menu>) add the line:
<include src="PPA\PPA_HUD.xml" />
3a. Save the file, and that should be it.
OR
2b. If the file is not there, browse to Data\menus\prefabs\PPA\main and move that copy of hud_main_menu.xml to the Data\menus\main folder (if the folder doesn't exist, create it).
If you install any mods that alter the HUD (like DarN's UI) after installing PPA, it is likely that they will overwrite the changes made to hud_main_menu.xml, and your PPA HUD icons will no longer show up. If you notice that they are suddenly missing, repeat steps 1 through 3a. Using Gopher's Unified HUD Project utility, linked above, can help avoid this.
DarN's UI is highly recommended - the PPA HUD was crafted with DUI compatiblity in mind, and will look much better if you have DUI installed. But install DUI before rather than after PPA.
http://ui.darnified.net/wip/DUIFONV/v1/DUINVv04.7z
***************************************************************
Uninstall
__________
!!!!!!!!!!!!!!!!!!!!!!!!!!!!!!!!!!!!!!!!!!!!!!!!!!!!!!!!!!!!!!!
IMPORTANT: You'll want to remove power armor, then save, before uninstalling this mod. This will ensure that the numeric game settings fJumpHeightMin and fJumpFallHeightMin are not permanently changed.
!!!!!!!!!!!!!!!!!!!!!!!!!!!!!!!!!!!!!!!!!!!!!!!!!!!!!!!!!!!!!!!
Delete Powered Power Armor.esp, Inventory Access.esm, and Jump Fall Fixer.esp, and delete the PPA folders from Data\Meshes, Data\textures, Data\Sounds\FX, and Data\Menus\Prefabs. Also open up Data\menus\main\hud_main_menu.xml, scroll to the bottom, and remove the line <include src="PPA\PPA_HUD.xml" />. Save and close.
***************************************************************
Compatibility
______________
!!!!!!!!!!!!!!!!!!!!!!!!!!!!
Project Nevada Users:
It is recommended that you enter the Powered Power Armor vision overhaul configuration menu and disable Option 4 - adjustable zoom with scoped weapons. Project Nevada provides its own (very polished) adjustable zoom feature. Also, you should no longer have to disable Project Nevada's dynamic crosshair, the PPA code has been updated to take it into account.
!!!!!!!!!!!!!!!!!!!!!!!!!!!!
This mod does not actually modify power armor in any way (well, almost, a few repair lists are respecified), so very little is overwritten. The upgrades and charging system will apply to any armor designated as power armor, and taking up the upper body slot, whether vanilla or added by a mod. All mod armors are treated as if they were T-45d (meaning they will require recharging).
The following changes can be resolve via merged patch:
Ingestible: Stealth Boy
Armor: ArmorPowerT51b (repair list)
Armor: ArmorPowerT51bHelmet (repair list)
Armor: ArmorPowerRemnantsHelmet (repair list)
Armor: ArmorPowerRemnantsTeslaHelmet (repair list)
Armor: ArmorGannonTeslaHelmet (repair list)
Form Lists: All power armor repair lists
Leveled Item: CondLegionArmorVeteran
Leveled Item: CondLegionArmorPrime
Base Effects: 4 MS13 mesmetron related effects
NPC: HVPaladinDead04
Terminal: REPCONHQPresidentTerminal
You may want to check things out in FNVEdit. Leveled item, form list, and armor stat conflicts should be resolved in your merged patch.
The bigger issue is the pair of numeric game settings used to increase jump height and reduce fall damage. They are adjusted via script is the potential for conficts with any mod that changes either of these values.
Numeric Game Setting: fJumpHeightMin
Numeric Game Setting: fJumpFallHeightMin
If you run into a conflict, let me know and I may put together a compatibility patch.
***************************************************************
Credits
________
Big thanks to The3rdType for making all of the custom Pipboy and HUD icons (though I'll have to find a new use for some of the pipboy icons, most have been replaced by text.) Also thanks to Joe Shrapnel for working with me to debug release 1.4 gold, the most recent FO3 release of this mod. Thanks to Kungfubellydancer for the UI voice acting.
***************************************************************
Use Info
_________
Contact me before using anything from this mod.