\"There be abandoned dragons nests in those yonder hills,\" the old man said between puffs on his pipe.
Being a traveling adventurer type, the lure of wealth and artifacts lying about for the taking seems like an opportunity not to be missed, but 12 hours trekking later it\'s obvious why the supposed lairs had never been looted -- the intense co
Permissions and credits
Credits and distribution permission
Other user's assetsAll the assets in this file belong to the author, or are from free-to-use modder's resources
Upload permissionYou can upload this file to other sites but you must credit me as the creator of the file
Modification permissionYou must get permission from me before you are allowed to modify my files to improve it
Conversion permissionYou are not allowed to convert this file to work on other games under any circumstances
Asset use permissionYou must get permission from me before you are allowed to use any of the assets in this file
Asset use permission in mods/files that are being soldYou are not allowed to use assets from this file in any mods/files that are being sold, for money, on Steam Workshop or other platforms
Asset use permission in mods/files that earn donation pointsYou must get permission to earn Donation Points for your mods if they use my assets
Author notes
This author has not provided any additional notes regarding file permissions
File credits
This author has not credited anyone else in this file
Donation Points system
This mod is opted-in to receive Donation Points
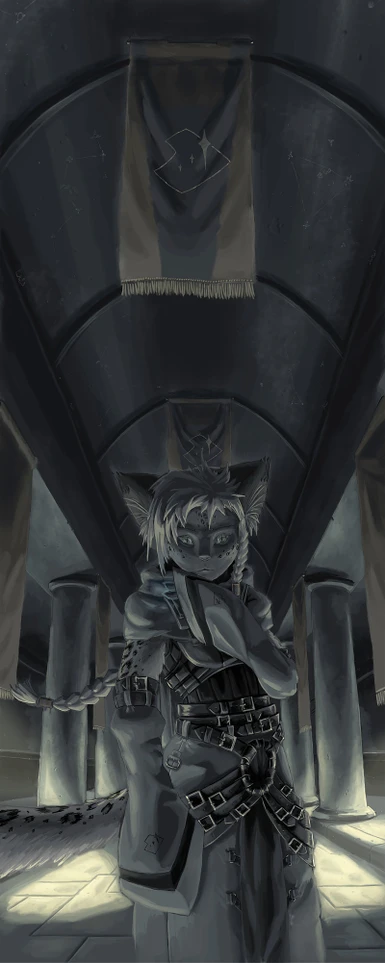
The Guardinal By Ryuujin
"There be abandoned dragons nests in those yonder hills," the old man said between puffs on his pipe. "A strapping lad like you'd do well to go find it, back in my day we found it, but alas our provisions were running low, and we had to abandon, after that ne'er found it again." Old Bill was a regular at that local inn, and had been an adventurer in his days, and he knew more about those mountains than anyone.
Being a traveling adventurer type, the lure of wealth and artifacts lying about for the taking seems like an opportunity not to be missed, but 12 hours trekking later it's obvious why the supposed lairs had never been looted, the intense cold has kept the peaks isolated for years...
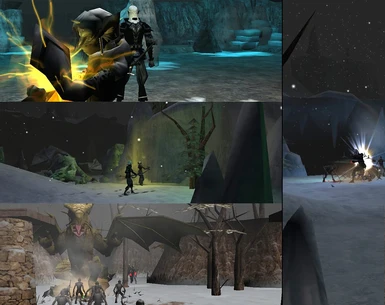
This small module is designed to showcase one of the prototype guardinals for NWN2 converted to an NWN1 format, designed for level 8-12 characters of any alignment and disposition.
Category: Snowy Adventure Requires Both Expansions (SoU & HotU) Level Range: 8-12, 13-15 will still find it fun. Tricks & Traps: Heavy Roleplay: Heavy Hack & Slash: Heavy Scope: Small Single Player Min Character Level: 08 Max Character Level:[/b] 13 Content Rating: Teen Alignments: Any. Neutral/Lawful Good have an extra ending. Evil players can be evil as they want and not break the plot. Gameplay Hours: Under an hour Requires hakpack: Guardinal model
Installation Simply run the executable file, and it will self install. It's important you have downloaded and installed the Guardinal hakpack.
Overview The demo module is a fairly short (15-30 minute) hack and slash dash for safety on the part of the player ideally for levels 8-12, in which you can ally with a Guardinal.
I completed the module solo with a level 8 Barbarian, but it's highly advisable you party with the Guardinal, in which case you stand a very good chance of survival unless you really mess up.
All the quests can be finished, although you might need to keep your eyes open if you want to complete the main (Dragon's Horde) quest.
A few points to remember in this module include: - The guardinal is rather verbose, and may have life saving information, so listen up - Unlike most henchman, after you rest or join her, she'll automatically use her long duration buffs, so give her a moment to finish. - If you do die, she'll automatically resurrect you if it doesn't put her own safety in too extreme danger. - High saves, and a ranged weapon may make the fighting less painful.
*SPOILERS* Walkthrough There's more than one way to finished the module, depending on alignments and abilities, namely: + With Ayala, the most obvious and easiest path + On your own + Kill the good guys, and reap the foul rewards.
Tips highlighted with "+" are optional but helpful "-" are required to complete.
Temple of Bahamut: + There is a small artifact that can cast "Clarity" in the North East crystal gallery. This will be a great help to characters with a low will save. + Party up with Ayala unless you *want* to die a horrible death. - Exit via the South East passage behind the Shrine.
Cold Mountain: + Use the crystal artifact if you have it as soon as you exit the Shrine - Slay the Black Dragon, Ayala can usually defeat him alone - Take Ayala's advice and head East, avoiding the blueish-green ice ramps, if you walk on these you'll fall to your death - Descend down the ramp to the next level, and head back west, again avoiding the icy slopes. + Push the boulders off the cliff top to incapacitate the white dragon at the foot of the mountain. - Follow the footprints down the ramp south, and back east one last time, don't try running "up" the ice slopes or you'll slide back and fall into the pit. Enter the cave at the end of the path. + If you're having trouble with the Drabolds, search their bodies for useful items such as haste potions or death armour.
Out of the Cold and into the Freezer: + Ayala being a guardinal has 10/- cold resistance, you do not, so don't linger. You take 1d4 cold damage every 3 rounds. - Head North, this ice block is just decoration, you can push it in the water or walk around it. + Go into the North Alcove where a party of Drabolds are frozen solid, one of them has dropped a bag with alchemists fire in, collect the alchemists fire. - Follow the West passage until you meet a block of ice. - Blocks of Ice can be pushed (High STR), or melted (Alchemists fire), it's advisable you push if you can, since the Drabolds get jumpy and will attack it instead of you. If you push the ice off a ledge or into water it'll just vanish however. + If you're a smaller character (Halfling, Dwarf, Gnome), some of the Drabold snipers here are wearing cold weather clothing you could take from their bodies, making you immune to the extreme cold. - Head out the South West exit
Cold Mountain: - Head East, and down into the ravine, exiting via the South East area transition. + If you didn't push the boulders off the cliff above, you may have to fight an adult white dragon here.
Foothills: - Simply follow the path to the end and speak with Tetsutythis to end the module. + If you already attacked Tetsutythis, you'll have to fight the waves of Drabolds alone + Head North after speaking to Tetsutythis and you'll find the Dragon horde you came for + Ending 1: Simply receive your token of appreciation and say your farewells and go back to the inn to regale your heroism. + Ending 2: [Lawful Good, Neutral Good only] Ask to let you join them as a warrior in Bahamut's name. This has strong RP connotations and not to be taken lightly, you'll receive a holy avenger with additional dragon smiting powers, platinum dragon armour, and a record of your trials and deeds when you begin your next module, as well as your deity being adjusted to Bahamut. + Ending 3: Kill Tetsutythis and Ayala, and loot their bodies. You don't like working for the good guys after all. Wear that gold dragon hide with pride. + Ending 4: Just leave via the path to the East, Tetsutythis is already dead or angry at you and won't land to say hi.
Frozen Pit: - Seriously, there is no escape. If you have fallen into the pit you will freeze to death guaranteed, unless you have 100% cold immunity, where you'll be very very bored.
Music: Mountain Battle- From Queen of the Demonweb Pits. Ice Caves - From TOA: The Awakening (Chapter 1)
Legal Resale of the contained materials is strictly prohibited by a whole bunch of Trademarks, Copyrights and local laws. I (The author and texture artist) grant permission to alter the contained textures and redistribute them without my consent. Although an E-mail is always appreciated.
Editing and redistribution however of the 3D mesh itself requires you contact it's original Author "Hide".