


0 of 0

About this mod
The purpose of Troop Designer is to allow modders to design and create troop xmls thanks to a new screen in the main menu.
It also allows to quickly test troops without having to integrate them in the campaign and recruit them.
- Requirements
- Permissions and credits
INSTALLATION
Download the mod, unpack it and put its content in 'Mount & Blade II Bannerlord\Modules'.
When launching the game, do not forget to check Troop Designer in the Mods tab.
CUSTOM TROOP ROSTER SHORTCUT
Ctrl + P: to use while being on the campaign map, will open a troop management screen allowing you to pick units specified in an xml file.
Open 'TroopDesigner\ModuleData\custom_troop_roster.xml' in order to change the units available and put your own units.
TROOP DESIGN TUTORIAL
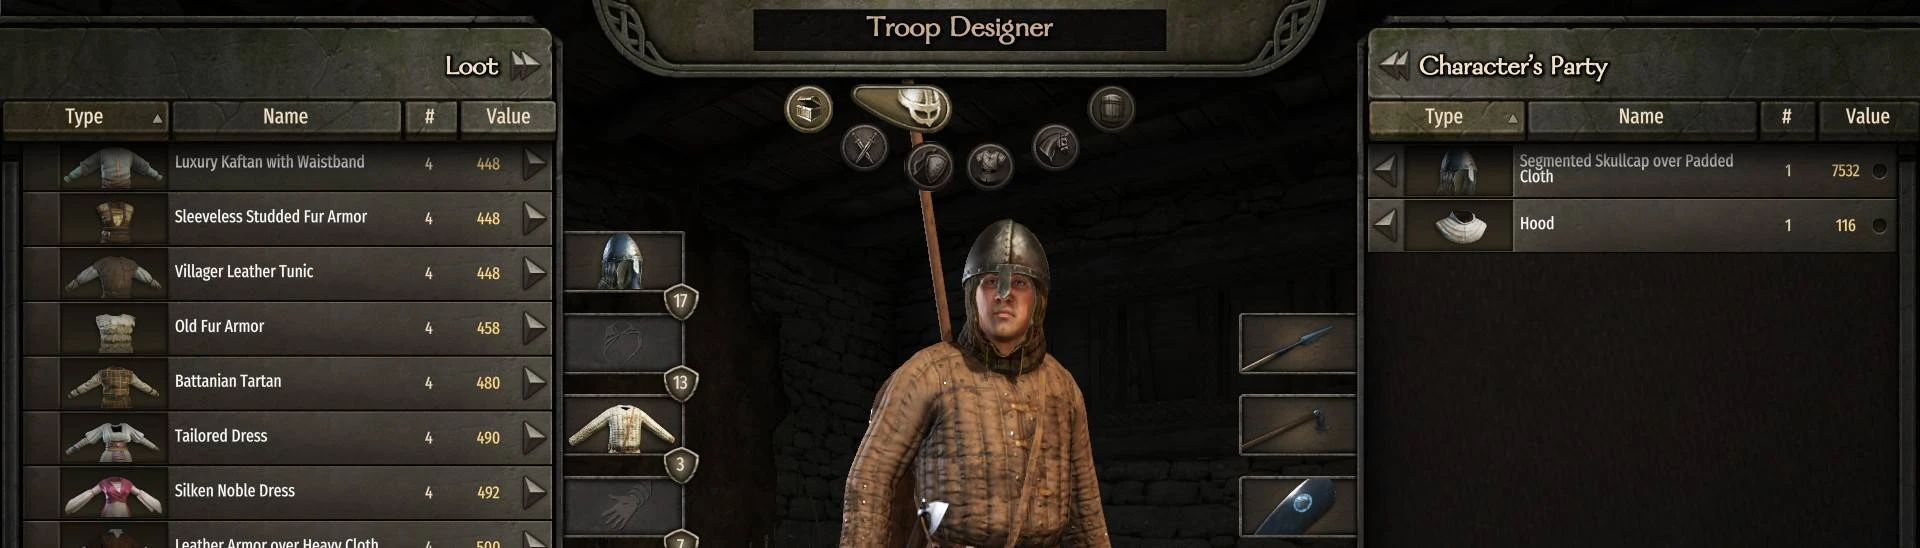
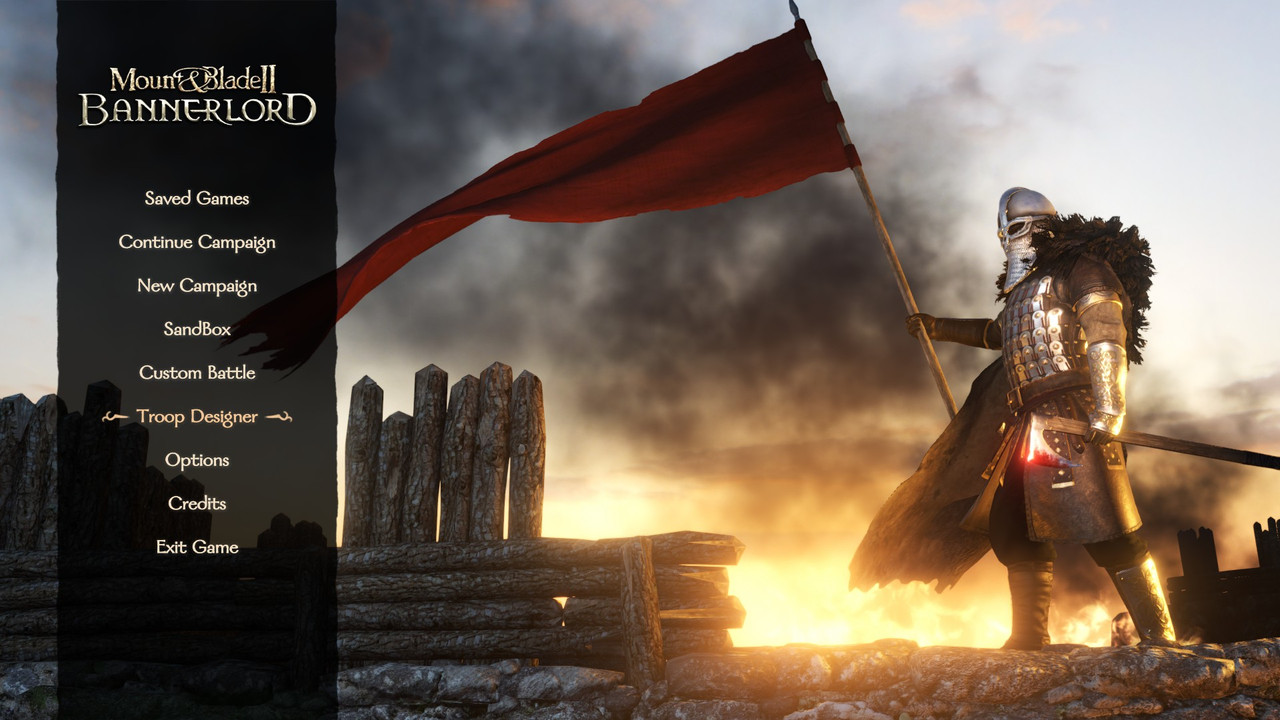
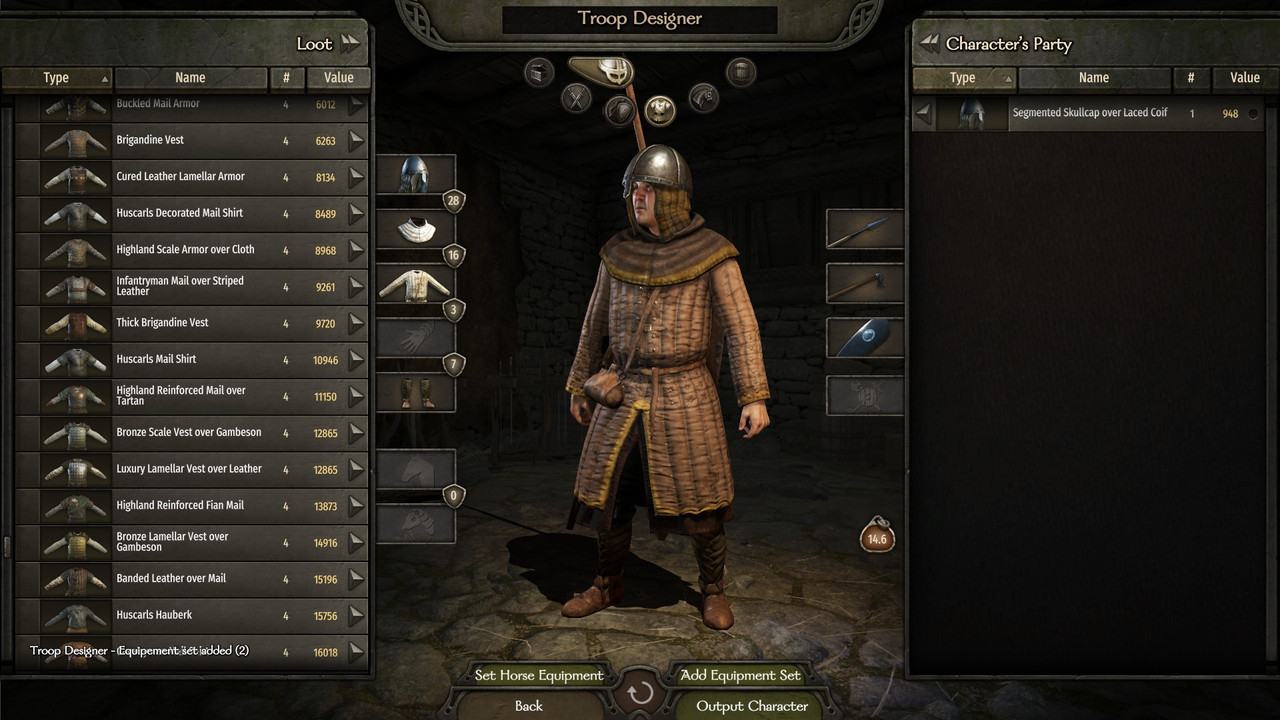
First, access the Troop Designer screen from the main menu.
All equipments from Native and loaded Modules will be available to you.
Grab everything you need for your custom unit !

We can now start to add equipment sets to our character.
Equip whatever equipment you want and use the Add Equipment Set button.
At the bottom left of the screen, you will notice a message 'Troop Designer - Equipment set added (1)'.
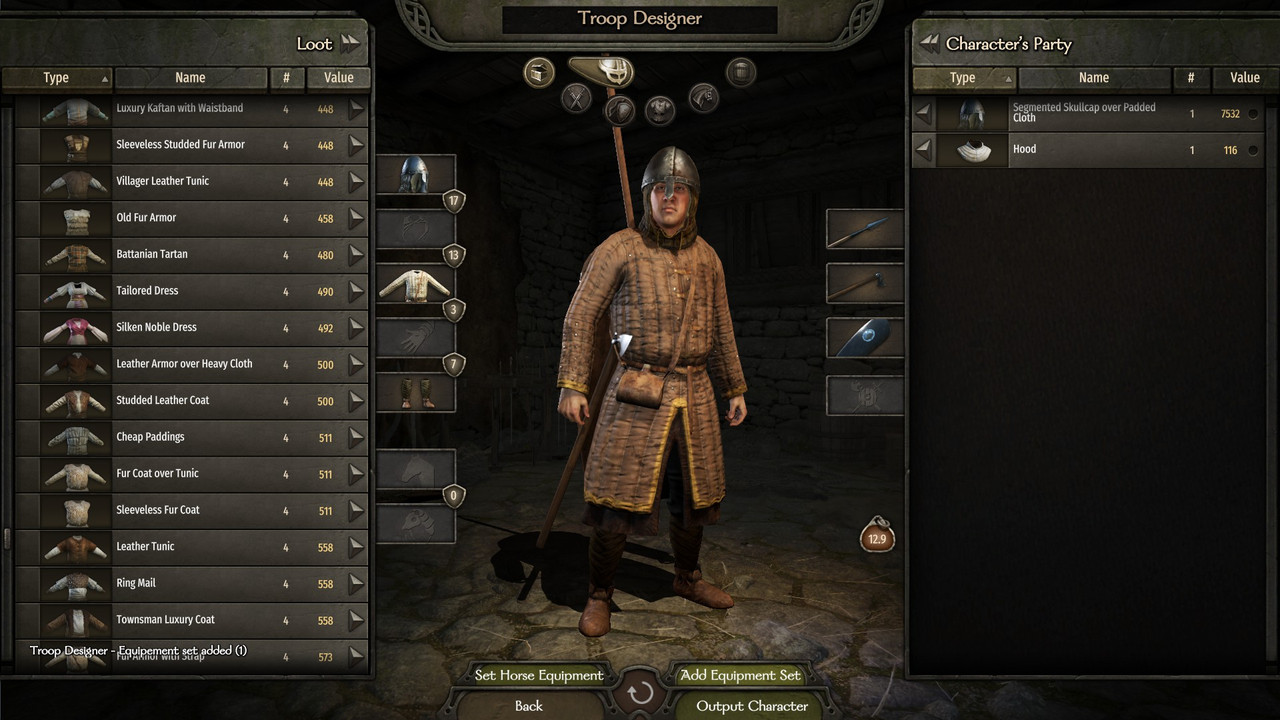
You can change your character equipment and use this button again to add a new equipment set.
Note that the current amount of equipment rosters will be displayed in the feedback.
If you use items from external mods, remember that the item (and so the mod it comes from) need to be loaded for your troop to be valid (will cause a crash otherwise).
Continue until your are satisfied with your amount of equipment set.
If you want to add a horse and horse harness to your character, use the Set Horse Equipment button.

At the bottom left of the screen, you will notice a message 'Troop Designer - Horse Equipment set' with details about the currently used horse and harness.
This is how cavalry units are designed in the Native files.
If you want to have different horses and harnesses for the same unit, check 'TroopDesigner\ModuleData\troop_designer_characters\example_different_horses.xml' to learn how to do it manually.
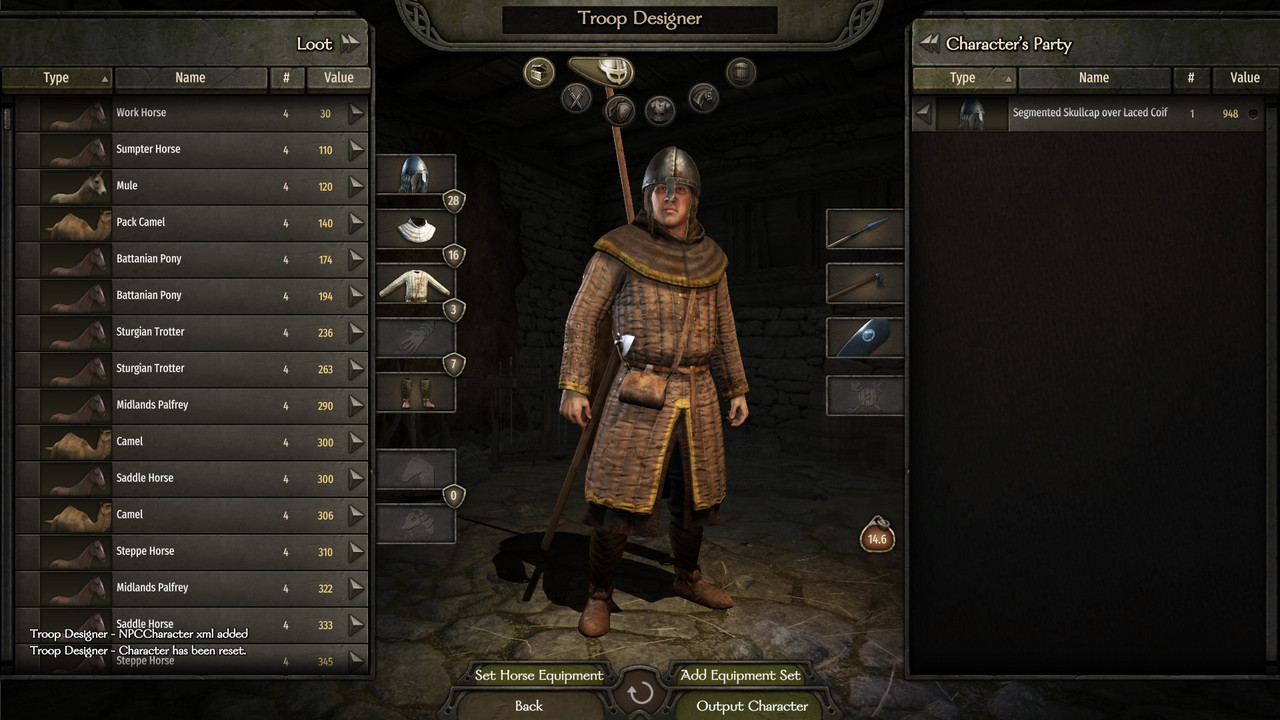
If at any moment you need to start over (reset both your inventory and equipment sets), you can use the restart button.

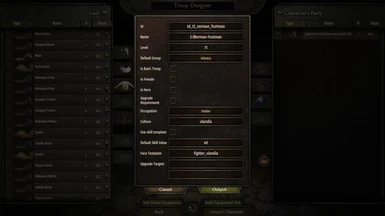
Finally, use the Output Character button to complete the unit creation.
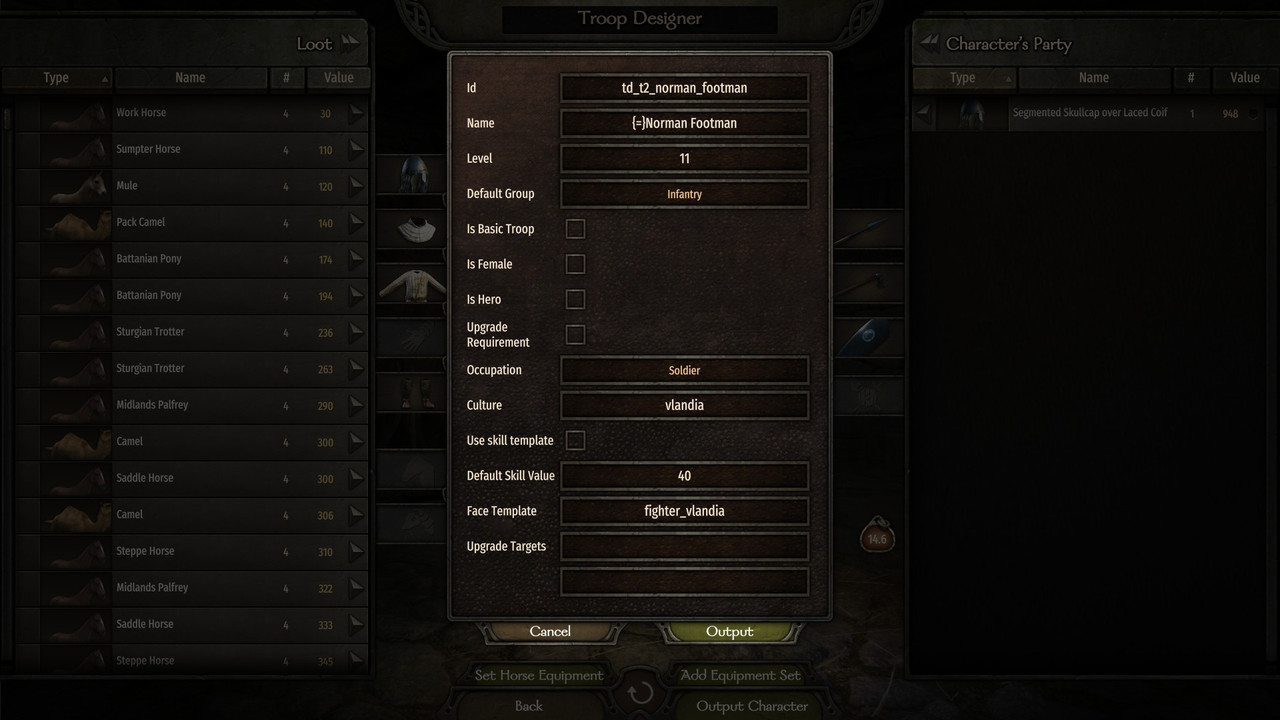
This popup will allow you to specify info needed for your unit to be integrated in game.
- Level 6 => Tier 1
- Level 11 => Tier 2
- Level 16 => Tier 3
- Level 21 => Tier 4
- Level 26 => Tier 5
- Level 31 => Tier 6
Then use the Output button.
The character xml will be output to 'Mount & Blade II Bannerlord\Modules\TroopDesigner\ModuleData\output_characters.xml'.
You now have a valid NPCCharacter structure and valid equipment entries, but the NPCCharacter xml cannot be used yet.

First, you need to copy your character xml in a NPCCharacters xml file.
For this example, I created a 'norman_troops.xml' file in the 'TroopDesigner\ModuleData\troop_designer_characters' folder.
This folder is already referenced by the mod as a NPCCharacters folder (see the 'SubModule.xml' file at the root of the mod), which will allow the game to retrieve character xmls from it.

With that, the character will be loaded in the game upon loading an existing save or starting a new game.
To verify if a character is loaded, you can try to find it in the encyclopedia.
This tutorial will not cover how to properly integrate troops in the game (recruitment and such) but will allow to quickly test them with a second utility.
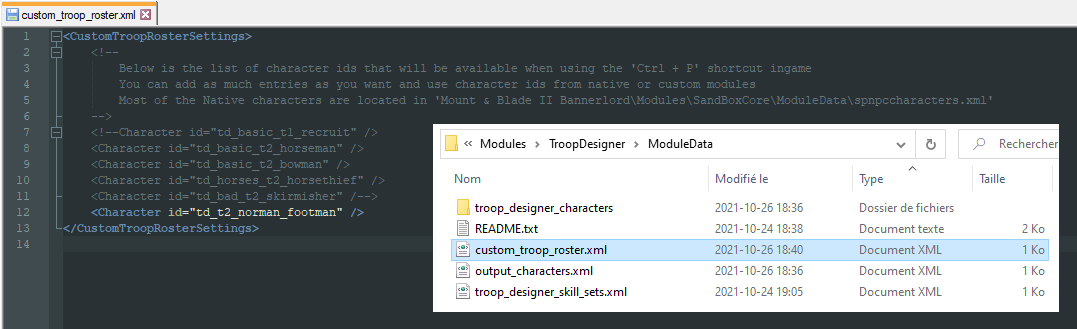
Open the 'TroopDesigner\ModuleData\custom_troop_roster.xml' file.
Here is a list of character ids you will be able to add to your party thanks to a in-game shortcut.
For this demonstration, I commented all of them and added my norman footman id:
Then, while on the campaign map, you can use the custom troops roster shortcut: Ctrl + P
Here you can grab custom troops and add them to your party.

With those tools, you should be able to create and test your own troops.
Have fun !
Download the mod, unpack it and put its content in 'Mount & Blade II Bannerlord\Modules'.
When launching the game, do not forget to check Troop Designer in the Mods tab.
CUSTOM TROOP ROSTER SHORTCUT
Ctrl + P: to use while being on the campaign map, will open a troop management screen allowing you to pick units specified in an xml file.
Open 'TroopDesigner\ModuleData\custom_troop_roster.xml' in order to change the units available and put your own units.
TROOP DESIGN TUTORIAL
First, access the Troop Designer screen from the main menu.
All equipments from Native and loaded Modules will be available to you.
Grab everything you need for your custom unit !
We can now start to add equipment sets to our character.
Equip whatever equipment you want and use the Add Equipment Set button.
At the bottom left of the screen, you will notice a message 'Troop Designer - Equipment set added (1)'.
You can change your character equipment and use this button again to add a new equipment set.
Note that the current amount of equipment rosters will be displayed in the feedback.
If you use items from external mods, remember that the item (and so the mod it comes from) need to be loaded for your troop to be valid (will cause a crash otherwise).
Continue until your are satisfied with your amount of equipment set.
If you want to add a horse and horse harness to your character, use the Set Horse Equipment button.
At the bottom left of the screen, you will notice a message 'Troop Designer - Horse Equipment set' with details about the currently used horse and harness.
This is how cavalry units are designed in the Native files.
If you want to have different horses and harnesses for the same unit, check 'TroopDesigner\ModuleData\troop_designer_characters\example_different_horses.xml' to learn how to do it manually.
If at any moment you need to start over (reset both your inventory and equipment sets), you can use the restart button.
Finally, use the Output Character button to complete the unit creation.
This popup will allow you to specify info needed for your unit to be integrated in game.
- id: unique id for your unit
- name: name of the unit as it will appear in game, can be localized
- level: level of the unit, it will determine the unit tier as following:
- Level 6 => Tier 1
- Level 11 => Tier 2
- Level 16 => Tier 3
- Level 21 => Tier 4
- Level 26 => Tier 5
- Level 31 => Tier 6
- Default Group: the default formation (infantry, ranged, ...) the unit belongs to
- Is Basic Troop: is the unit the start of a troop tree ?
- Is Female: is the unit using the female character model ?
- Is Hero: is the unit a Hero ?
- Upgrade Requirement: checking it will add a text field in which you can specify special requirements to upgrade to this unit (example: horse). Needs to be a valid item category id
- Occupation: the occupation of your unit. Most of the native units are Soldier or Bandit. As there are a lot of occupations, some are not in the dropdown list and will need to be set manually.
- Culture: culture of the unit, needs to be a valid culture id
- Use skill template: checking it will switch the Default Skill Value field for a Skill Template field in which you will be able to specify a skill template for your unit. Needs to be a valid shill template id
- Default Skill Value: the default skill value attributed for all skills for the unit (they will have to be changed manually if needed)
- Face Template: the face template to use for this unit. Needs to be a valid face template id
- Upgrade Targets: the two upgrade targets for this unit. Will have no upgrade target if blank (you can also fill only one). Needs valid character ids.
Then use the Output button.
The character xml will be output to 'Mount & Blade II Bannerlord\Modules\TroopDesigner\ModuleData\output_characters.xml'.
You now have a valid NPCCharacter structure and valid equipment entries, but the NPCCharacter xml cannot be used yet.
First, you need to copy your character xml in a NPCCharacters xml file.
For this example, I created a 'norman_troops.xml' file in the 'TroopDesigner\ModuleData\troop_designer_characters' folder.
This folder is already referenced by the mod as a NPCCharacters folder (see the 'SubModule.xml' file at the root of the mod), which will allow the game to retrieve character xmls from it.
With that, the character will be loaded in the game upon loading an existing save or starting a new game.
To verify if a character is loaded, you can try to find it in the encyclopedia.
This tutorial will not cover how to properly integrate troops in the game (recruitment and such) but will allow to quickly test them with a second utility.
Open the 'TroopDesigner\ModuleData\custom_troop_roster.xml' file.
Here is a list of character ids you will be able to add to your party thanks to a in-game shortcut.
For this demonstration, I commented all of them and added my norman footman id:
Then, while on the campaign map, you can use the custom troops roster shortcut: Ctrl + P
Here you can grab custom troops and add them to your party.
With those tools, you should be able to create and test your own troops.
Have fun !