


0 of 0


About this mod
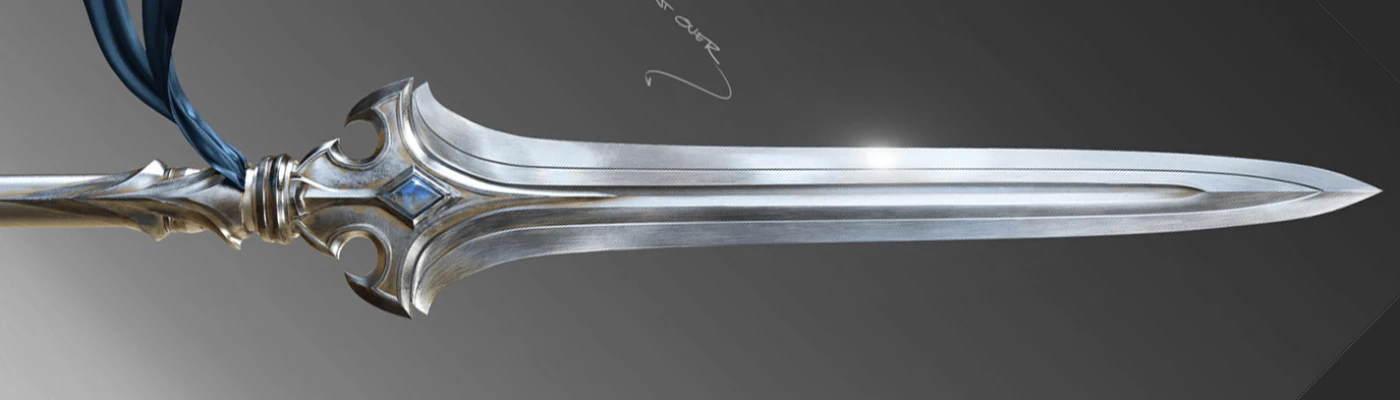
Custom Weapon Model :
A lance worthy of a King;
For Lance and Insectglaive
- Requirements
- Permissions and credits
- Donations
Description
It's a custom weapon model for Lances and Insectglaives. I wanted a spear, not a fat lance, so I learned 3D modelling from scratch and this is the result after 4 days of work.
By default Lance replaces the model of Silver Prominence lan022
By default Insectglaive replaces the model of Ruinous Catastrophe rod011

Lance: Angel's Blade Version

Lance: Archangel's Blade Version

Lance: Archangel's Blade Version

Lance: King's Blade - Non-retract AddonInstallation Guide for other models:
1. Download one of the main files [Lance or Insectglaive]+[King, Angel or Archangel]
2. Look up the name of your weapon. E.g. Nergal Reaper
Nergal Reaper [Basemodel: bs_rod001]+[Partsmodel: op_rod004]
If your weapon doesnt have a Partsmodel, e.g. Gae Bolg [Uniquemodel: rod008] ignore steps beyond 5
If it has a Basemodel and Partsmodel download the FixWeaponParts file in the Misc download section
3. Place the KingsLance folder, of the mod, in nativePC\wp\lan folder so it looks like this nativePC\wp\lan\KingsLance
4. Rename all files in the rod011\mod folder, from the mod, from e.g. rod011.evwp into bs_rod001.evwp. It should look like this
5. Rename the rod011 folder, from the mod, into bs_rod001 and place it in nativePC\wp\rod so it looks like this nativePC\wp\rod\bs_rod001\mod
6. From the second downloaded file, the PartFix, you rename the file op_rod016.mod3 into op_rod004.mod3
7. Rename the op_rod016 folder into op_rod004 and place it in nativePC\wp\rod\Parts\op_rod004\mod so it looks like this nativePC\wp\rod\Parts\op_rod004\mod\op_rod004.mod3
Endproduct
If you want to use the model for multiple weapons:
The mod has two folders. The first one, KingsLance, is the resource folder and includes the textures. Don't touch this one. This folder has to stay at its place and no matter how many times you duplicate the second folder, for other models, there's just one instance of this folder.
Optional 1: Angel's Lance
Optional 2: Archangel's Lance
Optional 3: King's Lance
Optional: Non-retracting Blade Addon
Credits:
Huge thanks to every single person here
Weapon Concept Art: Jonathan Berube
Weapon Model for 3D printing: Slusho
Modloader: Stracker
Chunktool: MHVuze
NoChunk: JodoZT
Texture Converter: JodoZT
ModdingWiki: Ezekial711, AsteriskAmpersand, Vuze, Miralis, zStatykz, Starflare
oo2core_8_win64.dll: Warframe
Blender-Mod3-Import-Addon: AsteriskAmpersand, TheCrazyT
CrAs T MRL3 Editor: AsteriskAmpersand, TheCrazyT
Intel DDS Plugin for Photoshop: GameTechDev
Textures: Poliigon, 3DTextures, CC0Textures
Holy Moonlight Sword: Drahaka for his use of a different model for a sheathed weapon and glowing of models
MHW Model Importing Video: Simon Andrews, whose video makes a lot of sense after reading the modding wiki
MOD3, EVWP Editor Templates: TheCrazyT
010 Editor
Blender
All those Blender Tutorials on Youtube
All those people on Stackexchange
and of course
Monster Hunter World: Capcom
My other mods:
Seven Deadly Sins - Chastiefol
Troy - Achilles Shield

Additional Notes:
Credits:
Just because of every single person mentioned in the credits (and problably more) and their free work I was able to create this mod from never having used Blender or knowing anything about MHW mod creation in about 100 hours.
Useful Blender Scripts:
I'd really wish the Mark vertices with repeated UVs script would work. I managed to update the script to Blender 2.8x without giving an error, but nothing happened. This script can really save time for people UV mapping regularly
Blemishes:
The weapon:
After seeing the mod by Drahaka, I realized how much customizability MHW has, so I wanted to create a weapon which has all those features. For anybody interested:
The glowing effect is handled by material properties in the MRL file: fEmissiveMapFactor__uiColor , fAnimEmitMin , fAnimEmitSpeed
Un-/Sheathed Weapon Model is handled by a value called visibleCondition in the mod3 which every object in a model has.
Mod3: VisibleCondition
0 Both
1 Only unsheathed
2 Only sheathed
3 Both
4 Both (but something different; used on shields)
EVWP: Sheathed Weapon Position (seen from Back of player, positive values)(Only use these if your 3D model is not in the origin)
x-Axis: Left
y-Axis: Up
z-Axis: Front
EVWP: Sheathed Weapon Rotation (Try to avoid using these properties and instead use two different models, with visibleCondition=1 and 2)
x-Axis: Front
y-Axis: Up
z-Axis: Back = Inverted Front
I don't understand why the x and z Axes are parallel to each other: Here just a picture as proof that when both have the same value, they cancel each other out.
Also I'd recommend, if using Blender, to use Rotation along local Axes
EVWP: Pendant Position
y-Axis: Left
Z-Axis: Up
Working with 010 Editor Templates:
Go to Templates -> View installed Templates and add the downloaded templates to the editor permanently so it assigns the correct templates to the files automatically and you don't have to tell the program which template to use each time
Insectglaive corresponding Kinsect Dust Glow:
I barely looked into this but in the MOD3 File there is a property above visibleCondition called materialIdx . Setting it to 0 caused the objects to glow corresponding
Model Creation: Lance Model Hitbox (with regular EVWP Weapon Position):
Unsheathed model upper end: around z=380m for Hit-accurate model
Sheathed model lower end: min z=-120m so it doesnt clip the ground
No need to create new UV maps etc. for imported ingame objects in your model. It's possible to assign them to different material and then link them to the original texture maps in the MRL3 file. This is done twice in my mod, whereas the fabric ribbons have their original maps from lan016 and the shield from lan028
Texture Creation:
Blender Preferences -> System -> Cycles Render Devices: CUDA: GPU (dont select CPU+GPU)
Object -> Render properties -> Render Engine: Cycles; Device: GPU Compute
Color/Albedo/BML Map: Bake Type: Diffuse; Influence: Only Color; (for every metallic surface deactivate metallness)
Normal Map, Roughness Map default settings
Metallic Map: Set Roughness for all metallic materials =1 and all non-metals =0 -> Bake Type: Roughness
DDS Creation:
Note for Photoshop:
If copy/pasting dont use Ctrl+C/Ctrl+V, because your layer position doesn't copy correct; instead press Ctrl+C/Shift+Ctrl+V to paste position-correct
Color/Albedo/BML Map; NormalMap: Nothing to do; Just save as DDS
Roughness,Metallness,Transparency -> Fundament BMT Map -> Roughness Layer; [Ctrl+A; Ctrl+C] -> BML File; Channels; Select Red Channel -> Shift+Ctrl+V] repeat for Metallness on Greenchannel; Delete Alpha Channel
It's a custom weapon model for Lances and Insectglaives. I wanted a spear, not a fat lance, so I learned 3D modelling from scratch and this is the result after 4 days of work.
By default Lance replaces the model of Silver Prominence lan022
By default Insectglaive replaces the model of Ruinous Catastrophe rod011
Features:
Spear:
Shield:
Spear:
- Retracting Blade
- Has a hitbox-accurate length
- Jiggly ribbons
- Insectglaive Version: Crystal glow corresponds to Kinsect dust
Shield:
Lance: Angel's Blade Version
Lance: Archangel's Blade Version
Lance: Archangel's Blade Version
Lance: King's Blade - Non-retract Addon
1. Download one of the main files [Lance or Insectglaive]+[King, Angel or Archangel]
2. Look up the name of your weapon. E.g. Nergal Reaper
Nergal Reaper [Basemodel: bs_rod001]+[Partsmodel: op_rod004]
If your weapon doesnt have a Partsmodel, e.g. Gae Bolg [Uniquemodel: rod008] ignore steps beyond 5
If it has a Basemodel and Partsmodel download the FixWeaponParts file in the Misc download section
3. Place the KingsLance folder, of the mod, in nativePC\wp\lan folder so it looks like this nativePC\wp\lan\KingsLance
4. Rename all files in the rod011\mod folder, from the mod, from e.g. rod011.evwp into bs_rod001.evwp. It should look like this
5. Rename the rod011 folder, from the mod, into bs_rod001 and place it in nativePC\wp\rod so it looks like this nativePC\wp\rod\bs_rod001\mod
6. From the second downloaded file, the PartFix, you rename the file op_rod016.mod3 into op_rod004.mod3
7. Rename the op_rod016 folder into op_rod004 and place it in nativePC\wp\rod\Parts\op_rod004\mod so it looks like this nativePC\wp\rod\Parts\op_rod004\mod\op_rod004.mod3
Endproduct
If you want to use the model for multiple weapons:
The mod has two folders. The first one, KingsLance, is the resource folder and includes the textures. Don't touch this one. This folder has to stay at its place and no matter how many times you duplicate the second folder, for other models, there's just one instance of this folder.
Optional 1: Angel's Lance
Optional 2: Archangel's Lance
Optional 3: King's Lance
Optional: Non-retracting Blade Addon
Credits:
Huge thanks to every single person here
Weapon Concept Art: Jonathan Berube
Weapon Model for 3D printing: Slusho
Modloader: Stracker
Chunktool: MHVuze
NoChunk: JodoZT
Texture Converter: JodoZT
ModdingWiki: Ezekial711, AsteriskAmpersand, Vuze, Miralis, zStatykz, Starflare
oo2core_8_win64.dll: Warframe
Blender-Mod3-Import-Addon: AsteriskAmpersand, TheCrazyT
CrAs T MRL3 Editor: AsteriskAmpersand, TheCrazyT
Intel DDS Plugin for Photoshop: GameTechDev
Textures: Poliigon, 3DTextures, CC0Textures
Holy Moonlight Sword: Drahaka for his use of a different model for a sheathed weapon and glowing of models
MHW Model Importing Video: Simon Andrews, whose video makes a lot of sense after reading the modding wiki
MOD3, EVWP Editor Templates: TheCrazyT
010 Editor
Blender
All those Blender Tutorials on Youtube
All those people on Stackexchange
and of course
Monster Hunter World: Capcom
My other mods:
Seven Deadly Sins - Chastiefol
Troy - Achilles Shield
Additional Notes:
Credits:
Just because of every single person mentioned in the credits (and problably more) and their free work I was able to create this mod from never having used Blender or knowing anything about MHW mod creation in about 100 hours.
Useful Blender Scripts:
I'd really wish the Mark vertices with repeated UVs script would work. I managed to update the script to Blender 2.8x without giving an error, but nothing happened. This script can really save time for people UV mapping regularly
Blemishes:
- The spear blade has some annoying lighting issues
- I probably have to make the vertices in those areas more uniform
- I probably have to make the vertices in those areas more uniform
- The shield clips into the spear (currently to avoid this issues a bit, the shield is floating behind player with a huge gap)
- I should probably look into CTC files
- I should probably look into CTC files
The weapon:
After seeing the mod by Drahaka, I realized how much customizability MHW has, so I wanted to create a weapon which has all those features. For anybody interested:
The glowing effect is handled by material properties in the MRL file: fEmissiveMapFactor__uiColor , fAnimEmitMin , fAnimEmitSpeed
Un-/Sheathed Weapon Model is handled by a value called visibleCondition in the mod3 which every object in a model has.
Mod3: VisibleCondition
0 Both
1 Only unsheathed
2 Only sheathed
3 Both
4 Both (but something different; used on shields)
EVWP: Sheathed Weapon Position (seen from Back of player, positive values)(Only use these if your 3D model is not in the origin)
x-Axis: Left
y-Axis: Up
z-Axis: Front
EVWP: Sheathed Weapon Rotation (Try to avoid using these properties and instead use two different models, with visibleCondition=1 and 2)
x-Axis: Front
y-Axis: Up
z-Axis: Back = Inverted Front
I don't understand why the x and z Axes are parallel to each other: Here just a picture as proof that when both have the same value, they cancel each other out.
Also I'd recommend, if using Blender, to use Rotation along local Axes
EVWP: Pendant Position
y-Axis: Left
Z-Axis: Up
Working with 010 Editor Templates:
Go to Templates -> View installed Templates and add the downloaded templates to the editor permanently so it assigns the correct templates to the files automatically and you don't have to tell the program which template to use each time
Insectglaive corresponding Kinsect Dust Glow:
I barely looked into this but in the MOD3 File there is a property above visibleCondition called materialIdx . Setting it to 0 caused the objects to glow corresponding
Model Creation: Lance Model Hitbox (with regular EVWP Weapon Position):
Unsheathed model upper end: around z=380m for Hit-accurate model
Sheathed model lower end: min z=-120m so it doesnt clip the ground
No need to create new UV maps etc. for imported ingame objects in your model. It's possible to assign them to different material and then link them to the original texture maps in the MRL3 file. This is done twice in my mod, whereas the fabric ribbons have their original maps from lan016 and the shield from lan028
Texture Creation:
Blender Preferences -> System -> Cycles Render Devices: CUDA: GPU (dont select CPU+GPU)
Object -> Render properties -> Render Engine: Cycles; Device: GPU Compute
Color/Albedo/BML Map: Bake Type: Diffuse; Influence: Only Color; (for every metallic surface deactivate metallness)
Normal Map, Roughness Map default settings
Metallic Map: Set Roughness for all metallic materials =1 and all non-metals =0 -> Bake Type: Roughness
DDS Creation:
Note for Photoshop:
If copy/pasting dont use Ctrl+C/Ctrl+V, because your layer position doesn't copy correct; instead press Ctrl+C/Shift+Ctrl+V to paste position-correct
Color/Albedo/BML Map; NormalMap: Nothing to do; Just save as DDS
Roughness,Metallness,Transparency -> Fundament BMT Map -> Roughness Layer; [Ctrl+A; Ctrl+C] -> BML File; Channels; Select Red Channel -> Shift+Ctrl+V] repeat for Metallness on Greenchannel; Delete Alpha Channel