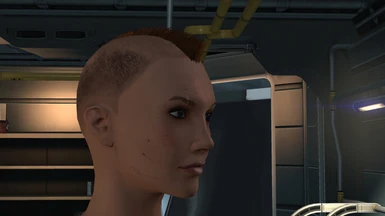
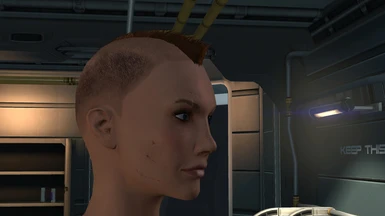
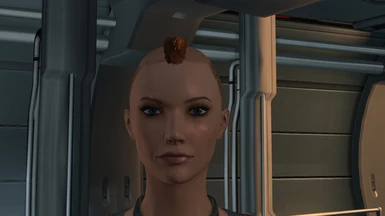
About this mod
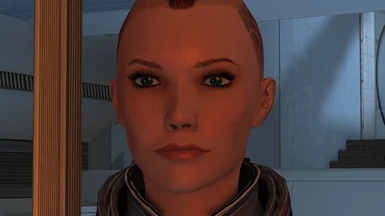
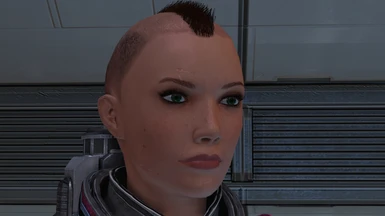
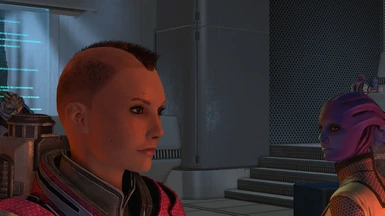
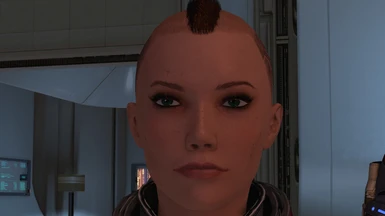
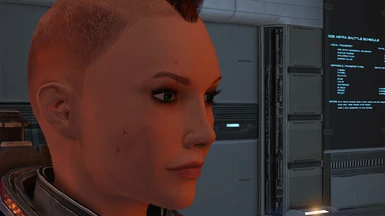
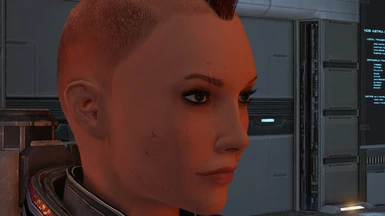
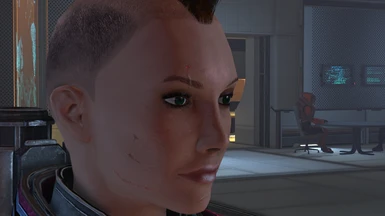
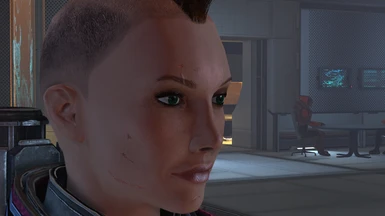
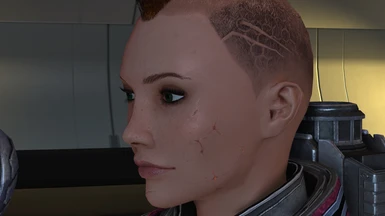
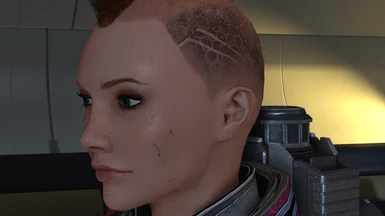
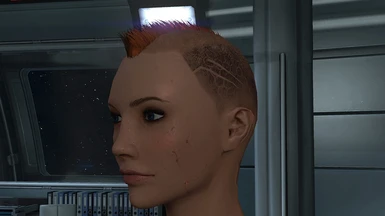
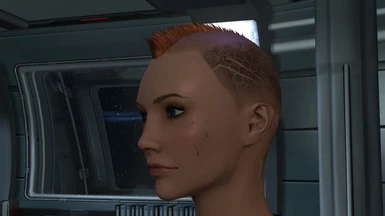
Freckle Face Diffuse Textures for MELE Mass Effect 2 - Added some blemishes, subtle windburn and redid the lips a bit. With a sort of proof of concept Normal Map for Face Textures
- Requirements
- Permissions and credits
Based on a overlay of the eye socket area from the ProBase Standard face texture into the Freckle Face with added freckles from the Freckle textures in the game. Blended the lip textures from the ProBase into the Freckle.
All textures modified in Gimp and then the Diffuse was saved from Gimp into straight up BC3/DXT5 DDS file.
========Update Notes=========
Update 1.0 - Initial Release. There are two MEM files in the zipfile. One has the original textures so you can go back, one is the update.
- Uploaded a quick fix for the f*d up Normal Map.
Update 1.1 - Simple repackage. Removed the Normal Map so the MEM files only contain the Diffuse Freckle Face texture. I cannot get rid of the seam from the normal map no matter what format or blending.
Update 1.2 - Figured out how to add a normal map without the UV seam at the scalp line. Uploaded a proof of concept. Will need more editing in Gimp/Krita/Photoshop to add some details back in. But, it does work and that damn seam is gone. I updated the note at the bottom of the page on what I did.
Update 1.3 - Redid the Normal from the Diffuse in ShaderMap knowing the blend reduces details. Put Image up that shows the seam that exists even with the original Freckle Normal map. Not prominent but in certain lighting it shows up, probably unable to remove it since it is inherent in the game engine's lighting.
Update 1.4 - Updated the Diffuse Texture for the Freckle Face. Worked the Alpha Channel so the specular on the cheeks are more subdued, along with lowering it on the lips themselves, and from the line around the lips (trying to get rid of that lip edge shine where the lips meet the skin). Overall smoothed and reduced the Alpha/spec
Update 1.5 - Reworked the Lips on the Diffuse. Bit more detail in the inside area and more even coloring. Worked the outside area of the lips so they blend into the face better (Again, trying to remove the annoying whiter line area on the default textures). Since they are a bit redder and darker, you may need to adjust the HED_Lips_Tint_Scalar in your Head Morph using the Trilogy Editor.
=========Standard MEM Install Blurb===========
You will need the Mass Effect Modder ( GitHub - MassEffectModder/MassEffectModder: Mass Effect Modder (MEM) ) to load the MEM file.
Unzip the above, the run it and then run the Texture Manager at least once (may not be needed, but other tools need to build the database so I expect this does also), then goto the Mods Manager -> Mod Installer in the interface and load the above mod you want and install it.
======== Rambling Note on Normal Creation for Face Textures ===========
Most all of this will refer to procedures I did in Gimp because I am more familiar with that program.
Using the base diffuse, I created the Greyscale Image for the Normal Map and then I used ShaderMap 4 to generate the normal map I used in the blending for this one. But, any normal map tool will use. I did a rough one with the Nvidia Texture Tool Standalone edition (NVIDIA Texture Tools Exporter | NVIDIA Developer) that worked fine also.
Then I exported the Original Normal Map using the Mass Effect Modder mentioned above, extracting it a PNG file.
I loaded the Original Normal Map PNG file into Gimp (or Krita/Photoshop, your choice), along with the tweaked freckle diffuse and the created Normal Map from that freckle diffuse.
Using the Freckle Diffuse as a base, I created a path in Gimp that covered the general area of the face (roughly the mid forehead, outside cheeks and jawline) from a selection I drew. (In Gimp, use the selection tool to create a selection around the area, then under the Selection Menu or Drop Down, Save Selection to Path)
I copied that Path from the Freckle Diffuse to to the Created Normal Map from the Freckle Diffuse. Then promoted that path to a selection in the Created Normal Map. I inverted that selection and cleared that area out (make sure you have added a Transparency layer) and after that was done, make sure flip the invert (or you can just re-promote the path to selection)
This next step is optional and is just used as a visible guide line. Shrink the original outside selection by what ever pixel width you want (I did 80) and then create a path from the shrunk selection. Select that path so it is outlined. This is gives you a visible guide to gauge your fade-in edge on the outside of your normal area you will eventually blend in.
Next step is to select your erase tool and set the Opacity to about 25-40% (your choice) and use one of the feathered brushes. Set the brush size to a percentage of the pixel width you used to shrink the original selection.
Then in the Path Tab, you want to right click on the Original Outer Selection Path ( the selection that outlined your normal area) and in the pop up menu, select Stroke Path. Select the Erase from the choices and stroke the path. You will see that the eraser has traced a path around your selection.
Gradually (at whatever rate you want) increase the size of the eraser brush and repeat the above Stroke Procedure until you reach a brush size equal to your pixel width you shrunk the original path/selection. Your fade should blend from nothing on the outside to 100% opacity at the edge of the visible guide ( if you did the optional above step).
This will gradually blend a edge into the Created Normal cutout you have. There may be a more efficient way to do this, but in Gimp this is the way that worked without having the program make a mess.
Once you have something you like, copy the image and paste it as New Layer into the Original Normal PNG file you exported way above.
Make sure that layer is at the top and then blend the opacity of that pasted layer until you achieve something you think looks good.
When done, just merge the layers and save that file with a new name as PNG file. When I saved my PNG, I turned off the Save Gamma option in Gimp for saving a PNG. Don't know if it makes a difference, but on the off chance that it adds something to the PNG header that messes stuff up I turned it off.
Then in the Mass Effect Modder, find your Texture File Normal you want to replace and then Replace that texture with your PNG you just created.
This was the *only* way I could get the normal to *not* have that damn seam. Any Normals I created from a source and saved in any format had that seam. I'm guessing that whatever they used to bake the original normal in their modeling file has very specific value set to edge of the Normal Map so their UV seams blend in.
It's a kludgy way to do it, but it works. Of course, any nice blending you do in something like ShaderMap to get a good looking Normal Map will need some love in Gimp (or whatever) to replicate some of it because in the blending you will lose some of the finer details.


