


0 of 0

About this mod
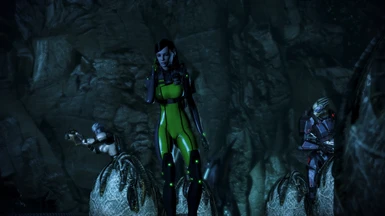
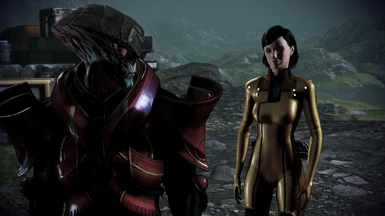
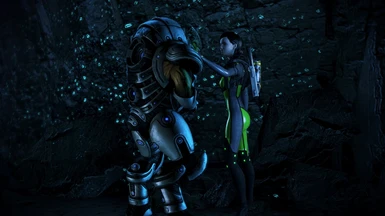
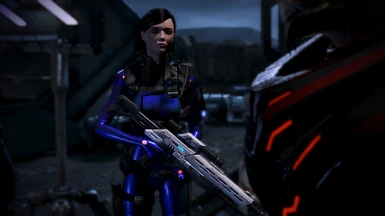
EDI's catsuit with Jill Valentine's accessories, plus your own colors to boot.
Based on nameislooney's work on deviantArt.
- Permissions and credits
Update! In 3.01 armor parts are now modular!
WHAT IT IS:
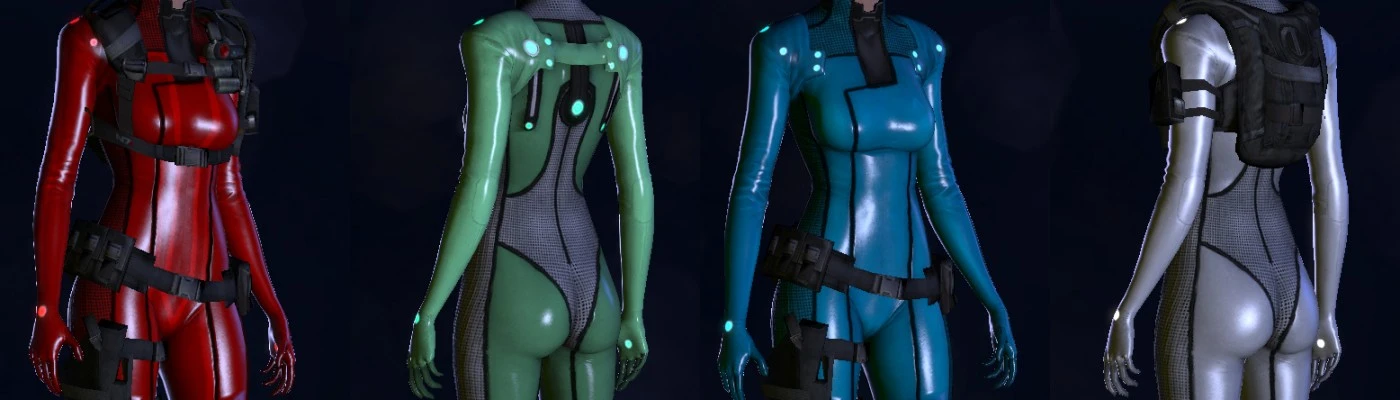
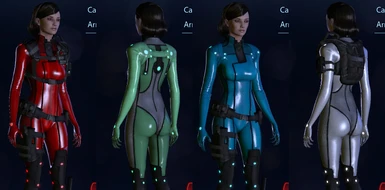
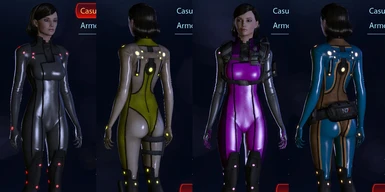
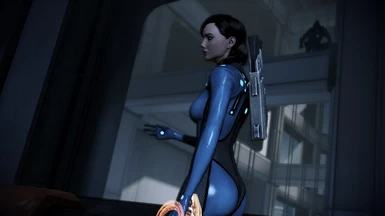
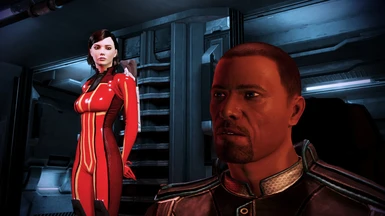
Ever thought that Shepard needed her own sexy catsuit but you never liked the colors available? This is EDI's skin-tight suit with (optional!) Jill Valentine's accessories from Resident Evil. It's built to be color-customized using the in-game armor locker console, so you can choose any color you want, any time you want. Also included are instructions on adding it as a casual appearance, although the casual cannot be colored. (ME3 has decided it must be grey with red lights.)
I CAN COLOR IT MYSELF?
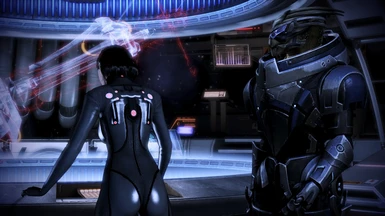
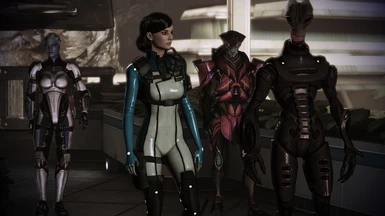
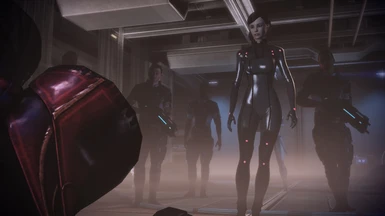
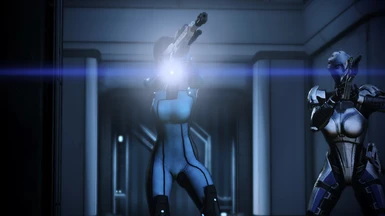
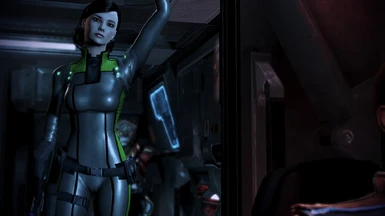
Indeed! Just like you can color your N7 armor at your locker, this works the same way. It includes 4 patterns (none, striped, sleeved, or nuanced) to get the flavor you want. You can also pair it with any standard helmet and non-chest armor pieces (though the armor pieces might include clipping and is not recommended).
IS THIS COMPLICATED TO INSTALL?
More complicated than your average armor mod, but I'll explain things enough that anyone should be able to install it, even if it's your first mod. I'm going to assume you have ME3 Explorer 3.0 and a coalesced.ini editor -- if you don't, go find those two and get them setup.
INSTALLATION INSTRUCTIONS: (requires ME3 Explorer 3.0 and a coalesced editor)
This replaces the Rosenkov armor pieces. It might work with other parts too but results could be wonky, so mod at your own discretion.
1) Getting started:
- Download the file, open the zip, and extract the contents to anywhere you like. Prepare yourself an ice-cold refreshment too, because you deserve it.
2) Importing the armor meshes into the game:
- Start up ME3 Explorer, click on Mod Maker.
- Click Load and select the EDI-Shep armor .mod installer file you extracted earlier.
- Click Run All. Done!
3) Importing the textures into the game:
- In ME3 Explorer, click on TPF Tools.
- Click Load and choose one of the two EDI-Shep TPF files you extracted earlier. The difference is in pattern 3, visible in one of the provided images. Sleeved resembles EDI's original suit while nuanced is good for highlighting the juicy bits. You can repeat this step whenever you want to change the TPF, so no stress.
- Click Check All at the top left, Analyse with Texplorer at the bottom left, and Install Valid. When it says Installed 20/20 valid mods, you may close this window.
4) Giving yourself empty armor pieces:
Usually a chest piece is nothing but the torso without the limbs, yet the catsuit takes a "chest" slot while actually being the entire body. This means we need to give your armor locker "empty" arms, legs, and shoulders so you can see the entire body without N7 armor pieces on top of it.
- Open your coalesced editor and open coalesced.bin (located in Origin Games > Mass Effect 3 > BIOGame > CookedPCConsole).
- Expand biogame.ini, then sfxgame, then sfxplayercustomization. Click on armappearances = (multiple) and you should get a list on the right.
- In an empty slot at the bottom, add the following:
(GameEffects=(),Id=7,Name=339526,Description=339527,PlotFlag=-1,Type=CustomizableType_Arms) and hit enter.
- Click on legappearances = (multiple) and add
(GameEffects=(),Id=7,Name=339525,Description=339524,PlotFlag=-1,Type=CustomizableType_Legs) and hit enter.
- Click on shoulderappearances = (multiple) and add
(GameEffects=(),Id=7,Name=339528,Description=339523,PlotFlag=-1,Type=CustomizableType_Shoulder) and hit enter.
- Click on torsoappearances = (multiple) and add
(Mesh=(Male="BIOG_HMM_ARM_SHP_R.SHPe.HMM_ARM_SHPe_Tor_MDL",Female="BIOG_HMF_ARM_SHP_R.SHPe.HMF_ARM_SHPe_Tor_MDL"),GameEffects=(),Id=7,Name=723320,Description=710998,PlotFlag=-1,Type=CustomizableType_Torso) and hit enter.
- Note: Those armor pieces are truly empty, meaning you don't have any bonuses from them. You can add any bonuses you want; each bonus you apply is about +10%. A standard armor set gives 60% bonuses, so if you wanna play it straight, add about 5 bonuses OR add every bonus twice and murder everything like a demigod.
Copy and paste the following codes into the empty parentheses in GameEffects=(). You can just add one, or add multiple separated by commas.
Extra ammo: "SFXGameContent.SFXGameEffect_PartBasedArmor_AmmoCapacityBonus"
Headshot damage: "SFXGameContent.SFXGameEffect_PartBasedArmor_ConstraintDamageBonus"
Health: "SFXGameContent.SFXGameEffect_PartBasedArmor_HealthBonus"
Shield strength: "SFXGameContent.SFXGameEffect_PartBasedArmor_ShieldBonus"
Shield regen: "SFXGameContent.SFXGameEffect_PartBasedArmor_ShieldRegenBonus"
Melee damage: "SFXGameContent.SFXGameEffect_PartBasedArmor_MeleeDamageBonus"
Cooldown reduction: "SFXGameContent.SFXGameEffect_PartBasedArmor_PowerCooldownBonus"
Power damage: "SFXGameContent.SFXGameEffect_PartBasedArmor_PowerDamageBonus"
Weapon damage: "SFXGameContent.SFXGameEffect_PartBasedArmor_WeaponDamageBonus"
Notes: Each piece must have at least one bonus, or the stat display will disappear completely.
Make sure there are no spaces in your copy-pasted codes.
Each bonus requires quotes around it, so if you have two or more on one piece, it should read GameEffects=("Bonus1","Bonus2","Bonus3")
4b) Optional step 1 - Adding the accessories immediately
The backpack (shoulder slot), waist bag (arm slot), and boots/thigh pouch (leg slot) are the Rosenkov armor pieces. You can either unlock them right now, or skip this step to unlock them naturally as you play the game.
- Click on armappearances = multiple, and select the SHPe item. You should find a "PlotFlag=x" right near the end of the dialog. Change the value to read PlotFlag=-1 (that's PlotFlag equals minus one). Hit enter when done.
- Change the PlotFlags for the SHPe pieces under legappearances = multiple and shoulderappearances = multiple like you did with the arm appearance.
4c) Optional step - Adding the casual appearance:
- Click on casualappearances = (multiple) and add the following to an empty line:
(Mesh=(Male="BIOG_HMM_ARM_SHP_R.SHPe.HMM_ARM_SHPe_Tor_MDL",Female="BIOG_HMF_ARM_SHP_R.SHPe.HMF_ARM_SHPe_Tor_MDL"),Id=10,PlotFlag=-1,Type=CustomizableType_Torso)
(The Id# can be any number as long as it's a unique one.)
Sadly, for the time being the casual appearance is defaulted to grey with red lights. I don't yet know how to change this :(
- End optional steps -
- When you're finished, File -> Save and close your coalesced editor.
That's it! You're done! Enjoy that ass!
ISSUES/COMMENTS:
- At the finale when Shepard is injured, her damaged armor will be the standard damaged N7 armor.
CREDITS:
The mesh and textures were based off of nameislooney's amazing work. Check out her dA page where she made the original here:
http://nameislooney.deviantart.com/art/ME3-EDI-Jill-Outfit-452951476
My only modifications were mesh tweaks (especially on the UVs), minor texture diff adjustments, then adding new textures for the strp, tint, and spec. The norm and 95% of the diff and mesh is her work.
Changelog:
v2.02
- Includes a .tpf file for easy installation. The TPF contains the N7 logo diff and Spec 1, along with the other standard textures. Use this to skip the Texplorer step if you like those options!
v2.01
- New mesh!!
Higher poly count
Reduced clipping on side straps
Removed (or at worst, greatly reduced) neck clipping
Reduced bust size slightly
Reduced cameltoe (shouldn't make you think "ouch" when you see it)
Corrected UV maps down the center of the mesh, on the knees, back of the neck, and so many other places
Tightened straps so they shouldn't be floating so much
- New specs that add a light on the back of the neck, which is now visible due to the corrected UVs and reduced neck clipping
- New diff option! SASqQs provided a new textures that has N7/Alliance logos and a smoother butt. This is my preferred diff but I'm leaving the old one in case someone feels differently.
WHAT IT IS:
Ever thought that Shepard needed her own sexy catsuit but you never liked the colors available? This is EDI's skin-tight suit with (optional!) Jill Valentine's accessories from Resident Evil. It's built to be color-customized using the in-game armor locker console, so you can choose any color you want, any time you want. Also included are instructions on adding it as a casual appearance, although the casual cannot be colored. (ME3 has decided it must be grey with red lights.)
I CAN COLOR IT MYSELF?
Indeed! Just like you can color your N7 armor at your locker, this works the same way. It includes 4 patterns (none, striped, sleeved, or nuanced) to get the flavor you want. You can also pair it with any standard helmet and non-chest armor pieces (though the armor pieces might include clipping and is not recommended).
IS THIS COMPLICATED TO INSTALL?
More complicated than your average armor mod, but I'll explain things enough that anyone should be able to install it, even if it's your first mod. I'm going to assume you have ME3 Explorer 3.0 and a coalesced.ini editor -- if you don't, go find those two and get them setup.
INSTALLATION INSTRUCTIONS: (requires ME3 Explorer 3.0 and a coalesced editor)
This replaces the Rosenkov armor pieces. It might work with other parts too but results could be wonky, so mod at your own discretion.
1) Getting started:
- Download the file, open the zip, and extract the contents to anywhere you like. Prepare yourself an ice-cold refreshment too, because you deserve it.
2) Importing the armor meshes into the game:
- Start up ME3 Explorer, click on Mod Maker.
- Click Load and select the EDI-Shep armor .mod installer file you extracted earlier.
- Click Run All. Done!
3) Importing the textures into the game:
- In ME3 Explorer, click on TPF Tools.
- Click Load and choose one of the two EDI-Shep TPF files you extracted earlier. The difference is in pattern 3, visible in one of the provided images. Sleeved resembles EDI's original suit while nuanced is good for highlighting the juicy bits. You can repeat this step whenever you want to change the TPF, so no stress.
- Click Check All at the top left, Analyse with Texplorer at the bottom left, and Install Valid. When it says Installed 20/20 valid mods, you may close this window.
4) Giving yourself empty armor pieces:
Usually a chest piece is nothing but the torso without the limbs, yet the catsuit takes a "chest" slot while actually being the entire body. This means we need to give your armor locker "empty" arms, legs, and shoulders so you can see the entire body without N7 armor pieces on top of it.
- Open your coalesced editor and open coalesced.bin (located in Origin Games > Mass Effect 3 > BIOGame > CookedPCConsole).
- Expand biogame.ini, then sfxgame, then sfxplayercustomization. Click on armappearances = (multiple) and you should get a list on the right.
- In an empty slot at the bottom, add the following:
(GameEffects=(),Id=7,Name=339526,Description=339527,PlotFlag=-1,Type=CustomizableType_Arms) and hit enter.
- Click on legappearances = (multiple) and add
(GameEffects=(),Id=7,Name=339525,Description=339524,PlotFlag=-1,Type=CustomizableType_Legs) and hit enter.
- Click on shoulderappearances = (multiple) and add
(GameEffects=(),Id=7,Name=339528,Description=339523,PlotFlag=-1,Type=CustomizableType_Shoulder) and hit enter.
- Click on torsoappearances = (multiple) and add
(Mesh=(Male="BIOG_HMM_ARM_SHP_R.SHPe.HMM_ARM_SHPe_Tor_MDL",Female="BIOG_HMF_ARM_SHP_R.SHPe.HMF_ARM_SHPe_Tor_MDL"),GameEffects=(),Id=7,Name=723320,Description=710998,PlotFlag=-1,Type=CustomizableType_Torso) and hit enter.
- Note: Those armor pieces are truly empty, meaning you don't have any bonuses from them. You can add any bonuses you want; each bonus you apply is about +10%. A standard armor set gives 60% bonuses, so if you wanna play it straight, add about 5 bonuses OR add every bonus twice and murder everything like a demigod.
Copy and paste the following codes into the empty parentheses in GameEffects=(). You can just add one, or add multiple separated by commas.
Extra ammo: "SFXGameContent.SFXGameEffect_PartBasedArmor_AmmoCapacityBonus"
Headshot damage: "SFXGameContent.SFXGameEffect_PartBasedArmor_ConstraintDamageBonus"
Health: "SFXGameContent.SFXGameEffect_PartBasedArmor_HealthBonus"
Shield strength: "SFXGameContent.SFXGameEffect_PartBasedArmor_ShieldBonus"
Shield regen: "SFXGameContent.SFXGameEffect_PartBasedArmor_ShieldRegenBonus"
Melee damage: "SFXGameContent.SFXGameEffect_PartBasedArmor_MeleeDamageBonus"
Cooldown reduction: "SFXGameContent.SFXGameEffect_PartBasedArmor_PowerCooldownBonus"
Power damage: "SFXGameContent.SFXGameEffect_PartBasedArmor_PowerDamageBonus"
Weapon damage: "SFXGameContent.SFXGameEffect_PartBasedArmor_WeaponDamageBonus"
Notes: Each piece must have at least one bonus, or the stat display will disappear completely.
Make sure there are no spaces in your copy-pasted codes.
Each bonus requires quotes around it, so if you have two or more on one piece, it should read GameEffects=("Bonus1","Bonus2","Bonus3")
4b) Optional step 1 - Adding the accessories immediately
The backpack (shoulder slot), waist bag (arm slot), and boots/thigh pouch (leg slot) are the Rosenkov armor pieces. You can either unlock them right now, or skip this step to unlock them naturally as you play the game.
- Click on armappearances = multiple, and select the SHPe item. You should find a "PlotFlag=x" right near the end of the dialog. Change the value to read PlotFlag=-1 (that's PlotFlag equals minus one). Hit enter when done.
- Change the PlotFlags for the SHPe pieces under legappearances = multiple and shoulderappearances = multiple like you did with the arm appearance.
4c) Optional step - Adding the casual appearance:
- Click on casualappearances = (multiple) and add the following to an empty line:
(Mesh=(Male="BIOG_HMM_ARM_SHP_R.SHPe.HMM_ARM_SHPe_Tor_MDL",Female="BIOG_HMF_ARM_SHP_R.SHPe.HMF_ARM_SHPe_Tor_MDL"),Id=10,PlotFlag=-1,Type=CustomizableType_Torso)
(The Id# can be any number as long as it's a unique one.)
Sadly, for the time being the casual appearance is defaulted to grey with red lights. I don't yet know how to change this :(
- End optional steps -
- When you're finished, File -> Save and close your coalesced editor.
That's it! You're done! Enjoy that ass!
ISSUES/COMMENTS:
- At the finale when Shepard is injured, her damaged armor will be the standard damaged N7 armor.
CREDITS:
The mesh and textures were based off of nameislooney's amazing work. Check out her dA page where she made the original here:
http://nameislooney.deviantart.com/art/ME3-EDI-Jill-Outfit-452951476
My only modifications were mesh tweaks (especially on the UVs), minor texture diff adjustments, then adding new textures for the strp, tint, and spec. The norm and 95% of the diff and mesh is her work.
Changelog:
v2.02
- Includes a .tpf file for easy installation. The TPF contains the N7 logo diff and Spec 1, along with the other standard textures. Use this to skip the Texplorer step if you like those options!
v2.01
- New mesh!!
Higher poly count
Reduced clipping on side straps
Removed (or at worst, greatly reduced) neck clipping
Reduced bust size slightly
Reduced cameltoe (shouldn't make you think "ouch" when you see it)
Corrected UV maps down the center of the mesh, on the knees, back of the neck, and so many other places
Tightened straps so they shouldn't be floating so much
- New specs that add a light on the back of the neck, which is now visible due to the corrected UVs and reduced neck clipping
- New diff option! SASqQs provided a new textures that has N7/Alliance logos and a smoother butt. This is my preferred diff but I'm leaving the old one in case someone feels differently.