


0 of 0


About this mod
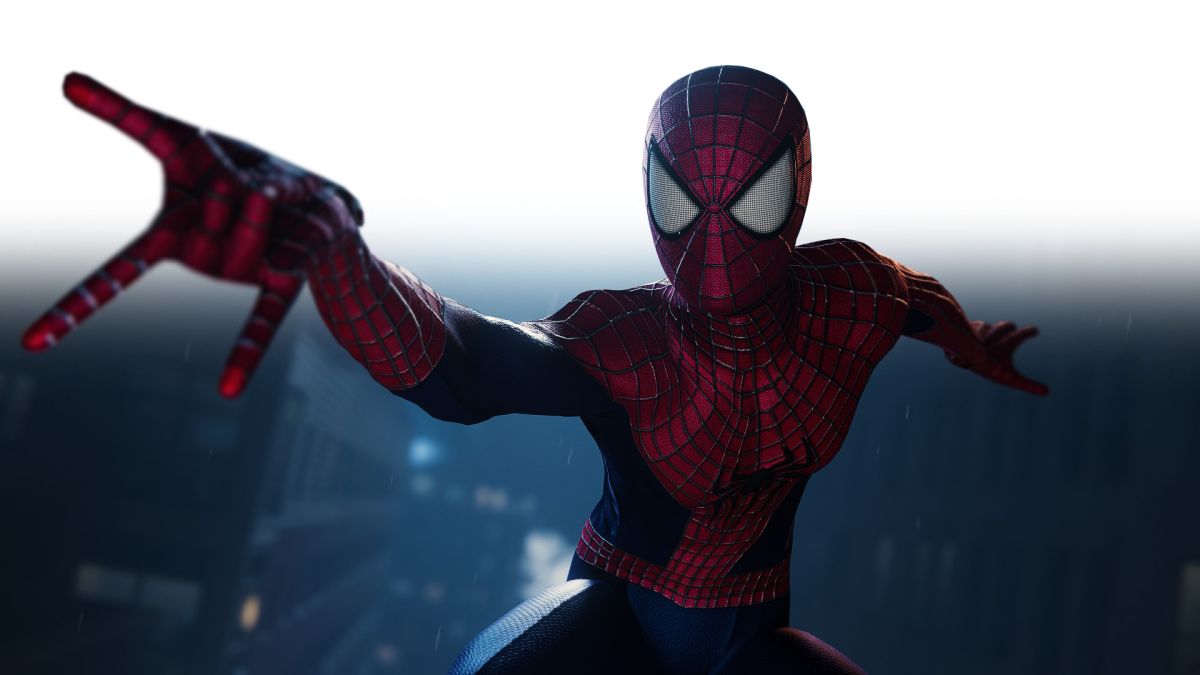
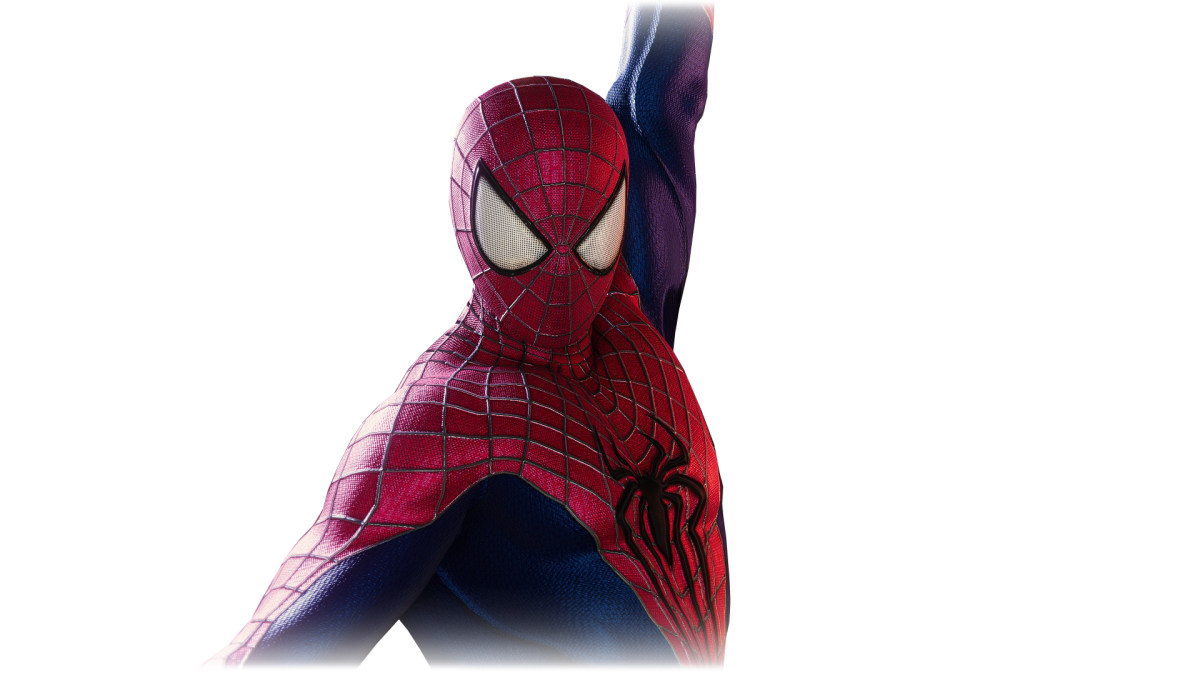
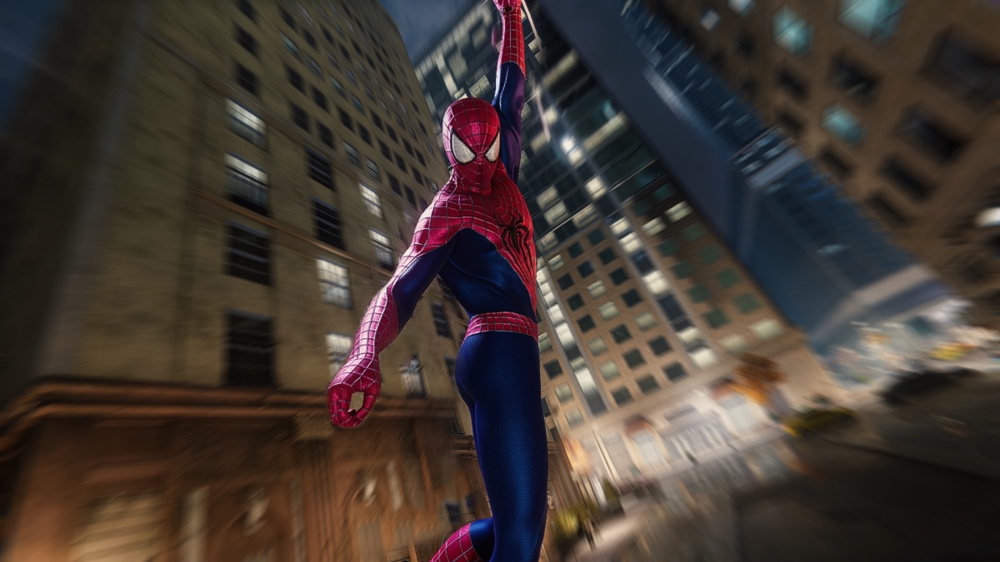
The suit from The Amazing Spider-Man 2
- Requirements
- Permissions and credits
- Donations

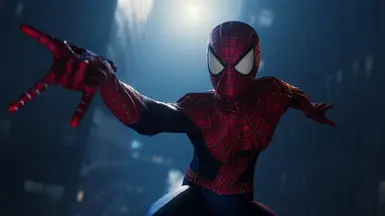
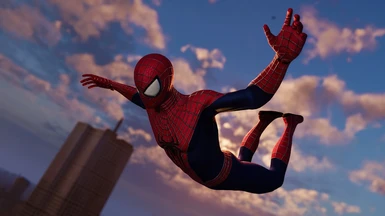
IT'S HERE!
The suit from The Amazing Spider-Man 2 is now available on PC
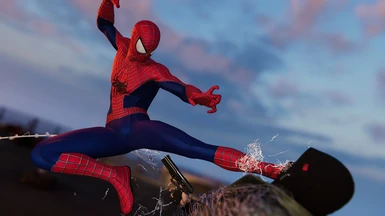
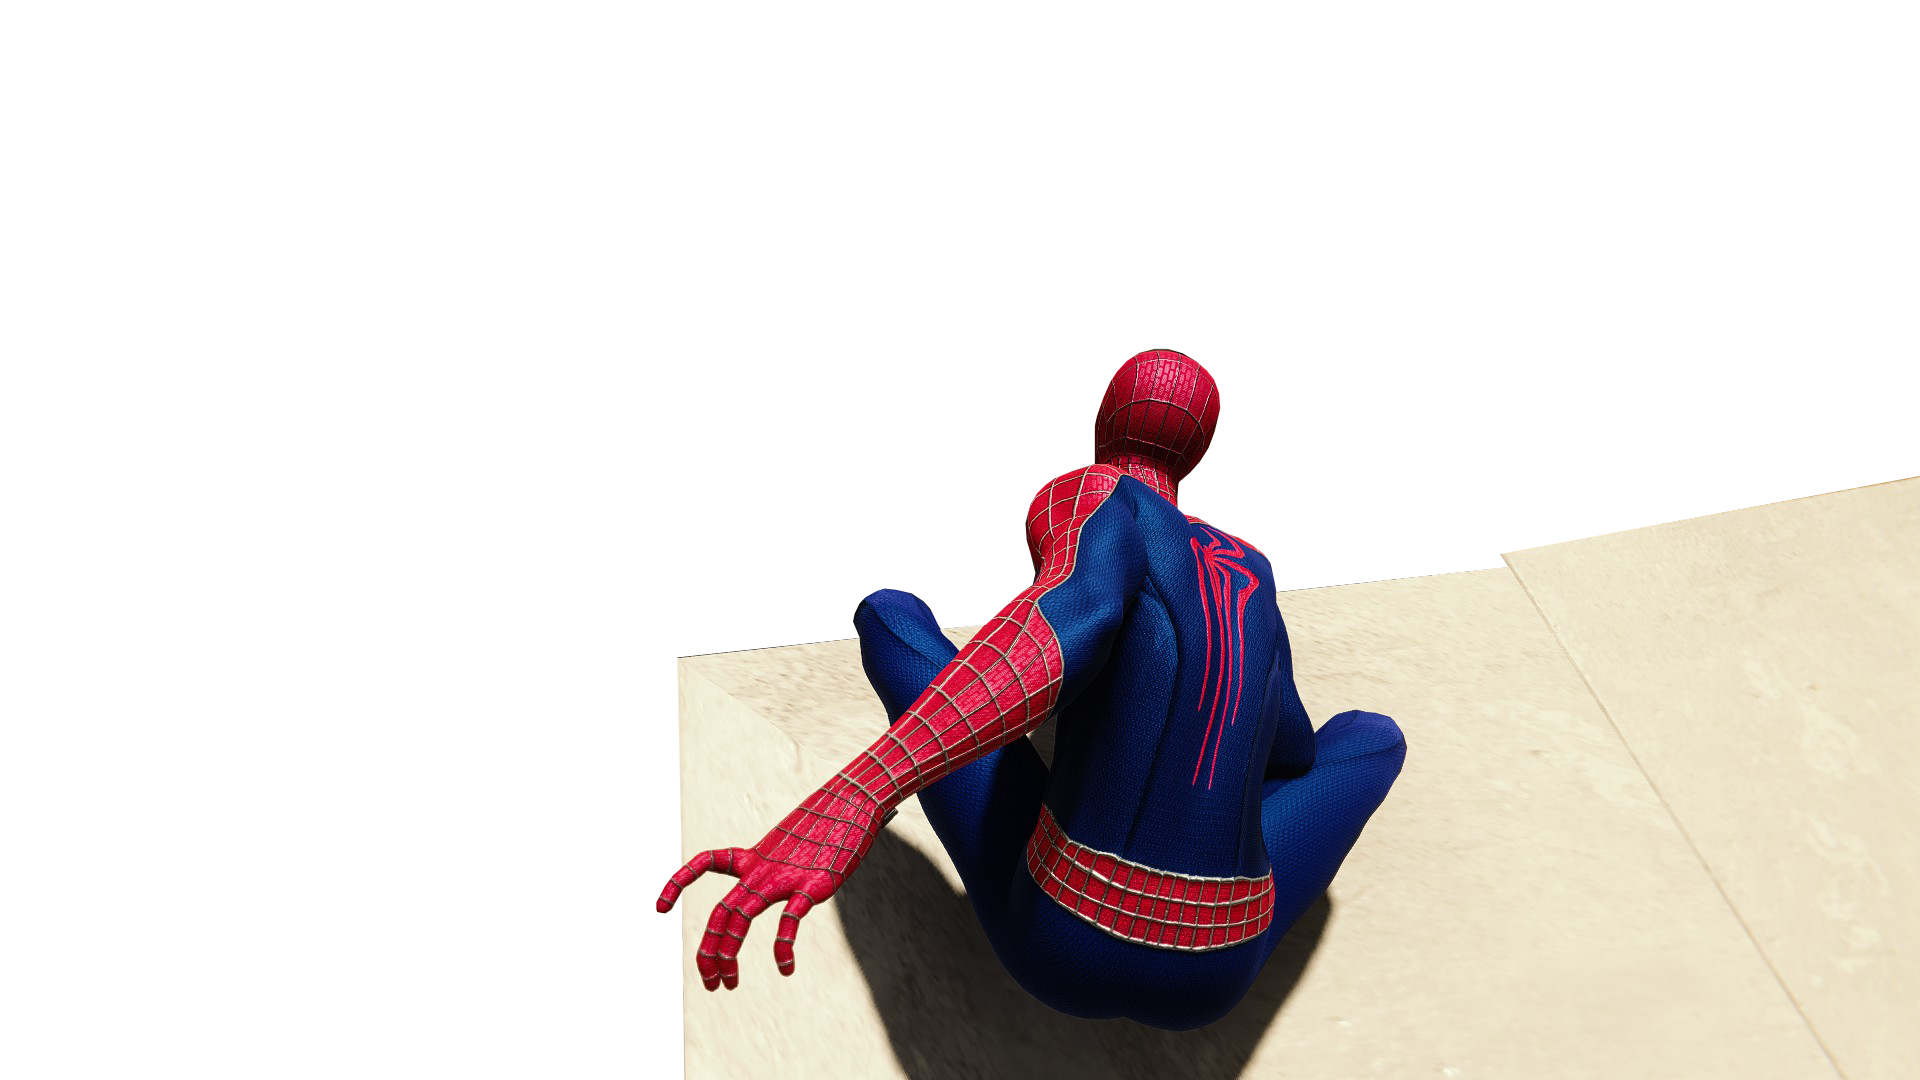
Replaces the Future foundation suit.
Featuring hand crafted details in attempts to make this as screen accurate as possible down to micro details
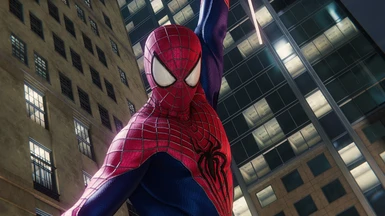
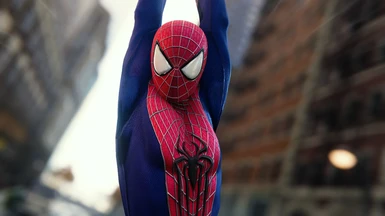
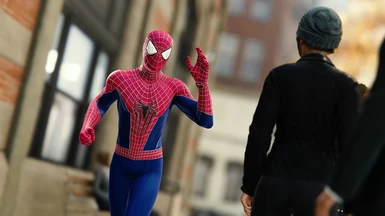
Version 3 was built from the ground up based on responses from Version 1 and 2.
New Lenses
New Colours
New Logo's
Better quality!

Interested in making your own mod?
You can download all the textures used to make this mod in the Optional downloads section.
These can be used for re-colours of my suit, as long as proper credit is given.
(This includes Crediting the mod in the description, linking to this mod in the description and setting this mod as a required download for your own)
You can also use these as a basis for your own mods, as a scale reference, or just as a starting point.
As long as all files are sufficiently changed to a point in which they do not resemble my own anymore then you are free to upload it without requiring my mod to be linked.

Replaces the Future foundation suit.
Featuring hand crafted details in attempts to make this as screen accurate as possible down to micro details
Version 3 was built from the ground up based on responses from Version 1 and 2.
New Lenses
New Colours
New Logo's
Better quality!
Interested in making your own mod?
You can download all the textures used to make this mod in the Optional downloads section.
These can be used for re-colours of my suit, as long as proper credit is given.
(This includes Crediting the mod in the description, linking to this mod in the description and setting this mod as a required download for your own)
You can also use these as a basis for your own mods, as a scale reference, or just as a starting point.
As long as all files are sufficiently changed to a point in which they do not resemble my own anymore then you are free to upload it without requiring my mod to be linked.
I Built this mod using a new design process I've never tried before.
If you're interested in development, read on! I'll cover this mod from beginning to completion
This documentation was written during version 2's development, but uses V1 designs. The process remained the same throughout.
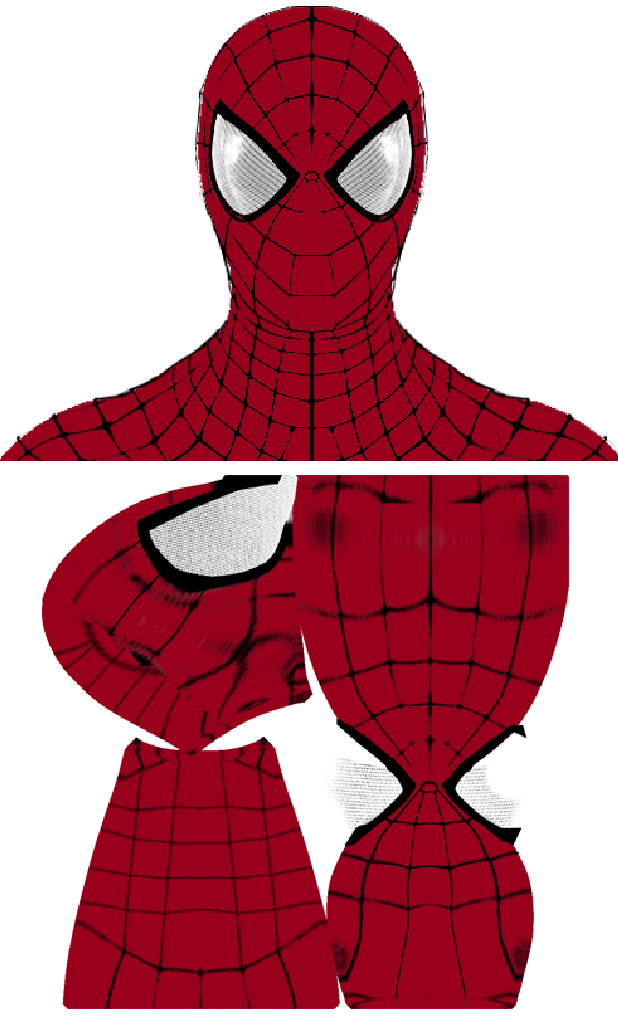
I started this mod by getting the model of the Future Foundation suit and taking an orthographic image of it (basically a perfectly 2D perspective) of the suit in Blender
Using this base image, I drew the TASM 2 suit onto it by hand using reference images (Colour only, no details)
That gave me these results (Note that I only matched symmetry on one side after realising I would be able to solve that in 3D later)

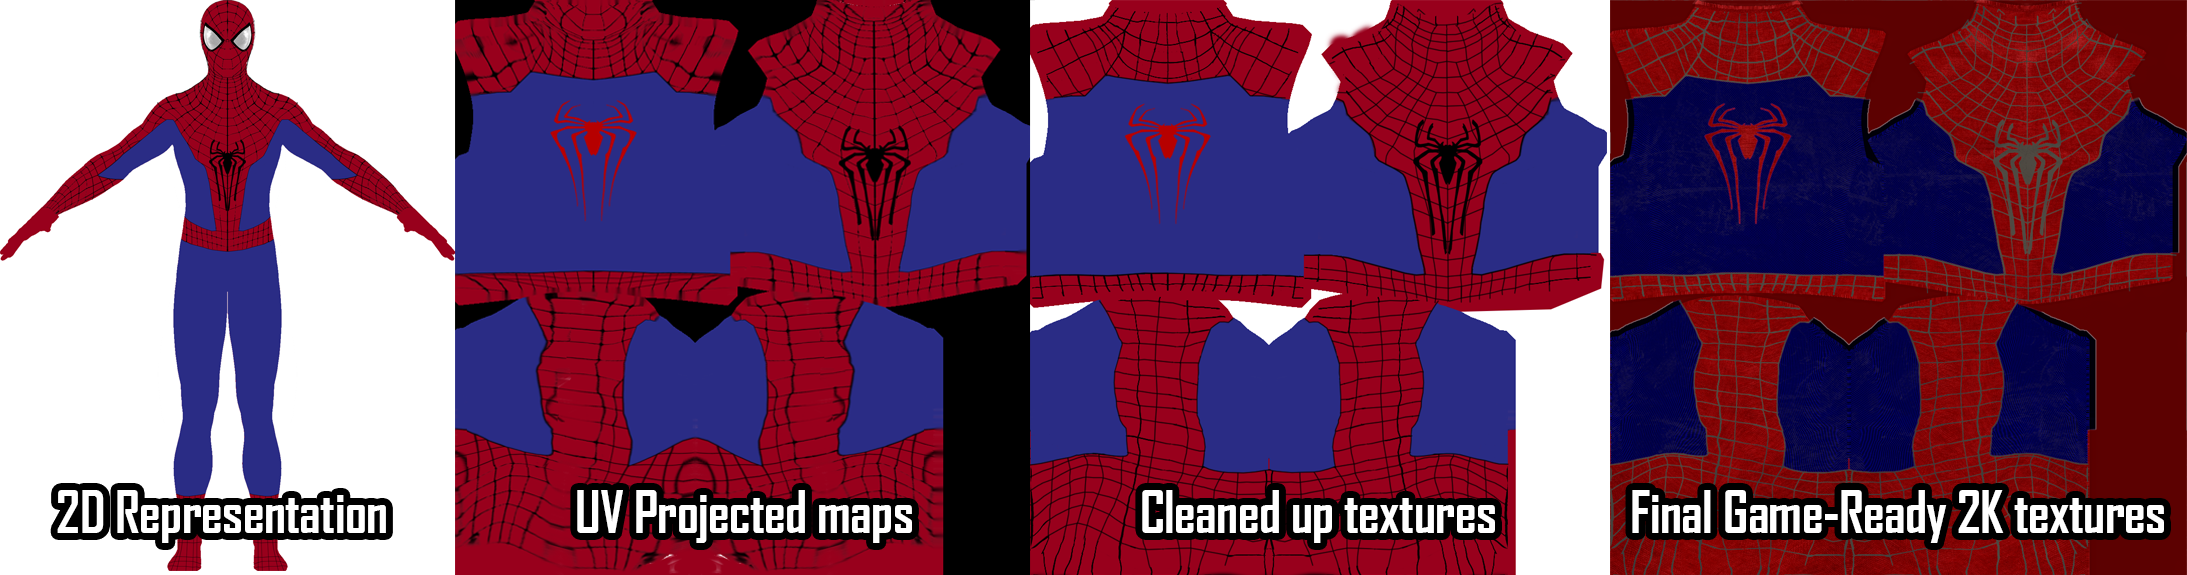
After this, I then created a second 3D model and projected this texture directly onto the front and back.
This gave very promising results if viewed head on, though the issues are still visible

Now I had a base texture/layout I was ready to go into 3D design. I baked the textures of the new projected mesh onto the UV's of the original mesh which gave me these results:
After a little cleaning up in Photoshop to better understand line-structure I was able to send the cleaned texture back to Blender to begin painting, I painted each section on a separate layer so I'd have 3 masks to work with once the 3D painting was done (Red, Blue and webbing)

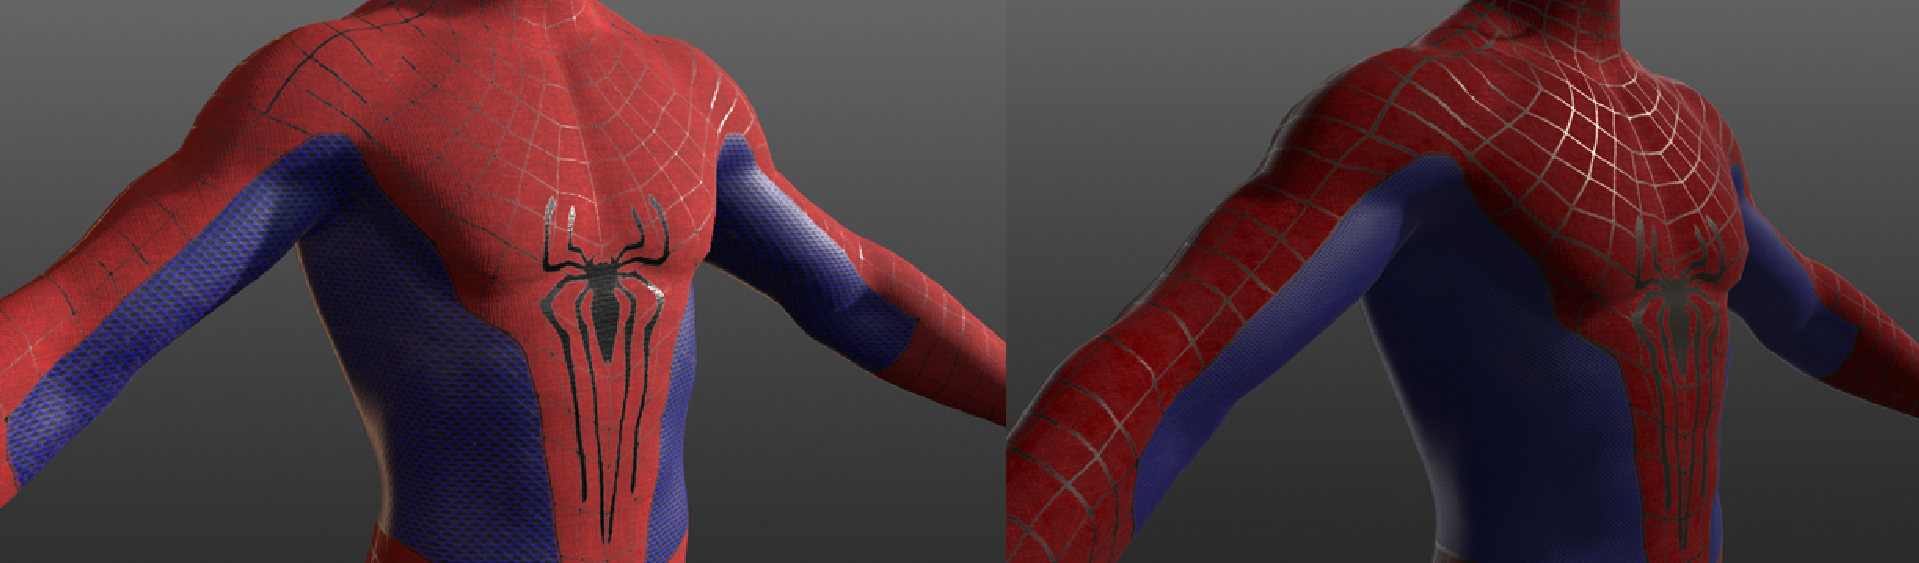
After these textures were complete, I tried putting them in-game for the first test run

You can still see the underlying Normal map of the Future Foundation suit in this image, but it was a good first step. Next up was to add the details and other maps, for this I used Quixel Mixer. Using my previously created masks, I was able to easily define which section of each texture corresponded to what material and so could quickly prototype different material properties until I found some good candidates, Here's just 2 of the combinations I tried:
So once I had something I was satisfied with, I exported the textures, Quick recap of where these textures have come from to where they are now:
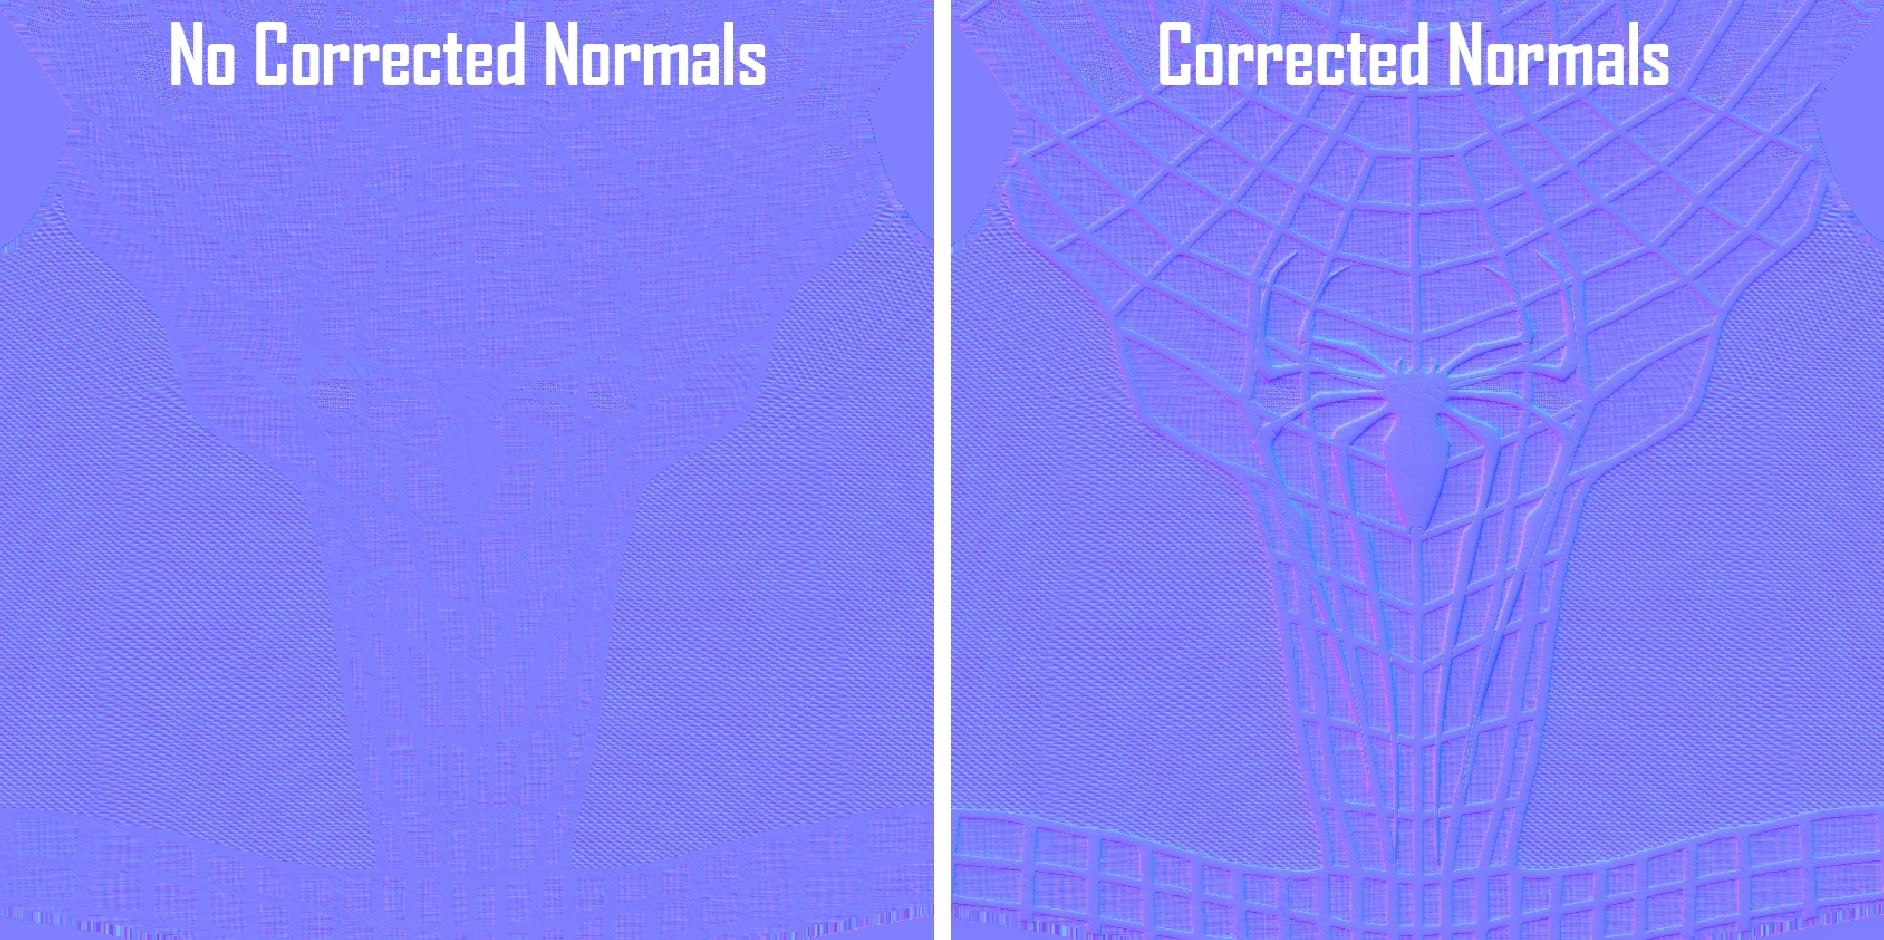
Now with the way I created the materials, it created Normal maps for me. However; It didn't create bumps for certain parts the suit needed to look perfect in-game. For example, here's the Normal map around the chest logo:
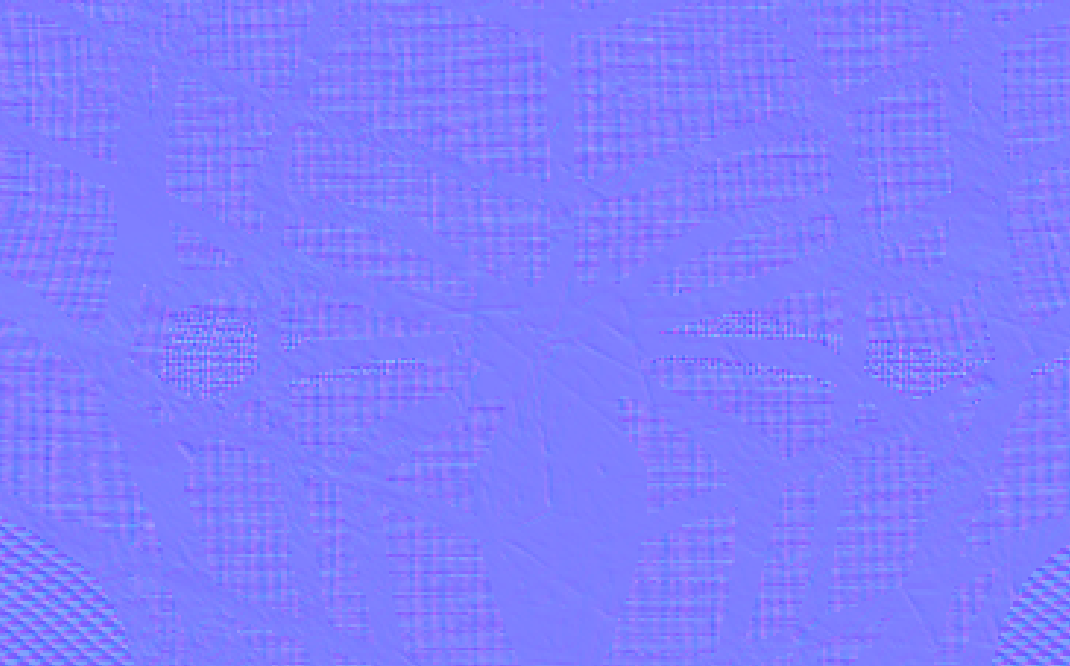
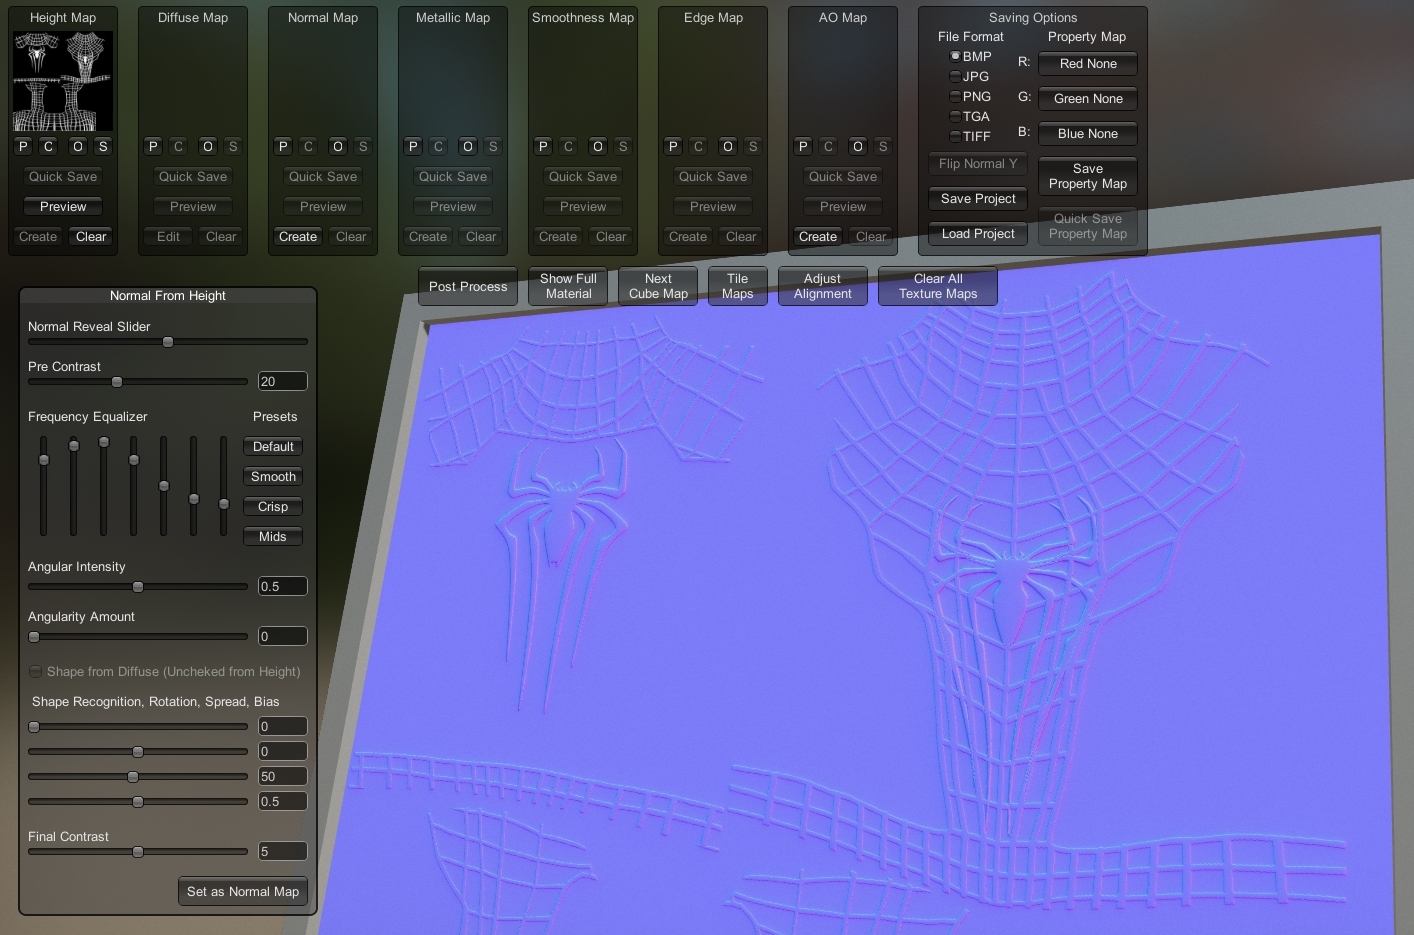
It had great fabric normals and scuffs, but no raised sections. To solve this I used an old favourite tool of mine: Materialize
Using the Masks I'd created earlier while designing the textures I was able to feed them into Materialze as a height map, from which I could generate convincing Normal maps for the webbing.
From here it was just a case of combining the two normal maps, I think the difference speaks for itself:
Normals being out of the way meant all I had left was to create the mask textures (which I already had made so it was a case of arranging them in a way the game liked) and then the _g files which are a roughness map I was able to create using the same masks!
(Work smart, not hard)
And that's where we're at now!
I hope this is somewhat informative to those who are interested in this sort of stuff and if this inspired or helped anyone to create their own suit, then that's amazing and be sure to link your work in the posts tab!