


0 of 0
About this mod
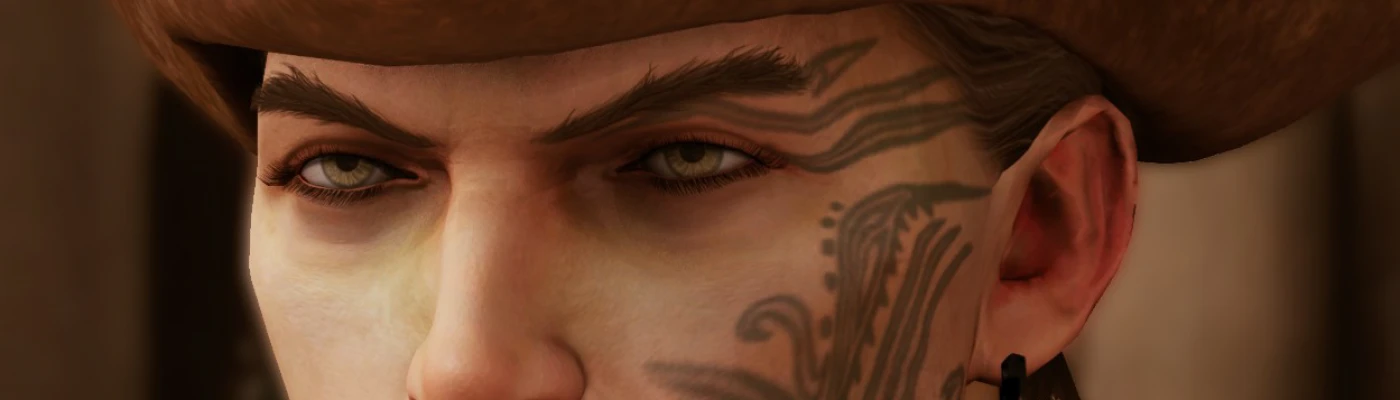
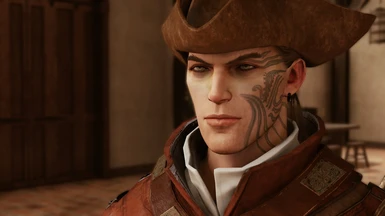
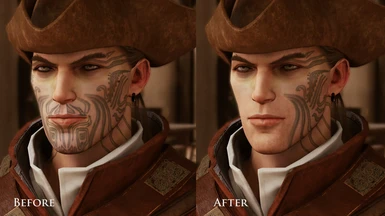
Texture replacer for Vasco which removes much of his tattoos and his mole.
- Permissions and credits
- Donations
VASCO - LESS TATTS
by mrjack
by mrjack

Fewer face tattoos for Vasco and mole removal. Also eyeliner removal but you can't tell really because of his lashes.
Works before and after SPOILER.
You need Resorep for this mod but it doesn't just work out of the box. You need to make the files replaceable first so you need to put the two pgz files in the datalocal folder.
For mod users, just follow the instructions in the README included in the the download or in the Docs tab.
Resorep tutorial
For mod makers, turn back now:
Spoiler:
Show
The game will accept files dumped in the datalocal folder but the only tool I know that can edit the .pgz archives is Ego PSSG Editor by Ryder25 but it won't export/import textures into the archive. Resorep won't extract or replace the large files you see on screen because they don't have the dds extension and other stuff to do with texture streaming that I don't understand.
The only way round it is to manually copy the texture data from the large textures to the tiny textures that Resorep can extract and replace (using the PSSG editor) and then use Resorep to run the texture normally. It's a real pain in the arse and hopefully someone will come up with a more elegant way to replace textures and quickly because if you want to use this method to causally mod the game, it will do your head in. It did my head in.
If you have to mod textures now, I will briefly try and explain what I did because I know someone will ask but I literally have no idea what I'm doing and there is probably a better way but I don't know what it is. Please someone, come up with a better way.
The large texture files are in Greedfall/packs/datapchighres.spk, the small ones that you need to edit to make Resorep extract and replace are in datapc_initial.spk. You can extract both packs using WinRar or any unzipper. The small textures are in files with the .pgz extension, the largest ones have the .stzu extension (ignore the medium sized stxh files). This is for character stuff. Environment textures and other crap is in other packs.
You can open both with the PSSG editor (right click, open with... etc).
Next you need to make a few edits in the other nodes above.
Now you have proper sized texture files that can be extracted and replaced with Resorep.You need to put them in the datalocal folder in the game directory with the same file structure they had when you unpacked the "packs" so the game will load them.
You don't need to keep the stxu anywhere particular now that you have copied the information you needed. You can delete it, save it, whatever.
I'm not going to explain how to use Resorep to replace textures. This guy can do it. It's a Batman game but the principle is the same.
If you are following another mod that tells you to edit the Region and Data packs and unpack the entire data pack into your game folder, I didn't need to do that for this to work. The game just reads whatever is in the localdata folder like it was a Bethesda Data folder or any override folder in old Bioware games.
If you are wondering how to know what textures are the ones you need. You don't. You have to guess based on the filename or open the mesh file (usually in the folder above) and look at the material nodes. Then you go through this whole process to extract the texture just to look at it to check and you can't do a bunch at once because Resorep just exports it with a number. It's fine if you are doing a diff, a norm and a roughness at the same time because you can tell what is what but if you export a bunch of similar diffs like face textures, you won't know which is which necessarily unless it's obvious. Hint: character textures are in "Equipment". "Hea" is head "Hai" is hair etc.. Make sure you are in the "textures" folder.
If you think this is all too much and you want to give up, I don't blame you. Someone will probably come up with an easier way soon so I'm not going to provide any type of "support" for this hacky method. If it ends up being the only way that works, then I might make a proper tutorial with pictures or someone else can do it first because I really don't want to...
Happy modding... ugh.
The only way round it is to manually copy the texture data from the large textures to the tiny textures that Resorep can extract and replace (using the PSSG editor) and then use Resorep to run the texture normally. It's a real pain in the arse and hopefully someone will come up with a more elegant way to replace textures and quickly because if you want to use this method to causally mod the game, it will do your head in. It did my head in.
If you have to mod textures now, I will briefly try and explain what I did because I know someone will ask but I literally have no idea what I'm doing and there is probably a better way but I don't know what it is. Please someone, come up with a better way.
The large texture files are in Greedfall/packs/datapchighres.spk, the small ones that you need to edit to make Resorep extract and replace are in datapc_initial.spk. You can extract both packs using WinRar or any unzipper. The small textures are in files with the .pgz extension, the largest ones have the .stzu extension (ignore the medium sized stxh files). This is for character stuff. Environment textures and other crap is in other packs.
You can open both with the PSSG editor (right click, open with... etc).
- Open both files at the same time (you can have two instances running at once) but go to the stxu file first.
- Expand the tree until you get to TEXTUREIMAGEBLOCKDATA.
- Click on the word (the node) and it will freeze for a few seconds while it loads all that binary data.
- With that highlighted, you need to click on Nodes > Export Data in the menu bar. It will save as a .bin file. Name it something relevant.
- Now keep the stxu open but go to the pgz file and highlight the same node in that file and go to Nodes > Import Data and import the bin file you just saved.
Next you need to make a few edits in the other nodes above.
- Edit the number in TEXTUREIMAGEBLOCK to match the same, higher number in the stxu. Just copy and paste.
- Above that in the TEXTURE node, you need to paste that same number in SizeNormal and SizeHigh so they match SizeUltra.
- Also in this node you need to edit the width, height and mipmapcount to match the same info in the stxu file.
- Now you need to change the extensions of the file names in nameHigh and nameUltra to .dds
- Finally you can save the file as .pgz (you have to click on the drop down menu and select All Files or it will save as PSSG) but you can change the extension after if you forget and it saves in the wrong format.
Now you have proper sized texture files that can be extracted and replaced with Resorep.You need to put them in the datalocal folder in the game directory with the same file structure they had when you unpacked the "packs" so the game will load them.
You don't need to keep the stxu anywhere particular now that you have copied the information you needed. You can delete it, save it, whatever.
I'm not going to explain how to use Resorep to replace textures. This guy can do it. It's a Batman game but the principle is the same.
If you are following another mod that tells you to edit the Region and Data packs and unpack the entire data pack into your game folder, I didn't need to do that for this to work. The game just reads whatever is in the localdata folder like it was a Bethesda Data folder or any override folder in old Bioware games.
If you are wondering how to know what textures are the ones you need. You don't. You have to guess based on the filename or open the mesh file (usually in the folder above) and look at the material nodes. Then you go through this whole process to extract the texture just to look at it to check and you can't do a bunch at once because Resorep just exports it with a number. It's fine if you are doing a diff, a norm and a roughness at the same time because you can tell what is what but if you export a bunch of similar diffs like face textures, you won't know which is which necessarily unless it's obvious. Hint: character textures are in "Equipment". "Hea" is head "Hai" is hair etc.. Make sure you are in the "textures" folder.
If you think this is all too much and you want to give up, I don't blame you. Someone will probably come up with an easier way soon so I'm not going to provide any type of "support" for this hacky method. If it ends up being the only way that works, then I might make a proper tutorial with pictures or someone else can do it first because I really don't want to...
Happy modding... ugh.