


0 of 0


About this mod
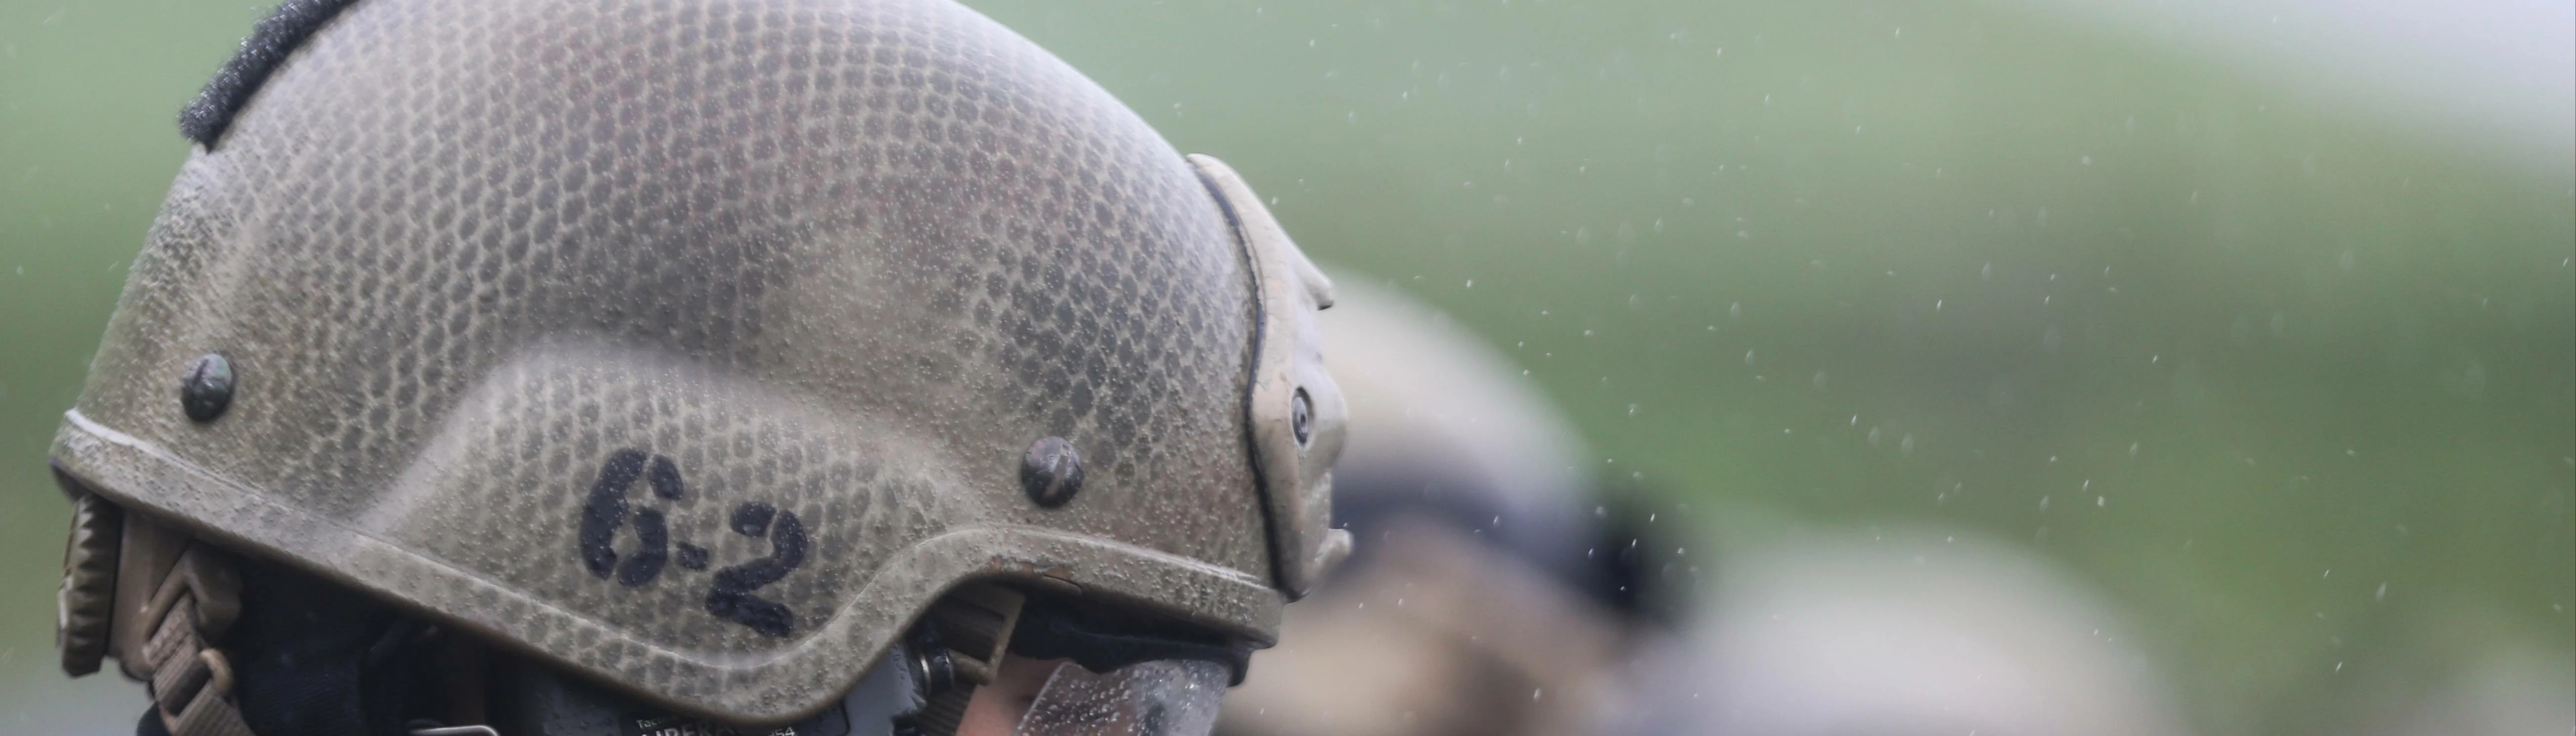
Replaces the Rebel Helmet with a MICH helmet with a custom netting-style paint job.
- Permissions and credits
Description
NOTE: This mod intentionally does not accept camo options. The base helmet on its own looks close enough to the vanilla ACH helmet that I felt adding camo support would effectively render it mostly redundant, especially if you're already using another mod like Modular Helmets, which adds the strobe and battery unit anyways. I experimented for a while as well with allowing the game to take on the secondary colour of the various in-game camos to preserve the netting pattern, but was unsatisfied with the tone of all of the in-game helmets.
I've decided instead to make this helmet uncolourable. The only colour it will take is the secondary colour on the helmet strap. Instead, to recolour it, you must select one of the colour options included in the installation. MAKE SURE YOU READ THE INSTRUCTIONS BELOW AND FOLLOW THEM DIRECTLY. YOUR GAME WILL CRASH IF YOU INSTALL THIS IMPROPERLY.
Installation
The download includes three files:
STEPS:
1. Install the BASE FILE into Data_PC_Resources_Patch_01/Extracted.
2. Select a colour option. Install it into the BASE FILE directory. This should be Data_PC_Resources_Patch_01/Extracted/86890_-_TP_Helmet_OutCastB_Heavy_LOD0.data.
3. Return to your Extracted folder. Right click on 86890_-_TP_Helmet_OutCastB_Heavy_LOD0.data and recompile it.
4. Recompile Data_PC_Resources_Patch_01 as usual.
TO USE THE TEMPLATE:
1. Select any camo pattern or base colour of your choice, and open it in your image editor.
2. Take the template included with this file and paste it as a new layer.
3. Set blend mode of the new layer to ADD.
4. Save the image as a PNG or DDS (BC7).
5. In Anvil Toolkit, navigate to Data_PC_Resources_Patch_01/Extracted/86890_-_TP_Helmet_OutCastB_Heavy_LOD0.data.
6. Double-click on 5_-_TP_Helmet_MICH_HELMET_DiffuseMap_PC.TextureMap.
7. On the left side, click the third icon down (encircled check mark) for "Replace". Navigate to your custom texture and open it.
8. On the left side, click the top icon to save the TextureMap. You can now close the image.
9. Recompile as usual.
Attribution
The models and textures were ported by me from 3DMA's MICH HELMET LOW CUT, purchased and graciously donated for use by CommanderVeers7789 via The Bivouac Discord server. Many thanks to CommanderVeers for helping me test these, and setting the colours.
- Replaces Rebel Helmet with a MICH helmet with a custom netting-style paint job
- Four custom paint jobs: BROWN, BLACK, TAN, OLIVE DRAB. See the images for reference
- Compatible with all headgear and facegear that can be worn with eyewear, most likely will be clipping with certain helmets and hats
- Gender-neutral
- Soft incompatibility with mods like Modular Helmets that add accessories in the same location
- NO UI OPTION, because I'm too lazy for that type of thing
NOTE: This mod intentionally does not accept camo options. The base helmet on its own looks close enough to the vanilla ACH helmet that I felt adding camo support would effectively render it mostly redundant, especially if you're already using another mod like Modular Helmets, which adds the strobe and battery unit anyways. I experimented for a while as well with allowing the game to take on the secondary colour of the various in-game camos to preserve the netting pattern, but was unsatisfied with the tone of all of the in-game helmets.
I've decided instead to make this helmet uncolourable. The only colour it will take is the secondary colour on the helmet strap. Instead, to recolour it, you must select one of the colour options included in the installation. MAKE SURE YOU READ THE INSTRUCTIONS BELOW AND FOLLOW THEM DIRECTLY. YOUR GAME WILL CRASH IF YOU INSTALL THIS IMPROPERLY.
Installation
The download includes three files:
- Base file. This goes in Data_PC_Resources_Patch_01/Extracted.
- Colour option. You must manually select a colour option. This goes in Data_PC_Resources_Patch_01/Extracted/86890_-_TP_Helmet_OutCastB_Heavy_LOD0.data.
- Optional template for modders. With this, you can apply any camo you want using an image editor like Photoshop or GIMP. The edited image must be reimported as a TextureMap
STEPS:
1. Install the BASE FILE into Data_PC_Resources_Patch_01/Extracted.
2. Select a colour option. Install it into the BASE FILE directory. This should be Data_PC_Resources_Patch_01/Extracted/86890_-_TP_Helmet_OutCastB_Heavy_LOD0.data.
3. Return to your Extracted folder. Right click on 86890_-_TP_Helmet_OutCastB_Heavy_LOD0.data and recompile it.
4. Recompile Data_PC_Resources_Patch_01 as usual.
TO USE THE TEMPLATE:
1. Select any camo pattern or base colour of your choice, and open it in your image editor.
2. Take the template included with this file and paste it as a new layer.
3. Set blend mode of the new layer to ADD.
4. Save the image as a PNG or DDS (BC7).
5. In Anvil Toolkit, navigate to Data_PC_Resources_Patch_01/Extracted/86890_-_TP_Helmet_OutCastB_Heavy_LOD0.data.
6. Double-click on 5_-_TP_Helmet_MICH_HELMET_DiffuseMap_PC.TextureMap.
7. On the left side, click the third icon down (encircled check mark) for "Replace". Navigate to your custom texture and open it.
8. On the left side, click the top icon to save the TextureMap. You can now close the image.
9. Recompile as usual.
Attribution
The models and textures were ported by me from 3DMA's MICH HELMET LOW CUT, purchased and graciously donated for use by CommanderVeers7789 via The Bivouac Discord server. Many thanks to CommanderVeers for helping me test these, and setting the colours.