


0 of 0

About this mod
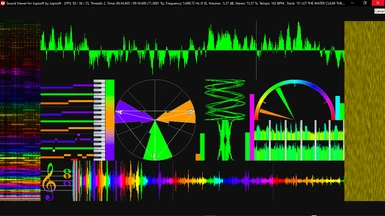
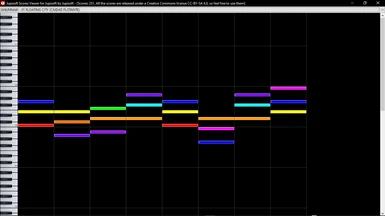
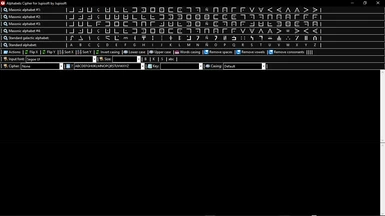
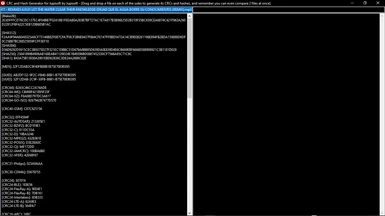
All-In-one tool with lots of tools for Fatal frame 4 and 5 at once like a KSCL and KSLT editor, GMPK, G1M and G1T modding tool, Photographs viewer, FMSG Text exporter, etc.
- Permissions and credits
- Mirrors
- Changelogs
- Donations
[Fatal Frame Modding Tool tutorial by Jupisoft (17-07-2023)]
[Requirements to make new mods for Fatal Frame 4 and 5]
You should be able to find most of the included tools from the main menu of the application (on it's initial window), under the "Tools" menu, and also most of the links for the rest of tools under the "Links" menu. Here is a list of all the tools needed to make new mods:
- Fatal Frame Modding Tool (this tool), to automate most of the process of mod making.
- Blender, tested on x64 v3.3.3 [NOT INCLUDED].
- Blender add-ons "blender_3dmigoto.py", "blender_lock_groups_with_vgmap.py" and "blender_select_polygons_in_vgmap.py". Add them in Blender as add-ons and check them so they are enabled. You'll see new import and export options from its menu (all included).
- Paint.NET to edit the textures as PNG images (also supports direct DDS editing, but is not recommended to edit the textures like that due to a potential loss of quality, so better only edit the PNG images the modding tool generates automatically, since it will keep each original DDS format when importing them back later on). [NOT INCLUDED].
- Gust Tools, to export and import the GMPK and G1T files, used automatically by the tool [included].
- G1M Exporter, to export and import the G1M files with the meshes or 3D models, used automatically by the tool [included].
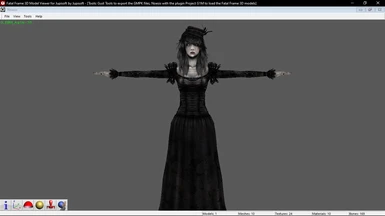
- Noesis with the Project G1M plugin, used to preview the 3D models [included]. The version included has it by default, but if you use another, you should copy the Project G1M plugin to the Noesis plugins folder and then go to its menu and go to "Tools -> Display Plugin Tools" so its checked, then check again the same menu and you'll see below "Project G1M -> Merge all assets in the same folder", which is basic to see the full model with all the meshes and textures at once. Also when loading any model by default it will be very dark, so first click on the model window and then press "F5" to give it some light (the Fatal Frame Modding Tool tool does all this by default automatically).
With all these tools you should be ready to start modding, but remember that all that say "included" are already within the application, so there's no need to get those again. Basically you only need to install Blender, either from Steam or directly, add to it the add-ons mentioned above and finally install Paint.NET if you still don't have it.
[How to use the modding tool by Jupisoft]
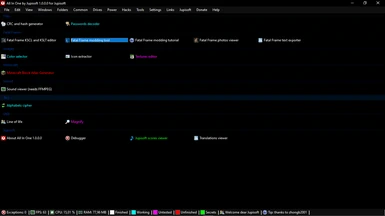
First of all you need to start the "All-In-One" tool by Jupisoft located under "...\All In One\bin\Debug\net6.0-windows\All In One.exe", then on its main window you'll see several tools grouped by a few categories, look for the one called "Fatal Frame". There you'll find some useful tools like:
- Fatal Frame KSCL and KSLT editor: To edit the DDS textures stored in those kind of files. You might change the icons, buttons or even backgrounds in game with this tool.
- Fatal Frame modding tool: The main tool to make new mods for the Fatal Frame games. It's the most powerful tool so far, and works thanks to a lot of other tools, so open its main menu (main window) to check all the links of the used tools and other ones not included.
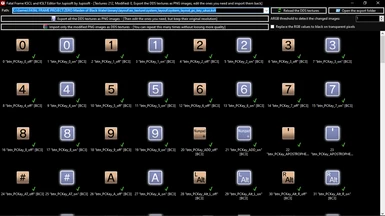
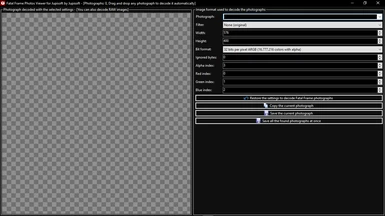
- Fatal Frame photos viewer: Useful tool to decode and export as PNG your photographs.
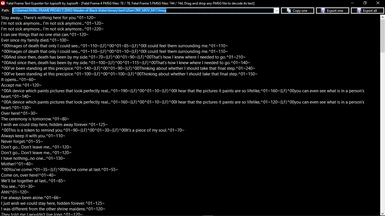
- Fatal Frame text exporter: Tool to export the text from the FMSG files. Useful to get the character names, descriptions, etc.
This tutorial assumes you are interested in making new mods for the Fatal Frame games (ignoring the other 3 tools mentioned above), so to do that, just click on "Fatal Frame modding tool" (just click "Enter" after the tool starts, since it's selected by default) to start the tool dedicated to make new mods. Once it starts it might ask to you about the location of any of the Fatal Frame games in case it couldn't find them by itself. If that happens, please navigate to the Steam folder where you have your game installed, usually at "...\Steam\steamapps\common\..." and then one of the folders for Fatal Frame 4 or 5. Select those last ones and the tool should be ready to start working again. This tool in theory should also support cracked versions of the games.
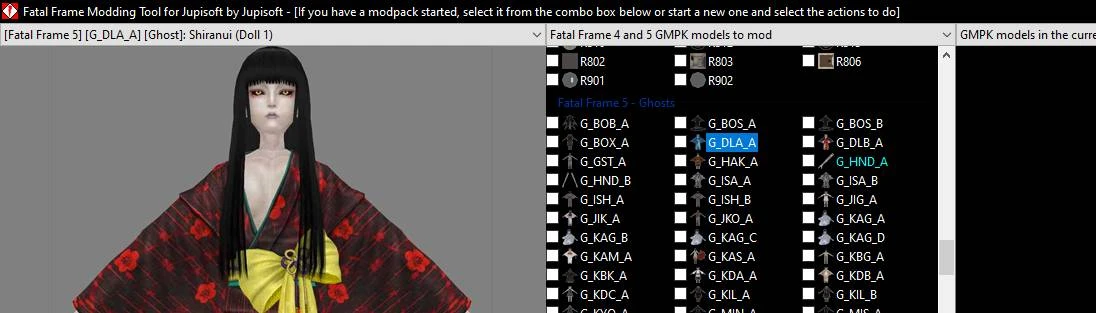
If you already have a previously started modpack, just select it from the combo box below, and if you are just starting then either accept the current numeric date as the modpack name, or give it any name you like by writing directly in the combo box (you'll also see a button with a calendar on it, by clicking it it will set the modpack name to the current date and time, useful in case you want to set the more up to date modpack name).
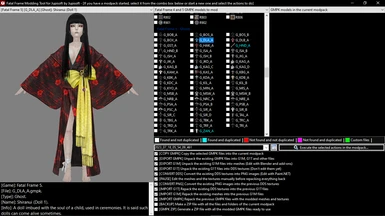
Then select from the checked list box below the combo box of the modpack name the actions to perform in the modpack, usually you'll want to edit the meshes and textures, but this tool lets you customize what actions to perform, so check only the actions you want to do. Also you might use the context menu (right click) to quickly choose waht actions to do.
Of course every time you start a new modpack you must check the "COPY GMPK" to make sure the tool will copy the checked GMPK files from the list above, but you might also drag and drop any GMPK files that are not vanilla or in the game paths and the tool should let you mod those as well. You also must check the option called "EXPORT GMPK" or you won't be able to mod the contents of the game pack files.
Then check "EXPORT G1M" only if you want to edit the meshes (3D models) and "EXPORT G1T" only if you want to edit the DDS textures (like to do a recolor, etc). If you check the option to edit the textures, then also check "CONVERT DDS" since that option is essential to convert any DDS texture to a PNG image, making it lossless while is in that format, and a lot easier to edit with free tools like Paint.NET.
Also check "PAUSE" to make the application show a message box when you have exported all the files and might be ready to import them back. Now you can cancel the rest of options until you manage to finish all your mods. Remember you can finish your modpack at any time, even on a different day, but the first part that is exporting all the needed files to later on edit them must be done directly after generating any modpack. Please always check this if you export any of the files but also check to import any of them at the same time.
To finish any previously started modpack, this time just open the drop down menu from the combo box with the modpacks and choose the name of the one you already started, then check the options to make, but this time don't check the options like "COPY GMPK", "EXPORT GMPK", "EXPORT G1M", "EXPORT G1T", "CONVERT DDS" or "PAUSE". Since all those options should only be used when starting a modpack.
Now just check the new import options like "CONVERT PNG" and "IMPORT G1T" in case you previously exported the textures, or "IMPORT G1M" in case you exported the meshes. Finally check "IMPORT GMPK" to import back the G1M AND G1T files into the GMPK files and finish the mods.
You also have 2 extra useful options called "BACKUP" to make a new ZIP file with all the contents of your currently selected modpack, located on the "Fatal Frame Backup" folder near the application executable, and "GMPK ZIP" that generates a new ZIP file only with the finished GMPK files ready to use. You might add a readme or other files inside of that one and release it to the public if you want, but that part is optional.
[How to edit the meshes with Blender and its add-ons]
Navigate to the modpack you're currently working in the Fatal Frame Modding Tool, then open any subfolder and there look for one that ends with "_Meshes", open it again and you'll see several files like ".fmt" (format files), ".ib" (index buffer), ".vb" (vertex buffer) or even ".vgmap" (skeleton files).
Those are files from the 3DMigoto tool, that can also be imported into Blender to change them as you like. One of the quickest ways is to right click on the Windows explorer folder (assuming you still have the previously mentioned folder with the meshes opened), and select "Copy direction as text", then open Blender with add-ons already installed and checked, press "Delete" to erase the default cube it starts with and go to its menu at "File -> Import -> 3DMigoto raw buffers (.vb + .ib)", on the explore window click on its direction and paste the previous one you copied, press "Enter" and you should see several files.
You can check which contents has each one by loading the model in Noesis (just select it in the Fatal Frame Modding Tool top left combo box, and then left click on the preview image), there go to its menu at "Tools -> Data Viewer -> Model 1 -> Meshes -> ...", and there try each one by just selecting it, this will highlight the one you are looking for a lot more easily, also expand each mesh subnode and double click on "Skip render: 0" so it changes to "Skip render: 1" (it can be reverted and it's not saved anywhere, so it's safe to use).
Then just select the files with the same name as in Noesis, or all at once if you prefer, and then load them in Blender. Then just press "Tab" to change from "Object mode" to "Edit mode" and you're ready to start modding the meshes. You can select them from the right panel.
Just export them once you're done, but be careful because it might crash if don't edit or export them correctly. You'll find a lot more tutorials on how to do that, since is the same as for any other game out there basically.
Also please search this video on YouTube if you want a more in depth tutorial: "3DMigoto Costume Mod Tutorial for Fairy Tail (PC)" [z2nvJzkwHHQ].
[How to edit the textures converted to PNG with Paint.NET]
Repeat the process of the previous meshes guide but this time open the folder that ends with "_Textures". There you'll see mixed the original DDS textures (just ignore those), the textures converted to PNG images (you must edit those ones) and a JSON file (don't change it). To make it a lot easier, please right click on the Explorer window and choose to sort the files by type and then again to group them by type, this will make it a lot easier to find only the PNG images you're looking for.
Then just open with Paint.NET the ones you want to edit. On Fatal Frame so far we know of 4 types of textures:
- Albedo or default texture, This has the colors of the model, so edit this for recolors.
- "Hair map": Unknown type, but seems to have hair in it of an orange color, rarely found.
- Normal map: Defines the depth of the 3D objects, usually has fuchsia or purple colors.
- Specular or light map: Defines the brightness or reflections of the objects, in gray-scale.
Depending of what you want to achieve you can simply edit the first type to recolor some parts of the model, like clothing, hair, etc. But if you also edit the meshes, then you might need to modify a bit the normal or even the specular maps, which might be a lot more difficult, you might need to find some tutorials for that online, but all can be done with Paint.NET at least. And please keep in mind that sadly not all the textures go in order and also not all of them include all the types. You might see just a default texture, or also with a normal map and without a specular map, etc. So you'll have to decide which texture is for which part visually and manually several times. And some of those times it can be very hard to guess which textures are with what parts, but most of the times is easy to see.
Never edit any of the original DDS textures, since they will be overwritten by the modding tool.
I really hope this tutorial might be useful to you, but if you still have any question or problem, please let me know either at [email protected], on GitHub (@Jupisoft111), or on LoversLab (+18, just google "LoversLab Fatal frame Jupisoft" and you should find all my posts). Thanks a lot for everything and have a wonderful day :-)
Special thanks to "@zhongb2001" for all his help. Without it, this guide wouldn't even exist :-)
[Requirements to make new mods for Fatal Frame 4 and 5]
You should be able to find most of the included tools from the main menu of the application (on it's initial window), under the "Tools" menu, and also most of the links for the rest of tools under the "Links" menu. Here is a list of all the tools needed to make new mods:
- Fatal Frame Modding Tool (this tool), to automate most of the process of mod making.
- Blender, tested on x64 v3.3.3 [NOT INCLUDED].
- Blender add-ons "blender_3dmigoto.py", "blender_lock_groups_with_vgmap.py" and "blender_select_polygons_in_vgmap.py". Add them in Blender as add-ons and check them so they are enabled. You'll see new import and export options from its menu (all included).
- Paint.NET to edit the textures as PNG images (also supports direct DDS editing, but is not recommended to edit the textures like that due to a potential loss of quality, so better only edit the PNG images the modding tool generates automatically, since it will keep each original DDS format when importing them back later on). [NOT INCLUDED].
- Gust Tools, to export and import the GMPK and G1T files, used automatically by the tool [included].
- G1M Exporter, to export and import the G1M files with the meshes or 3D models, used automatically by the tool [included].
- Noesis with the Project G1M plugin, used to preview the 3D models [included]. The version included has it by default, but if you use another, you should copy the Project G1M plugin to the Noesis plugins folder and then go to its menu and go to "Tools -> Display Plugin Tools" so its checked, then check again the same menu and you'll see below "Project G1M -> Merge all assets in the same folder", which is basic to see the full model with all the meshes and textures at once. Also when loading any model by default it will be very dark, so first click on the model window and then press "F5" to give it some light (the Fatal Frame Modding Tool tool does all this by default automatically).
With all these tools you should be ready to start modding, but remember that all that say "included" are already within the application, so there's no need to get those again. Basically you only need to install Blender, either from Steam or directly, add to it the add-ons mentioned above and finally install Paint.NET if you still don't have it.
[How to use the modding tool by Jupisoft]
First of all you need to start the "All-In-One" tool by Jupisoft located under "...\All In One\bin\Debug\net6.0-windows\All In One.exe", then on its main window you'll see several tools grouped by a few categories, look for the one called "Fatal Frame". There you'll find some useful tools like:
- Fatal Frame KSCL and KSLT editor: To edit the DDS textures stored in those kind of files. You might change the icons, buttons or even backgrounds in game with this tool.
- Fatal Frame modding tool: The main tool to make new mods for the Fatal Frame games. It's the most powerful tool so far, and works thanks to a lot of other tools, so open its main menu (main window) to check all the links of the used tools and other ones not included.
- Fatal Frame photos viewer: Useful tool to decode and export as PNG your photographs.
- Fatal Frame text exporter: Tool to export the text from the FMSG files. Useful to get the character names, descriptions, etc.
This tutorial assumes you are interested in making new mods for the Fatal Frame games (ignoring the other 3 tools mentioned above), so to do that, just click on "Fatal Frame modding tool" (just click "Enter" after the tool starts, since it's selected by default) to start the tool dedicated to make new mods. Once it starts it might ask to you about the location of any of the Fatal Frame games in case it couldn't find them by itself. If that happens, please navigate to the Steam folder where you have your game installed, usually at "...\Steam\steamapps\common\..." and then one of the folders for Fatal Frame 4 or 5. Select those last ones and the tool should be ready to start working again. This tool in theory should also support cracked versions of the games.
If you already have a previously started modpack, just select it from the combo box below, and if you are just starting then either accept the current numeric date as the modpack name, or give it any name you like by writing directly in the combo box (you'll also see a button with a calendar on it, by clicking it it will set the modpack name to the current date and time, useful in case you want to set the more up to date modpack name).
Then select from the checked list box below the combo box of the modpack name the actions to perform in the modpack, usually you'll want to edit the meshes and textures, but this tool lets you customize what actions to perform, so check only the actions you want to do. Also you might use the context menu (right click) to quickly choose waht actions to do.
Of course every time you start a new modpack you must check the "COPY GMPK" to make sure the tool will copy the checked GMPK files from the list above, but you might also drag and drop any GMPK files that are not vanilla or in the game paths and the tool should let you mod those as well. You also must check the option called "EXPORT GMPK" or you won't be able to mod the contents of the game pack files.
Then check "EXPORT G1M" only if you want to edit the meshes (3D models) and "EXPORT G1T" only if you want to edit the DDS textures (like to do a recolor, etc). If you check the option to edit the textures, then also check "CONVERT DDS" since that option is essential to convert any DDS texture to a PNG image, making it lossless while is in that format, and a lot easier to edit with free tools like Paint.NET.
Also check "PAUSE" to make the application show a message box when you have exported all the files and might be ready to import them back. Now you can cancel the rest of options until you manage to finish all your mods. Remember you can finish your modpack at any time, even on a different day, but the first part that is exporting all the needed files to later on edit them must be done directly after generating any modpack. Please always check this if you export any of the files but also check to import any of them at the same time.
To finish any previously started modpack, this time just open the drop down menu from the combo box with the modpacks and choose the name of the one you already started, then check the options to make, but this time don't check the options like "COPY GMPK", "EXPORT GMPK", "EXPORT G1M", "EXPORT G1T", "CONVERT DDS" or "PAUSE". Since all those options should only be used when starting a modpack.
Now just check the new import options like "CONVERT PNG" and "IMPORT G1T" in case you previously exported the textures, or "IMPORT G1M" in case you exported the meshes. Finally check "IMPORT GMPK" to import back the G1M AND G1T files into the GMPK files and finish the mods.
You also have 2 extra useful options called "BACKUP" to make a new ZIP file with all the contents of your currently selected modpack, located on the "Fatal Frame Backup" folder near the application executable, and "GMPK ZIP" that generates a new ZIP file only with the finished GMPK files ready to use. You might add a readme or other files inside of that one and release it to the public if you want, but that part is optional.
[How to edit the meshes with Blender and its add-ons]
Navigate to the modpack you're currently working in the Fatal Frame Modding Tool, then open any subfolder and there look for one that ends with "_Meshes", open it again and you'll see several files like ".fmt" (format files), ".ib" (index buffer), ".vb" (vertex buffer) or even ".vgmap" (skeleton files).
Those are files from the 3DMigoto tool, that can also be imported into Blender to change them as you like. One of the quickest ways is to right click on the Windows explorer folder (assuming you still have the previously mentioned folder with the meshes opened), and select "Copy direction as text", then open Blender with add-ons already installed and checked, press "Delete" to erase the default cube it starts with and go to its menu at "File -> Import -> 3DMigoto raw buffers (.vb + .ib)", on the explore window click on its direction and paste the previous one you copied, press "Enter" and you should see several files.
You can check which contents has each one by loading the model in Noesis (just select it in the Fatal Frame Modding Tool top left combo box, and then left click on the preview image), there go to its menu at "Tools -> Data Viewer -> Model 1 -> Meshes -> ...", and there try each one by just selecting it, this will highlight the one you are looking for a lot more easily, also expand each mesh subnode and double click on "Skip render: 0" so it changes to "Skip render: 1" (it can be reverted and it's not saved anywhere, so it's safe to use).
Then just select the files with the same name as in Noesis, or all at once if you prefer, and then load them in Blender. Then just press "Tab" to change from "Object mode" to "Edit mode" and you're ready to start modding the meshes. You can select them from the right panel.
Just export them once you're done, but be careful because it might crash if don't edit or export them correctly. You'll find a lot more tutorials on how to do that, since is the same as for any other game out there basically.
Also please search this video on YouTube if you want a more in depth tutorial: "3DMigoto Costume Mod Tutorial for Fairy Tail (PC)" [z2nvJzkwHHQ].
[How to edit the textures converted to PNG with Paint.NET]
Repeat the process of the previous meshes guide but this time open the folder that ends with "_Textures". There you'll see mixed the original DDS textures (just ignore those), the textures converted to PNG images (you must edit those ones) and a JSON file (don't change it). To make it a lot easier, please right click on the Explorer window and choose to sort the files by type and then again to group them by type, this will make it a lot easier to find only the PNG images you're looking for.
Then just open with Paint.NET the ones you want to edit. On Fatal Frame so far we know of 4 types of textures:
- Albedo or default texture, This has the colors of the model, so edit this for recolors.
- "Hair map": Unknown type, but seems to have hair in it of an orange color, rarely found.
- Normal map: Defines the depth of the 3D objects, usually has fuchsia or purple colors.
- Specular or light map: Defines the brightness or reflections of the objects, in gray-scale.
Depending of what you want to achieve you can simply edit the first type to recolor some parts of the model, like clothing, hair, etc. But if you also edit the meshes, then you might need to modify a bit the normal or even the specular maps, which might be a lot more difficult, you might need to find some tutorials for that online, but all can be done with Paint.NET at least. And please keep in mind that sadly not all the textures go in order and also not all of them include all the types. You might see just a default texture, or also with a normal map and without a specular map, etc. So you'll have to decide which texture is for which part visually and manually several times. And some of those times it can be very hard to guess which textures are with what parts, but most of the times is easy to see.
Never edit any of the original DDS textures, since they will be overwritten by the modding tool.
I really hope this tutorial might be useful to you, but if you still have any question or problem, please let me know either at [email protected], on GitHub (@Jupisoft111), or on LoversLab (+18, just google "LoversLab Fatal frame Jupisoft" and you should find all my posts). Thanks a lot for everything and have a wonderful day :-)
Special thanks to "@zhongb2001" for all his help. Without it, this guide wouldn't even exist :-)