About this mod
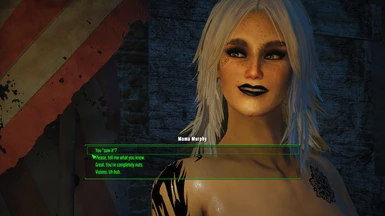
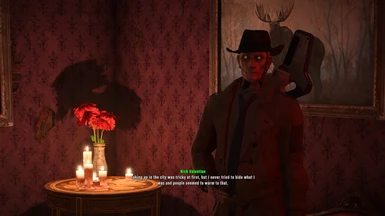
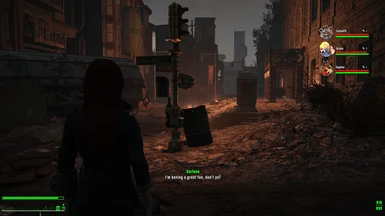
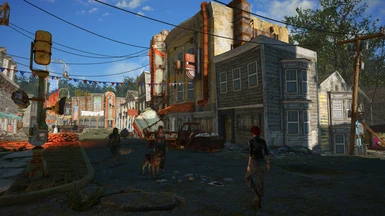
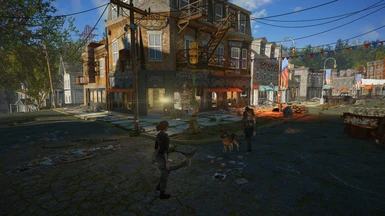
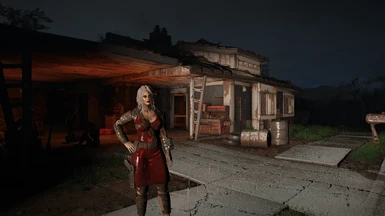
This includes about 700 plus select mods and a substantial atmospheric visual overhaul. The list also includes many fixes for smooth performance-friendly gameplay. You decide your playstyle and difficulty scaling. Support for managing a team of companions., and SS2. + 3
- Requirements
- Permissions and credits
See Nexus News For how to Avoid updates
Short Takeaway:
FallUI -With the New FIS Sort
ECO Redux Crafting
Munitions Ammo Expansion (with ECO patch)
NPC Level Scaling
Luxor HD Overhaul 2k
Luxor Summer
Modern Script Memory Increase Mods
(Helpful for SS2 + 3)
Sim Settlements 2+ 3 With Addon Support
Improved Combat AI
Unlevelled World F4SE (optional)
Mutant Menagerie Life Finds A Way
(Integrated with CW Creature Mods)
High FPS Physics Fix
NAC X Legacy Edition Weather and Visuals (Includes a visual overhaul)
NAC X Darker Nights
True Storms Integration
Reactor ENB
F4 Shadowboost
God Rays Redux
Robco Patcher
Liga Of My Companions - Team Management
Bodyslide
CBBE
Wheel Menu (edited for better aid visibility)
Player Comments and head tracking
Wide selection of weapons and armour
General - Fixes and utilities for a smooth gameplay
Mod List Here
PREAMBLE OR JUMP TO THE INSTALL SECTION
This download is quite large, with some very large quest mods omitted, but if you know what you are doing, or want to learn, download mods you fancy, a few slots are left before you hit the esp/esm mod limit. See the adding mods section below.
Looking at this build and some of the script-heavy mods like SS2+3 you may think it will not perform well, but utilising the modern memory and papyrus script memory increase mods and many fixes, had few issues on a mid-range machine. It took me a while to get it right, but worth it.
No PRP mods as there are no mods that break precombines that I know of, apart from Diamond City Expanded, but have installed a mod to rectify that, thanks to Storywealth. F4 is created with stitched precombined to save FPS. If a mod breaks them the PRP mods can sort that.
PACK Attack, a popular combat mod is available on Discord, you can replace my combat mods if you wish and feel confident with modding or, want to learn. See the adding mods section below.
Auto-Install
Wabbajack is a popular mod auto-installer that installs a portable instance of MO2, with the mods attached automatically. You need a premium Nexus account and an SSD drive. I am using the install from disk method, where you just download my file here. But many developers put their lists on the Wabbajack site. Have an exploration on Wabbajack, if you are looking for other options and playstyles. See the video section for more about Wabbajack.
Survival Mode / Creation Club
If you are looking for a list that supports these see the F4 Wabbajack lists.
Sorry, no VR or controller support, this is a PC thing, other mod lists might support that.
Specs:
This build has about 700+ mods and needs about 180 gigs of space initially. The download files take up about 72 gigs, you can delete those in MO2 after installation, but if you do, and need to reinstall a mod, you will need to download that Mod again from Nexus.
My Specs ballpark, getting about 58-70 fps in Boston with Reactor ENB on Capped at 70.
Processor: AMD Ryzen 9 3900 12-Core Processor
Graphics: NVIDIA GeForce RTX 2070 SUPER
Installed RAM 32.0 GBSystem
Preparation:
If mods are installed with other mod managers or manual, this needs a clean install of F4 on an SSD drive outside of Windows program files. A Steam uninstall is not enough, Steam leaves behind your stuff. Completely delete the F4 folder, or its contents before reinstalling.
If you choose the former and need to verify your Steam Install it will take some time
If you have not installed lists before:
Install Microsoft Visual C++ Redistributable Packages Download
Link Here
Download the x64 version under Visual Studio 2015, 2017, 2019, and 2022.
Visual Studio 2012 (VC++ 11.0) Update 4
Download the x64 version under Visual Studio 2012 (VC++ 11.0) Update 4.
Steam Install:
NOTE: IF YOU DO A FRESH INSTALL AFTER THE NEXT-GEN UPDATE THIS MODLIST WILL NOT BE COMPATIBLE IN THAT CASE USE YOUR EXISTING INSTALL ASSUMING YOU HAVE BLOCKED THE NEW UPDATE.
1. When doing a new F4 install, create a Steam Library on the SSD drive you are targetting during F4 installation if you don't have one already, and install F4 on that drive. Steam will give you that option during the installation. In Steam disable the HD DLC before reinstalling, you may get blackfaces if you don't.
2..Then start Fallout 4 at least once in Steam Launcher after a new install. No need to go into the game, just launch the game to initialize it. I would max out your settings initially, and disable Lens Flare and Screen Reflections. Later, using BethINI, you can fine-tune your INI settings, resolution, quality levels, and preferences.
3. After installing, in Steam right-click on the F4 game, go to properties choose "Only Update When I launch the Game" and disable any overlays
INSTALL MODLIST
Firstly, Download Luxor's 2k Overhaul
HERE
Fallout 4 HD Overhaul 2k at Fallout 4 Nexus - Mods and community (nexusmods.com)
Follow His Instructions, you need to extract 15 BSA files, I have already installed the other requirements.
You can install the files in your games DATA folder, or My Luxor Textures Folder in MO2 after the modlist list install is completed.
If you place the files in your game Data folder that's fine, but if you need to verify your game, it is best to back up the originals and reinstall them first or it will take some time to verify your game in Steam.
1. Download my file in the file section, best to extract the contents to the drive you want the list to target.
2. Download the latest Wabbajack installer Wabbajack
3. You need a premium nexus account. Best to put wabbajack.exe in the same drive as your install target. Don't install it in a game folder or inside a Steam library. Launch Wabbajack, then go to the Wabbajack settings menu cog at the top right and log into your premium account on Nexus. (See Video Section for general Wabbajack tuition)
4. Then choose the install from disk option, and navigate to the file you downloaded from here.
5. Choose the drive and folder you wish the download to target and include a downloads folder as a subdirectory in your main folder, wabback may do that automatically. Start the installation.
6. This will take some time depending on your internet, if Wabbajack fails, go back and try again, sometimes nexus delivery might have stumbled, but Wabbajack remembers where you were. A stumble is fairly common, depending on nexus status, and internet delivery. Keep trying, it's worth it, this is the hardest bit.
Troubleshooting: The log file should tell you which file it failed to download, If necessary, you can go to the file concerned on Nexus, download it manually, put the ZIP file in the downloads folder, and do a retry. See the Wabbajack videos for other help.
7. Then, after the install completed COPY THE FILES "Games Folder Files" folder, into your root F4 folder, where Fallout4 exe lives. Copy the files, not the folder.
8. Then go to your install folder and launch MO2.exe.
When ready, Launch the game in MO2 from the A New Start Ultra link to the top right, in-game, go to MCM settings, and APPLY my settings for hotkeys and my setup. Don't click save, but choose APPLY
You must always launch the game from MO2. You can set up your hotkeys with the hotkeys manager or individual mods. MCM might be slow at first till the booster cache sets in. It will be quicker next time. In MCM go to the bottom to see the Hotkeys I have already set up.
Don't activate the ENB patch in Nac-X, just APPLY my settings in MCM Settings, NOT save, see the Reactor ENB page for the correct settings. Already applied by me, but check them out anyway if you wish.
BethINI Pie And Resolution
BethINI is in the Tools folder to tune your INI files and preferences. Close MO2, and launch BethINI in the Tools folder of your installation. Open BethINI exe, and choose F4. It should load the New Start Ultra profile. I am using BethINI Pie, now whatever setting you change does not mean you have to change everything. Change the resolution to your own. It is currently set to 2560 x 1440.
I have set this to Windowed Borderless and no Vsync, which matches the settings I have in the High FPS Physics mod. make sure your card does not have Vsync activated but choose "Application Controlled" or equivalent.
To change the FPS limit right-click on High FPS Physics Fix Mod in the F$SE AND UTILITIES SECTION then Open In Explorer, drill down to the HighFPSPhsicsFix ini file, and open with a text editor.Scroll down till you see the [Limiter] section.I have set it to 70, but change that if you wish
The Optional Mods:
Don't add or remove mods mid-game. It's good practice to never delete a mod in the list, just disable it in the optional section. When you launch a new game, make sure the mods activated are not disabled later, or you may have mods missing messages in the game, which can corrupt your save.
Player Comments and Headtracking;
Can be disabled in MCM, using the Hotkey.
Playing as Male:
Go to camera Options and choose the male animations
GAMEPLAY TIPS
You will find a Universal Workbench and other things outside the vault.
USEFUL HOTKEYS
In MCM scroll down to the bottom and you will see the Hotkeys already assigned
In Game esp Explorer: F10 (press R to search once launched)
Shadow Booster: F12
Liga Companion Commands: G
Note: You can use In-Game esp explorer to use stuff that you would normally need to craft.
Tip: Search ESP Explorer for companions to find other LIGA tools like Teleport and the Companion Bag.
I assign a hotkey to the Bag in the pip-boy to store stuff.
Trash
When using a workshop in any settlement, you will see a Trash Can near each workshop. Activate the workshop, move near it till the Trash Can is highlighted, and choose Scrap from the menu, The Trash Can will turn into a ball. This will remove much of the local scrap safely. It's compatible with SS2. Thanks to Lively for this SS2-compatible mod.
Recruit Codsworth from the GetGo
A mod is included to make players able to recruit Codsworth from the first conversation. You may need him as he may not attack the lots of creatures in Sanctuary. It is called Courage To Codsworth and works very well with Liga.'
Go to Sanctuary and talk to Codsworth, but, as soon as Codsworth mentions searching the neighbourhood, then select option 3 - "there's nothing left here it's all gone" to exit the conversation. Otherwise, if you do not wish to use the mod, just select one of the other options.Engage in conversation again with Codsworth, and it will ask you if you wish to recruit, so say option 2 - yes Instead of following Codsworth around the neighbourhood, Codsworth will now be following you, and his mission will change to the Concord mission, check out the authors mod page.
MODLIST UPDATES
To Install an update launch Wabbajack and use the install from disk feature as before. Wabbajack should bring up the last install with the same paths filled in. Then use Target Modlist and navigate to the new file you downloaded. Click the big start icon and it will update to the new version.
Adding MODS
You could go for mods that are either esl or esp's flagged as esl, they don’t count towards the mod limit. The Buffout mod now allows us to bypass the BSA limit. As long as your plugin limit is below 255 you're fine. That count must include esm's and esp's together. After you download this, If you go to the plugins tab on the right of MO2 and hover over "active", look for the esms plus esp bit, which should be around 239.
You may notice in the dropdowns programs to the right, that there is a program called R88_Elsify, a godsend, extensively used, it finds the esp's that can be elsified without the complicated compacting process, without that, I would not be able to have so many mods without merging. You could try it on esps you download that are not elsified, if it doesn’t work, well keep it or leave it
IMPORTANT FOR LOAD ORDER
DO NOT USE ANY LOAD ORDER TOOLS
If mods you install have a plugin appear on the right-hand side of MO2, drag them up somewhere near the middle unless the mod author needs a particular load order. Definitely above NAC.esp Please don’t change my load order on the left or the right. Many Texture mods on the left have a deliberate load order as some are overwriting others. Esl plugins to the right of MO2 you can just drag and let go, they will automatically join the other esl's above. Plugins with an esp extension need to be dragged manually. ESM extensions should be dragged up to join the other ESM files near the top, but below the ESM's already there in most cases. If you hover over a plugin to the right of MO2 some text will indicate what masters need to be above.
Load order generally means some mods need to be below others called masters, not necessarily be next to each other, unless the mod author states otherwise. The plugin load order to the right is important, and Texture mods and others that overwrite esp's to the left of MO2 only need to overwrite the correct mods if required.
If you are new to modding plenty of tutorials on YouTube and guides on Nexus to assist. The best way to learn is to make mistakes. Well, so one has heard.
Add this code with square brackets to your mods at the left-hand side of the mod name to prevent deletion when I update.
ENDORSING MODDERS
You might consider going to the left of MO2 and seeing the flags to endorse the modders. You can endorse in bulk, just use shift and select each section. In time you will recognise the mods making this game a masterpiece, it would be appreciated by the modders if you say so in their posts section, or perhaps donate a few dollars or GPB if they allow that.
Discord;
I have a channel currently not activated, but if I get a request by all means, I will activate it if it helps.
Credits:
The mod creators for their work and skills
Wabbajack
Bethesda for the game
Nexus for Making This Possible
About Me: from the UK, an IT background. My name is Jim.
F4 is my main game, I love listening to old-time tunes while playing, so I took Radios and Sound seriously.


