About this mod
This is not a mod! This is a guide to setup and use specific set of tools to create Previsibines customized to your load order. This is complete rework of DIY Previsibines Repair Toolkit.
- Requirements
- Permissions and credits
- Changelogs
Have you ever downloaded and installed a mod, like DIY Previsibines Repair Toolkit, that promises astounding rise in FPS? Have you also seen how this “performance enhancer” causes flickering and disappearing objects in-game and performance that it promises is nowhere to be seen? Have you also shuffled this specific mod around load order to see that, in-game, just right after very next corner objects start to flicker and disappear. Again? Have you read hundreds of posts and searched trough dungeons of forums to only to find instructions to load this mod dead last, but you have already tried it and it just did not help at all? And when you disabled this specific mod, all problems just magically vanished? Have you spend countless of hours generating Precombines and Previsibility (= Previsibines) just to see that your Fallout 4 is even worse condition than before?
Well no more! Because know we now what is needed to be done!
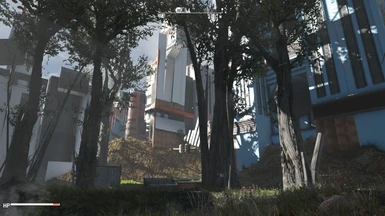
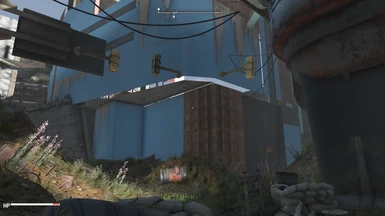
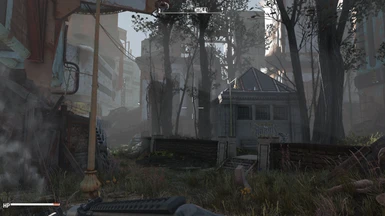
"Hall of mirrors", "the white void", flickering and disappearing objects are not a load order problem. Either is suboptimal performance which you get from different Previsibine mods. It is actually a set problem. Because only one set of PreCombines and PreVisibility (= Previsibility) data can exists at any given time.
Following text (in spoiler) is personal speculation of why and how:
Fallout 4 game world is divided into a grid of squares of equal size. Each square is a cell. Each of these cells partially overlap each other. Some more, some less. This overlapping of cells makes possible to transition seamlessly from one cell to another. This overlapping also makes possible to create, for example, a Precombined mesh of a house, which spans thorough three different cells.
But because each individual cell does not actually “know” what other cell contains, Precombined mesh of the house is present as a copy in all of these three cells. This means that the house is loaded three times in to the game world, but because meshes are identical, in size, location and so on, and the cells overlap, it looks like one big house.
If Precombined mesh of the house, which spans thorough three cells, is only located in two of the cells, the house disappears when looked at from the third cell. If one of these three cells has a Precombined mesh of the house with different coloring, the coloring of the house changes or flickers depending on point of view.
Cell overlapping, combined with ability of loading multiple copies of single or multiple Precombined meshes in multiple cells at once, seems to also apply to PreVis. But PreVis has two crucial differences:
1. PreVis is build from non-mobile uncombined objects (cars, crates, trees etc.) and Precombined objects (roads, houses etc.).
2. PreVis spans surrounding 3x3 cells.
When PreVis is not identical, shared between overlapping cells, a smooth transition cannot be archived between them and everything in game world starts to flicker and disappear.
This mechanism was not build mods in mind because there seems to be a limit of how many sets can be loaded at same time in one cell. I have not been able to verify exact amount, but it seems to be between 3 to 5 sets. And after this game-engine just does not show Precombined meshes at all (in that specific cell).
These “rules” does not seem to apply to interior areas. In-game interiors are handled as one cell. But it is very clear that "Hall of mirrors" and "the white void" is caused by multiple, non-identical sets of Previsibines loaded at same time. Game-engine just loads them all at once and creates an unintended mess of graphic nausea.
Aim of this mod articles is extremely simple:
1. Load as many as possible mods from your load order and generate Previsibines from them. As all of ours load orders, that means winning overrides, are different, so will be your set of Previsibines.
2. Remove all other existing sets of Previsibines from your load order so that there will be only one left. That is the one which you create and it is completely customized to your load order.
Now that we know what is needed to be done, lets get to work!
- Basic knowledge of editing txt files, unzipping files, folder structures and copying files.
- Some knowledge of using FO4Edit: Choosing modules, running scripts and modifying flags.
- Some knowledge of using any kind of mod organizer and load order.
- Windows 10. Any build will do. But it has to be installed so that you can actually run Fallout 4.
- Basic knowledge of administrating Windows 10 operating system: changing size of virtual memory, knowing what computer and user name is, folder sharing and access rights.
- A lot of HDD space (even up to 400GB).
- Patience. Lots of it.
- Creation Kit Version 1.10.162.0 or later.
- FO4Edit (remember to Endorse!).
- Visual C++ Redistributable for VisualStudio 2012 Update 4. Download and install both X64 and X86.
- F4 Creation Kit Fixes version 1.9 newer (also go here and endorse!) and NoSteamDRMPatch (from assets of 1.7. Direct download).
- Visual Studio 2015, 2017, 2019, and 2022. Download and install both X64 and X86.
- SeargeDP script pack: Discussion (attached Files: PrecombinePrevisSneakPeek.zip).
- Windows 8 SDK. Download page, scroll down to Earlier releases, get Windows 8 SDK. Direct download.
- A Mod Organizer. Any flavor will do.
- Download DIY Previsibines Repair Toolkit - REDUX package from this mod files section.
1. Download and install Creation Kit for Fallout 4.
2. Install Visual C++ Redistributable for Visual Studio 2012 Update 4. Creation Kit Archive2.exe does not work without this.
3. Install F4 Creation Kit Fixes version 1.9. Extract it directly to the root folder of Fallout 4 directory (where Fallout4.exe is).
4. Download NoSteamDRMPatch.7z. Extract it to some temporary folder.
4. Install Visual Studio 2015, 2017, 2019, and 2022. F4 Creation Kit Fixes does not work without this.
5. Download and extract FO4Edit anywhere you like.
6. Download SeargeDP script pack. Extract it to some temporary folder.
7. Download and install Windows 8 SDK. Select and install everything.
8. Download DIY Previsibines Repair Toolkit – REDUX package from this mod files section. Extract it to some temporary folder.
Windows 10:
- Change Virtual Memory size (swap file) in to Custom Size: Initial size (MB): 6400. Maximum size (MB): 200000. This change will require a reboot.
Fallout4.esm
DLCRobot.esm
DLCworkshop01.esm
DLCCoast.esm
DLCworkshop02.esm
DLCworkshop03.esm
DLCNukaWorld.esm
Unofficial Fallout 4 Patch.esp
PPF.esm
A Forest.esp
BTInteriors_Project.esp
RynsFallout4.esp
RailroadRedone.esp
Cannibal.esp
Commonwealth Underground and Forgotten Spaces2.0.esp
GoodneighborExpanded.esp
NEST_BUNKER_PROJECT.esp
subwayrunnnerdynamiclighting.esp
FallonsBasementOverhaul.esp
Atomic World.esp
moreXplore.esp
CrimeTown.esp
Immersive_Lexington.esp
JalbertBrotherSettlement.esp
CombatZoneOverhaul.esp
SalemEXPANDED.esp
HagenEXPANDED.esp
TheSewers.esm
Rsiyo'sLocationPack.esp
InsideJobs.esp
The Metro.esp
stumbleuponinteriors.esp
DWUK_LexingtonInteriors.esp
0_Vault120.esp
BUM.esp
MutilatedDeadBodies.esp
Simple Lightings - Custom Merge.esp
brotherhood of steel overhaul.esp
RaiderOverhaul.esp
GoodneighborExpanded_and_Crimetown_patch.esp
Windows 8 SDK:
- In the root folder of Fallout 4, create a new folder. Name it Bin64.
- From folder "C:\Program Files(x86)\Windows Kits\8.0\Redist\D3D\x64" copy file d3dcompiler_46.dll in to the root folder of Fallout 4 and in subfolder Bin64. After this you can uninstall Windows 8 SDK. It is not needed any more.
FO4Edit:
- In the root folder of FO4Edit there is a subfolder Optional. From there copy file FO4Edit64.exe in to the root folder of FO4Edit.
- In the root folder of FO4Edit, right click FO4Edit64.exe and choose Create shortcut. Right click FO4Edit64.exe - Shortcut and choose Properties.
-FO4 -IKnowWhatImDoing -AllowMasterFilesEdit
Rename Shortcut as you like or leave it as it is, but from this forward use only X64 version of FO4Edit.
- From DIY Previsibines Repair Toolkit – REDUX package folder FO4Edit_scripts copy 01 - Count loaded refs in load order.pas in to subfolder Edit Scripts under the root of FO4Edit.
- From DIY Previsibines Repair Toolkit – REDUX package folder FO4Edit_scripts copy 03 - Copy version control info from another plugin.pas in to subfolder Edit Scripts under the root of FO4Edit.
- From Searge’s script pack copy file 01_CopyCELLsIntoAutoPreCalc.pas in to subfolder Edit Scripts under the root of FO4Edit. Rename file 01_CopyCELLsIntoAutoPreCalc.pas into 02 - CopyCELLsIntoAutoPreCalc.pas.
NoSteamDRMPatch:
This step is mandatory for Steam version of Creation Kit. If creationkit.exe is not stripped from "SteamStub", F4 Creation Kit Fixes will not work right.
- Locate CreationKit.exe from Steam apps. For example steam\steamapps\common\Fallout 4
- Execute CreationKitPatch.exe. It asks where creationkit.exe is located. For example steam\steamapps\common\Fallout 4\creationkit.exe
- Click Update.
NOTE: This will strip creationkit.exe from "SteamStub". Patcher is so called "image restoration" executable. What will be left is exactly same version of creationkit.exe as it was published in Beth.net. A backup will be in folder steam\steamapps\common\Fallout 4\PatchWise.bak.
SeargeDP script pack:
You do not need to do this step if you are using F4 Creation Kit Fixes version 1.9. Lord of algorithms, perchik71, has incorporated SargeDP's patch (and more) straight into F4 Creation Kit Fixes. But this step is still mandatory if you want to use F4 Creation Kit Fixes version 1.8 or lower.
NOTE: Following steps will not work if creationkit.exe has not been stripped from "SteamStub" with NoSteamDRMPatch.
- Copy CKPatcher.exe in to the root of Fallout 4 folder. Execute it. This creates new file CreationKit.patched.exe.
- Rename orginal CreationKit.exe to CreationKit.exe_ORG. Or move it out from the root of Fallout 4 folder.
- Rename CreationKit.patched.exe in to CreationKit.exe.
- Delete CKPatcher.exe
Prepare and enable Creation Kit Version Control:
NOTE: In DIY Previsibines Repair Toolkit – REDUX package there is a folder named Autoconfig_for_DIY_Previsibines_Repair_Toolkit. In this folder there is a script named autoconfig.cmd. This script can automate all next steps except creating network share and modifying folder rights. Copy that file in to the root of Fallout 4 folder, execute it and it is all done. But remember to create the network share and modify folder rights! Script does not do that automatically.
Before proceeding, run Creation Kit once and close it. Make sure that it creates a new file in the root of Fallout 4 called CreationKitPrefs.ini. If Creation Kit asks about Flowchart or Script Source Extraction, just say No. These are not needed here.
Create Network share:
- In the root folder of Fallout 4 create new subfolder. Name it Merging.
- Right click folder Merging, choose Properties, choose tab Sharing, choose Advanced Sharing, tick Share this folder, choose Permissions, tick Full control. This ensures that group Everyone has full rights to this folder.
- Under folder Merging, create three new subfolders. Name them CheckInBackup, Data and VersionBackup.
Modifying folder rights:
- In the root folder of Fallout 4 there is now new subfolder Merging. Right click it. Choose Properties, choose tab Security and choose Edit.
- Chose Add.. and type in your Windows logon name. Or search it by clicking button Advanced. Click OK.
- Select your Windows logon name and check box Allow from Full control. Click OK.
NOTE: When using Creation Kit Version Control, it checks that is current user assigned to this folders access control list (ACL) and does it have full rights to it.
Edit some INIs:
- Open folder Merging. Create new text file. Name it ConstructionSetNetwork.ini.
- Open ConstructionSetNetwork.ini with your favorite text editor and add following lines in to it:
[Users]
%USERNAME%=1
1=%USERNAME%
[WhoCanMerge]
%USERNAME%=1
1=%USERNAME%
[WhoCanForceCheckout]
%USERNAME%=1
1=%USERNAME%
Remember to save!
F4 Creation Kit Fixes version 1.9 comes with two Creation Kit specific INI files: CreationKit.ini and CreationKitCustom.ini. And since you started CreationKit once, there is also third INI file CreationKitPrefs.ini. You need to edit these.
- Open CreationKit.ini with your favorite text editor and add these lines:
[Animation]
bSkipAnimationTextExport=false
- Open CreationKitCustom.ini with your favorite text editor. Change these lines:
[General]
bUseVersionControl=0
sLocalBackupPath=Data\VersionControl\CheckInBackup\
sNetwork Path=\\YOUR-USERNAME\Merging\
sNewVersionBackupPath=\\YOUR-USERNAME\Merging\VersionBackup\
sNetworkMasterPath=\\YOUR-USERNAME\Merging\Data\
[General]
bUseVersionControl=1
sLocalBackupPath=Data\CheckInBackup\
sNetwork Path=\\%COMPUTERNAME%\Merging\
sNewVersionBackupPath=\\%COMPUTERNAME%\Merging\VersionBackup\
sNetworkMasterPath=\\%COMPUTERNAME%\Merging\Data\
[WhoCanMerge]
%USERNAME%=1
1=%USERNAME%
[WhoCanForceCheckout]
%USERNAME%=1
1=%USERNAME%
- Where value %COMPUTERNAME% has to be replaced with your computer name and value %USERNAME% has to be replaced with your Windows logon name
- Open CreationKitPrefs.ini with your favorite text editor. Add these lines at the end of this file:
[WhoCanMerge]
%USERNAME%=1
1=%USERNAME%
[WhoCanForceCheckout]
%USERNAME%=1
1=%USERNAME%
Remember to save!
NOTE: As said... ermh, wrote before, inside DIY Previsibines Repair Toolkit – REDUX package there is a folder named Autoconfig_for_DIY_Previsibines_Repair_Toolkit. In this folder there is a script named autoconfig.cmd. This script can automate all previous steps except creating network share and modify folder rights. Copy that file in to the root of Fallout 4 folder and execute it. This script does not create network share or modify folder rights, so remember to do them.
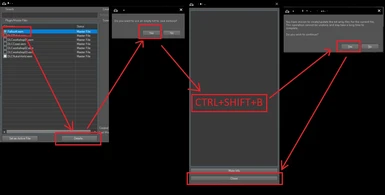
I have split guide to use these tools in to four parts:
1. References counting and making some temporary changes. In this guide you check what mods needs to be "ESMifyed" to lower reference count.
2. Preparing your plugin. In this guide you prepare a plugin so it can be processed.
3. Processing your plugin. In this guide you will semi-automatically create Previsibines to all vanilla exterior and interiors areas, mods that edits those and mods that add completely new exterior and/or interiors areas.
4. Test mods. In this guide there is a lists of mods that you can process safely and mods that cannot. There is also a guide how you can test a mod if it is safe to process.
And there is also completely optional article: Completely optional. Introducing: Version Control Merge - Not so handy replacement for zMerge.
A: It is a complete rewrite of process to create Previsibines. It is superior compared to "old" one. It trivializes whole process of creating Previsibines.
Q: Is this basically same thing as Previsibines Repair Pack (PRP)
A: No. PRP focus is on vanilla assets, official masters. This "mod" goes trough whole load order, including official masters. But real difference comes with what these mods actually try to do. With this guide you recreate the hot mess that Fallout 4 Previsibines are and add some more. It does help on terms of overall performance. In fact a lot. But team behind PRP is actually trying to fix that hot mess. There is a package in DIY Previsibines Repair Toolkit – REDUX download section named PRP Unleasher (instructions included). This is a small demonstration what PRP can actually do when its full potential is unleashed.
Q: Why should I do all this work and just not choose Previsibines Repair Pack (PRP)?
A: Three reasons. First, Fallout 4 utilizes two main optimization systems that are connected – Precombined resources (generally referred to as precombines) and Precomputed Visibility data (generally referred to as Previs). Of this system about 30% is on “shoulders” of Precombines, rest comes from Previs. This is because Precomputed visibility data is build from non-mobile uncombined references and Precombined resources. And this is where DIY Previsibines Repair Toolkit – REDUX really shines: It can provide Previs tailored to your load order. To your clutter, loose files and whatnot. Second reason is that you do not need to wait that team behind PRP creates a Previsibines to your favorite mod. You can actually Do It Yourself (see article 4. Testing mods for more information). And there will be no need for any compatibility patches to bloat your load order. Third reason is that there will be no more load order shuffle. One set of Previsibines to rule all.
Q: Do I need a supercomputer to do this?
A: Absolutely not! I build this "mod" and ran all tests with this kind of hardware:
Processor: Intel Xeon CPU E3-1241 v3
Motherboard: ASRock Z97 Anniversary
Memory: 8 GB RAM.
Hard Drive 1: 500GB SSD (OS and Swap)
Hard Drive 2: 2TB HDD (Fallout 4)
NOTE: This process does not care about GPU. It does not utilize it at all.
Q: In your older mod you stated that CLEAN option requires license file to function. But in this mod you're using that option to create PreCombined and PreVisibility. What's going on here?
A: I was wrong. Either of available (CLEAN or FILTERED) options do not require valid license file to function. Both of them work out-of-the-box. There seem to be only one difference between these options: FILTERED uses much less CPU and memory when generating Previsibines, but it creates files that are huge in size. CLEAN option uses absolutely astounding amount of memory when generating Previsibines (that is why Virtual Memory needs to be set at 200GB), but the files are much, much smaller. There is a rumor that Previsibines generated with FILTERED option reduces CPU usage and could help with heavily scripted mods, but I am very skeptical about this.
Q: What the hell does this mod actually do?
A: It is not a mod. It is a tool, a guide, to semi-automatically create PreCombines and Previsibility data (= Previsibines) to almost all plugins in your load order.
Q: Can I still create Previsibines to multiple mods at once?
A: Yes, of course. But remember to clean up your override, your plugin. Otherwise it will create a lot of problems. Like double objects (doors, furniture etc.) and other stuff that will reduce Draw Calls in to oblivion. Without cleaning your override it will become absolute opposite what it was created for.
Q: Can these scripts create Previsibines to any mod?
A: Yes. Scripts in DIY Previsibines Repair Toolkit – REDUX package are designed so that with them you can process any mod there is. But be warned: not all mods are made equal. Not all mods need or even can be processed.
Q: Performance?
A: FPS rise will be significant (+20 up to +40). So is also drop in Draw Calls (-5k up to -10k).
Q: Can I this be done in middle of playthrough?
A: Yes! You can alter Previsibines as much as you want, like textures, and it has no effect to save file. But there is "save/reload" effect. After making a change in your Previsibines, load a save, make a save and shutdown the game. Start the game, load new save and you will see the difference.
And extra credit, millions of Interweb points and extremely expensive incense to:
kediwah, Zilav, Sheson (sorry, mate, my firstborn will go to perchick71), ExcerptNovela, VIitS, SeargeDP, BenRierimanu, Pra, BiRaitBec, Aers and many, many others.


