0 of 0


About this mod
A step-by-step tutorial on how I enable myself to create custom furniture animations with 3DS Max and then implement these animations in-game using the Creation Kit.
- Requirements
- Permissions and credits
Animation Software
- 3DS Max 2013, 2014 or 2015 (recommended)
- Fallout 4 Animation Kit (F4AK)
HKXPack GUI, requires Java 64-bit
NIFTools Max Plugins 3.8.0 - Havok Content Tools 2014 (HCT 2014), download HavokContentTools_2014-1-0_20140830_64Bit_PcXs.exe
- F4Biped Animation Rig, used for animating humans in first-person and third-person, and power armor in first-person
F4Animation.hko (HCT 2014 configuration sets)
skeleton.hkx (32-bit human skeleton)
F4BipedCATImport.max and F4BipedCAT.max (importing and exporting animations)
Fallout4Rig1st.txt and Fallout4Rig3rd.txt (human skeleton definition files) - Power Armor CATRig for 3DS Max, used for animating power armor in third-person
ict_presets.hko (HCT 2014 configuration sets)
pa_skeleton.hkx (32-bit power armor skeleton)
PA_Import_2015.max and PA_Export_2015.max (importing and exporting animations)
pa_bone_file.txt (power armor skeleton definition file)
- Install 3DS Max, HCT 2014 and NIFTools 3.8.0
- Extract F4AK and the CAT rig(s) from their archives
- This tutorial will focus on animations using the human skeleton, but the steps are the same for other races, assuming that equivalent assets are available
Video Tutorials
Converting and Importing Animations
Converting, Importing, Editing and Exporting Animations
Implementing Existing Animations
Written Tutorials
Implementing Custom Animations
Honourable Mentions
- BlahBlahDEEBlahBlah: Being the Fallout 4 mounted actors expert I bombarded him with all sorts of questions that allowed me to better understand how they function
- kinggath: Creating a video tutorial that expanded on the source material
- SparrowPrince: Going through this with me
Files
3DS Max
I have included the HKX, FBX, CLP, and MAX animation files at each stage of the process in 3DS Max for you to reference. Also included is the MAX file and the exported NIF file used to create the furniture object that is used in the mod.
Creation Kit
I have created a mod that demonstrates how to implement custom furniture animations into the game using the Creation Kit. It covers some basic concepts that I would like to convey.
I will give you a brief run-down of what each furniture object uniquely demonstrates. The animations used in the mod have been taken from the base game, and so I will also tell you where I have taken them from. It is worth noting that I use a combination of flavor, furniture and idle animations in this mod, showing you that any existing animation can be implemented as a furniture animation.
The furniture objects can be found under Special in the workshop menu. After you have tested it out in-game I recommend you take a look at how it has been done in the Creation Kit. To save you some time, every form in the mod has the CFAT prefix.
Key Information
Spoiler:
Show
CFAT_FURN_FurnitureBehavior_1stPFurnitureIdleBehavior_Cigarette
- First-person and third-person subgraph data can use different behavior graphs
- The 1stPFurnitureIdleBehavior behavior graph plays the PoseA_Idle1 animation in first-person without having to force first-person
- The 1stPFurnitureIdleBehavior behavior graph loops the PoseA_Idle1 animation
- The 1stPFurnitureIdleBehavior behavior graph will not allow you to switch to first-person if you enter in third-person
- The FurnitureBehavior behavior graph loops the PoseA_Idle1 animation
- The FurnitureBehavior behavior graph will not play the PoseA_Idle1 animation in first-person
- Behavior graphs will not load animation objects if you enter in first-person
- The PoseA_Idle1 animation will play and animation objects will appear in first-person if you force first-person
- Only your arms will be rendered in first-person
- The EnterFromStand and ExitToStand animations are nearly instant, demonstrating that it is possible to effectively remove a required animation
- There is a distinct break between the EnterFromStand, PoseA_Idle1 and ExitToStand animations that clearly illustrates where one ends and another begins
- The difference between the FurnitureBehavior and FurnitureNoMirrorBehavior behavior graphs is subtle because I have not been able to find it
- The SingleAnimFurniture behavior graph plays the Activate animation a single time
- The SingleAnimFurniture behavior graph will play the Activate animation in third-person if you do not force first-person
Animation Files
Spoiler:
Show
Meshes\CFAT\Animations\Cigarette
- EnterFromStand: Meshes\Actors\Character\Animations\MT\Neutral\To_Smoking.hkx
- ExitToStand: Meshes\Actors\Character\Animations\MT\Neutral\Smoking\To_Normal.hkx
- PoseA_Idle1: Meshes\Actors\Character\Animations\MT\Neutral\Smoking\PoseA_IdleFlavor1.hkx
- EnterFromStand: Meshes\Actors\Character\Animations\Furniture\FightAnnouncer\EnterFromStand.hkx
- ExitToStand: Meshes\Actors\Character\Animations\Furniture\FightAnnouncer\ExitToStand.hkx
- PoseA_Idle1: Meshes\Actors\Character\Animations\DynamicAnims\WhistleDog.hkx
- EnterFromStand: Meshes\Actors\Character\Animations\Furniture\SittingOnFloor\Neutral\EnterFromStand.hkx
- ExitToStand: Meshes\Actors\Character\Animations\Furniture\SittingOnFloor\Neutral\ExitToStand.hkx
- PoseA_Idle1: Meshes\Actors\Character\Animations\DynamicAnims\WhistleDog.hkx
- Activate: Meshes\Actors\Character\Animations\DynamicAnims\WhistleDog.hkx
Converting Animations
Fallout 4 character animations are 64-bit HKX files. However, animations are imported into 3DS Max as FBX files. Therefore, the 64-bit HKX files must first be converted to 32-bit HKX files before they can then be converted to FBX files.
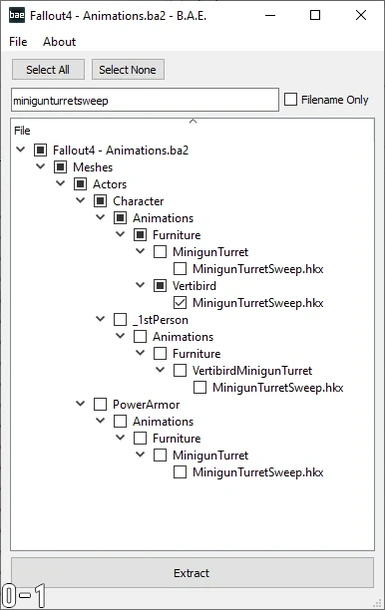
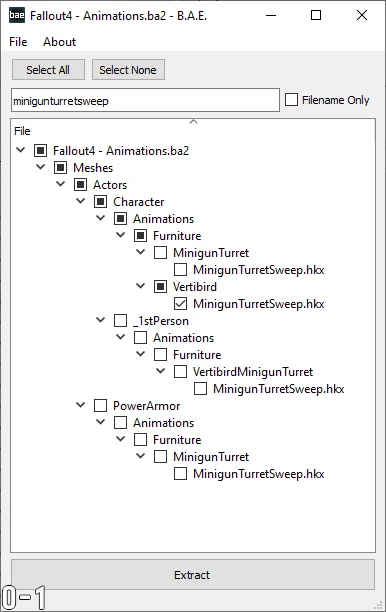
- Identify an animation that you want to edit and extract it from the Fallout4 - Animations.ba2 archiveSpoiler:Show
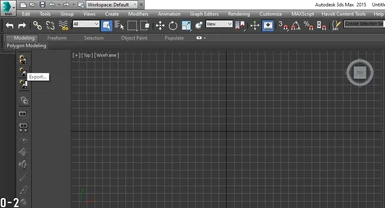
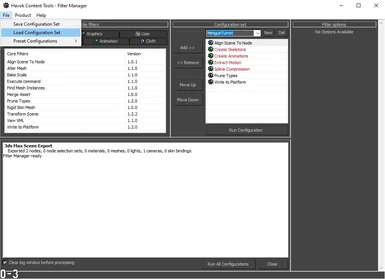
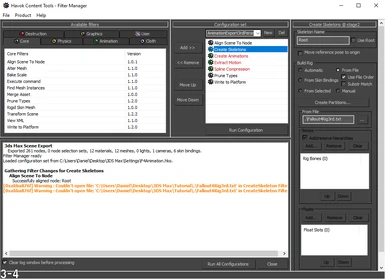
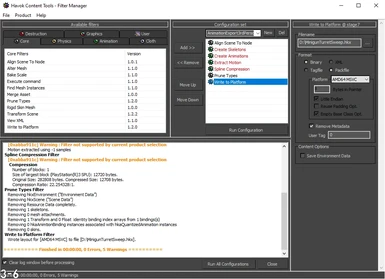
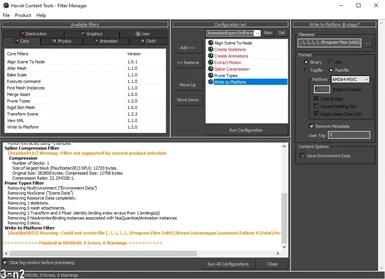
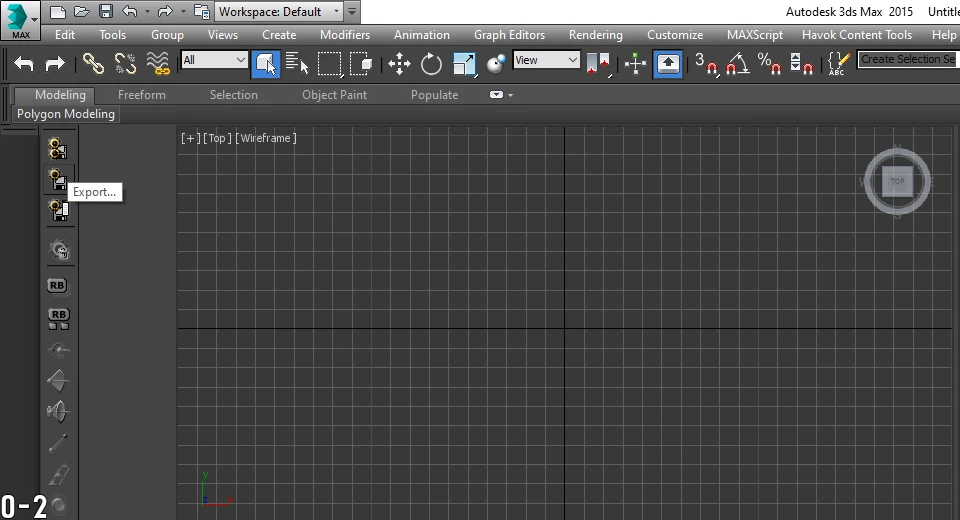
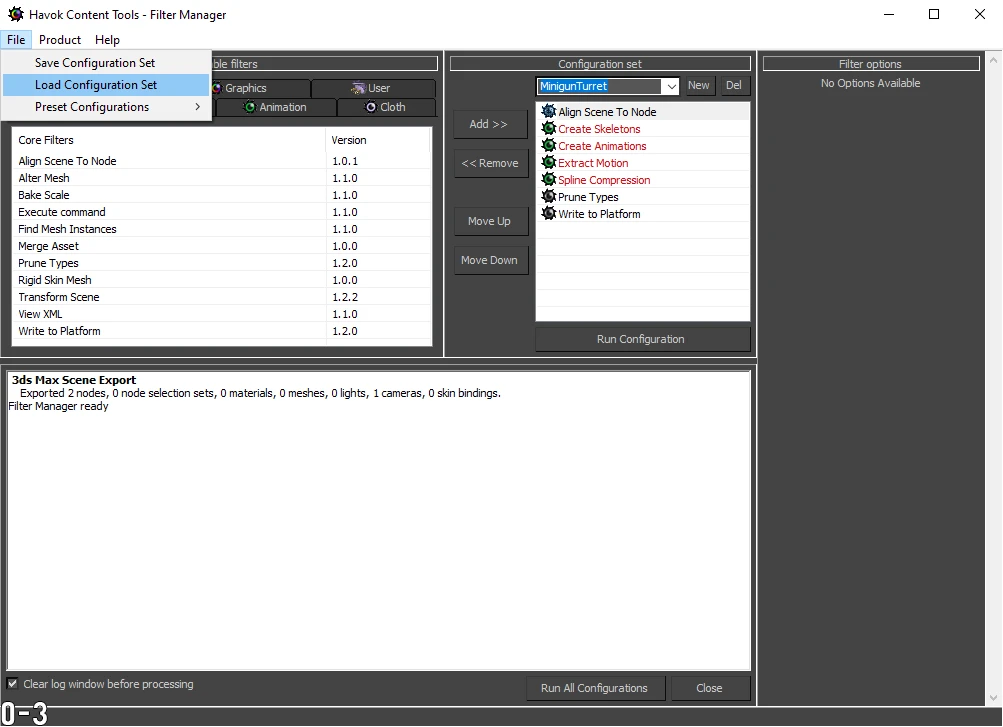
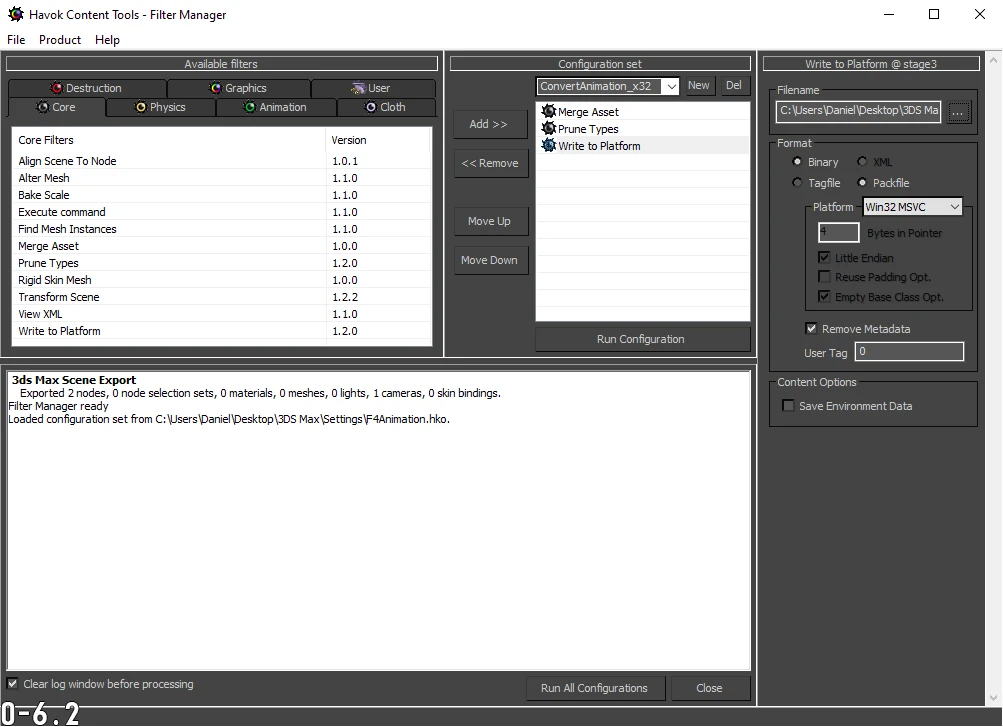
- Launch 3DS Max and click Export... to open the Havok Content Tools - Filter Manager windowSpoiler:Show
- Click File → Load Configuration Set and select F4Animation.hkoSpoiler:Show
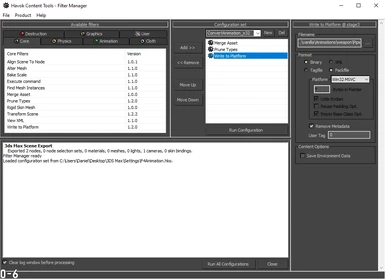
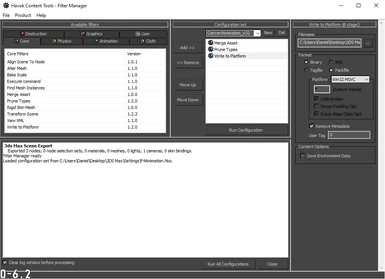
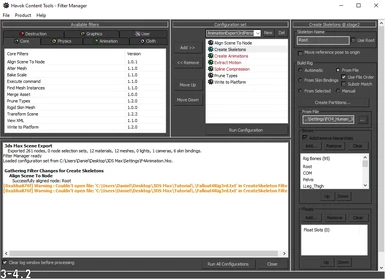
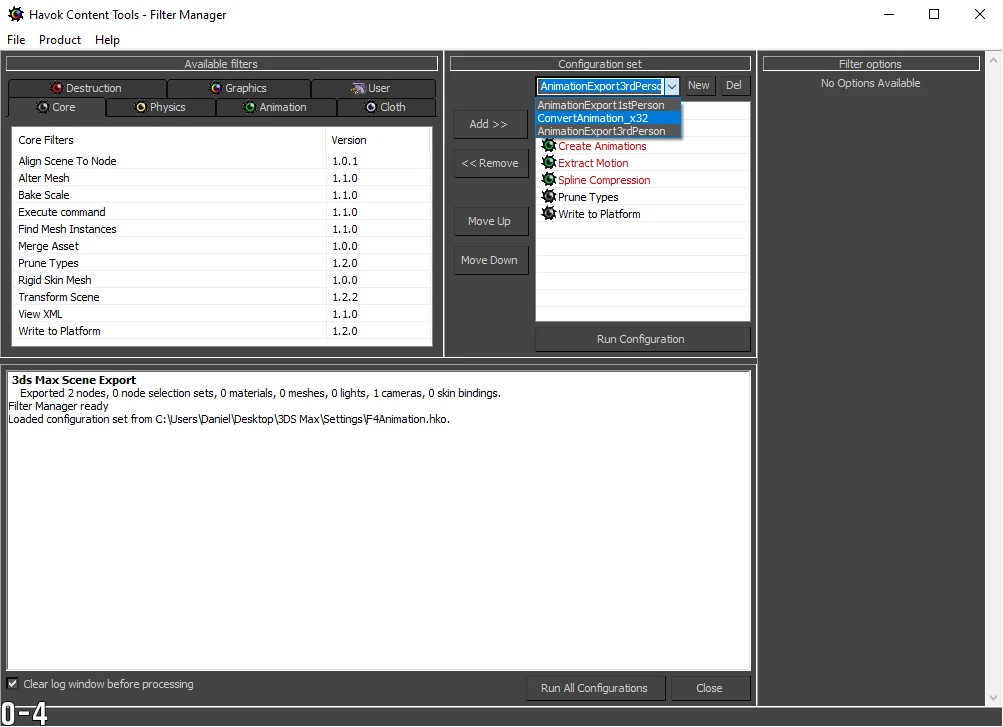
- Under the Configuration Set section select ConvertAnimation_x32 in the drop-downSpoiler:Show
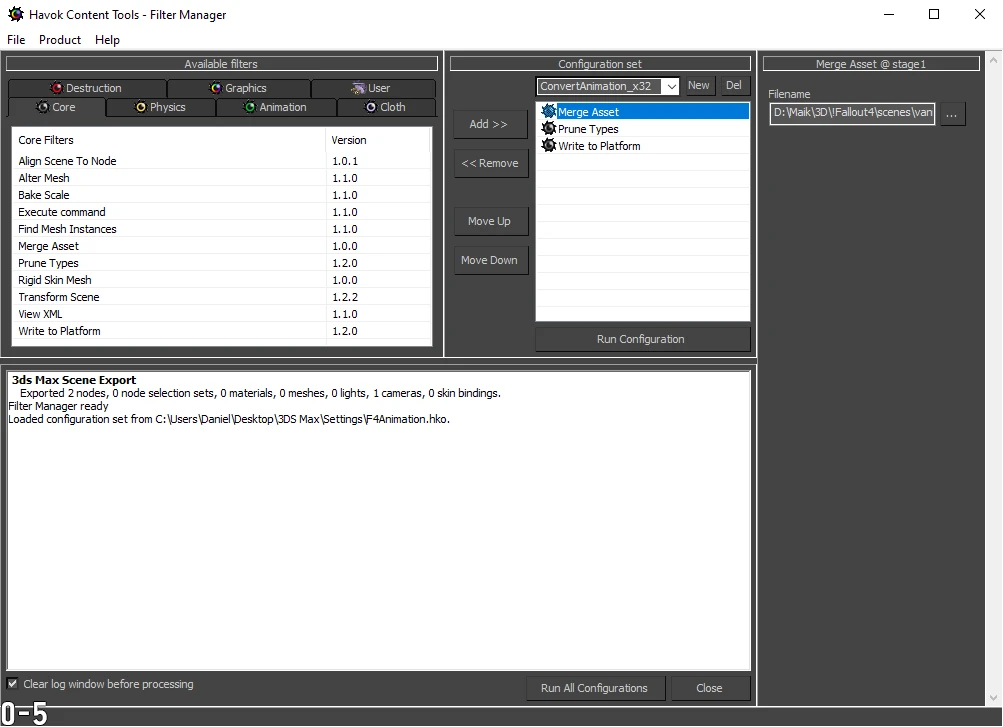
- In Merge Asset click ... under Filename to select the 64-bit HKX file that you want to convert to a 32-bit HKX fileSpoiler:Show
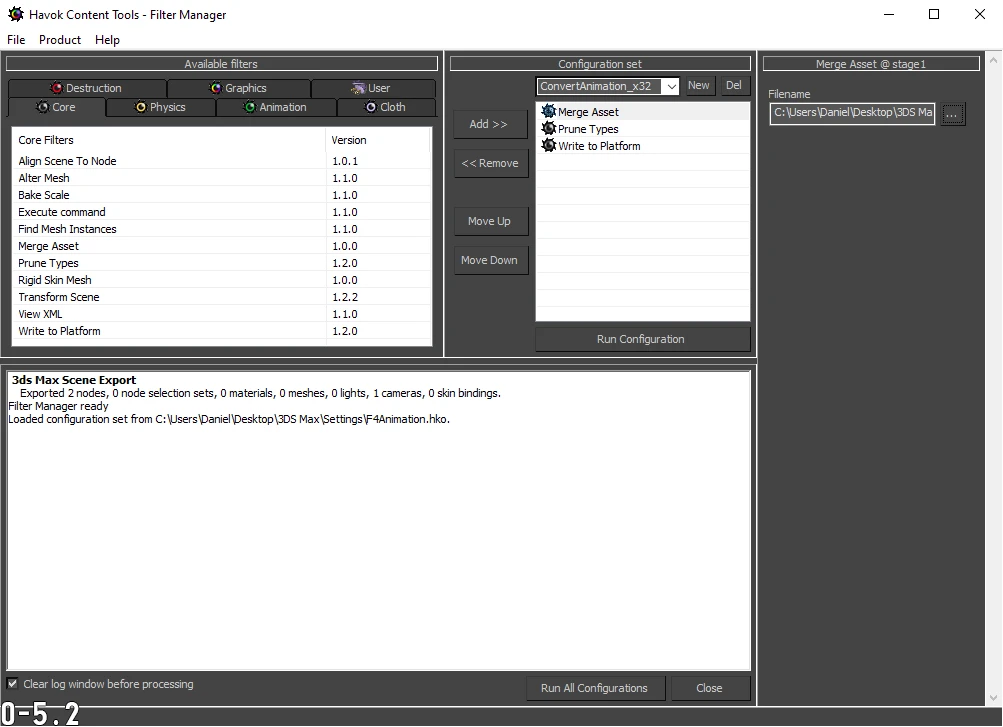
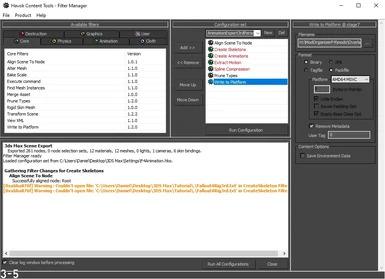
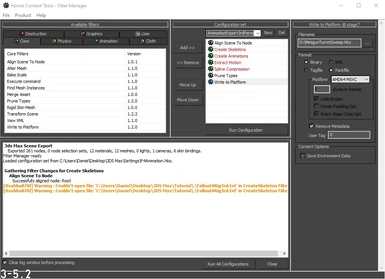
- In Write to Platform click ... under Filename to enter the file path of the converted fileSpoiler:Show

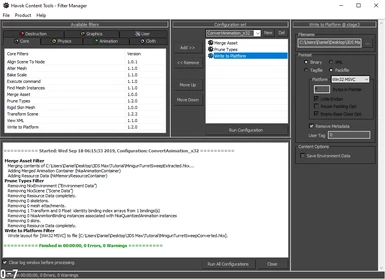
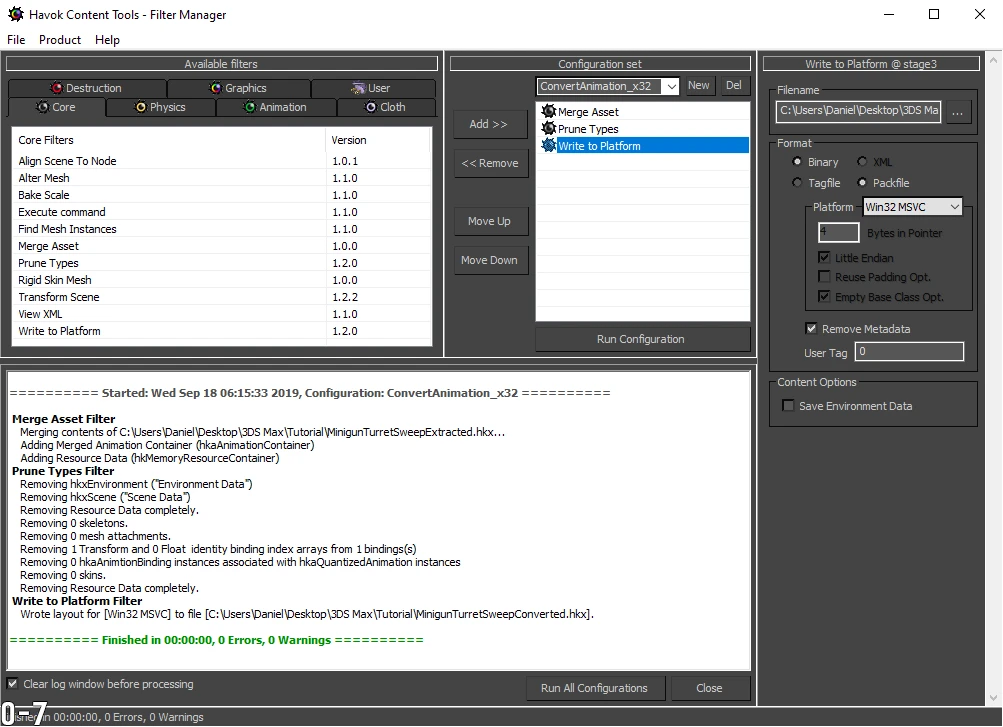
- Click Run Configuration and open the folder containing the converted fileSpoiler:Show
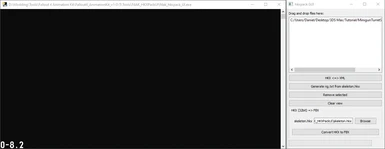
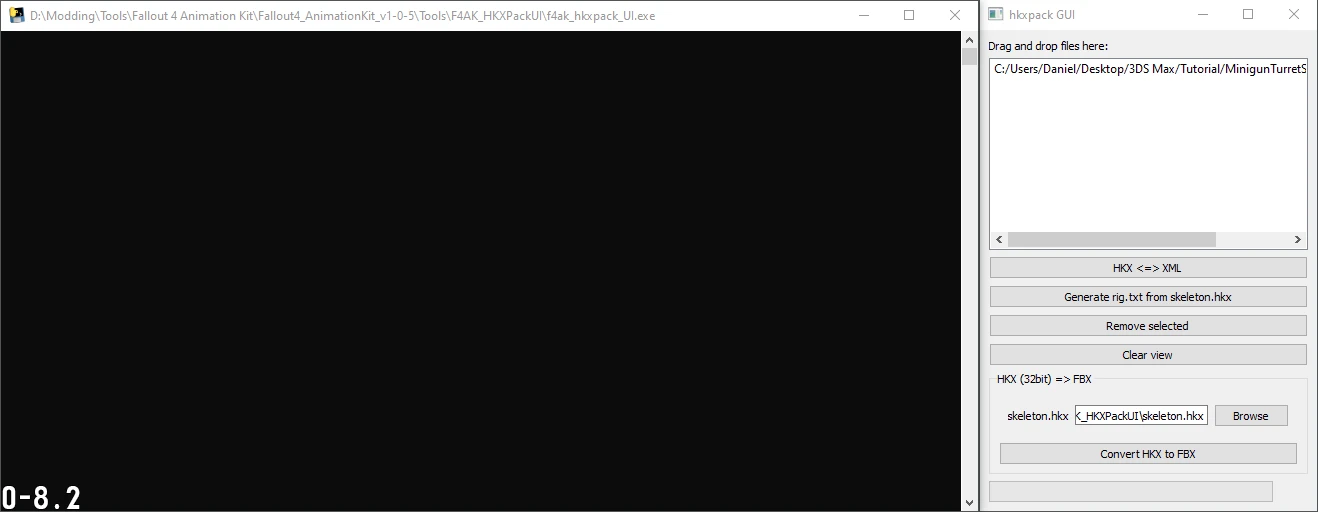
- Launch HKXPack GUI and drag and drop the converted file into the HKXPack GUI window Spoiler:Show
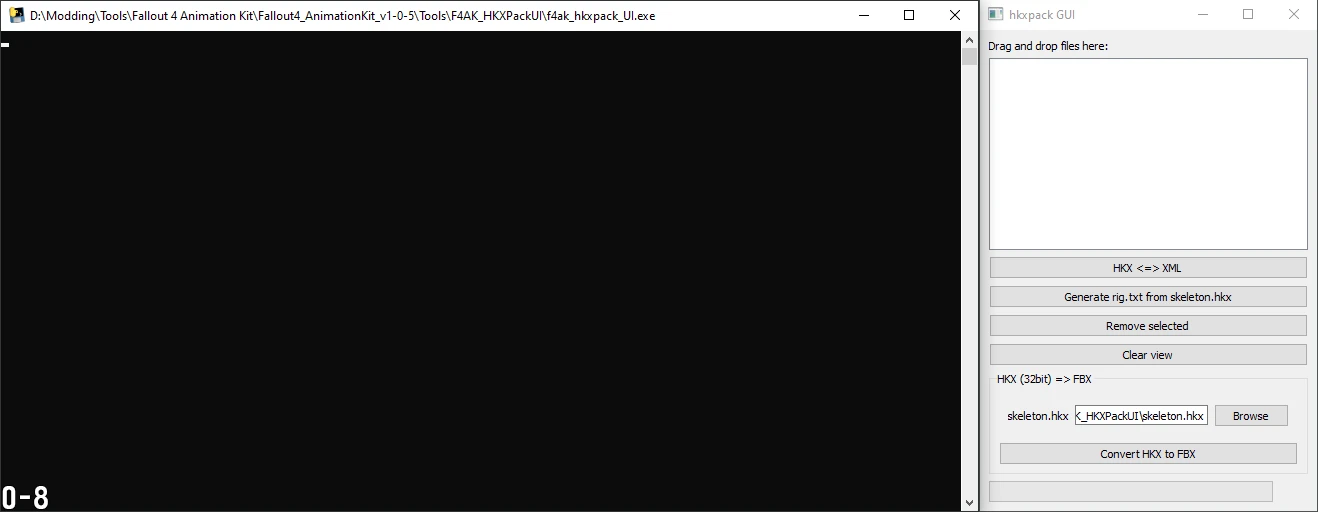
You can safely ignore the Runtime Error when launching HKXPack GUISpoiler:Show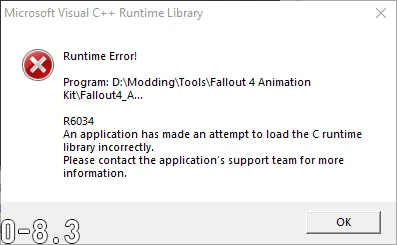
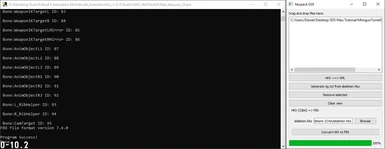
- Click Browse and select the 32-bit skeleton.hkx fileSpoiler:Show
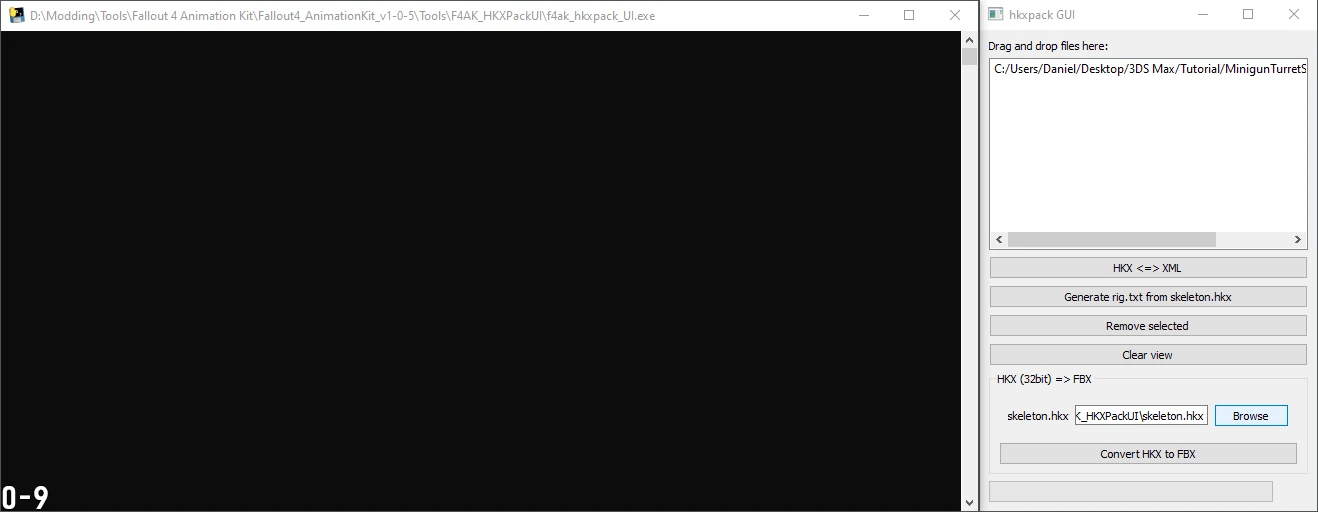

- Click Convert HKX to FBX and the new FBX file will appear in the same folder as the converted fileSpoiler:Show


An animation must first be imported into F4BipedCATImport.max as a FBX file, and then saved as a CLP file that you then open in F4BipedCAT.max.
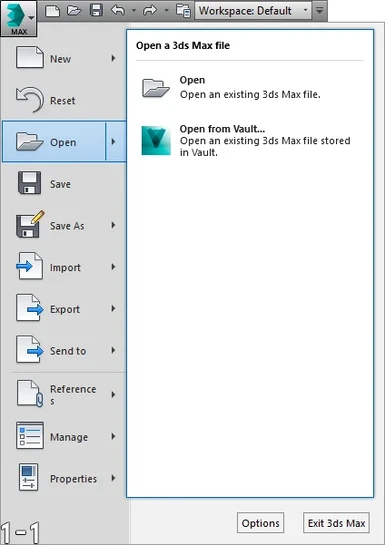
- Launch 3DS Max and click File → Open to open F4BipedCATImport.maxSpoiler:Show


- Click File → Import and select the FBX fileSpoiler:Show

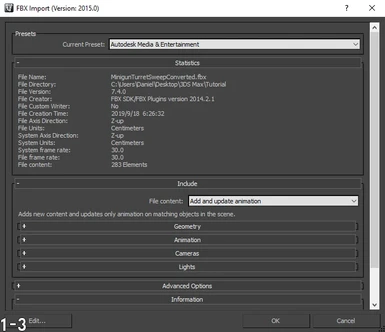
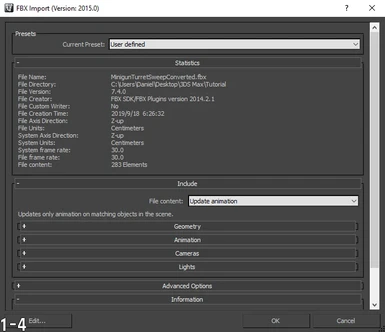
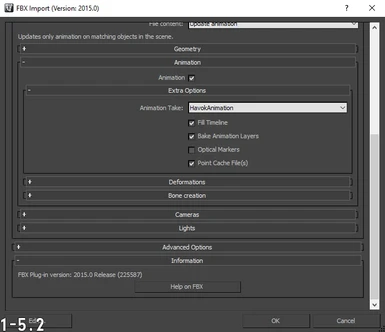
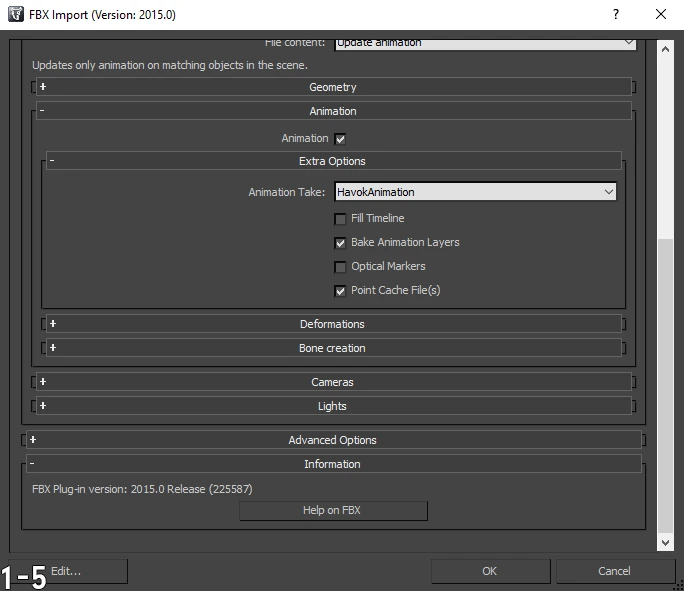
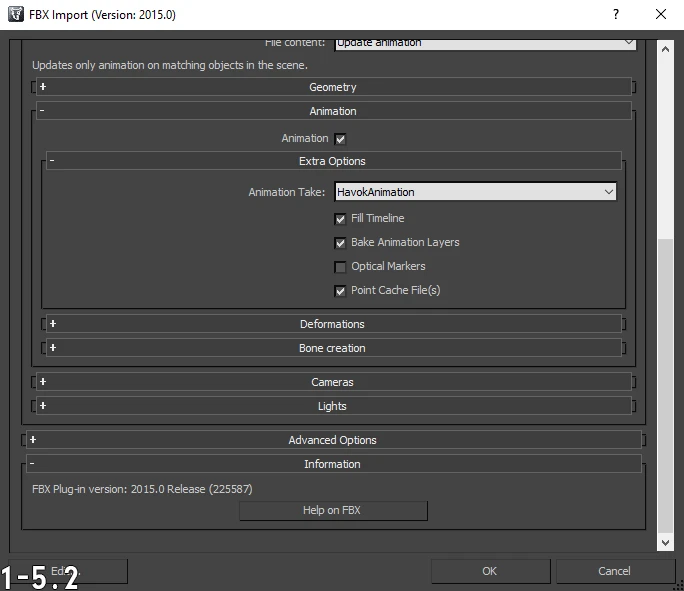
- In the FBX Import window, select Autodesk Media & Entertainment in the Current Preset drop-downSpoiler:Show
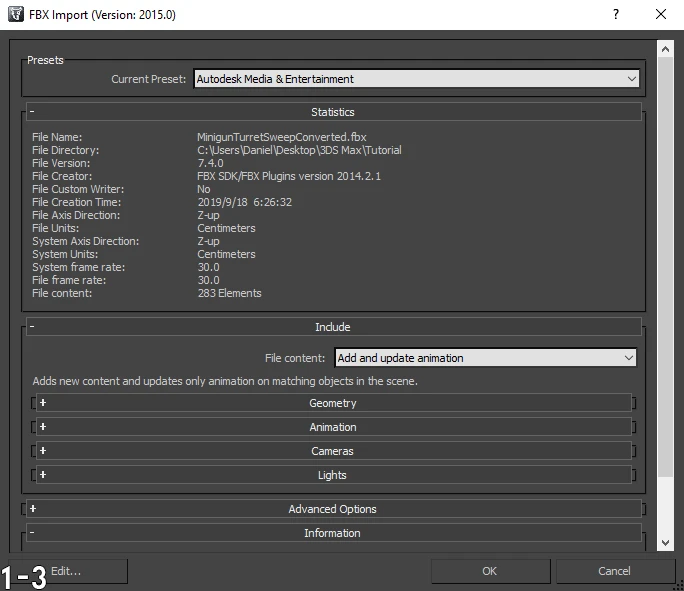
- In the File content drop-down select Update animationSpoiler:Show
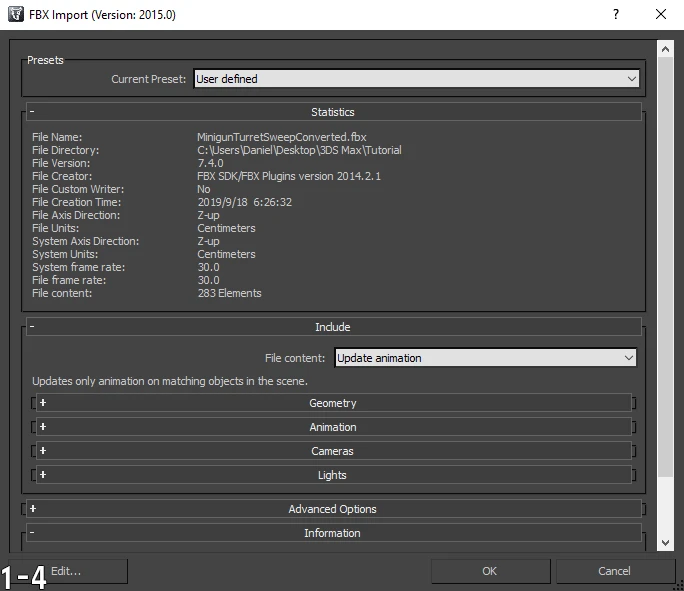
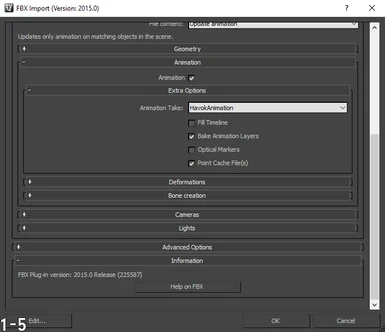
- Expand the Animation and Extra Options headings and flag Fill Timeline and click OKSpoiler:Show
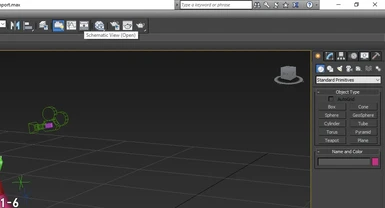
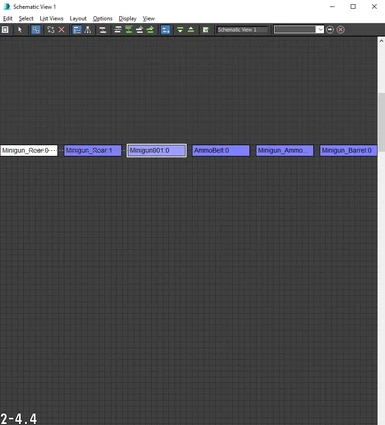
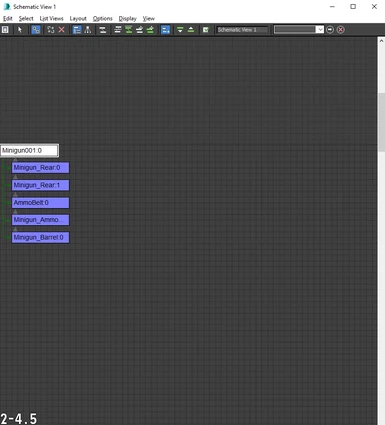
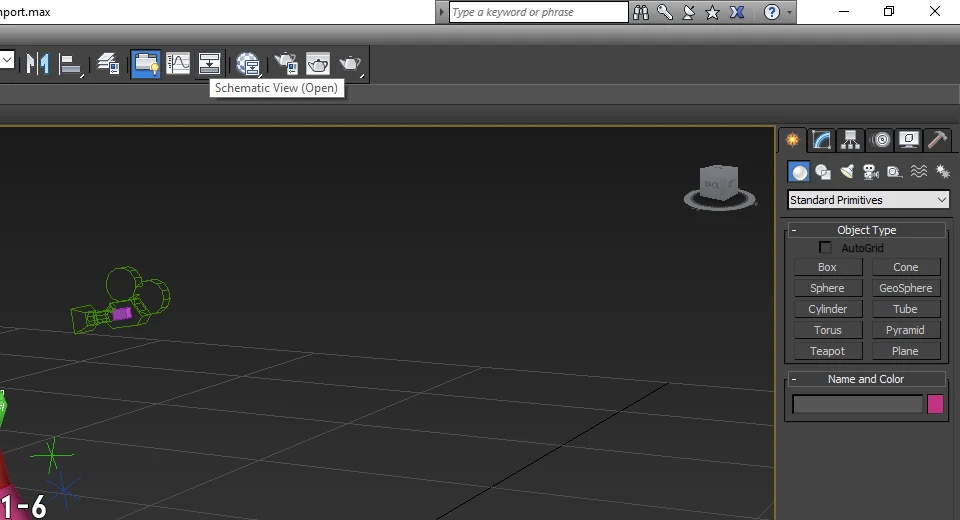
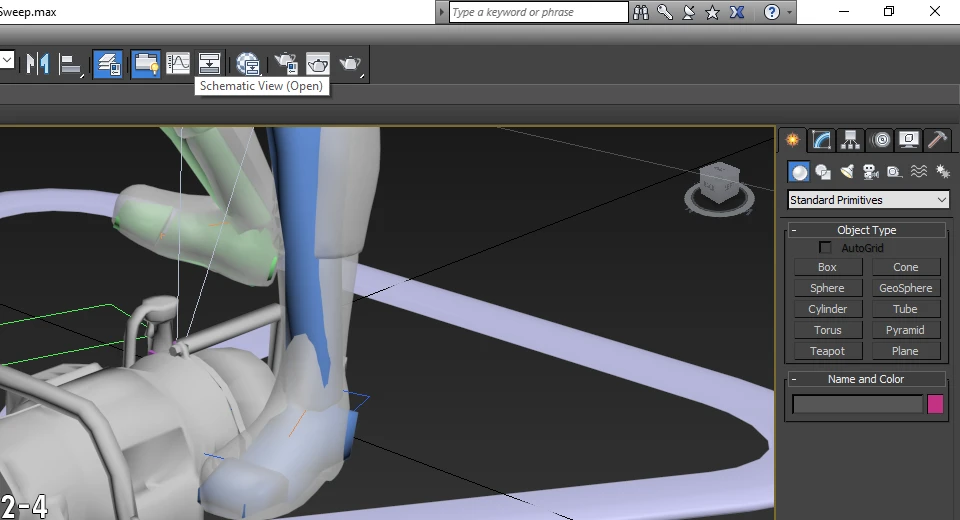
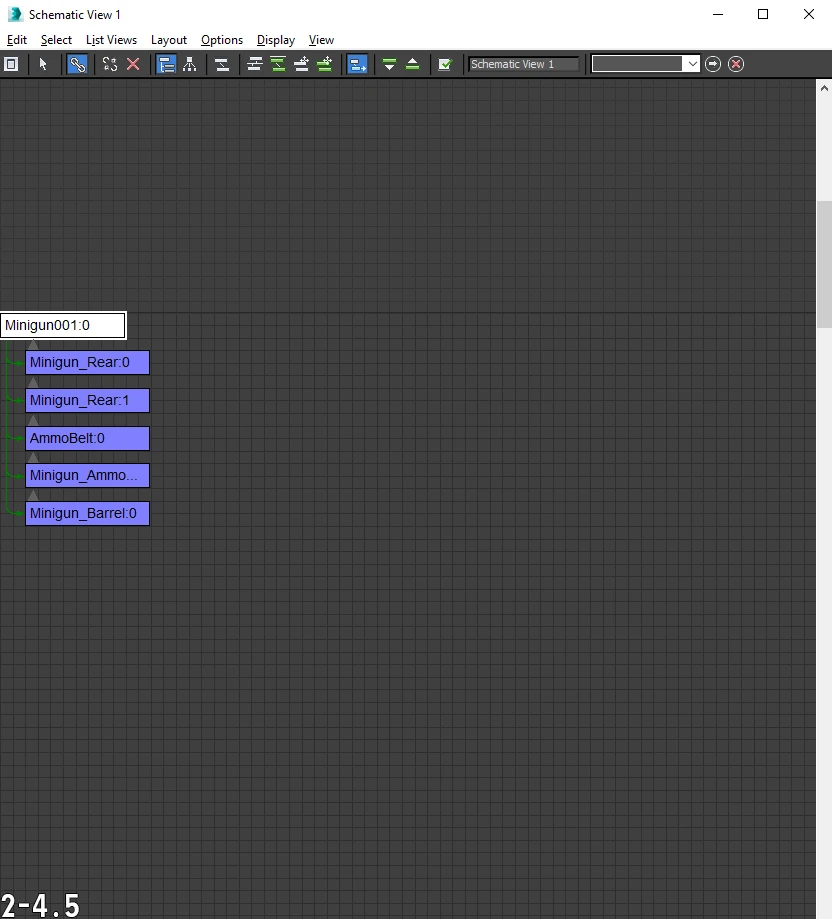
- Click Schematic View (Open) to open the Schematic View window and select the Root boneSpoiler:Show
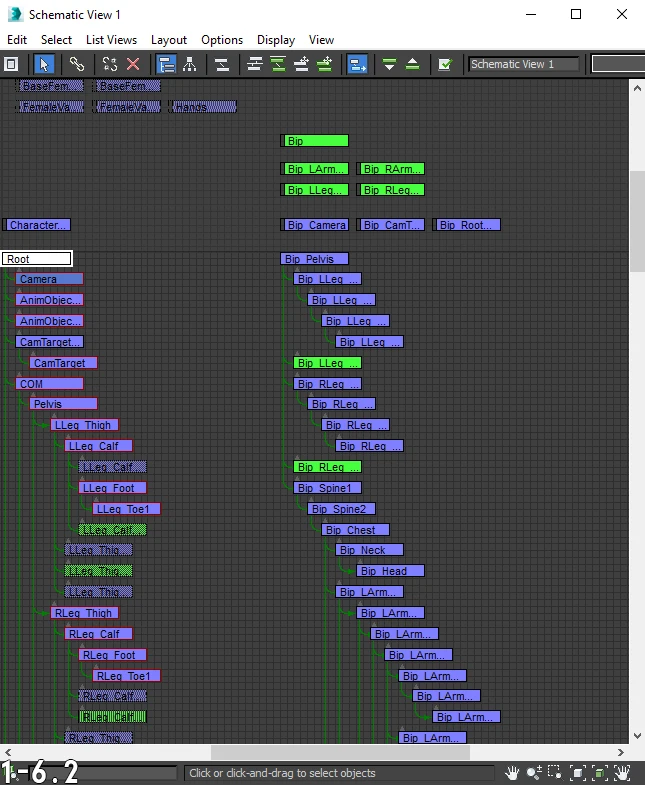
- Right-click the viewport and select Rotate and set the rotation of the root bone to (0, 0, 0)Spoiler:Show


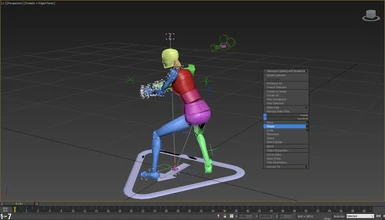
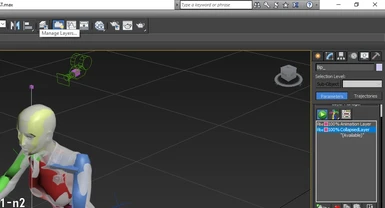
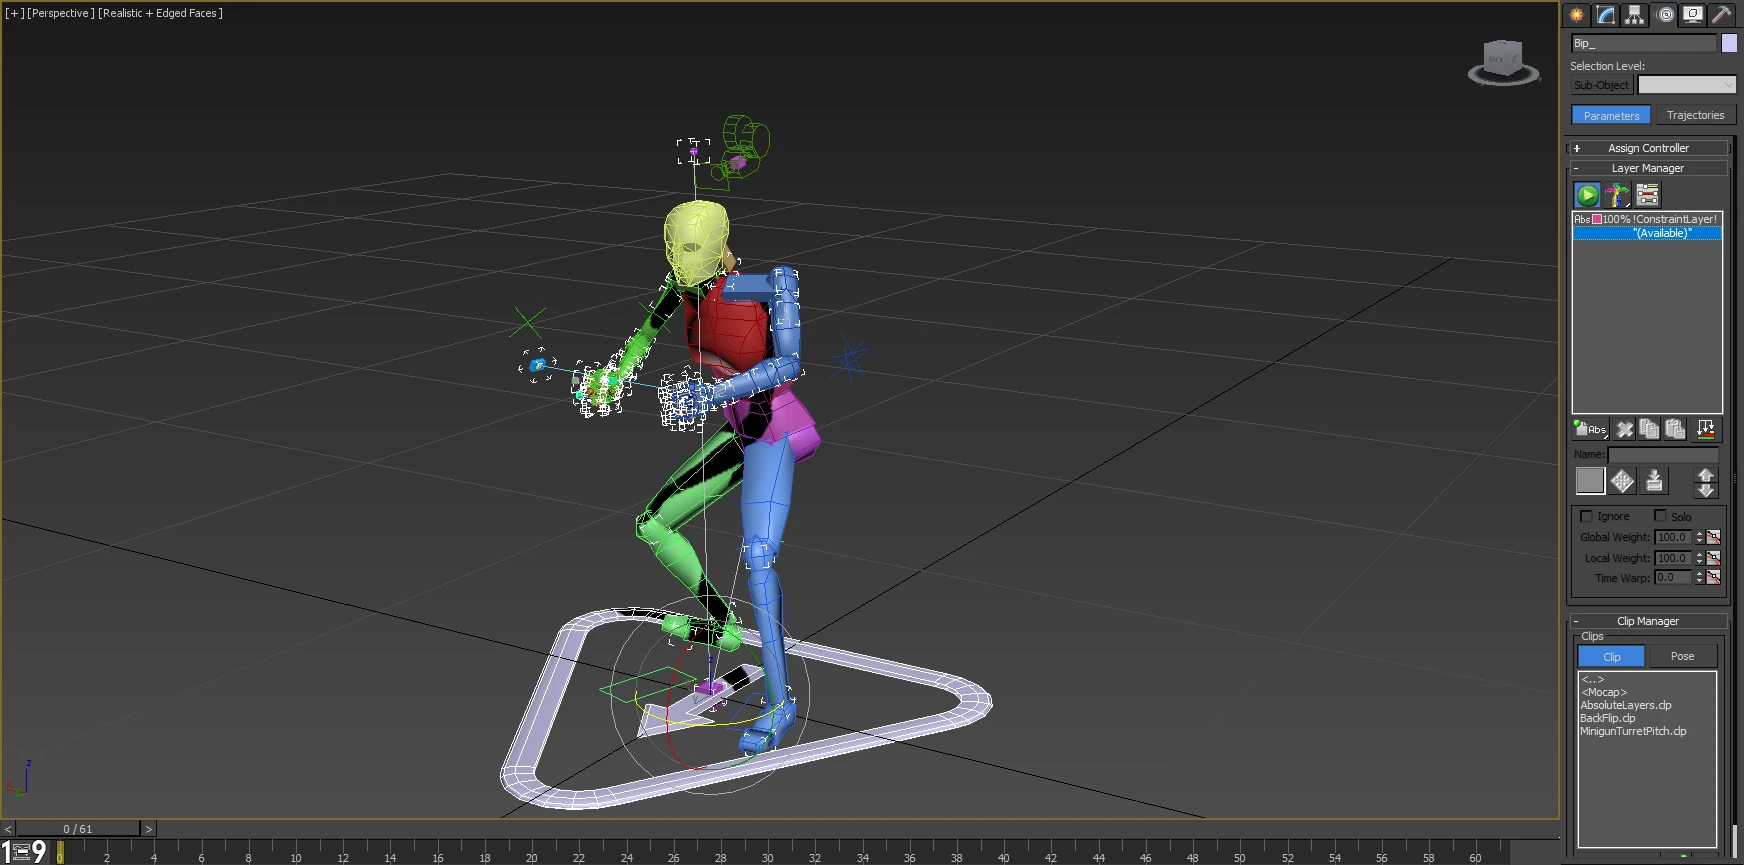
- Select the Bip_ bone in the Schematic View window and go to the Motion tabSpoiler:Show
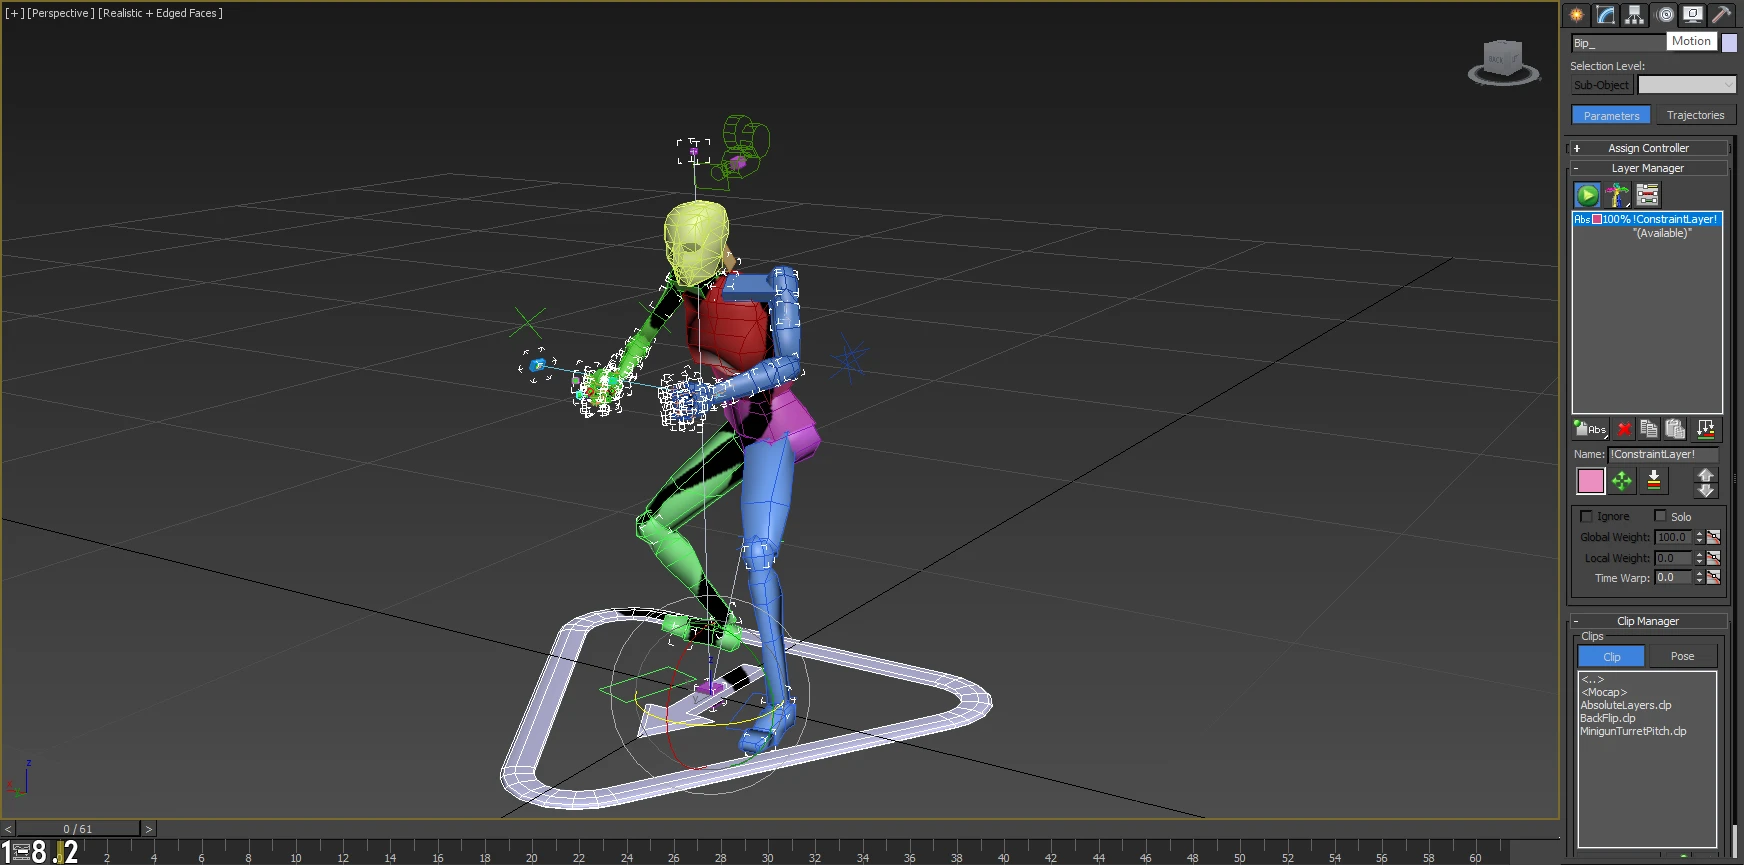
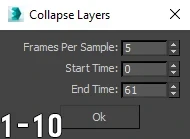
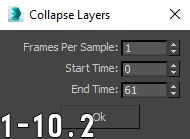
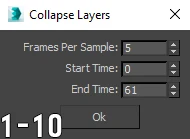
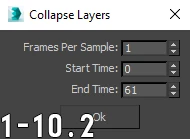
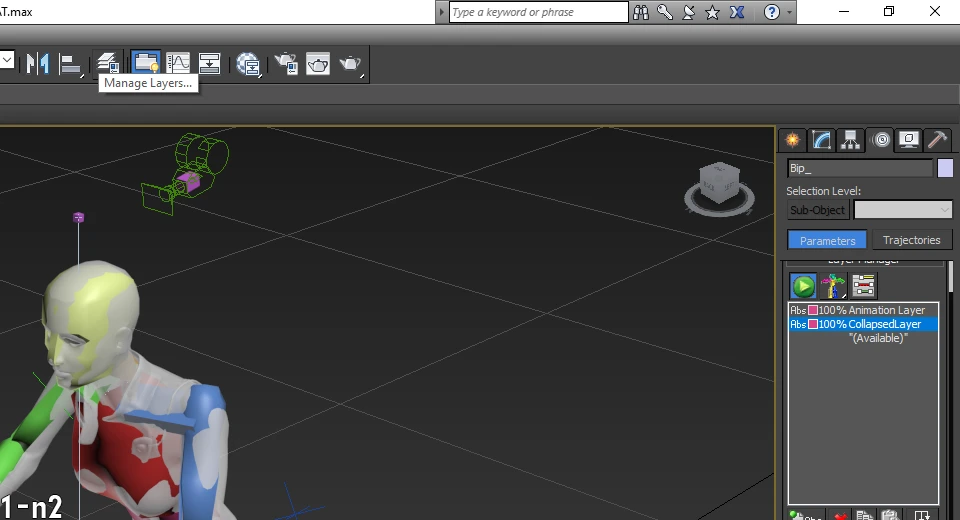
- Select the *(Available)* layer and click Collapse LayersSpoiler:Show
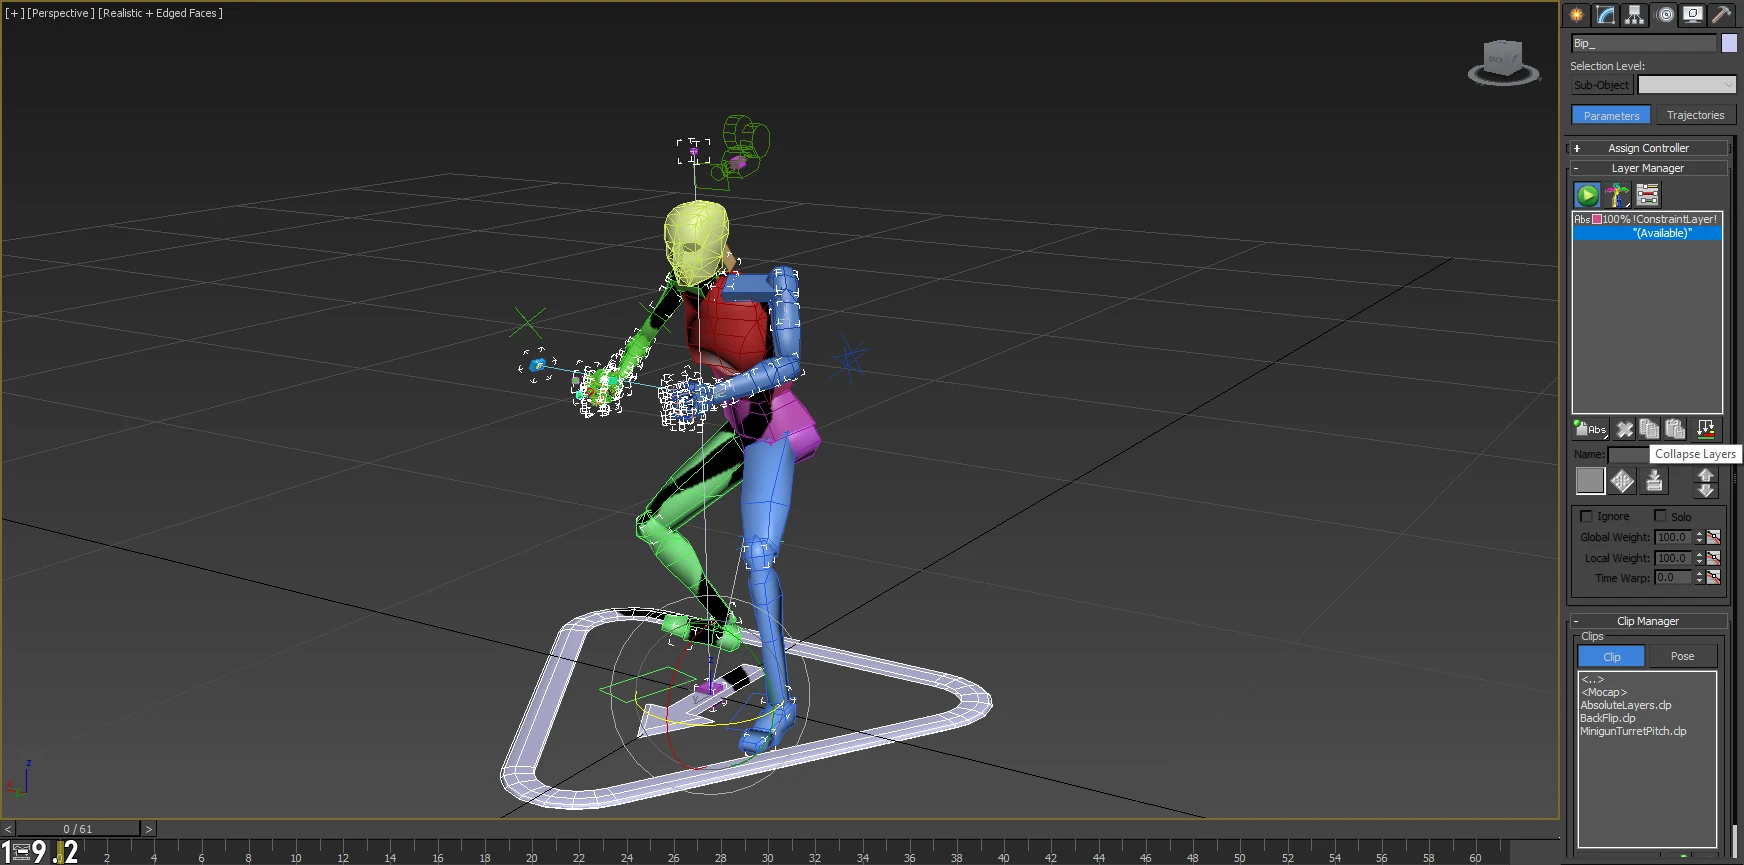
- Change Frames Per Sample from 5 to 1 in the Collapse Layers window and click OkSpoiler:Show
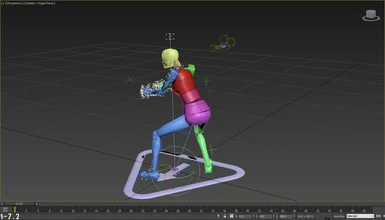
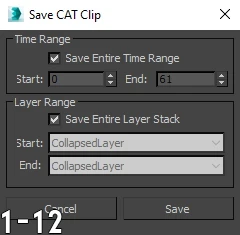
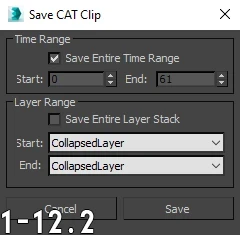
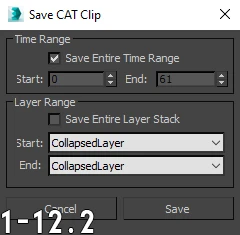
- Scroll to the bottom of the Motion tab and click Save Animated Clip to save the animation as a CLP file Spoiler:Show

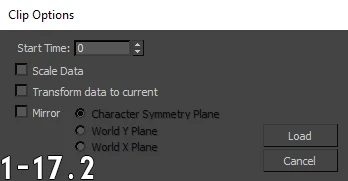
I recommend that you add the "_X" suffix to the name of the CLP file, where X is the number of frames in the animation - Unflag Save Entire Layer Stack in the Save CAT Clip window and change both the Start and End drop-downs to CollapsedLayer and click SaveSpoiler:Show

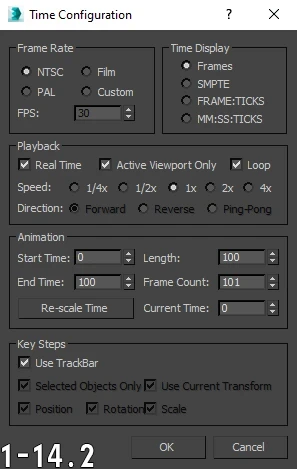
- Click File → Open and open F4BipedCAT.maxSpoiler:Show

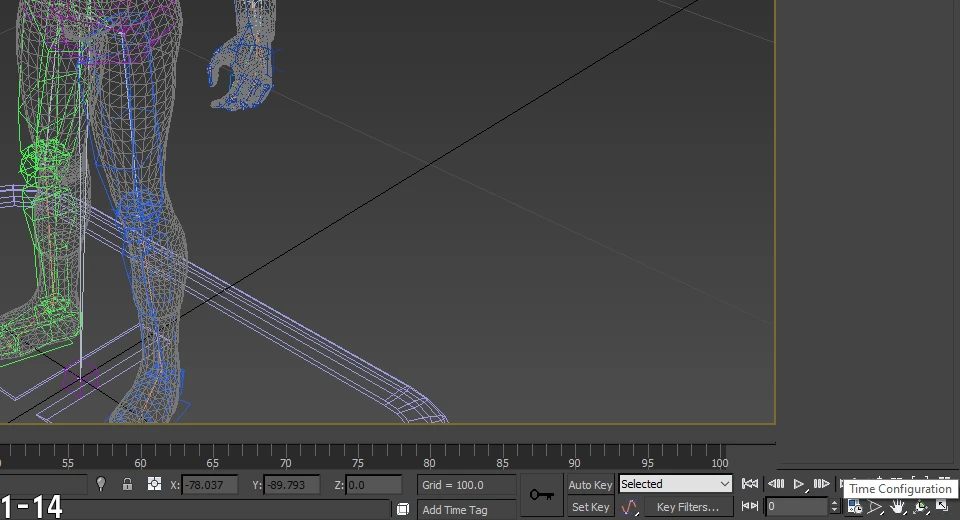
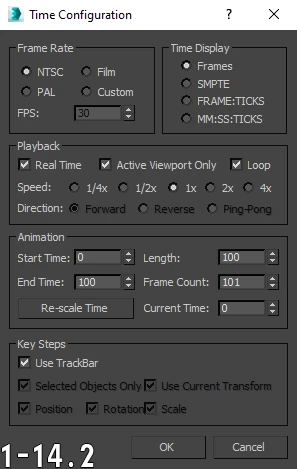
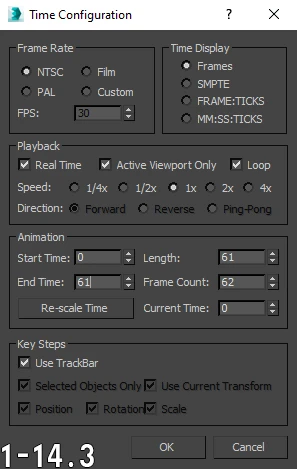
- Click Time Configuration and change End Time in the Time Configuration window to the number of frames in the animation and click OKSpoiler:Show
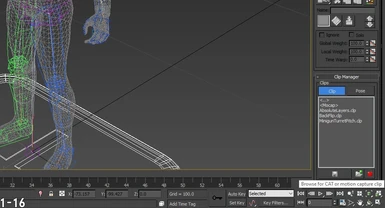
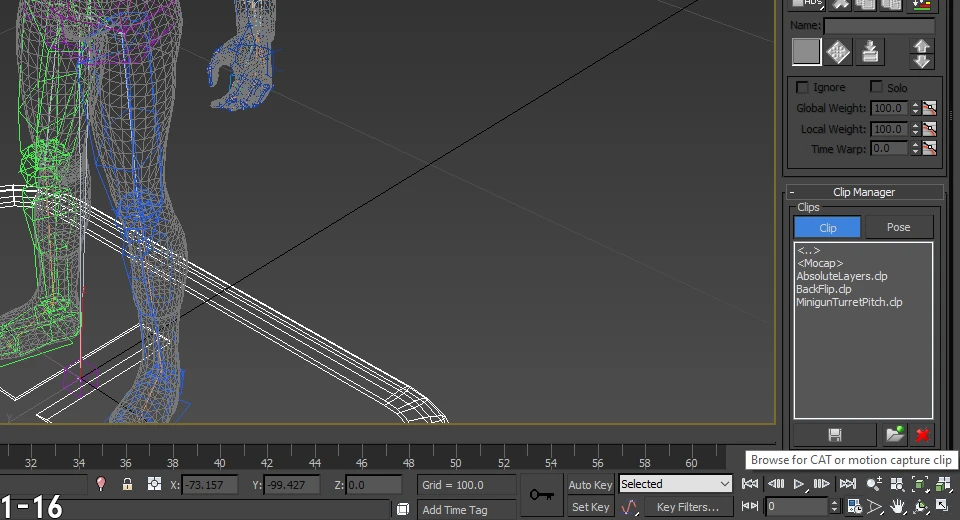
- Select the Bip_ bone and go to the Motion tab and select the *(Available)* layerSpoiler:Show

- Scroll to the bottom of the Motion tab and click Browse for CAT or motion capture clip to import the CLP fileSpoiler:Show
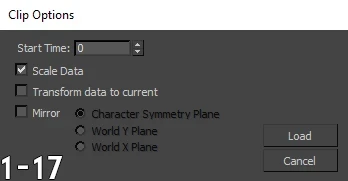
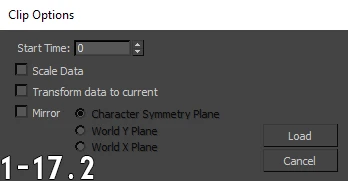
- Unflag Scale Data in the Clip Options window and click LoadSpoiler:Show

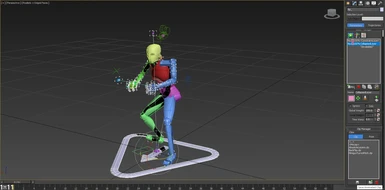
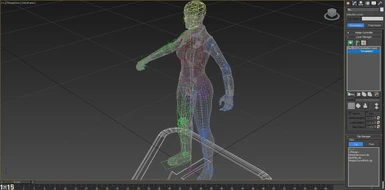
- Cycle through the frames of the animation to restore the character to their correct positionSpoiler:Show
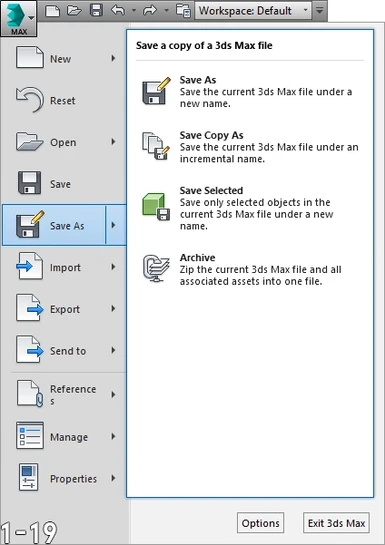
- Click File → Save As to avoid saving over the F4BipedCAT.max fileSpoiler:Show
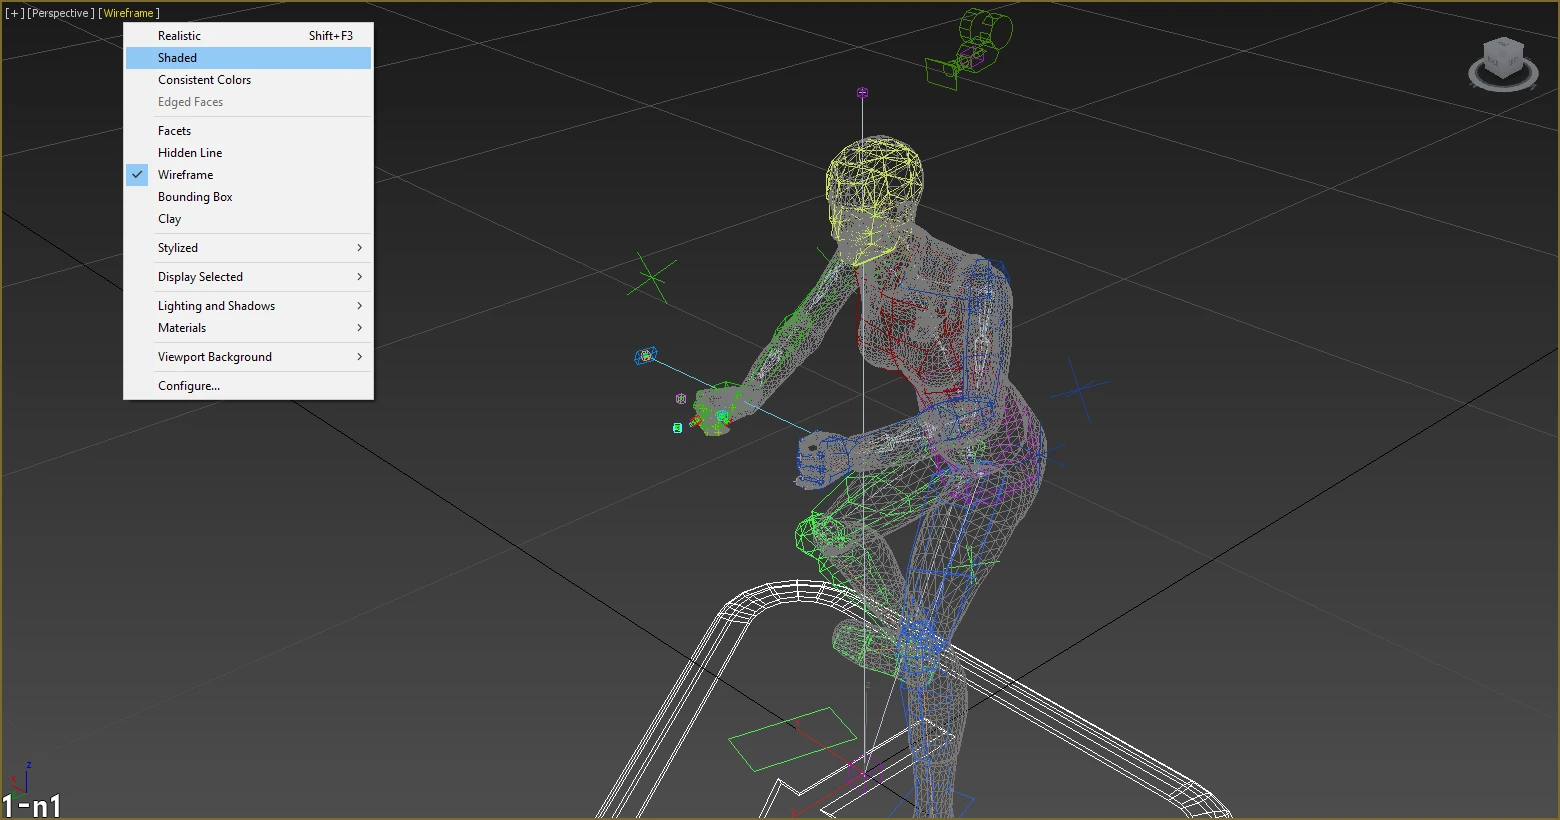
- I recommend that you change the viewport from Wireframe to Shaded because it is easier to see what is going onSpoiler:Show
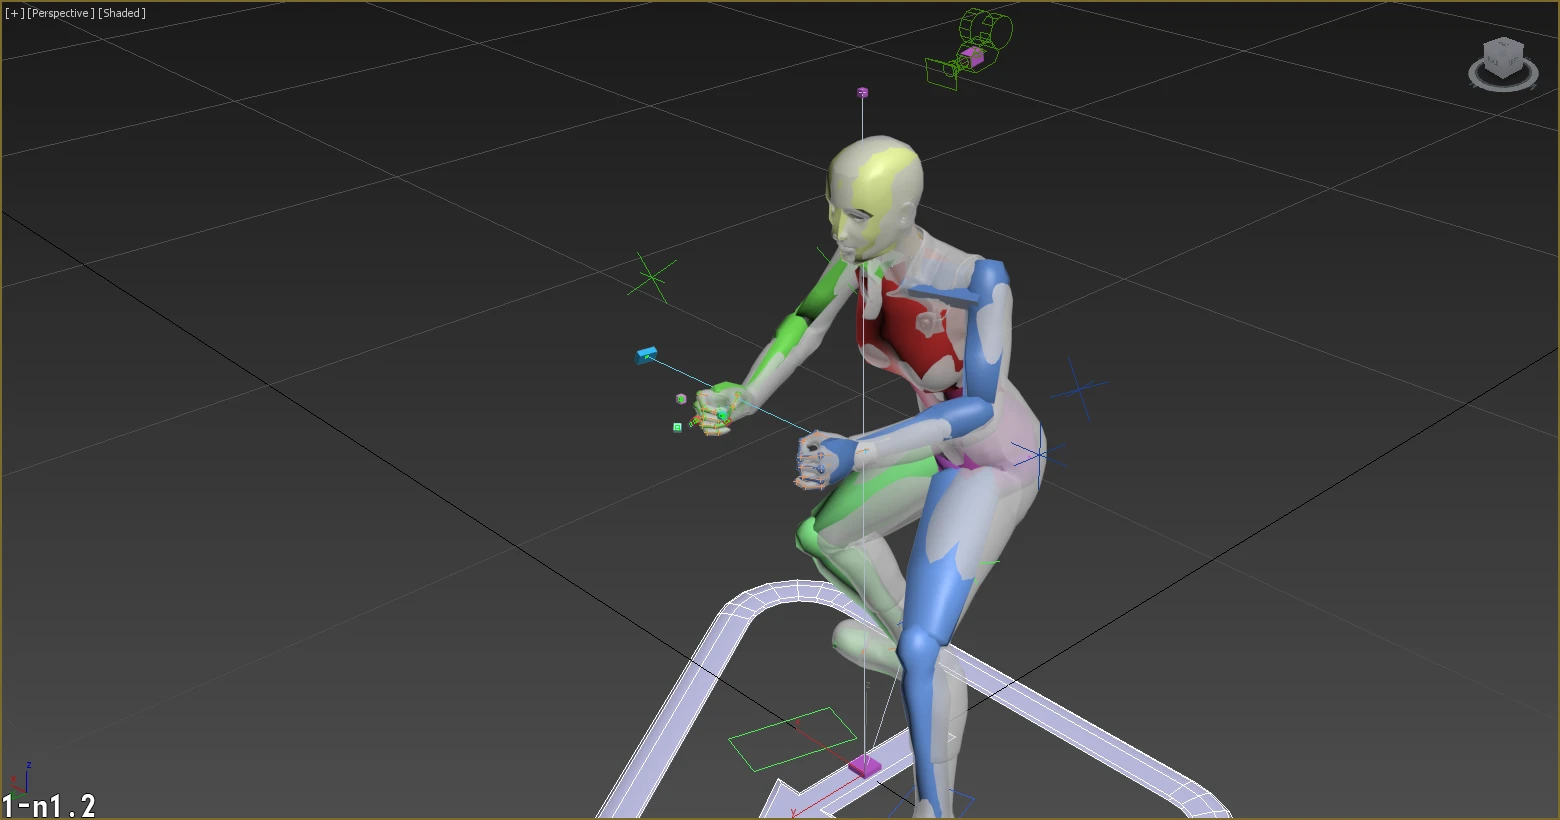
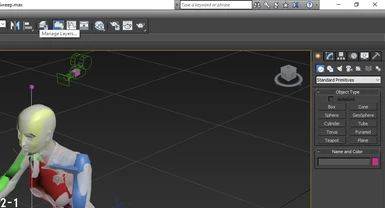
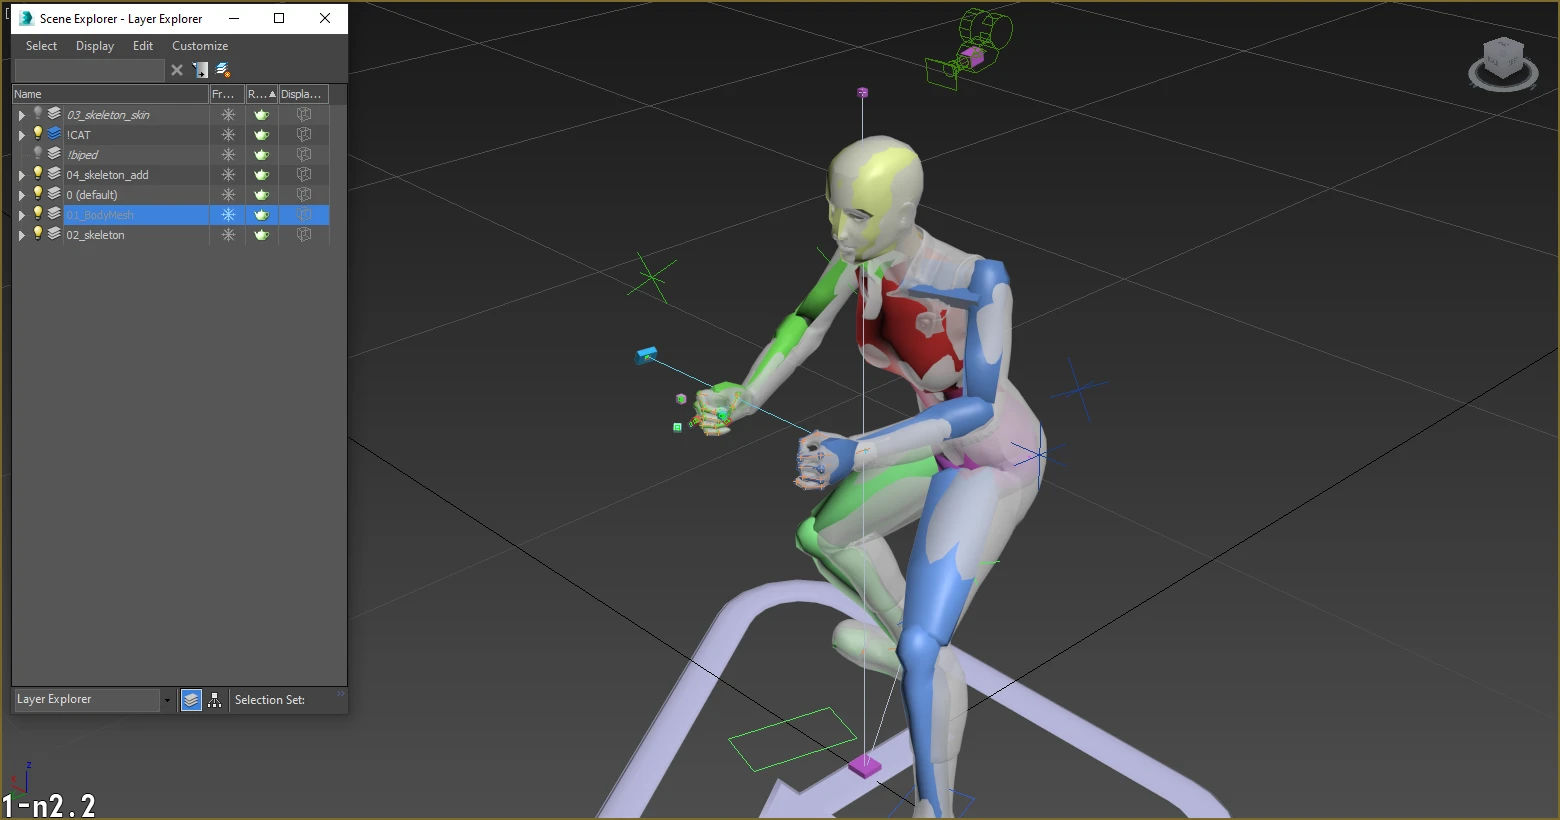
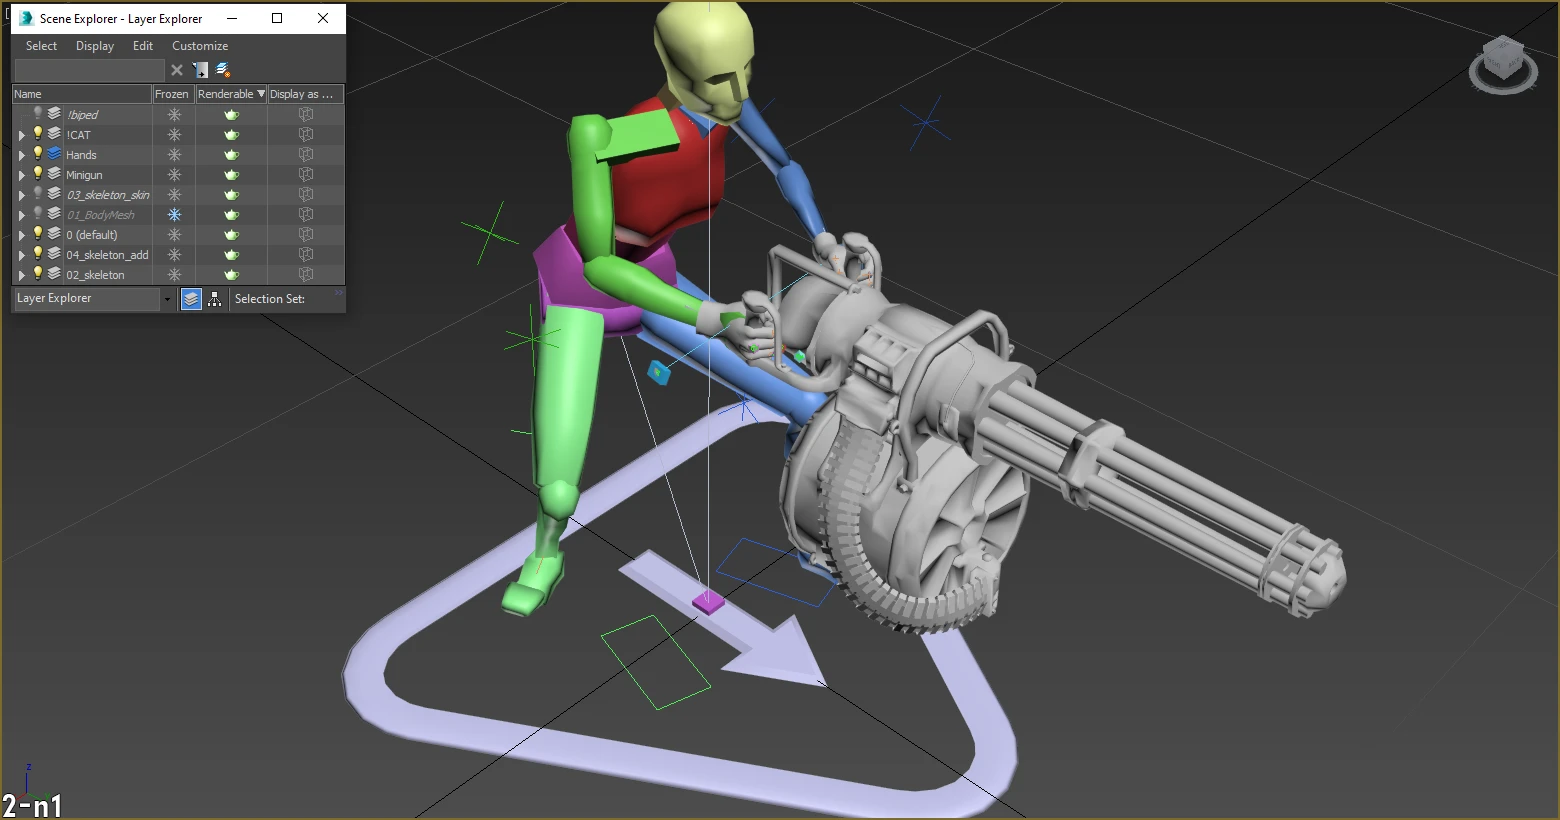
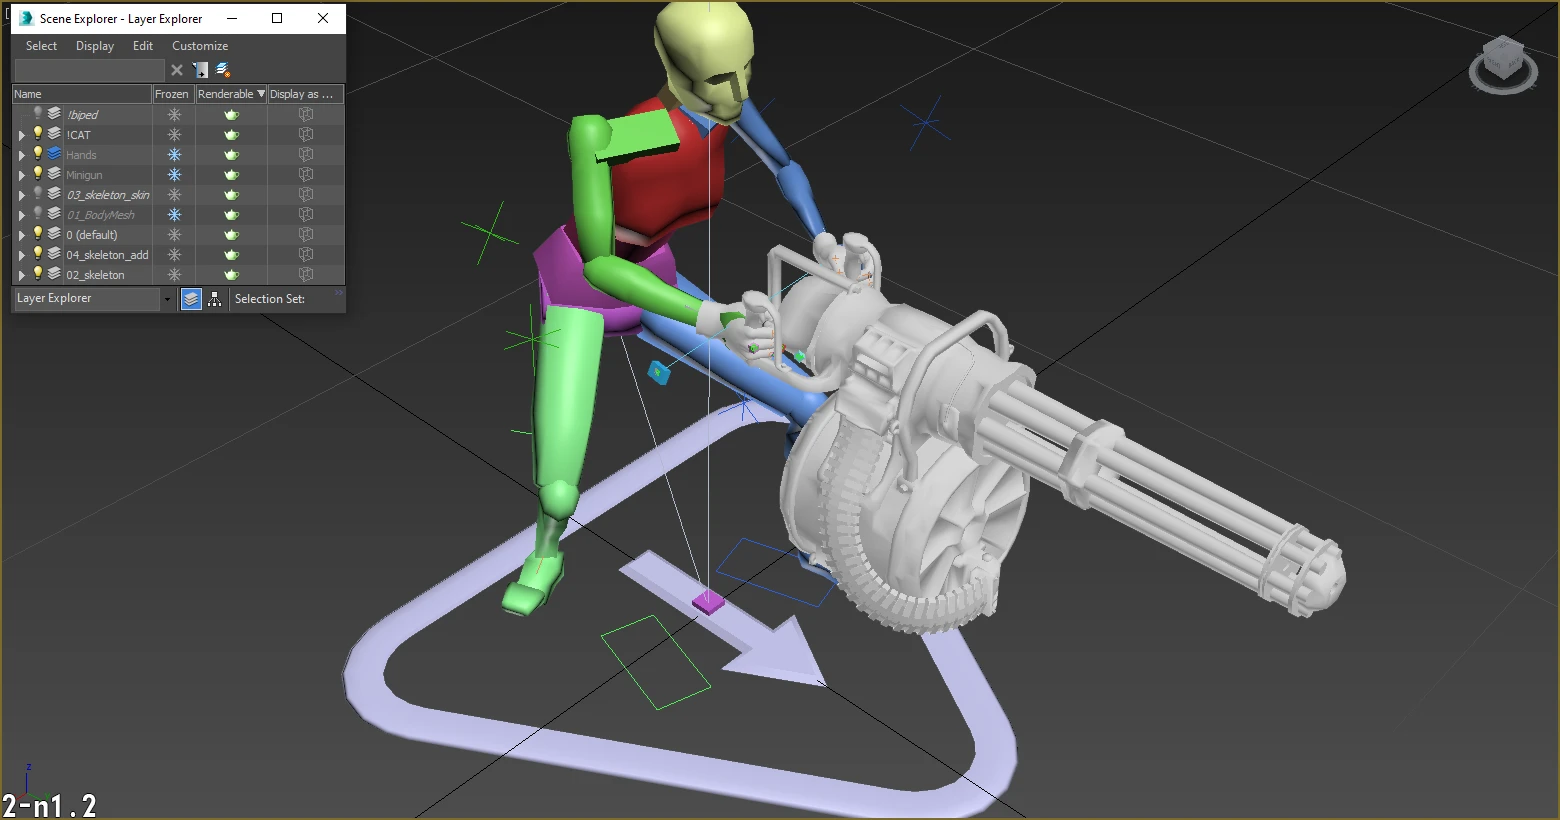
- You can click Manage Layers... and in the Layer Explorer window click the lighbulb icon next to the 01_BodyMesh layer to hide the characters skin, which makes it easier to select bonesSpoiler:Show

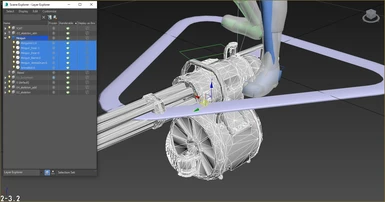
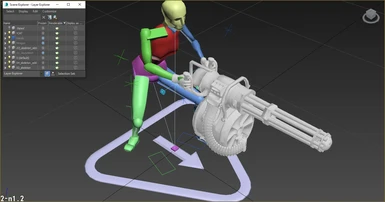
Meshes are important to help stage the animation and therefore better appreciate how the animation will appear in-game. Please keep in mind that the meshes will not be exported along with the animation.
- Launch 3DS Max, open your MAX file and click Manage Layers... to open the Layer Explorer window, and click Create New Layer to create a new layerSpoiler:Show


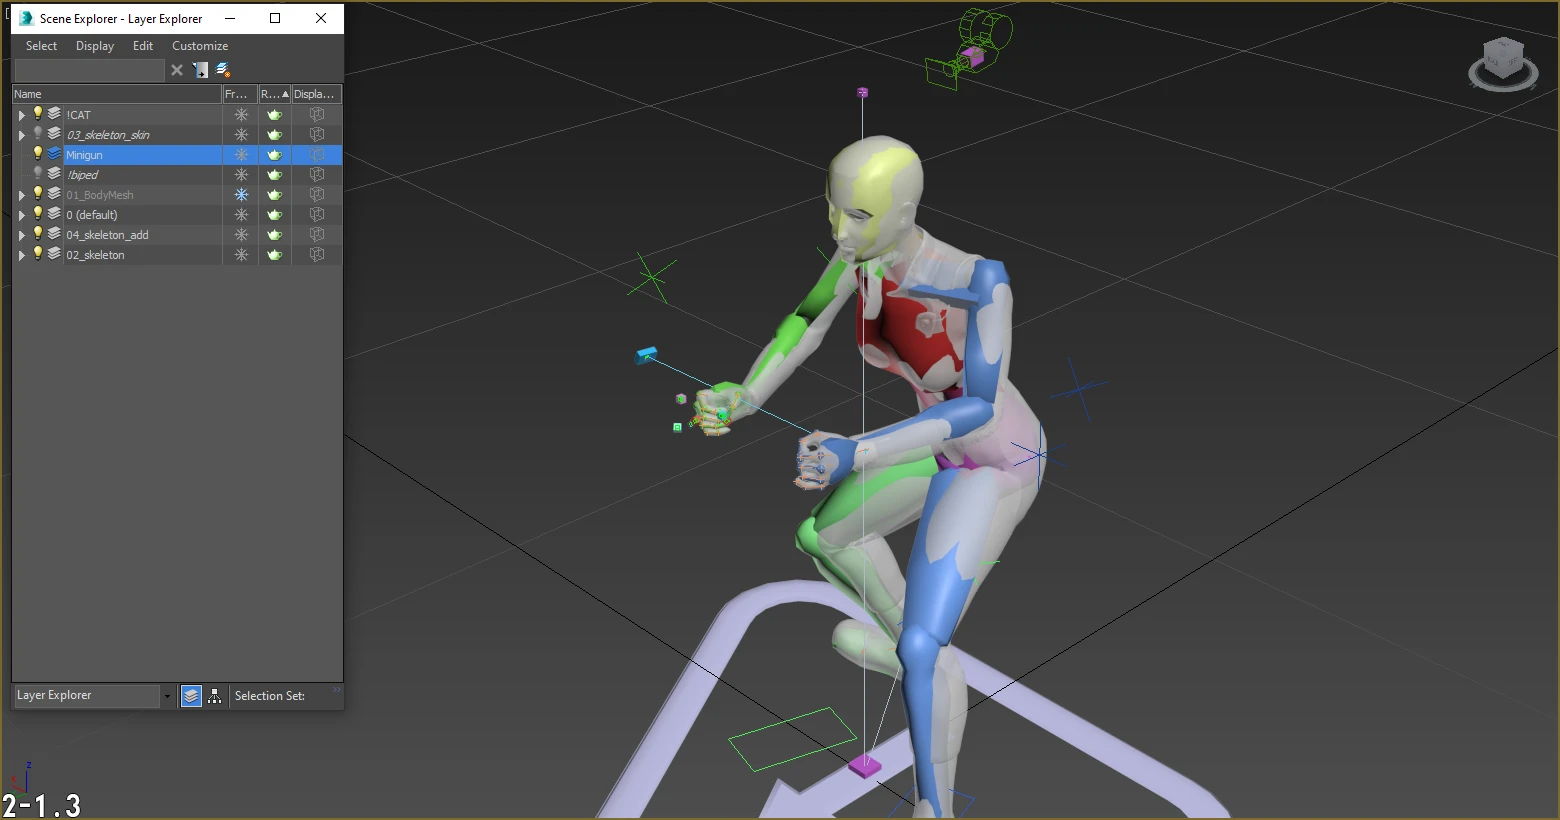
- While your new layer is the active layer click File → Import and select the NIF fileSpoiler:Show
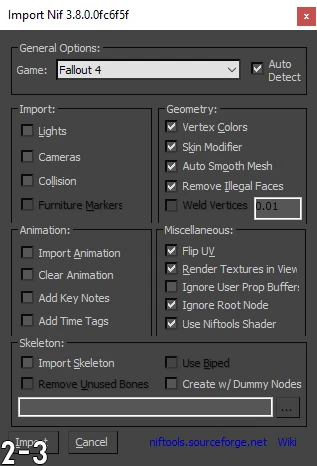
- Import the NIF file with the default NIFTools 3.8.0 settings after unflagging everything in the Import, Animation and Skeleton sectionsSpoiler:Show


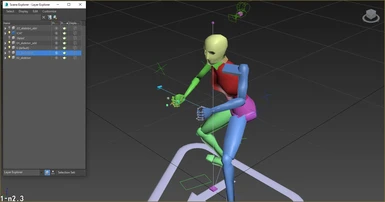
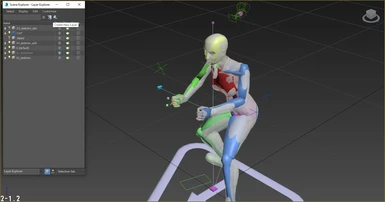
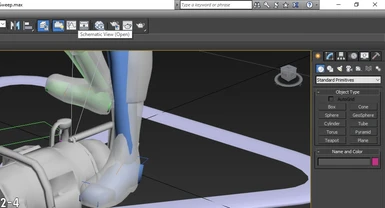
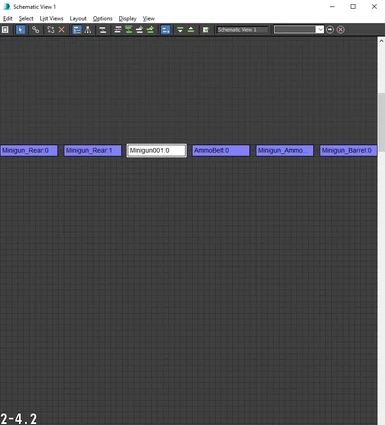
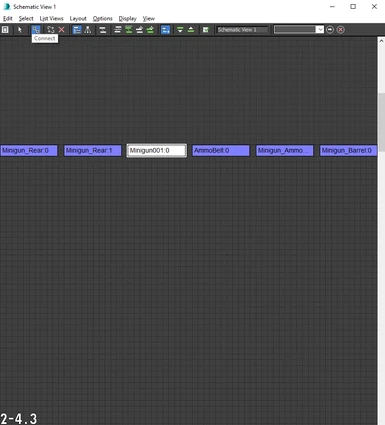
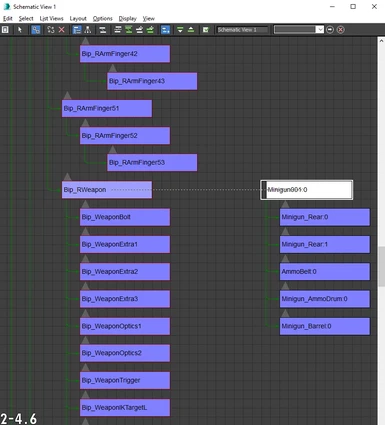
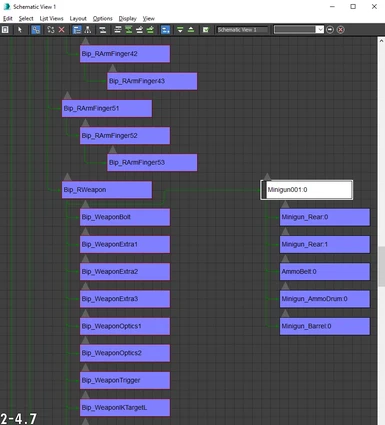
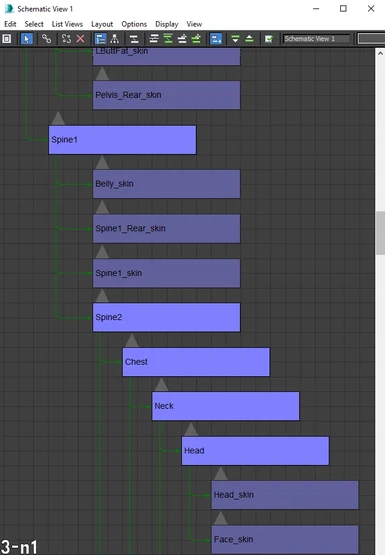
- Click Schematic View (Open) and in the Schematic View window establish the correct parent-child relationships for the BSTriShapes Spoiler:Show

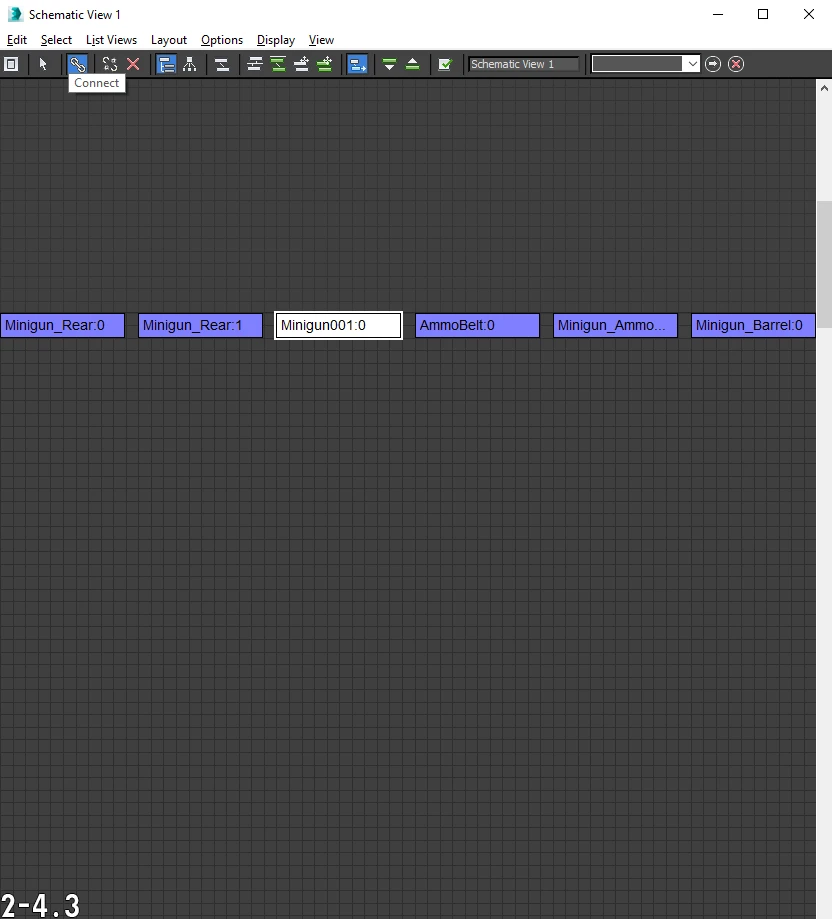
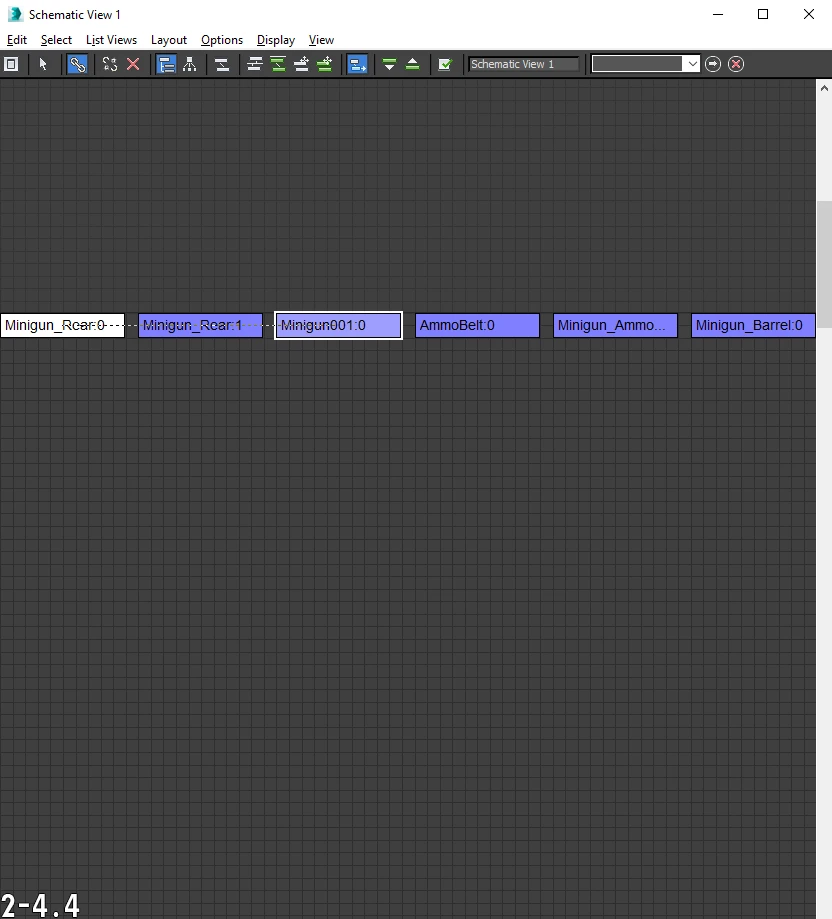
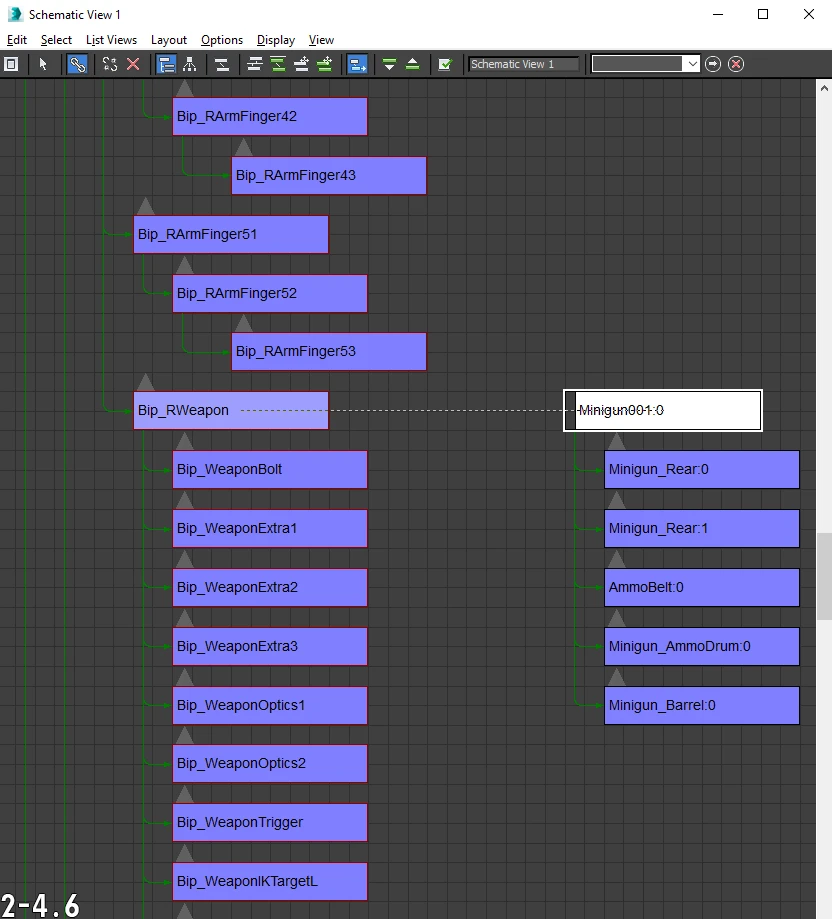

Parent-child relationships can be established by clicking Connect and dragging from the child to the parent
For example, parenting weapon meshes to the Bip_RWeapon bone, which determines the position of the characters right weapon during the animation
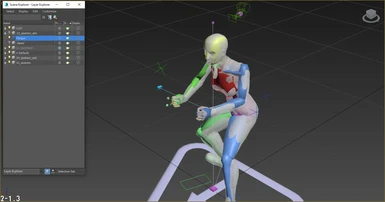
- I recommend you freeze any NIF-specific layers by clicking the snowflake icon under the Frozen heading in the Layer Explorer windowSpoiler:Show
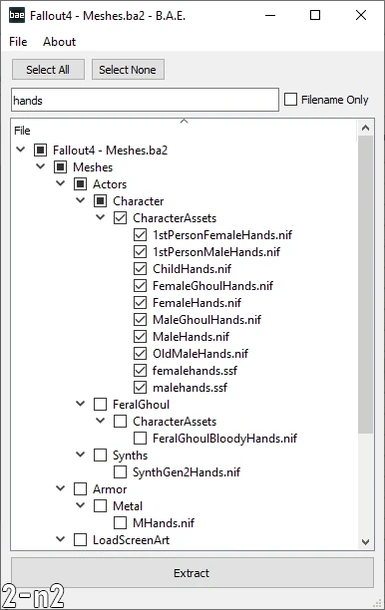
- You can extract hand meshes from the Fallout4 - Meshes.ba2 archive, which are found in the Meshes\Actors\Character\CharacterAssets folder Spoiler:Show
For example, male hands are slightly larger than female hands, so it may benefit you to create gender-specific animations
Hand meshes should automatically be applied to the characters hands when imported
Exporting Animations
Once you are happy with your animation you can quickly export it and play it in-game.
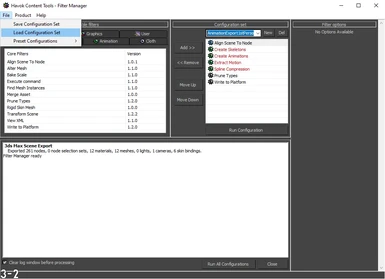
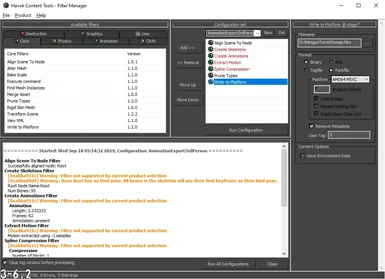
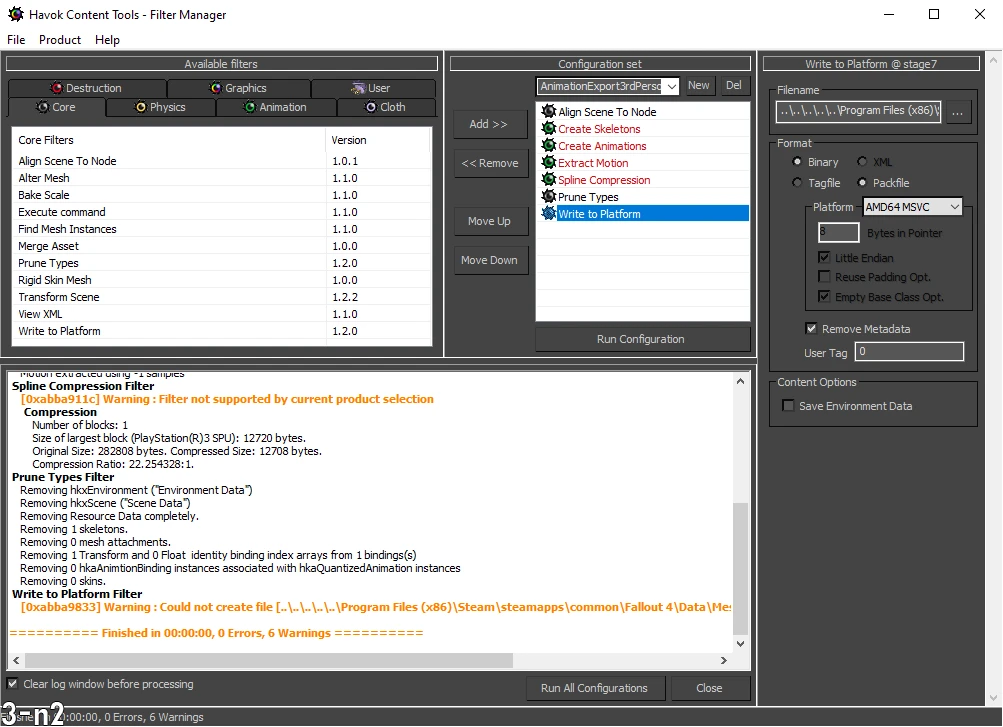
- Finish editing your animation and click Export... to open the Havok Content Tools - Filter Manager windowSpoiler:Show
- Click File → Load Configuration Set and select F4Animation.hkoSpoiler:Show

- In the Configuration Set section select either AnimationExport1stPerson or AnimationExport3rdPerson in the drop-downSpoiler:Show
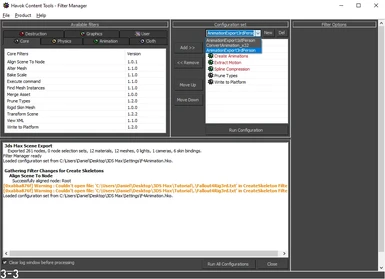
- In Create Skeleton click ... under From File to select the relevant skeleton definition fileSpoiler:Show

- In Write to Platform click ... under Filename to select the file path of the 64-bit HKX file that is to be exportedSpoiler:Show
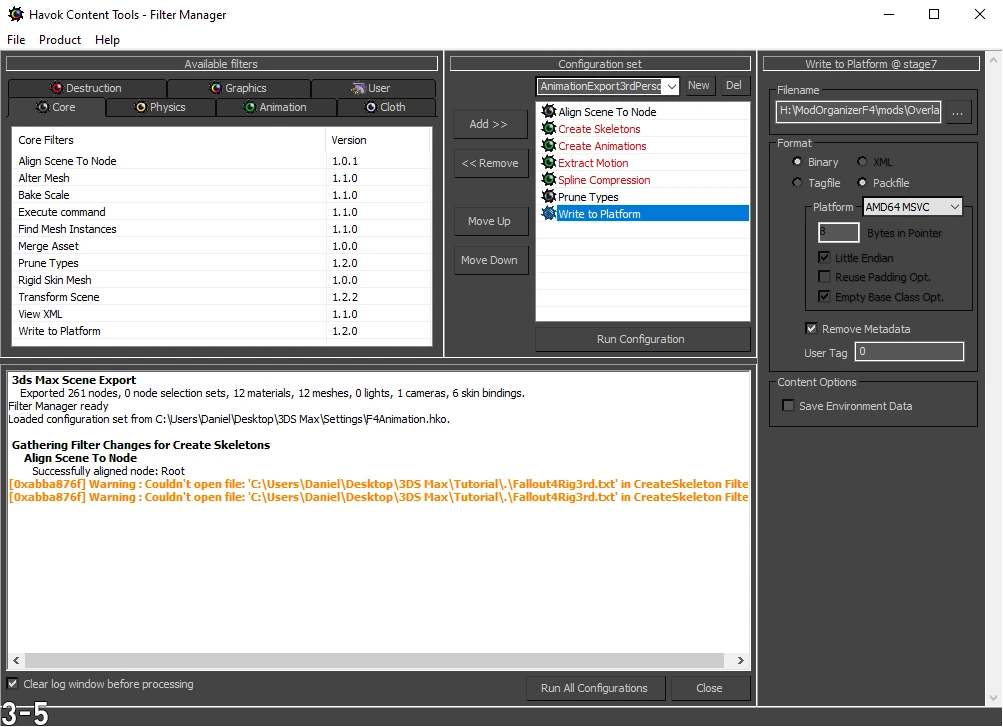
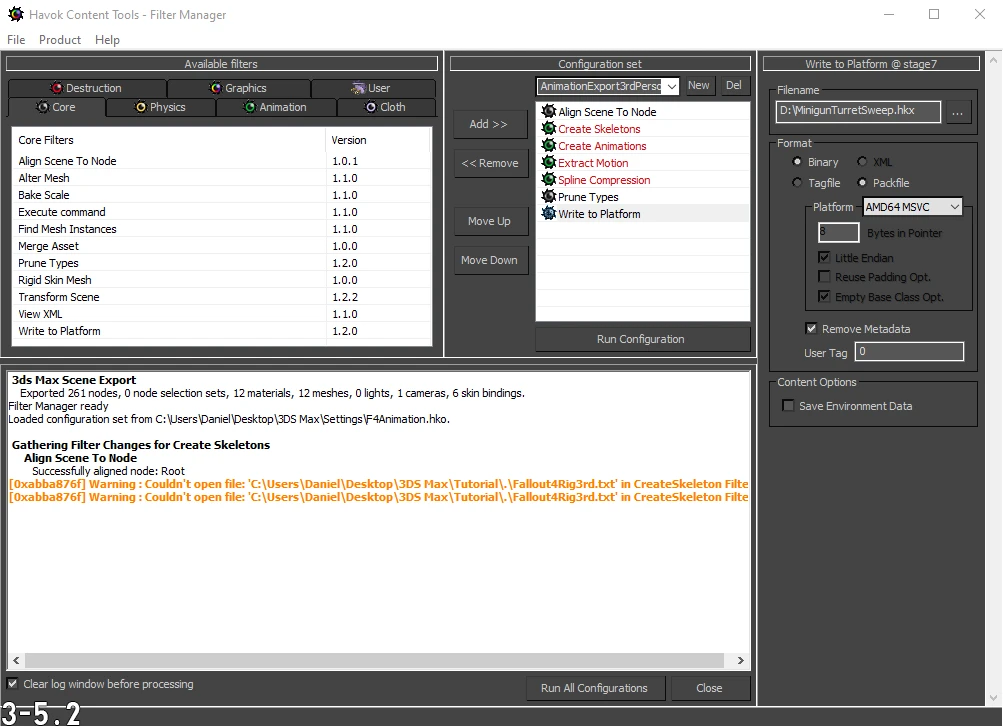
- Click Run Configuration and open the folder containing the exported file, which you can now use in-game Spoiler:Show
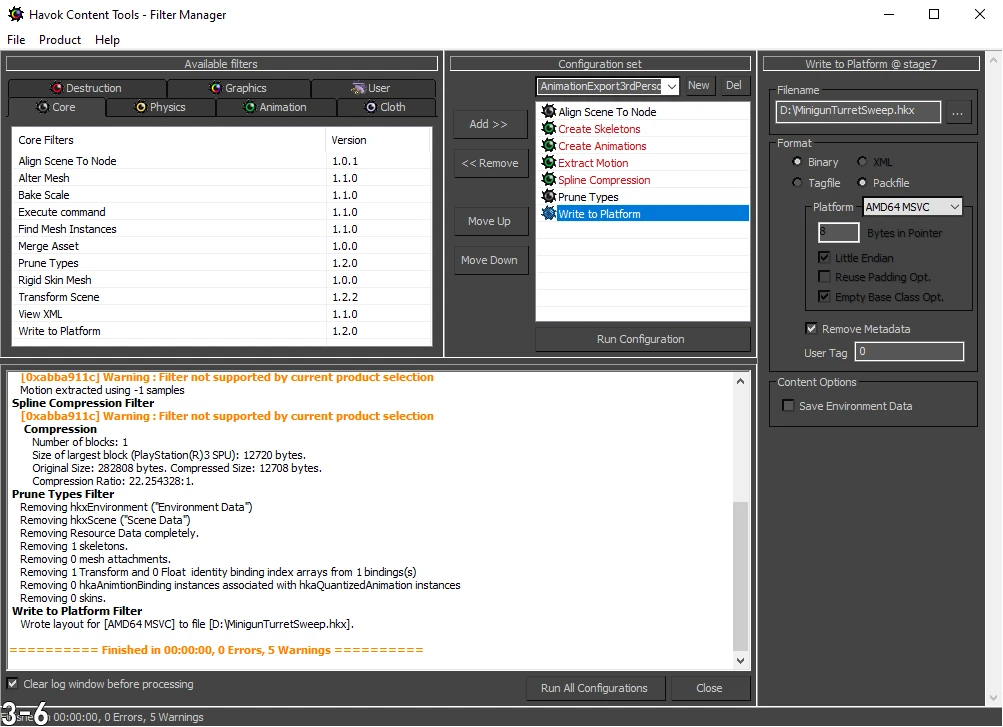
You can safely ignore the four "Filter not supported by current product selection" warnings and the "Bone Root has no bind pose. All bones in the skeleton will use their first keyframe as their bind pose." warningSpoiler:Show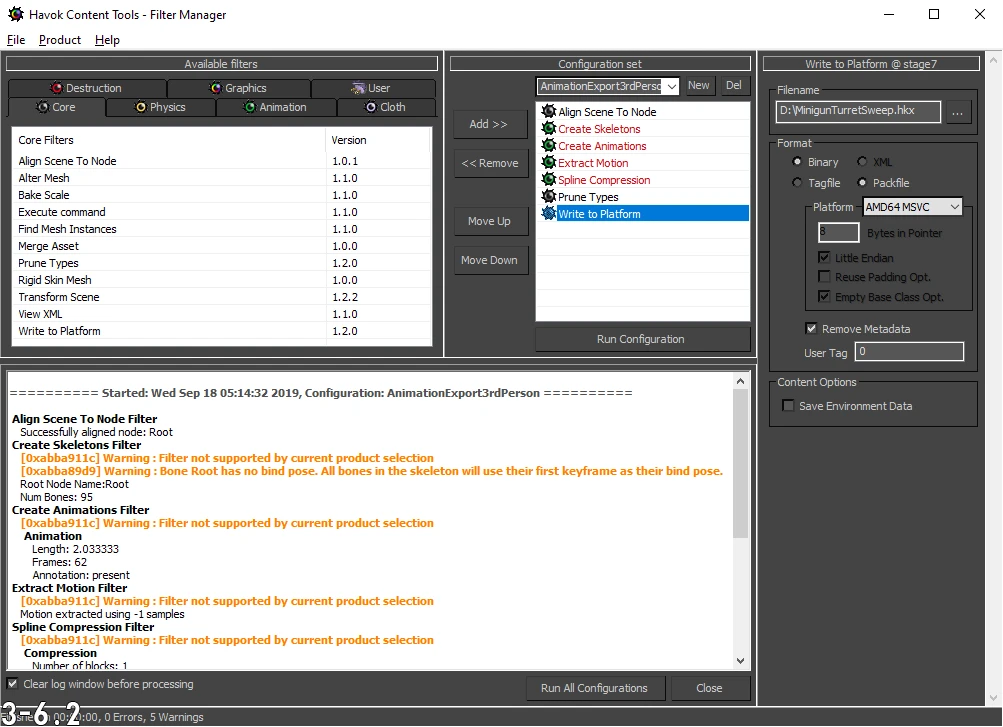
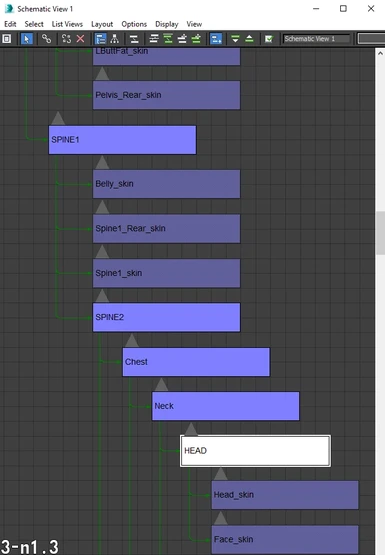
- You may need to rename the following bones before exporting your animation (you will be warned when selecting the skeleton definition file), which can be done in the Schematic View window Spoiler:Show

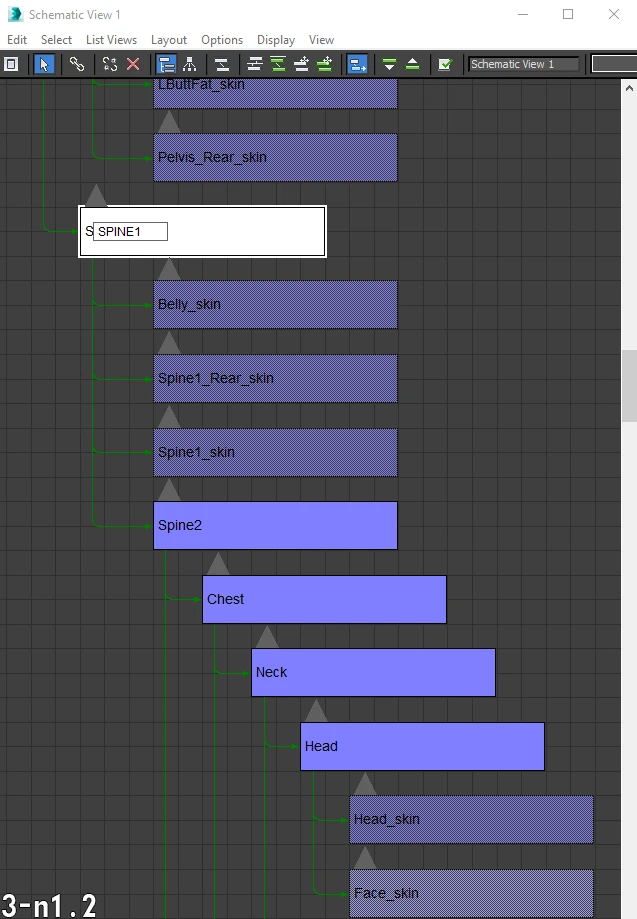
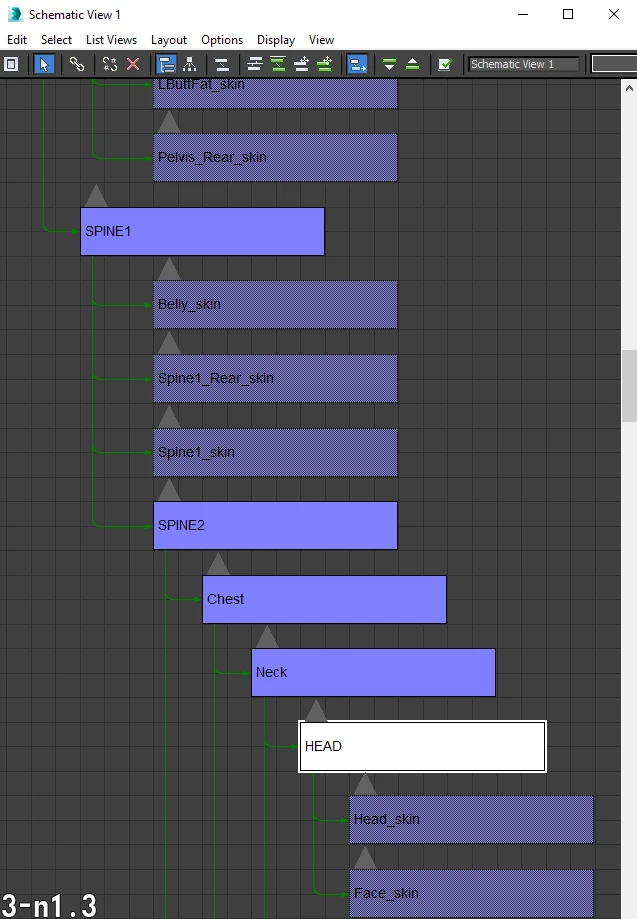
Spine1 → SPINE1
Spine2 → SPINE2
Head → HEAD - You may encounter the "Could not create file" error when running the configuration, in which case select a shorter file path (e.g. directly onto storage drive D:\)Spoiler:Show
When adding subgraph data you specify folders rather than files because the animation file names are baked into the behavior graphs. Therefore, when you want to use a new behavior graph you will first want to find the names of each of the animation files that it uses, and how they are used.
What I do myself is sort existing subgraph data by behavior graph (e.g. from the base game), and look at what folders they point to. I then extract the animation files in these folders from the Fallout4 - Animations.ba2 archive. This gives you the animation file names. However, there are many instances where not all of the animation files found in the folder will be used by the behavior graph.
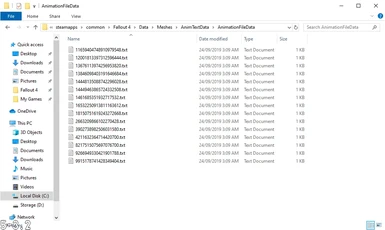
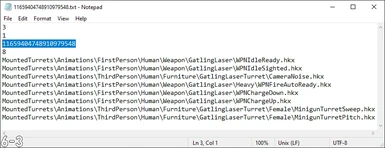
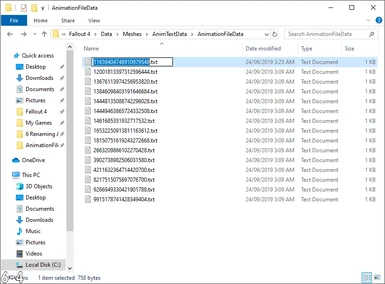
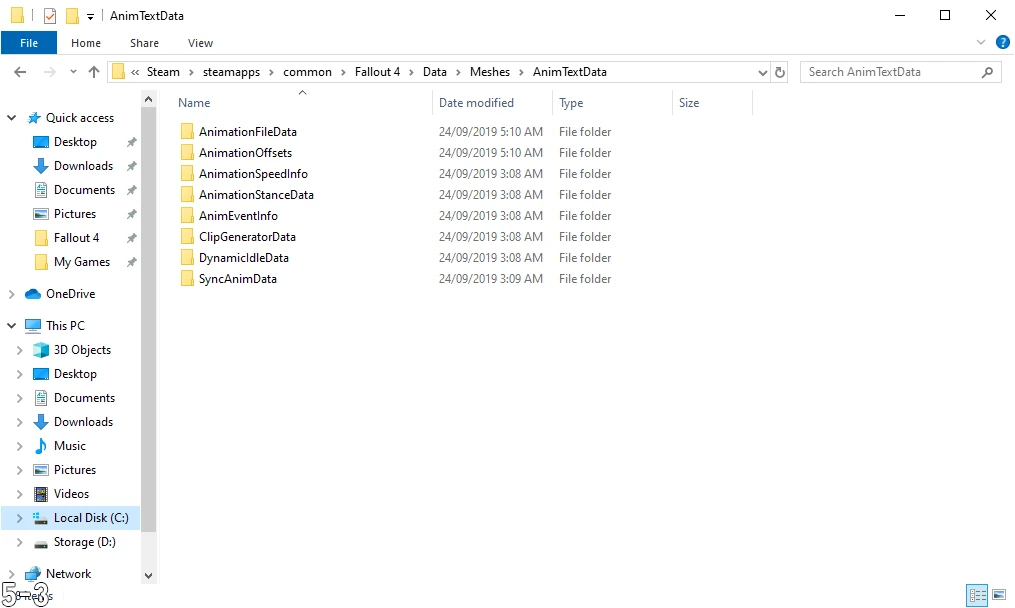
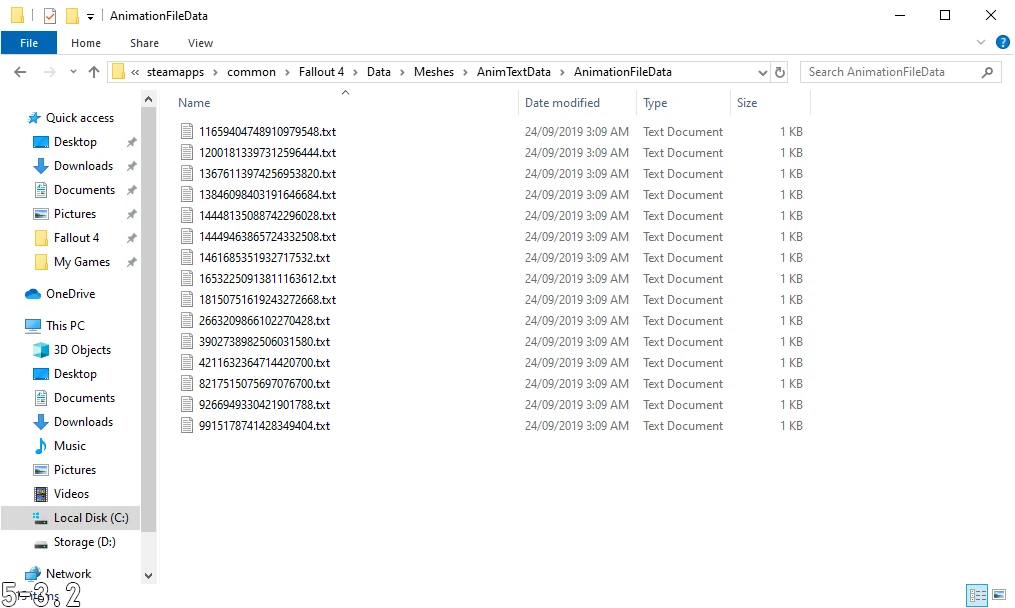
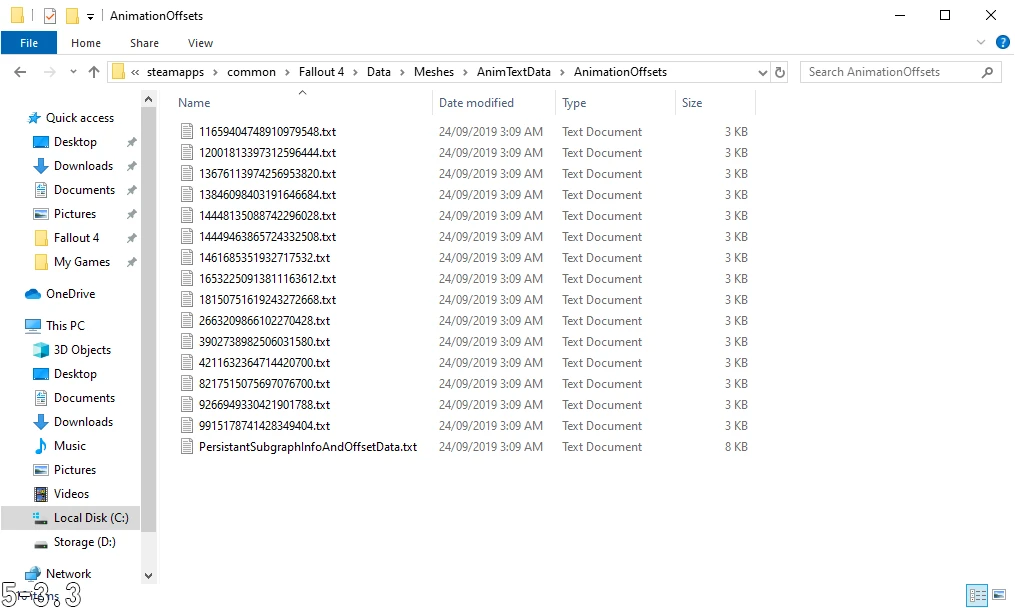
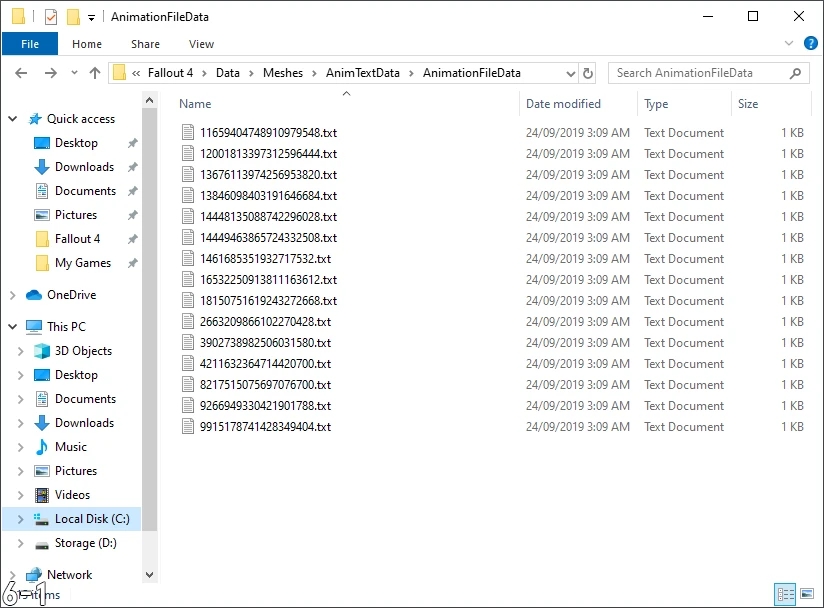
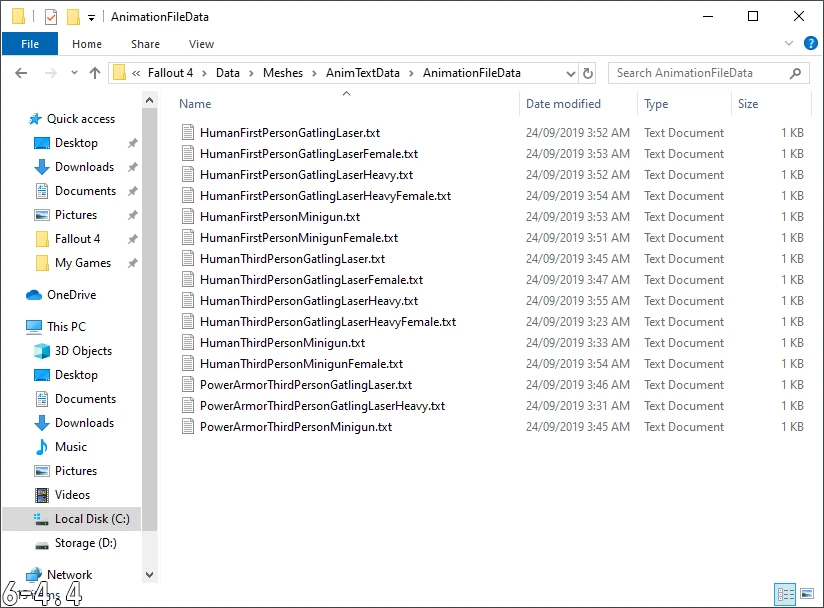
If you are unsure I recommend that you recreate the subgraph data in a new plugin and then generate the animation text info. You can then reference the relevant text file found in the Data\Meshes\AnimTextData\AnimationFileData folder to determine which animation files the behavior graph is using.
For reference, here are the required animation files for each of the simpler furniture behavior graphs:
Spoiler:
Show
Actors\Character\_1stPerson\Behaviors\1stPFurnitureIdleBehavior.hkx
- PoseA_Idle1
- EnterFromStand
- ExitToStand
- PoseA_Idle1
- EnterFromStand
- ExitToStand
- PoseA_Idle1
- EnterFromStand
- ExitToStand
- PoseA_Idle1
- EnterFromStand
- ExitToStand
- PoseA_Idle1
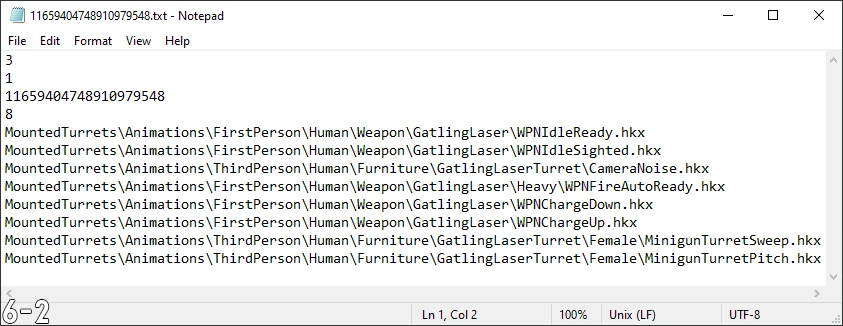
- Activate.hkx
- CameraNoise
- EnterFromStand
- ExitToStand
- MinigunTurretPitch
- MinigunTurretSweep
- WPNChargeDown
- WPNChargeUp
- WPNFireAutoReady
- WPNIdleReady
- WPNIdleSighted
- EnterFromStand
- ExitToStand
- PoseA_Idle1
- Ambush
It is possible to repurpose any existing animation file as a furniture animation. All that is required is for you to rename the animation file to match the naming scheme of the new behavior graph. Be aware of any events and annotations that the animation may use, because they may either do something different or not exist in the new behavior graph.
Adding Subgraph Data
Subgraph data must be added for each race that you intend to play the animations. Optionally, you can have the animations be more contextual and for example play different animations in first-person and third-person.
- Launch the Creation Kit and load your plugin
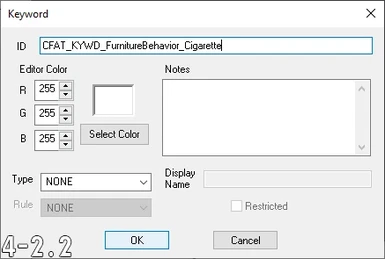
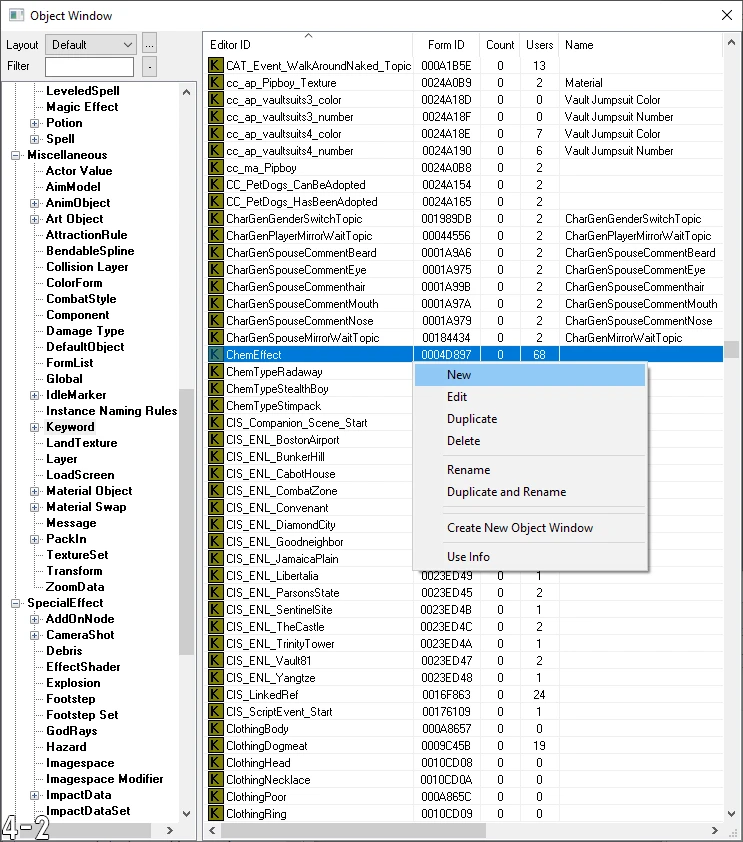
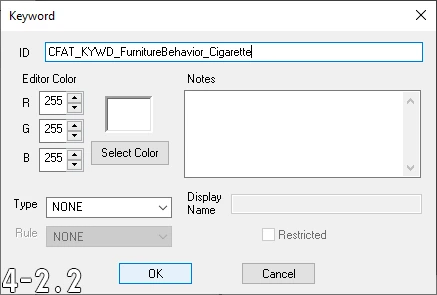
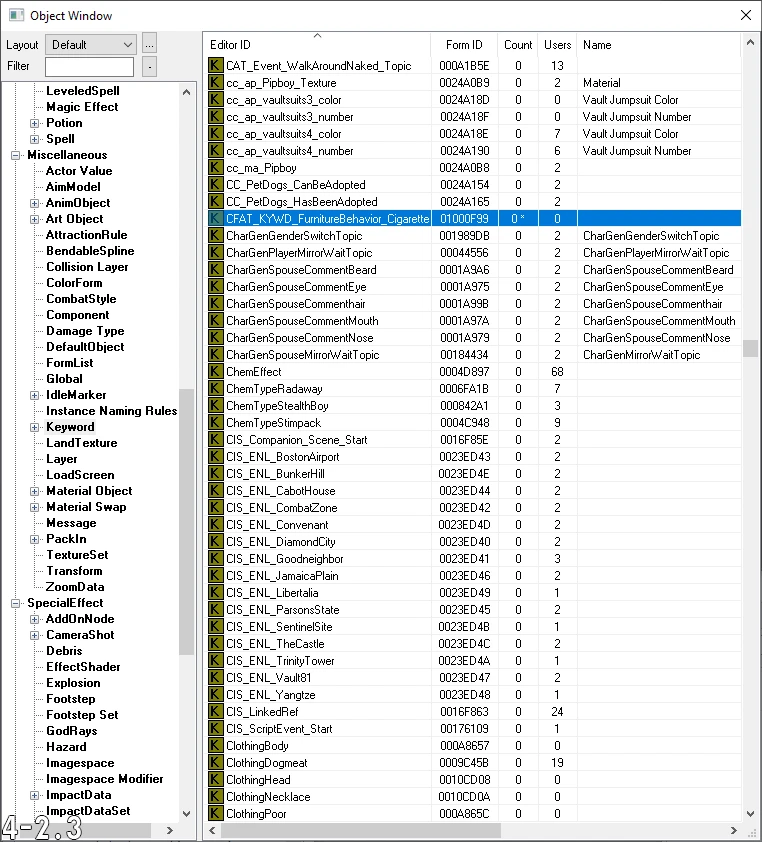
- Create a new keywordSpoiler:Show
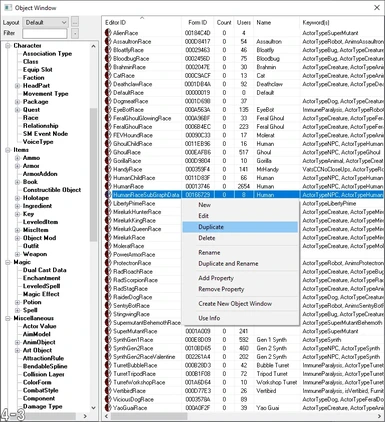
- Identify the race that you want to play the animations and duplicate their Race form Spoiler:Show
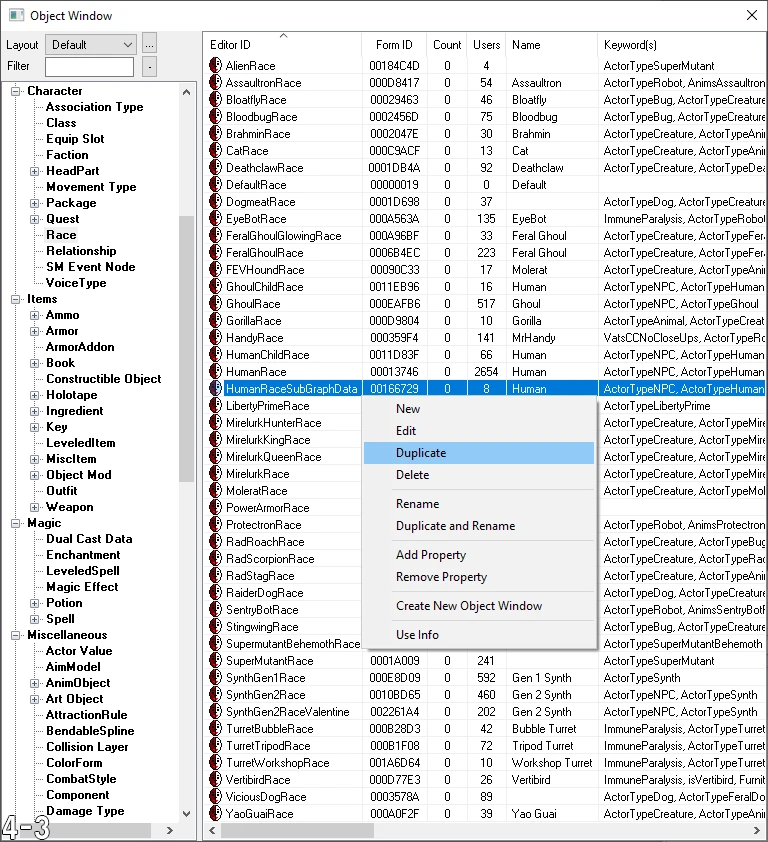
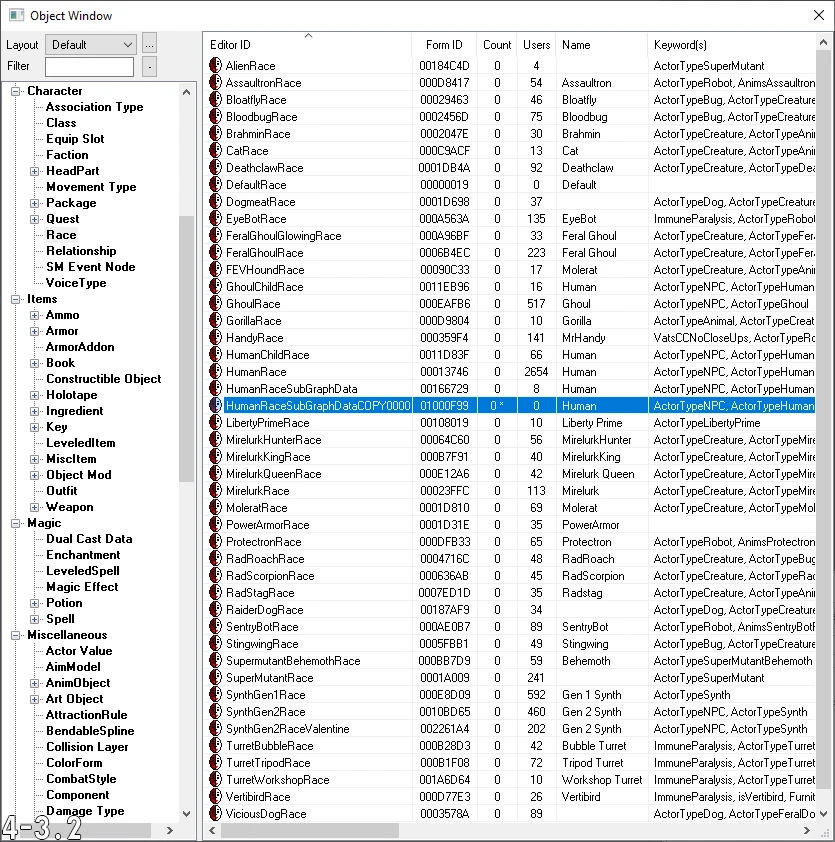
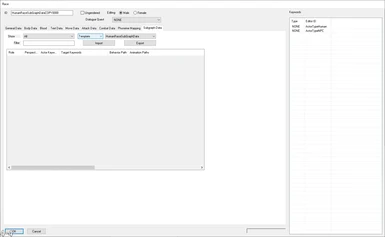
The race and the animation must use the same skeleton, otherwise the animation will not play correctly - Open the Subgraph Data tab of the duplicated Race form and change Template to Additive in the drop-down Spoiler:Show
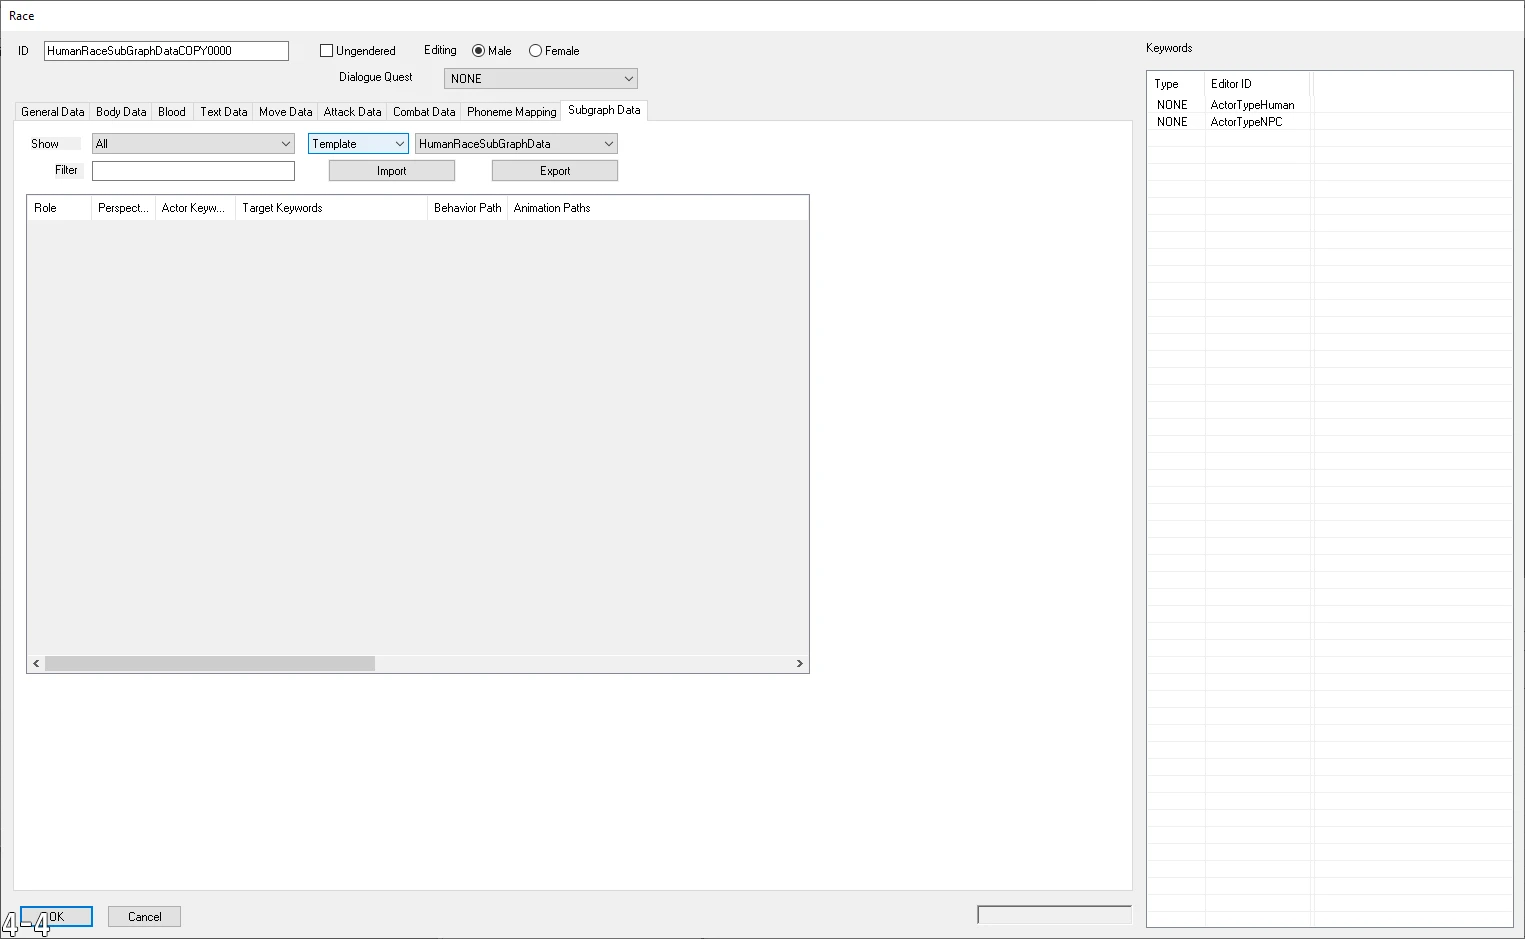
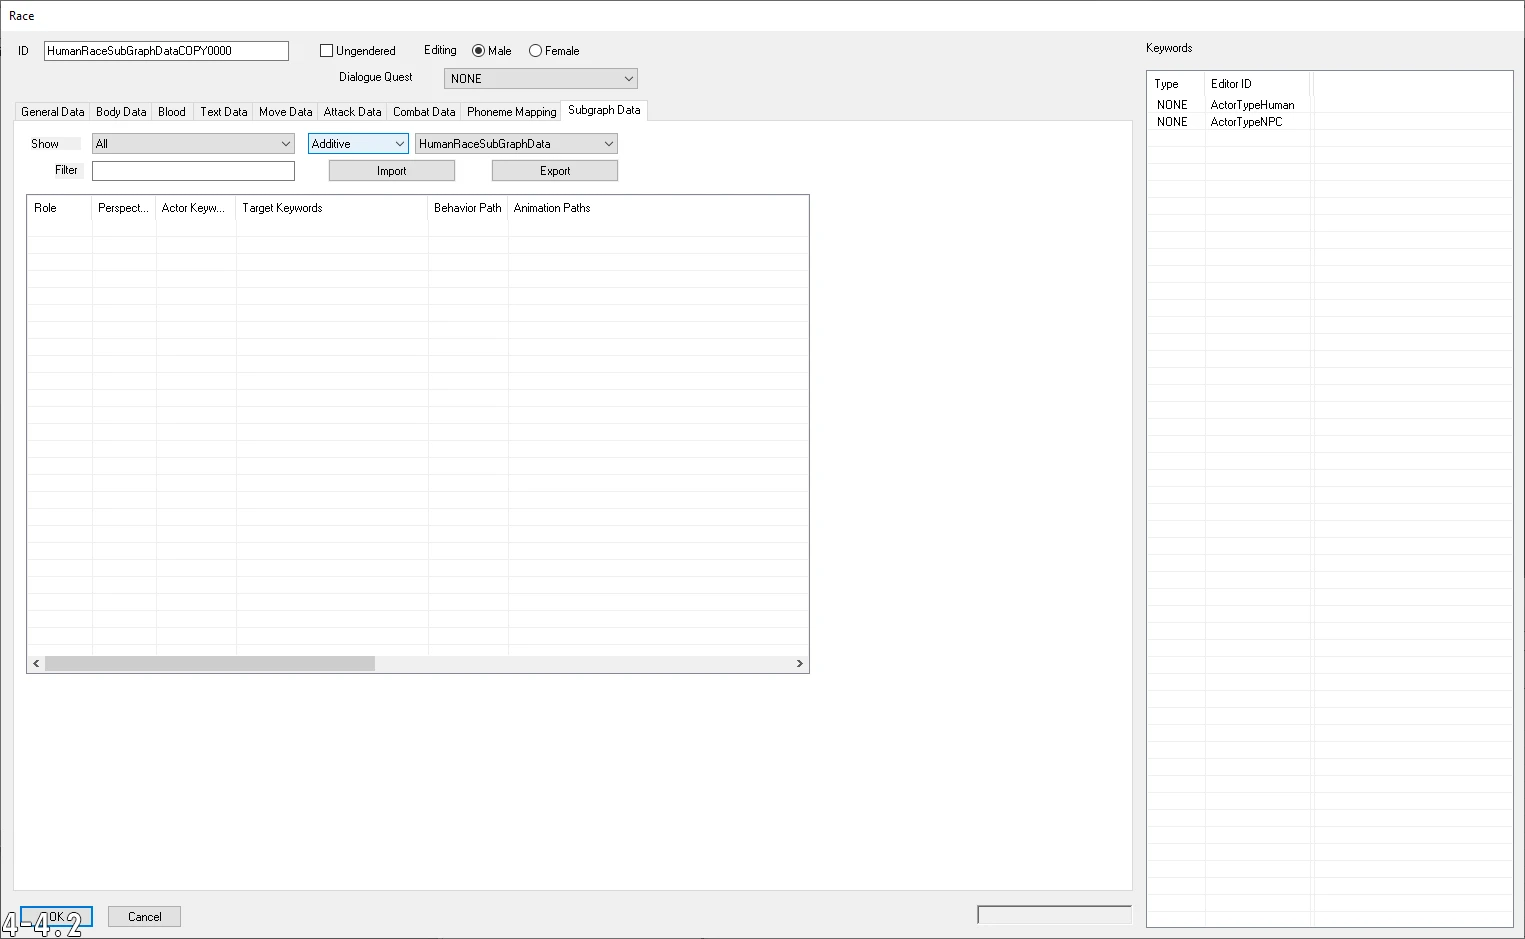
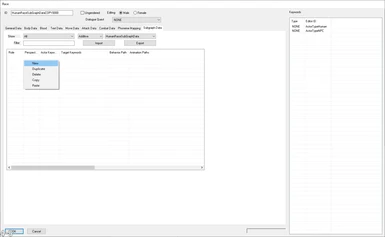
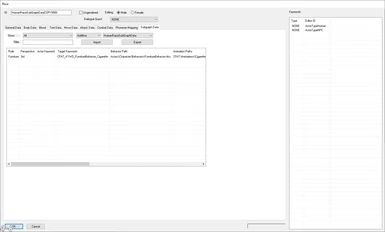
Additive subgraph data is added to the race in the neighbouring drop-down - Right-click → New to add subgraph data Spoiler:Show

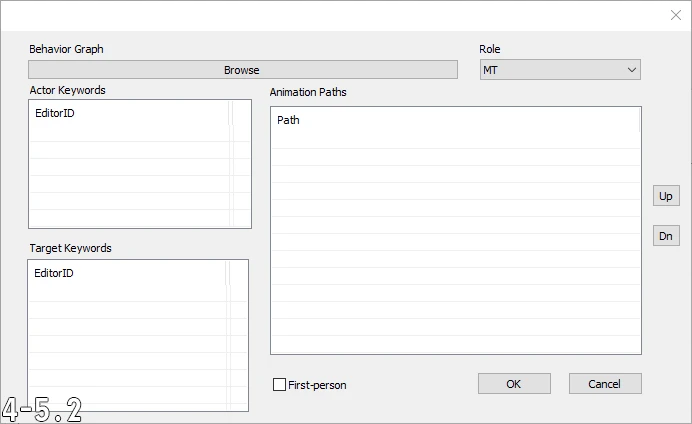
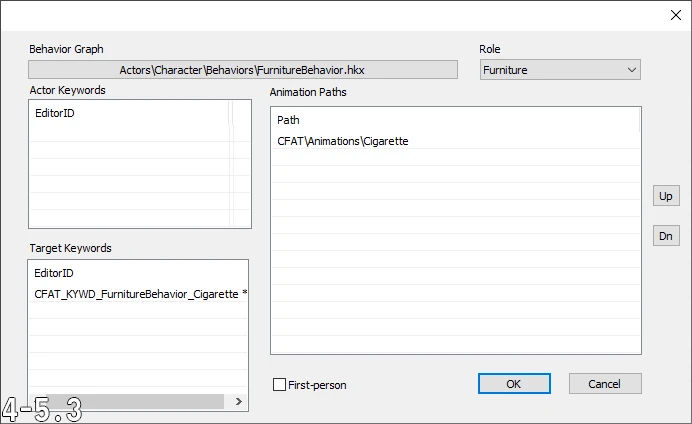
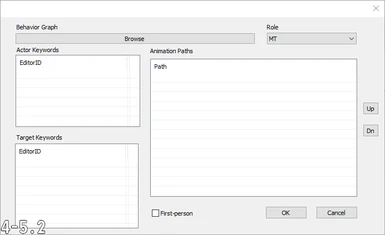
Behavior Graph
The file path of the behavior graph, starting from the Data\Meshes folder (e.g. Actors\Character\Behaviors\FurnitureBehavior.hkx). The behavior graph orchestrates the animations. The loose files are not required to be in your Data folder, so you are able to manually enter the file path.
Role
The context in which you want to play the animations. The role of furniture animations is Furniture.
Actor Keywords
Keyword(s) that the actor using the furniture must have. This allows actors with different keywords to play different animations when using the same furniture. For example, the vertibird gunner animations require the p-AttachGunner keyword and the vertibird pilot animations require the p-AttachPilot keyword. Therefore, the gunner and the pilot play different animations despite riding the same mount. To create gender-specific animations you can use the female keyword to distinguish between males and females.
Target Keywords
Keyword(s) that the furniture must have.
Animation Paths
The folders that contain the animation files. When generating animation text data, the Creation Kit will search the folders in descending order. The behavior graph tells the Creation Kit which animation files to look for. The folders themselves do not matter.
First-person
Flag this to play the animations in first-person, and unflag this to play the animations in third-person. While the player can play both first-person and third-person animations, all other actors can only play third-person animations. If a furniture animation keyword only has first-person animations associated with it, then it must be accompanied by the FurnitureForce1stPerson keyword. - Click OK and confirm that the subgraph data has been added Spoiler:Show

Notes
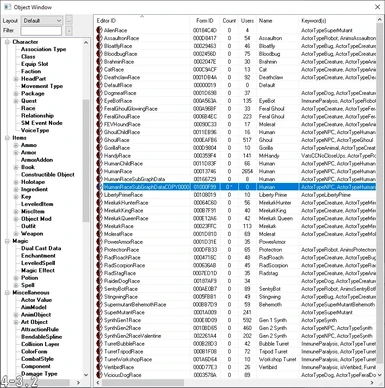
- The HumanRace form uses the HumanRaceSubgraphData form as a template for subgraph data, and therefore the HumanRaceSubgraphData form should be duplicated and selected in the drop-down rather than the HumanRace form
- Playable races use different skeletons for different perspectives
First-person skeletons are missing certain bones from their third-person counterparts
The human and power armor first-person skeletons share the same bones, and can therefore play the same animations - Each time you add subgraph data to a particular race you must use a unique combination of actor and target keywords
- Certain keywords can be added to the actor and target dynamically, and others cannot
For example, target keywords cannot be added to furniture dynamically
However, the FurnitureForce1stPerson keyword can be added to furniture dynamically - Keywords can be added to actors through either their Race or Actor forms
Generating Animation Text Data
Animation text data is generated for a plugin using the subgraph data that you have added.
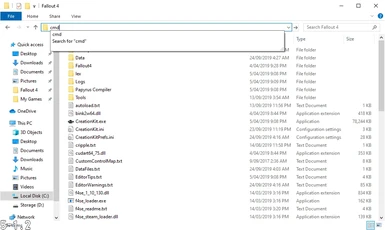
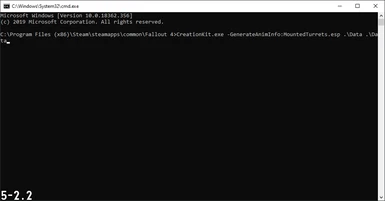
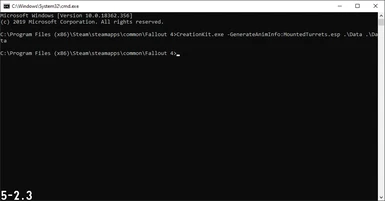
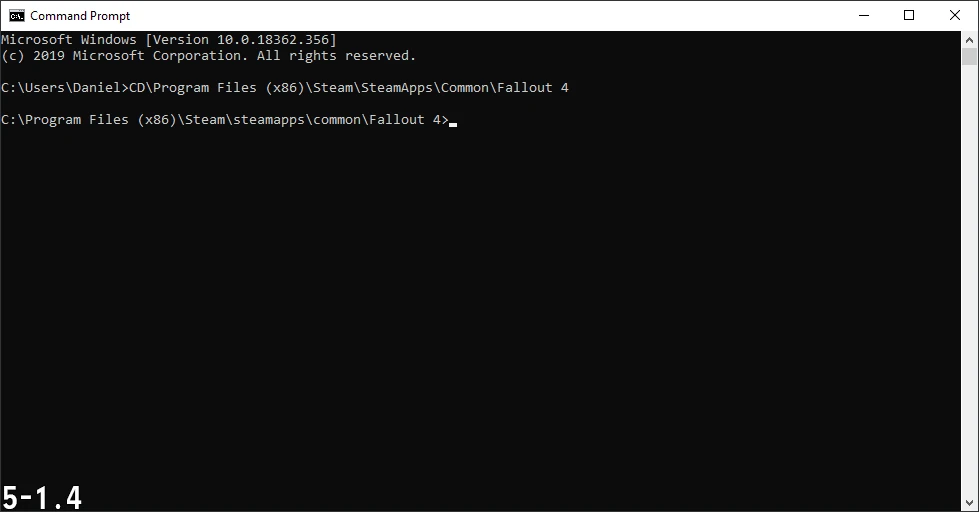
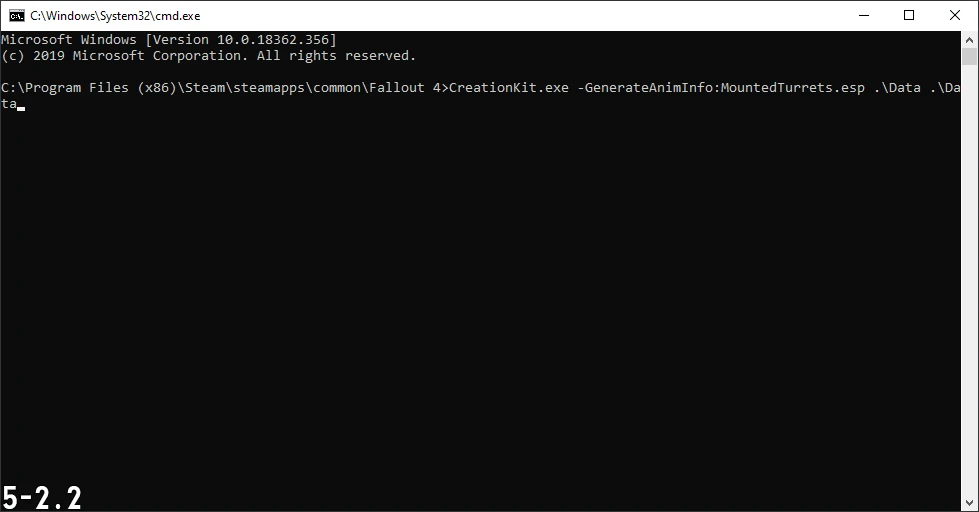
- Go to your Fallout 4 folder and enter "cmd" in the folder path text field to launch the command prompt in this directory Spoiler:Show
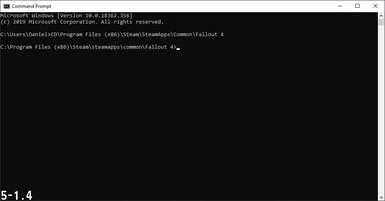
Alternatively, launch the command prompt and use theCD(change directory) command to manually change directory to your Fallout 4 folder
For example,CD\Program Files (x86)\Steam\SteamApps\Common\Fallout 4Spoiler:Show
- Run the following command to generate the necessary animation text data, where CustomFurnitureAnimationTutorial.esp is the name of your plugin
CreationKit.exe -GenerateAnimInfo:CustomFurnitureAnimationTutorial.esp .\Data .\DataSpoiler:This command will launch the Creation Kit, which will generate the animation text data in approximately the same time that it takes to load the pluginShow

If the Creation Kit is already open when you run this command then another instance of the Creation Kit will be launched
Before generating your animation text data, remember to:
Use the correct filename extension when writing the command (.esl, .esm, or .esp)
Save your plugin if it is already open in the Creation Kit
Delete any existing animation text data so you can more easily identify what is generated - The Creation Kit will automatically close once the animation text data has been generated, which will be added to your Data\Meshes\AnimTextData folder Spoiler:Show
After generating your animation text data, you can safely:
Delete any empty subfolders in the Data\Meshes\AnimTextData folder
Rename your plugin
Replace your animation files so long as they use the same events and annotations
You cannot change anything referenced in the subgraph data without also regenerating the animation text data
- If you have not correctly implemented your furniture animations using the Creation Kit, you will receive the "You cannot use this at this time." notification when you use the furniture in-game
- If you have only implemented first-person furniture animations, you will also receive the "You cannot use this at this time." notification when you command an NPC to use the furniture in-game
This is because NPCs will only use third-person animations - If you have implemented furniture animations for humans and not power armor, you will receive the "You cannot use this in Power Armor." notification when you are in power armor and use the furniture in-game
- If you attempt to generate animation text data for a plugin using an animation file that does not work in-game, no animation text data will be generated
- Some animation files are required and some animation files are optional, it depends on the behavior graph
If you attempt to generate animation text data for a plugin and you have not included all of the required animation files in the relevant folders, no animation text data will be generated
Certain animation files are not recognised by the Creation Kit when generating animation text data despite them being used in the base game. For example, furniture flavor animations, as referenced by grayshepherd in the comments of his tutorial. It is not known what the problem is exactly.
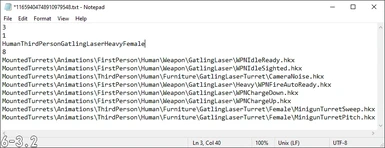
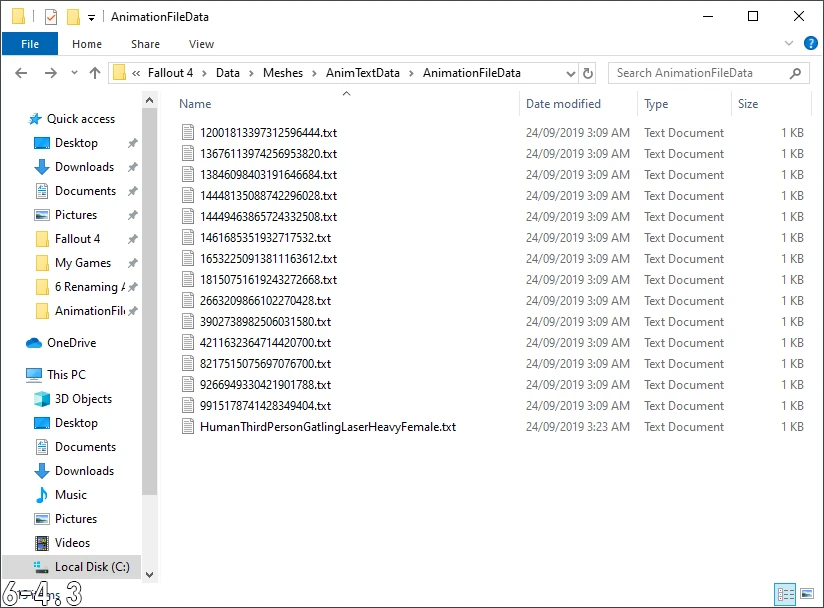
Renaming Animation Text Data
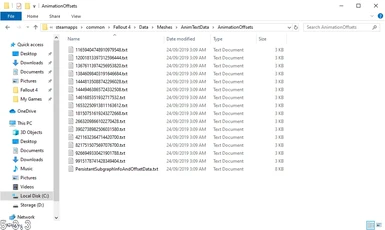
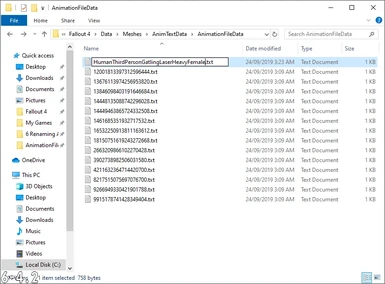
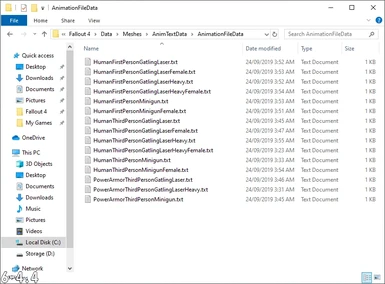
The animation text data is generated with hashed file names, which you may want to change. It is only possible to rename the files found in the Data\Meshes\AnimTextData\AnimationFileData folder.
- Open the Data\Meshes\AnimTextData\AnimationFileData folderSpoiler:Show
- Open the file that you want to rename in a text editorSpoiler:Show
- Change the third line of the file to the new file name and save Spoiler:Show
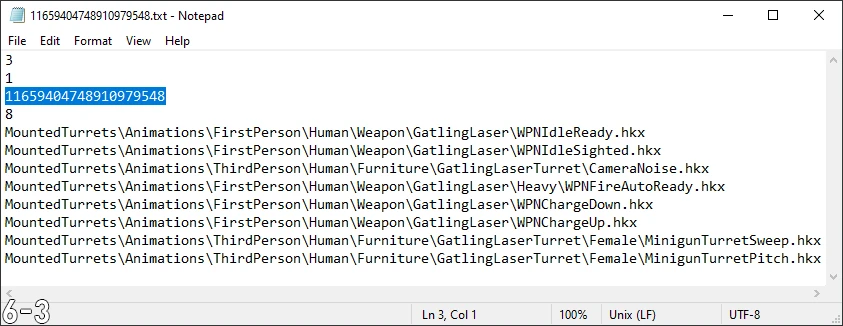
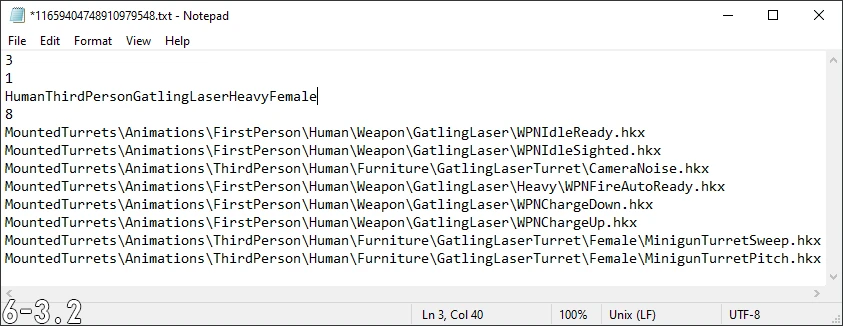
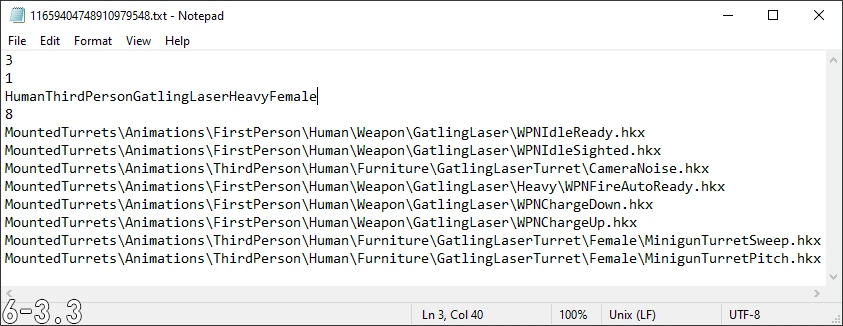
The third line of the file is the hashed file name - Close the file and similarly rename it in the folderSpoiler:Show


Keywords can be added to Furniture forms to modify their behavior in some way. The only exception is the hasPassengerMounts keyword, which can instead be added to an Actor or Race form. The actor then adopts many qualities of a furniture object, becoming a mount. Furniture keywords can then also be added to the same Actor or Race form, similarly modifying their behavior as a mount.
FurnitureForce1stPerson
- Forces the player into a first-person perspective while playing the furniture animation
- This keyword must be used if subgraph data has only been added for first-person animations
- This keyword cannot be used if subgraph data has not been added for first-person animations
FurnitureForce3rdPerson
- Forces the player into a third-person perspective while playing the furniture animation
- This keyword can be useful because most behavior graphs will allow the player to use a furniture object with only third-person animations, but will not play the animations unless the player is either already in third-person, or is forced into third-person (e.g. Actors\Character\Behaviors\FurnitureBehavior.hkx)
FurnitureAllowPerspectiveSwitchAfterSitting
- Used in combination with either the FurnitureForce1stPerson keyword or the FurnitureForce3rdPerson keyword to force the player into a perspective while sitting, and to then allow the player to switch perspective once they sit down
- Vertibirds use this keyword in combination with the FurnitureForce1stPerson keyword to force you into first-person while you are getting in, and to then allow you to switch perspectives once you have manned the turret
PlayerPathToFurniture
- The player will path to the interact point instead of teleporting, I'm assuming using navmesh
- Power armor frames use this keyword to have the player walk towards it and insert a fusion core
- The furniture animation will begin playing once the player reaches the furniture objects interact point, at which point the player may still be in the process of rotating to face the correct direction
- The pathing is poor, and subsequently the player may become stuck while pathing (the power armor frame accounts for this by using a script)
FurnitureCantWait
- The player cannot wait while using the furniture object
CanUseFurnitureForCombat
- Allows the actor to use the furniture object in combat and use their weapon while seated
hasPassengerMounts
- Actors with this keyword become mounts using their furniture animation keyword(s) (e.g. vertibirds)
- While being ridden actors in many ways behave like furniture objects, with a few differences:
If the mount moves, the rider moves along with it
If the mount is killed, the rider is forced to dismount and is ragdolled
The player cannot wait
The riders movement is disabled
Dialogue for the player is disabled, but the hardcoded companion wheel is not
Mounted Actors
Problem
If the player is riding a mount that is killed, then the player will encounter one of many problems:
If the mount is deleted when it is killed...
- ... and the player was playing the WeaponSheathe animation (to ride the mount)
The game crashes - ... and the player was playing the EnterFromStand animation
The player can no longer toggle perspective - ... and the player had finished playing the EnterFromStand animation
No problem occurs
- ... and the player was playing the WeaponSheathe animation (to ride the mount)
The player is frozen and the game cannot be saved, and the only way to thaw the player is to resurrect the mount - ... and the player had finished playing the WeaponSheathe animation (to ride the mount)
The player can no longer toggle perspective
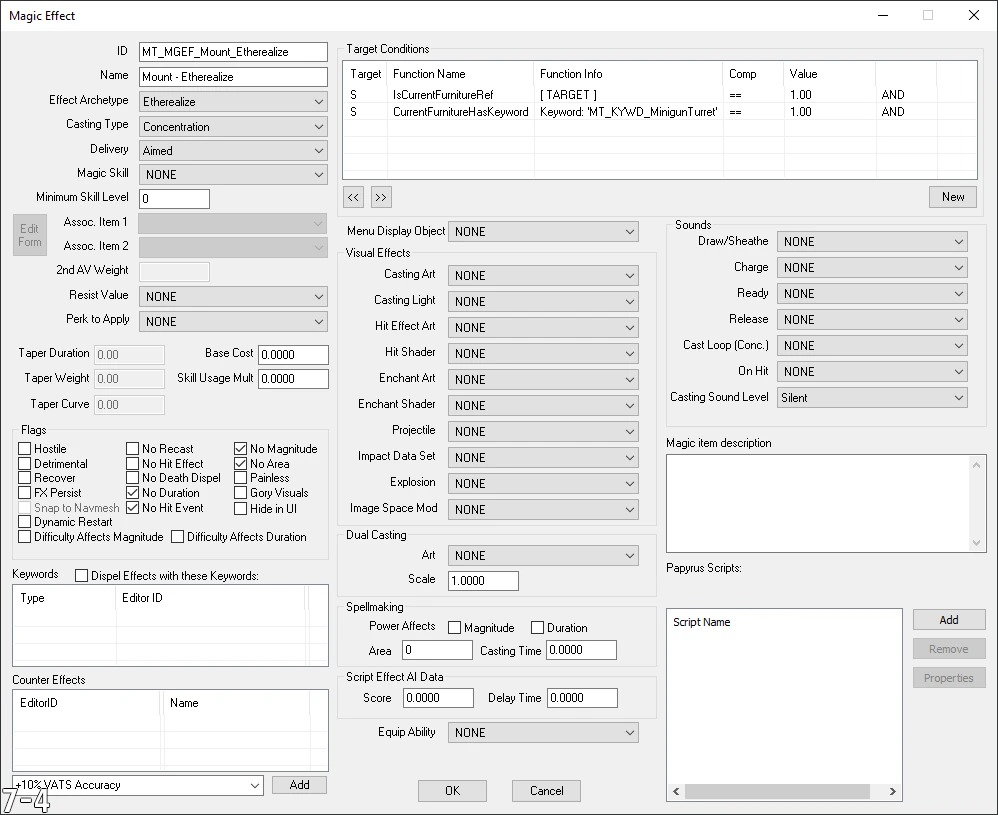
The only solution that I have found is to simply stop the mount from dying while it is being ridden by the player. Even mounts that are flagged as essential will force their rider to dismount when they begin to bleed-out. Instead, the mount should be etherealized or flagged as a ghost, making it immune to all types of damage.
The problem then becomes determining when the player is riding the mount. The more accurately you can determine when the player is riding the mount, the smaller the window of time in which the mount must be unkillable. The OnPlayerEnterVertibird event for example does not work because it is only sent once the player has sheathed their weapon to ride the mount.
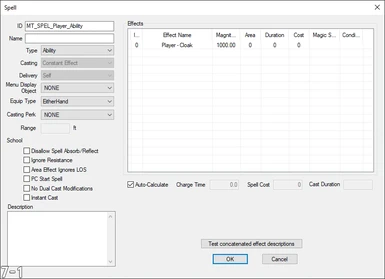
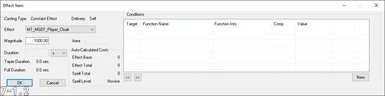
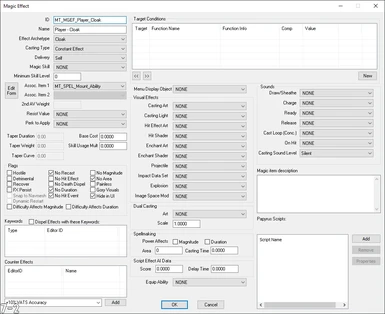
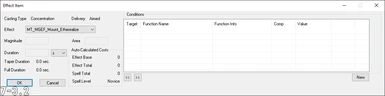
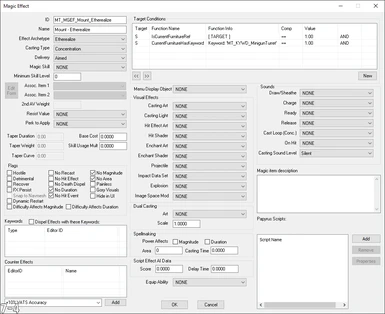
The best approach that I have found is to apply a spell cloak to the player that automatically etherealizes your mount while it is being ridden. To determine when the player is riding the mount you use the IsCurrentFurnitureRef condition and optionally the CurrentFurnitureHasKeyword condition as follows:
- Give the player an ability...Spoiler:Show
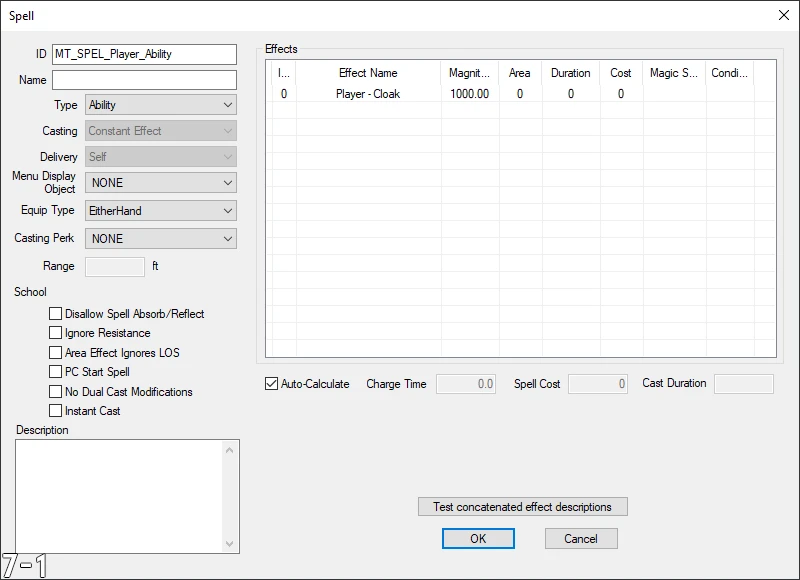
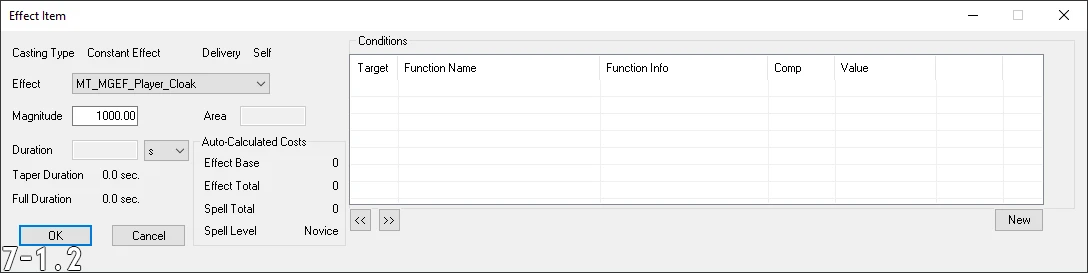
- That is a cloak...Spoiler:Show
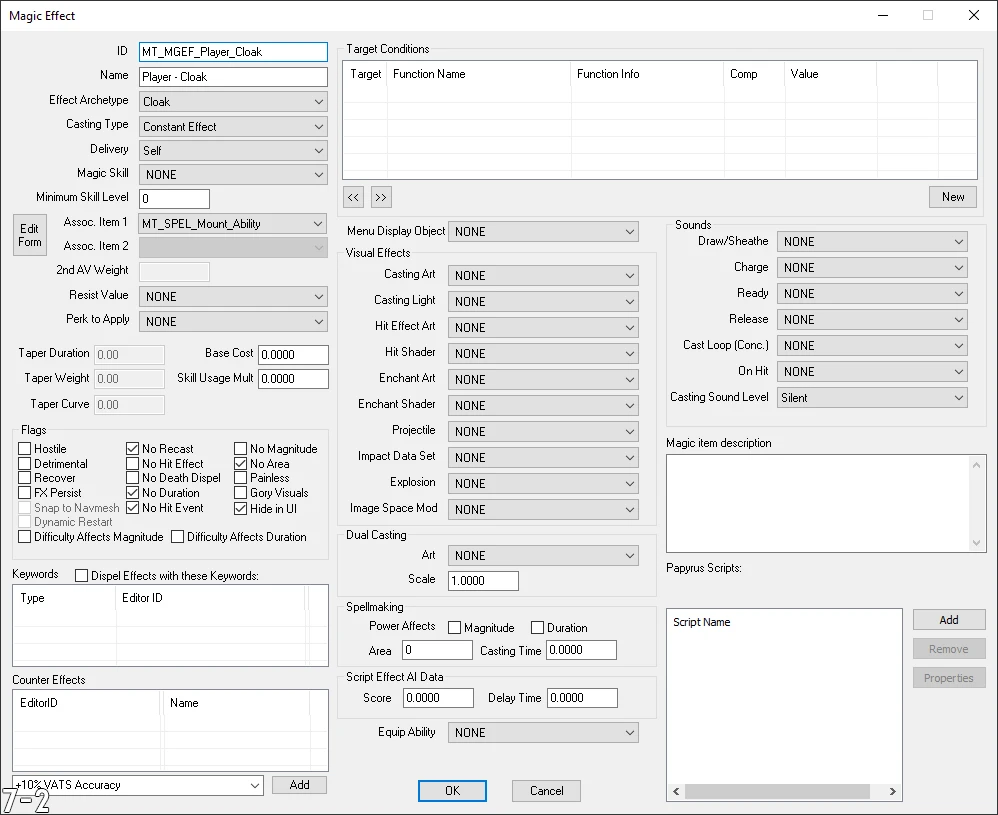
- That gives an ability...Spoiler:Show
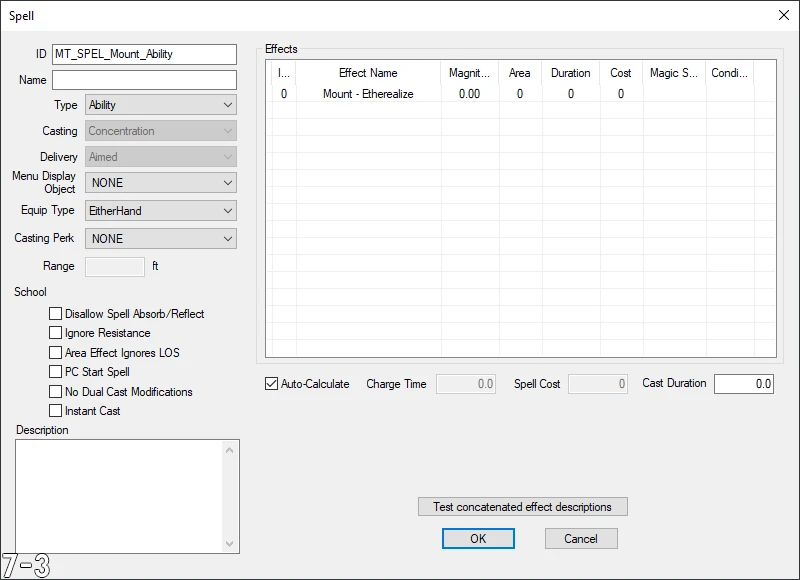
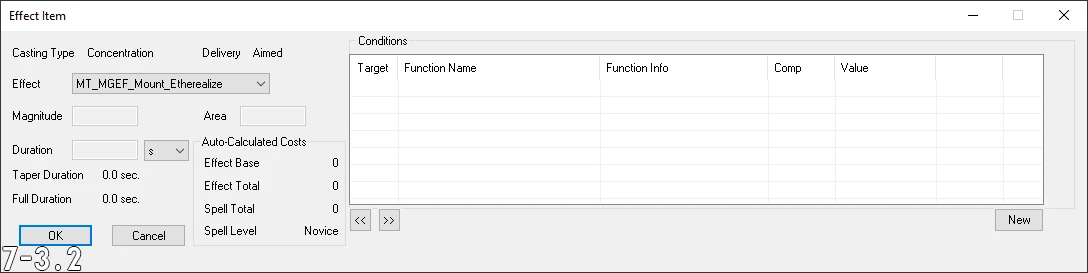
- To all mounts with a unique keyword that the player is ridingSpoiler:Show