


This is for modders who would like to create a custom overlay. The process is simple. Create overlay art and put it in the directory that matches a valid armor. Any Armor that uses the eyes biped slot is considered valid for overlays. The overlays are loaded at runtime by deriving unique file paths that are based on the armors own model path. An overlay file path may also be defined by the author when a derived file path is not suitable.
Create the art
The framework supports interface (swf) and texture (dds) files for art assets. There are some key differences between the two types so take some time to consider them. Take special care to draw your overlay art as what would be considered 100% opaque. This is because users may adjust an overlays alpha channel to their own preference using a slider control in MCM. If your overlay art is released with 50% opaqueness baked in the users won't be able to achieve 100% opaqueness if they prefer.
A) Create a texture overlay
Most authors are already familiar with `dds` texture files and tools like Paint.net or Adobe Photoshop. The process is straightforward when creating an overlay texture but lacks any of the advanced functionality of interface based overlays.
All overlay textures should use a size of at least 1920x1080 or greater. The texture format should be `DXT5 ARGB 8 bpp | interpolated alpha` with `Generate MIP maps`. When you are finished with your overlay save it as a '.dds' texture file. All texture overlays are loaded from the `Textures` folder.
B) Create an interface overlay
The interface `swf` files are vector based art which can be created in programs like InkScape, Adobe Illustrator, and Adobe Animate (Flash). Once the art is imported & published through Adobe Flash, the framework will load the interface `swf` files. The impressive thing about interface based overlays is that they support animation and filter effects. Interface based overlays are also capable of communicating with papyrus scripts.
Open Adobe Flash and create a new AS3 document with a size of 1280x720. The size of 1280x720 is the default resolution of the Fallout 4 user interface. The Fallout 4 user interface will automatically resize itself to the user's screen resolution. Don't worry about the low "resolution" though. Due to the nature of vector based graphics, the user interface is infinitely scalable without quality loss.
If you prefer to design your vector based art in a program other than Adobe Flash, it is possible to import files from Adobe Illustrator, Inkscape, and others. In the Adobe Flash file menu select "Import" and choose "Import to Stage..." or "Import to Library...". Select a valid art file and add it to the stage.
When you are finished with your overlay publish it as a '.swf' file. All interface overlays are loaded from the `Interface` folder.
Add the overlay in game
There are a few ways of implementing an overlay in game. Take some time to consider the best one for your project.
A) Using an automatically derived file path
By default, the framework will assume a file path which is derived from the Armor's own model path. If the Armor object has both a male & female model path then an overlay path must be provided for both genders, even if they are the same. First the framework will read the relevant Armor model path and then generate several potential overlay paths automatically.
Let's take for example vanilla sunglasses which are equipped by a male player. The default model path for male sunglasses is "Meshes\Clothes\ShortSleeves\MGlasses.nif". The framework will attempt to find an overlay in order of the following file paths..
** See option B below.Interface\Clothes\ShortSleeves\MGlasses.swfTextures\Clothes\ShortSleeves\MGlasses.dds
This pattern will apply to all valid armors in the game. Add overlays to the matching file paths for any armor and the framework will display the overlay automatically.
B) Using a defined file path
An overlay file path may be specifically defined by an author. This may be useful when it is intended for multiple helmets & eye wear to use the same overlay. The framework does this in a convoluted way due to a limitation in F4SE, which I hope is not too much of an inconvenience.
Before the framework considers an automatically derived file path, it will first scan down all the Object Mods attached to the current Armor which is located at the eyes biped slot. Each OMOD has an associated MiscItem which is called a "Loose Mod". When one of these "Loose Mod" items has the Keyword called `ArmorBodyPartEyes` attached, the framework will use the file path filled into the "Inventory image" field. Add the overlay file path to the "Inventory image" field. The `Inventory image` is not used by Fallout 4 so don't worry about any issues arising from that. Make sure that the MiscItem has the `ArmorBodyPartEyes` Keyword or the file path will not be considered.
Create a MiscItem either manually or by right clicking the Object Mod in the Object Window and clicking "Create Loose Mod".
If possible, I recommend that the Armor has this Object Mod attached by default instead of requiring the user build it or be acquired by other means.
If you are concerned about providing an "off" option for your overlays then don't worry! Users can simply not install the framework if they would like to turn them off. There are no dependencies to be concerned about.
All Done!
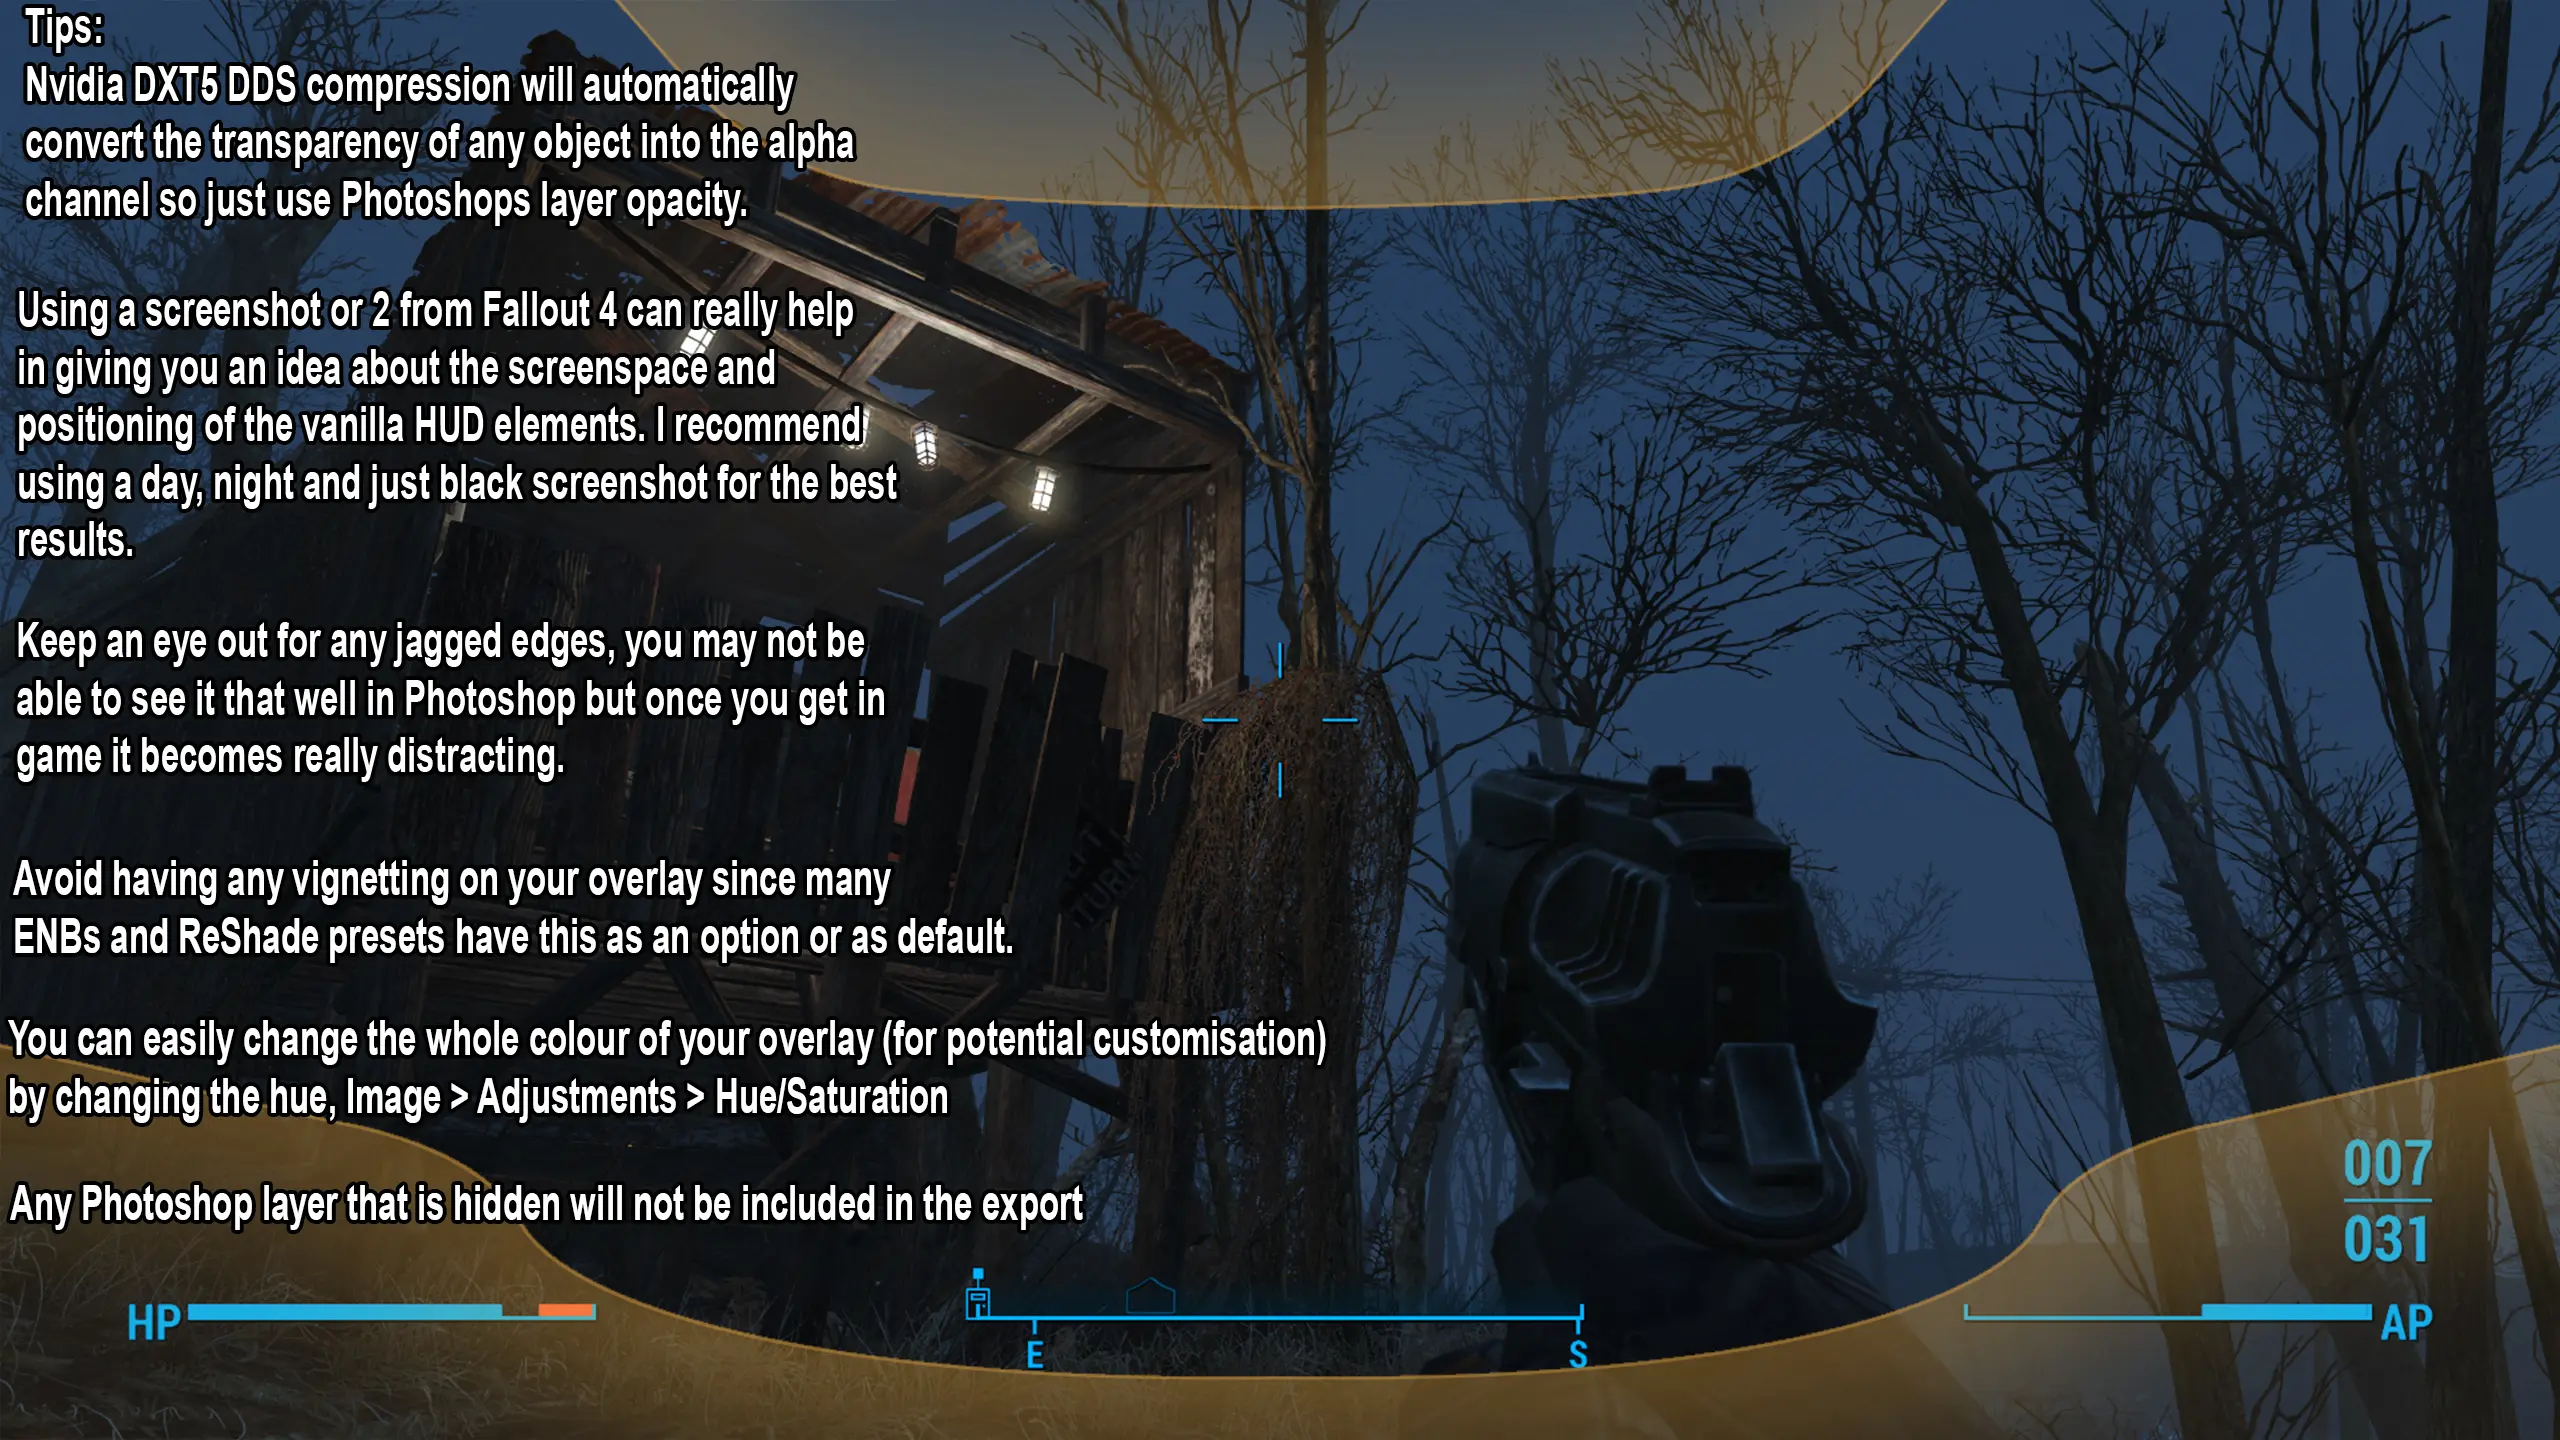
Tips
Notes
- Texture overlays should not be packed into archives. Distribute overlay textures as loose files.
- Interface overlays are allowed to be packed into archives.
- Ultra widescreen support is untested at the time of writing. The theory is that it won't work for textures because the compression snips out anything outside of the set resolution.
- There is a known issue where the "OverlayMenu" is rendered on top of the "HUDMenu". This means an overlay could potentially obscure a menu element. As a temporary solution a mod user can make overlays semi-transparent. Track the issue here.
3 comments
I put the dds file containg the overlay in every texture folder but i doesn't show up ingame.
The only thing left i can think of is renaming the dds file but i don't know what i should call it.
Is there a discord i could join for help?
The link on the main page is not longer working sadly.