Documentation
Readme
View as plain text
Moira Companion ReadMe
Advisory: This mod is not marked as adult but it does contain a small amount of sexual content. There is an FTB dialogue topic with mild audio (made from vanilla sounds, no "porn noises," it could best be described as "cute and slightly awkward") and some mildly suggestive dialogue.
Intro:
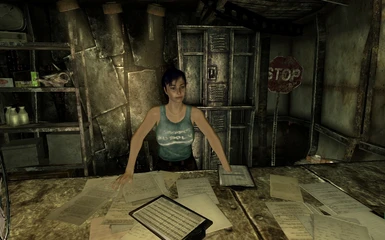
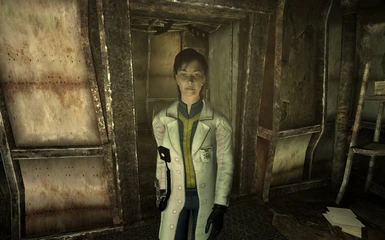
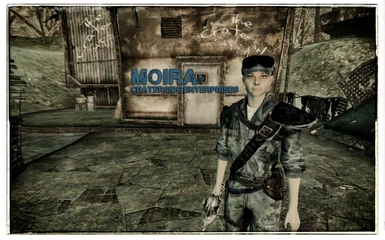
Moira. What is there to say? She's arguably the most important NPC in the game when you first start out; sending you to key locations, providing vital upgrades for your house, and working with you on one of the longest quests in the game.
But she's more than that.
Even after dozens of playthroughs over countless hours and a continual flux of new mods, Moira is a constant, friendly and familiar face. Moira is an anchor.
Moira IS Fallout 3 doncha know.
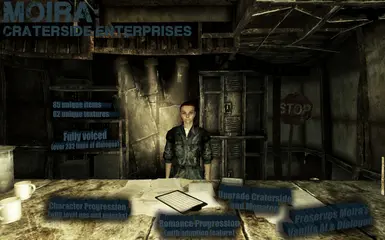
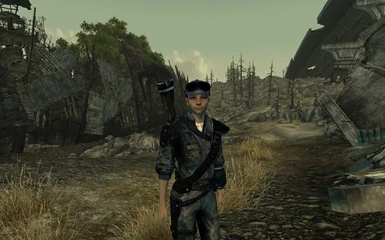
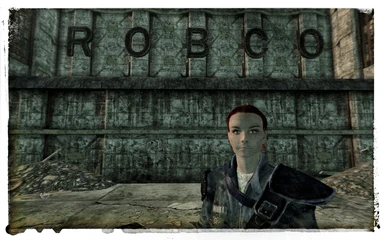
This mod allows you to recruit Moira Brown as a companion once you complete The Wasteland Survival Guide and disarm Megaton's bomb. At that point you will begin to improve her skills and develop your relationship while she is with you at various locations and during various quests. As Moira's "Adventure Skill" increases through doing this, she will unlock numerous new items, features, and rewards.
You will become an employee of Craterside Enterprises and help manage and improve Craterside Supply/Craterside Lab. Upgrading the new Lab area, the store and even Megaton itself.
You will eventually be able to open new stores and expand Megaton into new areas, turning Craterside Enterprises into almost a faction unto itself.
You will also be able to progress in a romantic relationship with Moira (PC gender/name aware) that proceeds from friendly compliments through flirting to a full on relationship, eventually offering the possibility to adopt Penny with Moira and make her a permanent resident of Megaton. You will also eventually be able to marry Moira in the Church of Atom.
This mod attempts, essentially, to allow the player to "build a life" with Moira and to really feel like part of a living Wasteland with Megaton as your home.
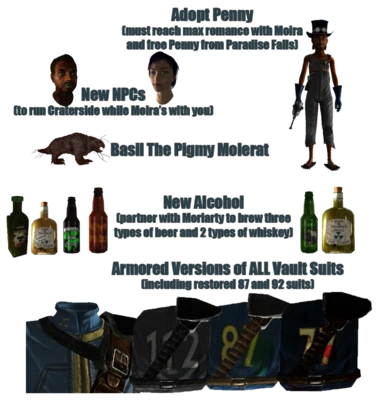
Also... you get to make your own booze and turn ANY Vault Suit into an armored version(including restored 87 and 92 suits).
Upgrade Notes:
.esP version:
It should be safe to upgrade. Overwrite anything that gives you a warning. Note that while this version contains EXACTLY the same features as the .esm, certain bugs from 1.0 may not be fixed by the update and the new NPCs will likely have the "head/body mismatch" issue. The only thing you loose out on by using the .esp will be any future plugins that require the .esm or any minor updates that require it (anything serious the esp will get a full update as well).
.esM version:
NOT safe to upgrade. MOIRA's script is preserved so any variables saved in her object script are ok but some of these lock quest dialogues and all the quests are going to reset. It is theoretically possible to fix this in console but it's a LOT of work. A future release may allow you to migrate to the .esm without a clean save (from 1.0 or the 2.0 .esp version) so if you want to stick with the .esp you are not hurting your chances to upgrade later to .esm.
EITHER version:
There are a few variables added to Moira's script but the new quests initialize them if you upgraded so that should be ok.
The only thing that you will loose by upgrading is one specific bonus multiplier at the new Canterbury Commons store if you were trained by Moira in Barter BEFORE upgrading. This is a fairly minor problem (reduces your max daily caps multiplier in the trade system to 17 instead of 19) and cannot be fixed except by using console.
Everyting else should work fine.
Hiring:
Before you can begin your adventures in the wasteland with Moira, you first need to complete the Wasteland Survival Guide. No bonus objectives are required but you must write the book, not talk her out of it. In addition, you must disarm the Megaton bomb and gain access to the Megaton house.
At that point you will unlock Moira's initial companion dialogue. Before she will join you, however, you will need to hire employees to run Craterside while she's away. This will take the form of a (very short) marked quest "Craterside Enterprises."
Once you complete that task, you will unlock your 20% discount at Craterside Supplies and Moira will become available as a companion.
After you initially hire Moira, you will be added to the Craterside Supply faction and be given a key, the lab door ladder will unlock (and get a shiny new sign), and you will be able to enter Craterside at any time of day and stay as long as you want (not all containers/items are player owned and the merc will still talk shit to you).
At this point useable Survival Guides (2 varieties) will be added to the game economy. One grants a small PERMANENT boost to your health, carry weight, and rad/poison resistances and the other (rarer) version also grants +1 to ALL skills. They both also provide a 5% critical chance boost for 10 minutes. (Note: the in game effect will only show up as being +5 crit chance but you will receive all bonuses.)
Moira's Barter and Repair dialogues will NOT be available while she is hired.
Hiring an Assistant ("Craterside Enterprises" Quest):
Before Moira will leave Megaton, she has to know someone good is minding the shop. There are two people in Megaton who fit the bill. These are Janet Markov and J. Robert Sellers. They are new NPCs with Megaton settler AI. You will need to hire one of them to be Moira's lab assistant (500 cap signing bonus required) and one to mind the shop (200 cap signing bonus required). Both NPCs can be hired to do either job.
Both employees will continue to live in Craterside if Moira is dismissed but the shopkeeper will resume their normal daily routine instead of running Craterside.
You can fire them after completing this quest (if you want to swap their jobs) but Moira cannot be hired unless both employees are also hired. This may also restart the quest though it should not reset any variables in your savegame.
(Note: You can hire them in the opposite order to the quest markers but the quest journal may get screwy. If you do this by accident, just ignore the quest journal, hire BOTH employees and then talk to Moira and the quest should complete anyway.)
Character Progression:
By taking Moira to scientifically significant locations in the Capital Wasteland, you will help her advance her skills and attributes. This also unlocks new features, upgrades the companion perk, and advances the romance progression.
This is accomplished primarily through dialogue. In most cases, you will need to talk to Moira while in specific scientifically interesting locations. These are available from the "Let's Talk" topic and are only available if she is in the required location and not set to "relax." There are also some instances where there is no dialogue but having Moira with you causes her skills to advance (if she's with you when you get Dr. Lesko's booster, for example, she gets one too even though there is no dialogue about it).
A complete breakdown is in the Cheats/Spoilers section of the readme but basically, you just need to talk to Moira as much as you can when you're in a place you think she'd be interested in.
As Moira progresses, she earns "adventure skill" points that unlock things at certain levels:
3 Points: She gets a unique Roving Trader Hat that matches her suit.
4 Points: Her Endurance is increased by 1.
5 Points: Her Strength increases by 1 and some additional dialogues and variations on existing ones unlock. This also expands Moira's Craterside Supply inventory (more ammo, chems, and common weapons) and unlocks most of the Craterside upgrades (some have additional requirements). Moira's confidence is changed from "cautious" to "average."
7 Points: Her Intelligence is increased by 1 and she has put on her RobCo factory unlocked PipBoy 3000. This also allows you to "ping Moira's PipBoy" and teleport her to your location as long as she is not dismissed to Megaton. (Note: If she is set to relax/wait, she will still be set that way after teleporting to you.)
8 Points: Her confidence and assistance are increased (brave, helps friends and allies). This will make her slightly more active in combat. She will use the same combat dialogue but will (mostly) only retreat if she is unarmed against a stronger enemy.
10 Points: Her companion perk bonuses are doubled. This further expands Moira's CS inventory (even more chems and ammo, better weapons and armor, better junk, some rare items). Your discount at Craterside increases from 20% to 35%.
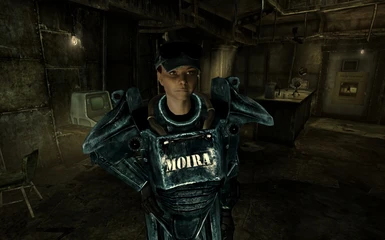
15 Points: She gets an upgraded Armored RobCo Jumpsuit (same texture better effects and stats) and an additional 1 Strength and Endurance.
20 Points: She gets RobCo Power Armor (cause why not... right :) ). This also unlocks the final expansion to Moira's inventory with more of the items from the first two expansions (including a LOT more ammo), additional rare items, and certain of the armored vault suits (you can buy them rather than giving Moira the parts). Your discount at Craterside increases to 50%. Moira's confidence will increase from "average" to "brave" (she won't retreat unless an enemy is significantly more powerful but will still retreat).
Romance Progression:
Some of the actions that earn Moira adventure points also reward romance points. These unlock daily dialogues at certain levels and allow you to progress more quickly or to lock out the romance dialogue entirely (Moira doesn't get toooo sad). Note that since there are multiple random "say once" options for these dialogues, they only reward a fraction of a point as you can say ALL OF THEM each once per day.
The thresholds for the various dialogues are:
3 Romance Points: A say once topic to either tell her you're interested (disables the lockout topic and enables further dialogues) or tell her you want to keep it professional (PERMANENTLY locks out all romance dialogues).
5 Romance Points: A daily flirt/compliment dialogue that rewards .25 romance points and has multiple random variations. (up to 1 total point per day)
10 Romance Points: A more overtly romantic daily flirt/compliment dialogue that rewards .50 romance points and has multiple random variations. (up to1.5 total points per day)
15 Romance Points: Lover perk unlocked, daily FTB dialogue that rewards .25 romance points, has multiple random variations and is only available in Craterside (store or lab) or Your Megaton Home (up to 2.25 total points per day). Moira will also sleep at your house instead of Craterside when dismissed (unless Penny is living in Craterside).
20 Romance Points: Daily "serious" romance dialogue that rewards 1 romance point (up to 4 per day, though currently irrelevant). Penny is now adoptable once you have freed her from Paradise Falls (varied dialogue if you did it alone or with Moira but can be done before mod installation).
(Note: Some of the various dialogues also depend on Moira's Adventure Skill. While it is unlikely that you will end up with more romance than adventure points without using console, it is possible not all variations will be immediately available when a new romance topic unlocks.)
Adopt Penny:
If you have rescued Penny from Paradise Falls and have at least 20 romance points, you will be able to adopt Penny and have her become Craterside Enterprises' junior vice president. To do this you will need to have at least good karma (over 250) and talk to Moira. (something personal topic).
Once you complete this dialogue, you will be able to ask Penny to move into Craterside. When she agrees, she will teleport to The Brass Lantern and begin a daily schedule. If Penny is "lost in the wasteland" she should immediately teleport to Megaton and will be set as fully adopted when you talk to Moira, you will miss like 3 lines of dialogue (blame the vanilla AI packages :) ), if you want to avoid this and get the additional Penny dialogue either wait till the kids make it back to Lamplight or use console to move them there manually.
She will sleep in a newly enabled bed area on the top floor of Craterside from 10PM to 7AM, do research in the lab (where she now has a junior scientist desk) from 7AM to 11AM, hang out with Maggie and Hayden from 11AM to 1PM, eat at The Brass Lantern from 1PM to 3PM, hang out in Megaton from 3PM to 10PM, and repeat. Once you adopt her, Basil the Pigmy Molerat will follow her at all times when dismissed instead of sandboxing in the lab.
You will also have access to a daily topic with Penny that lets you give her a Grognak, Toy Car, Sugar Bombs, Nuka Cola or 5 caps. This will check your inventory in that order and deduct the first one that you have. Grognak rewards 10 karma, all others reward 5 karma.
You will not be able to hire her as a companion but she will still engage in most of her dialogues as normal (some of her vanilla dialogue requires her to physically be in Lamplight so if you need her help to unlock Vault 87 do that first).
You will not be able to "un adopt" her once adopted. There is a dialogue to disable the adoption dialogues if you INITIALLY choose not to go through with it. There is no penalty for choosing not to adopt her (well, except for Penny since Moira basically has her dream job).
Wedding:
Once Moira has 20 adventure skill and over 50 Romance points, you will be able to ask Moira to undergo "Fusion" with you (marriage) at the Church of Atom.
After that, you'll need to ask Confessor Cromwell to do the ceremony and pay his 244 cap fee.
The wedding will trigger at 8AM and last until 12. You can do this any day and don't need to do it immediately. HOWEVER, certain NPCs will stay in the Church of Atom from the point where you get Cromwell to agree until the point where the ceremony is finished, so it is advised that you only wait if you want to see who's going to show up.
You will need to go to the Church of Atom and stand next to Moira at the altar for the ceremony to begin.
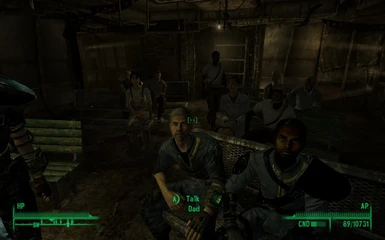
Most of Megaton's named citizens will attend as will several "special guests" depending on the current state of the main quests including Fawkes, Dad, Dr. Li, Amata, and Penny.
You will gain a perk that grants some major benefits while Moira is in your party and not set to "relax here" ("wait" is ok).
Perks:
Super Genius (available as soon as you hire her and levels with her):
While Moira is in your party, she will increase your science skill by 25 when hacking terminals, increase your chem duration by 50%, and will reduce your barter costs by 5%. When her adventure skill hits 10 this bonus doubles. If you train her to max lockpicking skill, you gain the ability to re attempt broken locks (Infiltrator perk effect). If you train her to max Science skill you gain the ability to re attempt locked terminals (Computer Whiz perk effect.) One of the location specific dialogues also unlocks a 25% reduction in drinking radiation (hint: uh... radiation... water... duh).
(Note: there is only one actual rank to this perk but there are conditioned effects. If you are not getting the bonus after an upgrade or unlocking additional features, fire (relax should work too but fire is recommended ) and re hire Moira.)
Moira's Affection (requires 15 romance points:
Increases Luck by 2 and Repair, Science, and Barter by 10. Bonus active even when Moira is fired.
Family Man/Den Mother (requires 20 romance points and adopting Penny):
20% addiction duration reduction, 50% addiction chance reduction, Silent Running effect, +10 Damage Resistance, -5 Action Points. Bonus active even when Moira is fired.
(Note: only the name is different based on PC gender, the actual perk effects are identical. )
Your Better Half (Marry Moira)
Your healing rate is improved by 10%, enemies suffer a 10% critical hit penalty against you, you will gain 25% more XP, gain an extra 2 skill points when you read a book, and receive an extra 5 skill points when leveling up. Only the level up skill point bonus is active if Moira is not in your party. Unlike most perks, this WILL remain active if she is set to "wait" (not "relax").
Founding Father (Found Megaton Towers)
50% discount on a random selection of about 10-15 items common to wasteland merchants.
Dread Oblivion (Complete onwership of "The Hound")
You will do 5% more damage with pistols (20% more against mutated animals or abominations) but only if your current health is no more than two thirds of your maximum.
Let's Talk:
The "Let's Talk" topic has most of Moira's options. These include Craterside management, training, relax here (regular wait is still a "top level" option and is still a guard rather than sandbox package), romance topics, workbench, medical treatment/infirmary, chem lab, and follow distance. You also access the location specific player initiated topics through this menu.
Any topics that only appear when Moira is in certain locations should be at the top of this menu. These are all "say once."
(Note: The text will vary with her responses so it may not actually say "let's talk." It WILL always be in the same order in dialogue and should quickly become obvious.)
Relax Here:
This option will set Moira to sandbox at her current location. While she will remain there indefinitely, she is not set as "dismissed" and the game will still consider her an active follower.
Most quest/NPC dialogue triggered Moira scripting will NOT run if she's relaxing. So if she's chilling at Rivet City she won't know what you're doing in Big Town.
This option is not available if she is currently waiting (nor is wait available if she is relaxing) and is only available in interior cells. It is strongly advised that you not dismiss her somewhere hostile even though she should still be set as invulnerable when told to relax.
(Note: The "let's go" for this is also available from the top level of Moira's dialogue)
Romance Tree:
"Can I ask you something personal" topic with access to all the romance topics.
Craterside Upgrade Topics:
Rooftop Deck - Unlocks the attic door. Costs 1000 caps and Moira must have 5 adventure skill.
Protectron - Enables a Nuka Cola Protectron in Craterside Supply. Must complete "The Nuka Challenge."
Brewing Partnership - You will also need to convince Moriarty to give you his "blessing" and seed money. This allows you to brew beer and whiskey which is available in large quantities from Gob and smaller quantities from Moira and Jenny Stahl. Certain other merchants and vanilla leveled lists will have some of these items as well. There is also a machine on the roof to make small batches once a month. Must have 5 adventure skill. (Note: You will need to navigate back to this topic to complete the quest "Strange Brew.")
Hydroponic Terraces - Partner with Jenny Stahl to install hydroponics on the Brass Lantern roof and add new food items to Megaton's merchants (and certain other wasteland merchants/leveled lists). Must have 7 adventure skill, have talked to Moira in both hydro/water related locations, and unlocked the Oasis upgrade.
Fire fawkes to CS - Makes Fawkes' fire location set to Craterside and adds him to CS faction. Must liberate Fawkes.
Medical Aid:
If you have NOT yet trained Moira in Medicine, you will have access to a daily dialogue to have Moira heal you 100 points IF your health is under 50%; she will also reduce your radiation level by 200 if it is over 200.
If you HAVE trained Moira in Medicine she will heal you to full health, remove all rads, and heal any limb damage.
Workbench:
If you have trained Moira in Repair you will have access to a Workbench menu through this daily dialogue.
Chem Lab:
If you have trained Moira in Science you will have access to a My First Laboratory menu through this daily topic.
Follow Distance:
Close (100 units), default (250), and long (500) follow distances available through this topic. Idle and random chatter settings vary slightly between the packages. (NOTE: a human is 128 units tall)
Hire/Fire Basil the Pygmy Molerat:
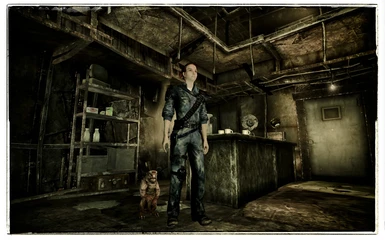
Talking to Moira about having Basil join you will "summon" him and set him to follow Moira. Dismissing him will send him to the Lab at Craterside. (Note: "Talking" to Basil directly will hire him to follow YOU instead of Moira. Talking to her about hiring him after you have hired him to follow you will make him follow her instead. You will need to fire him to get him to follow you again.)
Training:
This topic provides access to any available training topics. The various options are only available if you meet their conditions (there is no "fail topic" you just won't see any you can't do). These all reward .25 adventure skill points. There are also certain skills where Moira will train you if your skill is LOW enough (these do not reward any adventure points). Since the root training topic has three variations, you will be able to train/be trained three times per day. (NOTE: the "nevermind" choice still uses up one of the three.)
The skills and requirements are as follows:
Barter: You need at least 90. Moira is set to maximum skill if she is not already at it.
Barter: If you are UNDER 40, Moira will train you to 40.
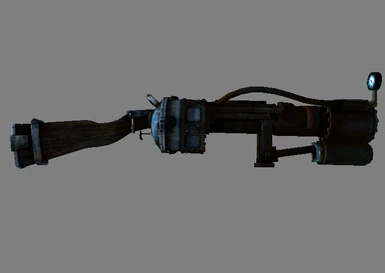
Big Guns: You need at least 86. Moira set to 75 and you receive a custom Rock-It Launcher.
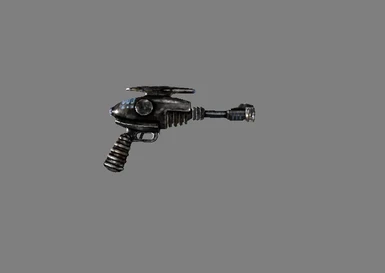
Energy Weapons: You need at least 88. Moira is set to 75 and receives "Moira's Unusual Blaster."
Explosives: You need at least 60. Moira is set to 50.
Small Guns: You need at least 75. Moira is set to 50 and receives a custom railway rifle, you receive Moira's Universal Revolver; a .38 that will fire any gun ammo (works like Rock It Launcher).
Lockpicking: You need at least 95. Moira is set to maximum skill if she is not already at it, Moira's companion perk now allows you to re attempt broken locks. (Note: there is a message in game telling you this but the actual perk description will not change.)
Lockpicking: If you are UNDER 50, Moira will train you to 50.
Medicine: You need at least 55. Moira is set to 50, Moira's daily medical dialogue now activates the My FIrst Infirmary menu and is available at any health percentage. Access to higher level functions of "Autodoc" enabled.
Repair: You need at least 95. Moira is set to the maximum skill if she is not already at it, Moira's daily Workbench dialogue unlocked.
Repair: If you are UNDER 50, Moira will train you to 50.
Science: You need at least 93. Moira will be set to the maximum skill if she is not already at it, Moira's companion perk now allows you to re attempt locked out terminals. (Note: there is a message in game telling you this but the actual perk description will not change.)
Science: If you are UNDER 50, Moira will train you to 50.
Sneak: You need at least 80. Moira is set to 80 and gets a custom shady hat.
(NOTE: If Moira is already at the level awarded by SOME of these topics, she will gain a boost anyway. For example, if if sets her to 50 and she's already at 50 she'd probably get a boost to 60-80.)
PipBoy Terminal:
Instead of the <Ping Moira's PipBoy> option, you will now have a <PipBoy Terminal Interface>. This will give you access to the Ping function for Moira as a menu option that works exactly like the device from 1.0. You will receive this during one of Moiras Level ups the same as the 1.0 version and there is a script to force it into your inventory if you upgraded.
There is also a new "Find My Moira" function that sets Moira as a quest target in your PipBoy and can be toggled on or off.
In addition, you will gain access to several other sub menus:
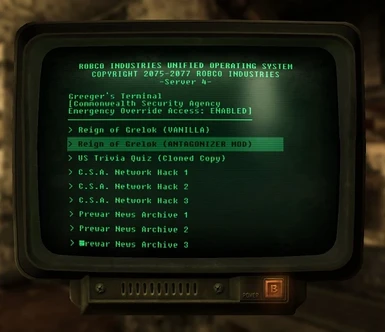
Grelok Game available from unlocking fast travel to Hubris Comics and/or finishing the new Canterbury Commons quest.
Grelok AntAgonizer mod from completing the Canterbury Commons quest.
Craterside Messageboard
PipBoy direct messages are quest extending messages that add lore and depth in the form of basically collecting several quest related notes into a format that feels more like actual corresponance.
Armored Vault Suits:
If you have finished the guide and have a leather belt, leather armor, any vault suit, and 3 scrap metal in your inventory you will be able to ask Moira to craft an armored version. This topic is available from Moira's main (top level) dialogue menu and can be accessed at all times (following, dismissed, relaxing, waiting, etc...).
The Armored versions of the suits are custom textured and theme appropriate. The 77 suit is OP and blood splattered, the 112 suit is 93% desaturated, the 87 suit has FEV stains, the 92 suit has a musical note for the "collar number," the 106 suit has various creepy tally marks, a "redrum" and blood stains on the forearms (from scraping the walls), the 108 suit has the "collar number" duplicated on both sides (cloned). The 101 suit is the vanilla texture but is upscaled 200 % as are all the armors. (NOTE: The VANILLA Armored Vault Suit and mounted vault suit will have the upscaled texture as well.)
Craterside Supply Upgrades:
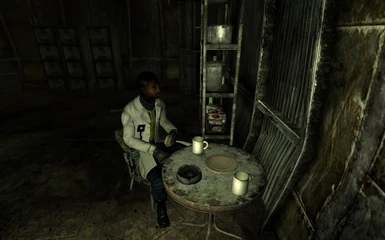
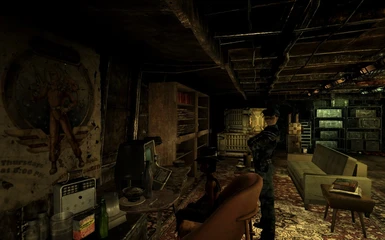
There is a new cell, Craterside Laboratories, accessible from a ladder/hatch near Moira's desk upstairs. It unlocks with Moira's initialization (when she becomes hireable as a companion).
There is a full suite of equipment (including the physical units that Moira's Med/Chem/Workbench topics connect to), multiple new terminals, and storage.
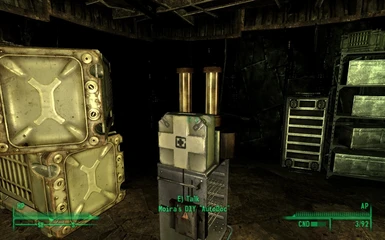
The "Auto Doc" connected to the infirmary will allow you to craft new chems after you train Moira in medicine.
The terminals all have conditioned entries that unlock as you progress. Basically check them every time you come back home to Megaton (if you care about journal entries) and you'll constantly be finding new stuff.
This is also where Basil the molerat lives when dismissed if Penny is not yet adopted.
The lab will be decorated with various trophies you unlock as you progress through the game.
One of the bookshelves functions as a "points tracker." A (static) copy of the Wasteland Survival Guide (adventure skill) or a custom pre war book (romance points) will be added to a "force fielded" (collision plane, no actual force field) bookshelf until there are 20. At that point an option in the Lab Terminal to PERMANENTLY disable all the books and the collision plane will appear, allowing you to use those shelves normally.
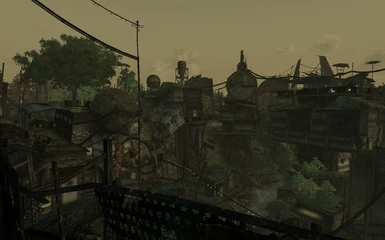
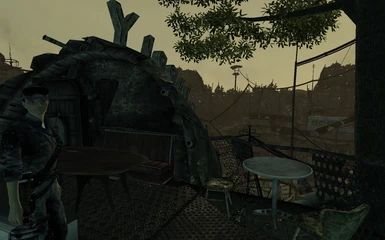
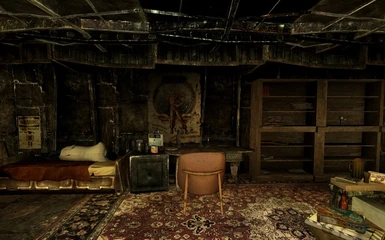
This cell also has a door to the new rooftop on the rear of Craterside with spectacular views of Moriarty's Saloon, Megaton's courtyard and... uh... the wall. The door is in an airplane piece so it really feels like the "properly positioned" attic of CS. The door is inaccessible until you buy the upgrade from Moira. This will require her to have 5 adventure points and for you to have 1000 caps to cover half her costs. If you have taken Moira to Oasis, you will also unlock trees on the roof that create a garden atmosphere and add foliage to that part of Megaton's "Skyline" (the trees are visible from outside Megaton as well) and an extension deck that uses the Oasis gazebo model (not navmeshed as it was conflicting with Megaton).
Once Moira has 5 adventure skill points, you will also be able to set up a distillery/brewery deal with Moriarty that adds unique, custom textured, Beer (3 variants) and Whiskey (2 variants) to Gob, Moira, and Jenny's inventory (as well as certain traders). Moriarty's saloon will have a much larger quantity and a better selection at lower levels. You will also be able to brew a batch of the rarer "Small Batch Private Reserve" variant once a month (first activation will count as having already been a month) at a machine on the roof deck.
Once Moira has 7 adventure skill, has visited RC Science Lab and Project Purity, and you have completed the Oasis quest (with or without Moira but not with a "quest failed" result) you will be able to ask Jenny Stahl to let you install a hydroponics garden on her roof. This will add additional foliage to Megaton's cityscape and will add new variant food items (rad free and slightly health boosted items with some that have chem like effects) to Jenny, Gob, and Moira's inventory.
When you complete "The Nuka Challenge" you will be able to "hire" a Nuka Protectron to work in Craterside. It has a unique greeting and a daily dialogue for a free Ice Cold Nuka Cola (if you are at least level 20 AND Moira has at least 20 adventure skill points, you will get a quantum instead. Aside from this it will not actually do anything but wander around the back of the shop looking cool.
Once you have finished "Finding the Garden of Eden" (and freed Fawkes from Captivity) you will be able to have him dismiss to Craterside Supply (and get added to CS faction) when fired and to send him back to Underworld if you want. The dialogue will teleport him to the correct location if he IS ALREADY FIRED, otherwise toggling this option will change his dismiss the next time you fire him.
When you adopt Penny, an area for her in the CS sleeping area and in the lab is unlocked along with her terminal and a "backyard playground" behind Craterside. A trike/minibike "parking area" also unlocks outside CS.
The DIY "Autodoc" unlocks when you train Moira in medicine. Before it unlocks it will simply open the my first infirmary menu. Once it is upgraded (no dialogue it just unlocks), it will allow you to craft unique versions of various chems as follows:
Filtered Med-X - Requires 2 Med X and 2 Purified Water. Slightly reduced effect, slightly longer length and significantly lower addiction chance.
Filtered Buffout - Requires 2 Buffout and 2 Purified Water. Slightly reduced effect, slightly longer length and significantly lower addiction chance.
Concentrated Mentats - Requires 3 Mentats and 1 Nuka Cola Quantum. Significantly longer effect and significantly higher addiction chance.
Dr. Moira's UltraPak - Requires 3 Stimpaks, 3 Radaway, 1 Jet. Stronger stimpack and radaway effects (50 instead of 30 and 100 instead of 60 with metabolism/rad tolerance perks), +20 AP for 3 min. Small chance to trigger Jet addiction. Counts as "chems" not "stimpacks."
Certain food items are also available from this menu even if you have not unlocked the hydro garden.
These are all available in single units or batches. The amount craftable will vary between the chems up to a max of 10 (usually 1, 3, 5, or 10). Larger batches "rebate" some ingredients and batches of 10 reward extra chems as well. The "dialogue" will automatically make the biggest batch you can and will not be available if you do not have the ingredients for at least 1.
Craterside Enterprises Quests:
Open a shop in Arefu:
After you have completed the vanilla quest Blood Ties peacefully (no arefu or family NPCs killed), you have at least 67 barter skill, and Moira has at least 15 Adventure Skill you will be able to mention that Arefu might actually be a decent spot for a trading post type store.
You will need to convince Vance to help haul materials up and have the Family with security and ask Karen Schenzy to work in the new store. Each will require a 500 cap retainer fee.
Once you have talked to both of them (in either order) you will be directed to the new store which will complete the quest and unlock Karen's merchant services. This will also unlock a (new) Family guard who sleeps in Karen's house during the day and guards the merchanise at night.
The new shop is called "The Sale Boat" (it's an open stall in the Arefu exterior so no in game name) and stocks mostly essentials like clothes , food and chems, useful junk, and simple weapons. Also, obviously, Blood Packs. You will get a 25% discount on all purchases.
Open a store in Canterburry Commons:
Once Moira has at least 20 Adventure Skill points, you have done the Alcohol and Hydro Farm quests, you have completed the vanilla quest "The Superhuman Gambit," and you have done at least one upgrade of each merchant through dialogue with Uncle Roe, you will be able to talk to Moira about opening a store in CC and begin the quest.
To complete the quest you will also need to have FULLY upgraded all the traders (the 500 cap one) and united them through the vanilla dialogues with Uncle Roe.
Moira will point you to a suitable building and will contact an old friend of hers to come help run the place. When you reach the store location, you will be directed to speak to Uncle Roe about using the new store as a trade hub and to ask Machete to help guard. Each will require a 500 cap retainer fee for their services. When you finish that, you will be able to enter the refurbished store and begin interacting with both the new NPC trader (Greeger) and the inventory/upgrade system.
While you WILL be able to make full use of the store and the small player/NPC home upstairs at this stage, the store quest will not complete until you do the first three upgrades. The upgrades are:
Upgrade 1 "extend supply lines" costs 1000 caps and improves the ammo, chems, and valuable junk available in the store.
Upgrade 2 "Sponsor a Merc Assault on a Raider Outpost" costs 2500 caps and adds better weapons, more chems and ammo, and raider armor to the store. This also gives Machete an Assault Rifle
Upgrade 3 "Enclave Battleground Salvage Runs" costs 5000 and adds energy weapons and ammo, and enclave gear including power armor.
While the third upgrade completes the quest, there is one additional upgrade available that adds additional items and new features.
Upgrade 4 "I Know A Guy" costs 10,000 caps. Adds a small amount of random vanilla UNIQUES to the CC store (WILL respawn). If your luck is at least 8 and your barter is at least 80, the amount of uniques will increase as will the number of items available from the other upgrades (if you don't meet the requirements when unlocking this upgrade but end up meeting them later this will still happen). This also unlocks NEW uniques that are made available to the player through dialogue with Greeger. This upgrade also gives Machete Shellshocked Combat Armor.
When fully upgraded, the CC store is arguably the best store in the game (HUGE inventory and TONS of merchant caps). It can almost hit the point where it breaks the economy; of course you need to spend over 20,000 caps to get to that point and you need to help form two trade empres (Craterside and CC merchants) so it mostly balances out.
The new uniques are:
Legandary BOS Sniper Rifle - better critical damage and chance, if target is a feral ghoul or super mutant 50% better crit damage, 25% better critical chance, extra 50 damage, and a damage resistance debuff.
Nightowl's Gaze - scoped .44 with better crit damage and chance and 25% damage boost and damage resist debuff at night (10Pm to 6AM).
RobCo Master Override - mesmetron that fires MFC and does minor damage to everyone not immune to EW. If fired at a robot, however, it will do an additional 1,000 damage. 1 shot per reload.
Extrordinary Antique Rifle - Massive damage but very quick decay, one 3 shot burst per reload, and hard to repair yourself (requires certain vanilla uniques).
Sleeper Agent's Assault Rifle - Chinese AR with a 100 round clip, a lower spread, and a slightly lower AP cost.
These will all be available for a flat rate of 1000 caps each as a random daily dialogue with Greeger once you have done the "I know a guy" upgrade.
After you have purchased all 5, a truly unique sixth one will be made available for free.
The Hound - Once you not only buy all the new uniques but pick up the final note (Jaime's Personal Journal: Entry 09) in the Dunwich Building, a mysterious package will be delivered for you care of Greeger. The package contains a Revolver that is flagged as a quest item (can't drop or sell it), uses a unique ammo type and you only get 6 rounds. Each shot has a 66 percent chance to do 666 critical damage on top of 66 base damage. Once you have used all 6 shots the gun will disappear and a perk will be added. If you attempt to use console to give yourself the gun back or more ammo they will be removed (potentially locking you out of the perk if you didn't already unlock it), a message will appear, and you will loose 66 health (damage, not permanent). Note: I got no problem with "cheating" in a one player game, but this is a Lovecraftian super revolver with a backstory. You only get 6 shots so make em count :)
Suped Up Limited Edition Deluxe Toy Car - Once you have all the other 6, this one is a freebie and locks out the now empty uniques dialogue. It increases your speedmult by 20 while carrying it.
Beyond upgrading the inventory of the new store, the store upgrades also improve your multiplier in the trade system.
The trade system:
In addition to functioning as a normal vendor, the CC merchant (Greeger) will also sell items you place in a footlocker behind the counter.
When a daily script triggers, all items in the safe are dumped to the merchant container and your "sold items today" counter goes up by 1. Note that the actual merchant container (not the "sold items safe" you are putting things in, the hidden one) is set to respawn so don't sell items you wouldn't actually sell, they may disappear after a few days.
The timer script also puts your daily take into the player safe (the cash register on the counter in Craterside East). The daily take is a random amount and varies based on your barter skill and a series of multipliers gained mostly through doing upgrades and selling items. A detailed breakdown is in the cheats section but basically you earn a multiplier of 2-60 on a random amount from 1-99. So you will always receive at least 2 caps and can theoretically receive up to an absolute max of 5,940 per day with all possible multipliers.
On a day where you did not sell items you still get paid but your payout is capped to a max of 200, 500, or 1000 caps depending on your multiplier. On a day you sold at least one thing, your max is only limited by the multipliers and the random roll. (Meaning if you didn't sell items and the script would give you 1,221 caps you may only get 500 but if you did you'd get 1,221.)
Note: The script triggers twice a day. Once to set if you sold items that day and once to actually sell the items. The "first half" triggers during business hours and the second triggers during off hours. As a result, waiting for 24 hours may skip the payout. (if you need to do this, wait 12 hours, walk around for a couple seconds, and wait 12 more)
The multiplier is a fixed value of 2 to 60 based on your quest progress applied to a game generated random value of 1-99, giving you a minimum possible daily payout of at least 2 caps and a theoretical maximum of 5,940. A more detailed breakdown of all this is in the cheats section.
While the 4th upgrade is not required to complete the quest, it IS required to get a multiplier anywhere close to the 60 max and is required to gain access to the new unique items.
There is also a "mini romance" with Greeger available to female PCs with the Black Widow perk. A daily flirt topic is available in the main dialogue that rewards one "point." It will change slightly as you progress. When you hit 10 points, you will unlock a bonus discount at the CC store, the main queen bed in the upstairs office home will gain the well rested perk (in addition to the window bedroll which already has it), and a second endtable and footlocker will appear on the other side of the bed. This also activates additional mood lighting that stays on when you turn off the CC lights.
The disount you will receive at the store varies in the following ways:
Base discount - 33%
Completed "mini romance" and/or currently have Moira with you - 40%
All upgrades complete - 50%
All upgrades complete AND completed "mini romance" and/or have Moira with you - 66%
Megaton annex quest:
Once you have done all the upgrades, opened the CC store, and Moira has OVER 20 adventure skill, a new dialogue will be available WHEN YOU ARE IN Craterside Supply. You will also need to have at least one bottle of the Reserve Whiskey in your inventory, as the dialogue is to get drunk in celebration of all you've done. During the subsequent revelry, you end up with the idea of expanding Megaton by building on the nearby highway overpass.
Moira will send you off to Scrapyard to recover some crane parts and prep them for transport by caravan. At this point Moira WILL BECOME UNAVAILABLE as a companion until you complete the next few quest objectives. This is so she can remain in Megaton to make arrangements and oversee construction.
Once you recover the crane (all you actually need to do is approach it) you will receive a PipBoy message from Moira directing you to a portable reactor and water filtration system. These are found in the County Sewer Mainline and the Franklin Metro Utility. Be aware that both of these locations are likely to have a large number of Feral Ghoul Reavers by the time you reach a high level. You can retrieve them in either order.
Once you have located them both, you will receive annother message from Moira asking you to hire some mercs as guards. This will point you to Reily (of Reily's Rangers). If you have not completed her quest, you will need to do that before you can proceed with the Megaton Annex quest. While the specifics of how you do that are irrelevant, you will need to COMPLETE the quest not fail it. Note that this also unlocks "celebrity visits" from the Rangers, so if you make them hostile after completing the quests they will may lay siege to Megaton and the annex once a month until they die.
After you have satisfied these conditions, you can talk to Reily about hiring a firend of hers and her crew to "settle down" in Megaton and work as guards. This will now send you back to Megaton to meet up with Moira.
When you rejoin her, you will now have the opportunity to visit the new town via the ladder that has been added to the "high side" pillar across from the crane. While you actually can go up there as soon as you recover the crane, this will be the first time you can see everything unlocked and will complete the quest.
At this point you can begin talking to the new NPCs (the ghoul bartender, and guard chief have new unique voices). There are also some small unmarked quests and upgrades made available in various ways.
You will be able to buy upgrades for the guards from Pritchard. She will offer the following options:
Better gear - guards get Assault Rifles instead of SMGs and Chinese ARs instead of regular ARs. The player gets 2 ARs and 1 Chinese AR as a reward as well.
Unique Armor - guards get custom combat armor based on Rivet City guard suits. Player gets a copy as well as a playable version of Pritchard's armor.
Turrets - Turrets on the Megaton Towers perimiter.
Vault Store:
There are four possible interior cells that will be connected to the final building in the new town area. The final state of the building will depend entirely on the resolution of the vanilla quest "Trouble on the Homefront." You will be notified in game when the interior is "locked in" and open to visit/trade.
1- A "Caravaneer Flop" with bedrolls, crates and caravan supplies.
This is the default and it will remain in this state unless you "unlock" one of the other three. NOTE that items or NPCs left in this interior (it has no useable containers) will become inaccessible without console once you unlock one of the other 3.
2- A squat for Vault 101 refugees.
If you caused the Vault to be evacuated without making the residents of Vault 101 hate you, there will be four "Vault Refugees" living in the building. They are non interactive but will have daily routines in the new town.
3- A GOAT themed pawn shop and caravan suppply run by Mr. Brotch.
If you are are exiled by the overseer without killing either him or Amata, and you freed Mr. Brotch during the quest, he will run a new shop.
4-A Vault 101 outpost and souveneir shop run by Christine Kendall.
If you are exiled by Amata after she becomes overseer and you have not killed her father. This also unlocks a monthy guest visit from Amata.
Loot:
Note: Most textures are upscaled 200 - 400 %. If this is an issue for any users, lower res textures will be made available.
Roving Moira Cap (XX003D8D): 3 AR.
Moira's Shady Hat (XX003D8C): Vanilla effects, 2 AR.
Moira's RobCo Technician Jumpsuit (XX002987): 8AR +10 Sci and Repair, +15 Poison Resistance.
Moira's Armored RobCo Jumpsuit (XX0036E2): 26AR, same effect as base suit.
Mora's Heavily Armored RobCo Jumpsuit (XX00538F): 33AR, +10 Science, Repair, Energy Weapons and Small Guns.
Moira's Power Armor (XX005390): 38 AR, same effect as base power armor.
Moira's Factory Unlocked PipBoy (XX00C1BC): NOT PLAYABLE
Craterside Laboratories Lab Coat (XX014239): 14 AR.
Craterside Employee Outfit (XX00F16E): 14 AR.
JD's Craterside Armored Vault Suit (XX012DFD): Vanilla effects and stats.
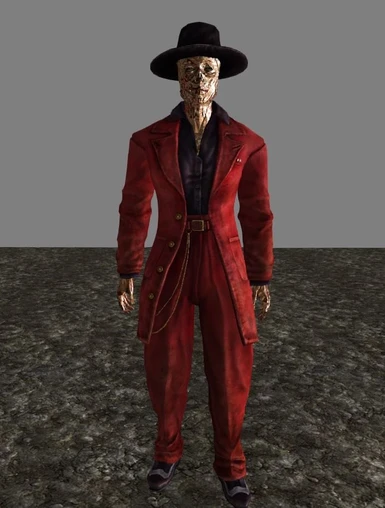
JD's Mysterious Trench Coat (XX012DFA): Vanilla effects and stats.
Penny's Moira Inspired Outfit (XX00C1C7): NON PLAYABLE
Penny's Filthy Assistant Hat (XX008B51): NON PLAYABLE
Armored Vault 106 Suit (XX0067ED): Vanilla effects and stats, uses new base suit texture.
Armored Vault 108 Suit (XX0067EC): Vanilla effects and stats, uses new base suit texture.
Armored Vault 112 Suit (XX0067EC): Vanilla effects and stats, uses new base suit texture.
Armored Vault 77 Suit (XX0067EA): Significantly more powerful with unique effects and bonus items, uses new base suit texture.
Armored Vault 87 Suit (XX0067EE): Vanilla effects and stats, uses new base suit texture.
Armored Vault 92 Suit (XX0067EF): Vanilla effects and stats, uses new base suit texture.
Vault 92 Suit (XX0B73F3): Vanilla effects and stats, uses vanilla (restored) suit texture.
Vault 87 Suit (XX0340ED): Vanilla effects and stats, uses vanilla (restored) suit texture.
Pink Power Helmet (XX007CF4): Vanilla PA Helmet effects and stats, uses vanilla (restored) suit texture.
Pink Power Armor (XX007CF3): Vanilla PA effects and stats, uses vanilla (restored) suit texture.
Moira's Unusual Blaster (XX004453): 42 dmg/crit, 11% crit chance, 22AP, extremely low rate of decay, uses microfusion cells.
Moira's Universal Revolver (XX006F10): PLAYER ONLY. 21 dmg, 39 crit dmg, 7% crit chance, 14AP. USES ANY VANILLA BULLETS. (Works like Rock- It-Launcher, you load as many of whatever bullets you want and it treats them all as loaded ammo.) It can also be repaired with any non energy pistol even without the jury rigging perk.
Rock-It Me Baby (XX004473): PLAYER ONLY. 66 dmg, 33 crit dmg, 33% crit chance, 33AP, low rate of decay.
Moira's Railway Rifle (XX01B562): 33 dmg/crit dmg, 5% crit chance, 22 AP, 10 round clip
Penny's Captain Cosmos Ray Gun (XX00C18C): NOT PLAYABLE.
Playable Variant of Penny's Ray Gun (XX00C87E): 0-1 damage, minor crime.
(NOTE: Most unique weapons and armor have unique repair lists.)
RoBeart (XX004472): +1 repair, science, barter
Bramhall (XX): +1 energy weapons, speech, sneak
Craterside Red Ale (XX008B21): +3 Cha and +1 Int for 5 Min, -2 End for 3 min.
Moriarty's Irish Stout (XX008B22): +3 Cha and +2 Str for 5 Min, -1 Int and +20 Health for 10 Min.
Atom's Blessing Pale Ale (XX008B24): +2 Str, -1 Int, +50 AP for 3 Min, 7 RADs for 10 seconds.
Moira & Moriarty's Atomic Irish Whiskey (XX008B26): +4 Cha, +3 Str, +2 End and -3 Int for 10 Min, 3 DMG to chest and 1 RAD for 10 Sec.
Moira & Moriarty's Small Batch Reserve (XX009211): +2 Str, +5 Cha, +2 End and -1 Int for 10 Min.
Green Lantern Potato Vodka (0178a0): +2 Cha, +2 Str, -1 Int for 5 Min.
USEABLE Survival Guides (XX015D24 and XX01C2C5): PERMANENT +1 to ALL skills, +10 health, +10 Carry Weight, +5 Rad Resist, +5 Poison Resist. +5 critical chance for 5 minutes.
Filtered Buffout (XX01490D): Buffout effect reduced from 25 to 20, addiction chance reduced 50%, time increased to 10 minutes.
Filtered Med-X (XX01490C): Buffout effect reduced from 25 to 20, addiction chance reduced 50%, time increased to 10 minutes.
Concentrated Mentats (XX01490F): Mentats effect increased to 5 point skill bonuses, time increased to 10 min, addiction chance doubled.
Dr. Moira's Miraculous UltraPak (XX014911): 50/100 instead of 30/60 health and rad removal bonus, 20 AP for 1 minute. The radiation removal effect is governed by the Rad Resistance Perk and the stimpak effect is governed by the Fast Metabolism Perk. (For example if you have the Rad Resistance Perk but not the Fast Metabolism Perk you would get 50 health and 100 rad removal.)
Chocolate Frosted Atomic Sugar Bombs (XX016A7B): Increased food health effect, 15 rads (5 for 3 sec), 25 AP for 1 minute.
Instant Amazon Wonder Mash (XX017174): Increased food health effect, 1 Str, Agl and End for 2 minutes.
Megaton "Atomic" Potato (XX017895): 10 AP and 1 END for 5 minutes, restores 25 points of health.
Megaton Potato (XX017896): 1 END for 5 minutes, restores 10 points of health.
Megaton Carrot (XX017898): +5 health for 5 minutes, restores 10 points of health.
Megaton Apple (XX01789A): Restores 10 points of health.
Megaton Pear (XX01789E): Restores 10 points of health.
Brahmin Stew (XX0178A2) 2 RADS, restores 25 points of health (30 with sanitizer).
Jenny's Famous Noodles (XX0178A4 ): +10 health for 5 minutes, restores 10 points of health.
Atomic Super Apples (XX01789C): +10 AP for one minute, restores 15 points of health.
Arthropod Serum (XX017142): 2 Str, 30% Rad, Poison, and Fire resist for 10 min.
Atomic Cowboy Carton - XX0470E4
Atomic Cowboy Carton (Empty) - XX046A05
Atomic Cowboy Pack - XX0470E2
Atomic Cowboy Pack (Empty) - XX046A07
Atomic Cowboy Cigarette - XX034FE8
Wine - XX02BC74
Greeger's Glasses - XX034FEC
Greeger's Hubris PipBoy (non playable) - XX032794
Greeger's Outfit - XX033BBB
Greeger's Hat - XX033BBD
Mayor's Hat - XX0233BB
Replica Mechanist's Helmet - XX032780
Guard Captain's Armor (non playable) - XX0312D4
Guard Captain's Armor (playable) - XX0312D5
Megaton Guard's Armor - XX0257BB
Chateau Sylom (wine) - XX02BC74
Very Slightly Dirty Water - XX025024
Slightly Dirty Water - XX025022
Purified Water (Water Chip #221) - XX025EA4
Purified Water (Water Chip #283) - XX025EA3
Megaton Mole Rat Steak - XX02D848
Bethesda Softworks Official Replica Vault 101 Jumpsuit - XX02C9C1
Sleeper Agent's Assault Rifle - XX0272E1
RobCo Master Override - XX0272E0
Nightowl's Gaze - XX0272DF
Greeger's Blaster - XX0356D5
Official Replica Captain Cosmos Ray Gun (Poor) - XX032782
Legandary BOS Sniper Rifle - XX0272DD
Extordinary Antique Rifle - XX0272E2
Atomic Cowboy Cigarette - XX034FE8
The Slayer - XX022653
Alabama (non playable) - XX0312CF
Vault Tec Security SMG - XX0250C1
Vault Tec Security Pistol - XX0250C0
The Hound - Not telling :)
Compatibility/Note to users of my other mods:
Unlike my other companions, this mod directly alters vanilla Moira.
Her vanilla NPC object script is basically just the timer for her healing dialogues during the Guide quests and a variable to check if she's dead so there's not much there to screw up :) .
The actual modifications made to Moira will function exactly like my other mods, but there is no "companion version" of Moira, it IS Moira, so any mods that change her in any way could potentially conflict. I advise putting this mod near the bottom of your load order and (almost) certainly below any other Moira mods.
Does not alter Moira's race so should be compatible with any appearance replacers.
Should not conflict with QUO VAGIS (lightly tested but conferred with Belthan), be advised that you should probably actually publish your Moira issue before completing the Survival Guide but this should not be necessary and should not conflict.
Should not conflict with WASTELAND REPRODUCTION GUIDE (not tested). It is advised that you complete the Reproduction Guide quests before initially talking to Moira about hiring her though this should technically not be necessary.
Known issues:
When initially hiring Moira as a companion, she may not begin following you immediately. She will start after you either go through a few load doors or wait a few minutes (real minutes not game minutes). This is intermittent and the cause is currently unknown. This only seems to impact the initial hire. As of 2.0 the time is usually reduced to a single load door transition.
If you use console or mods to detonate the Megaton Bomb and proceed with the Burke/Tenpenny quest AFTER permanently disabling it and hiring Moira, Moira will be ENTIRELY DISABLED and should not appear in her "other form." This has not been tested so be aware this may cause issues if you try for it. Your reward is a loss of all Moira's gear, Moira herself, and a snarky message condemning you for nuking Megaton and congratulating you on not CTDing (unless you did as the game may keep toggling her IsHireable variable back and forth between 0 and 1 infinitely).
It is possible to lock yourself out of Greeger's merchant topic if you talk to him while Moira is waiting or relaxing (but still hired) AND you have NOT completed the mini romance. Getting Moira as an active follower (or dismissing her to Megaton) again is the only way to resolve this.
It is theoretically possible to "wait through" the CC store safe's daily scripts. Always spend at least one (game time) minute not waiting between 8AM and 8PM and again between 9PM and 7AM.
Some of the Megaton Towers settlers and guards may have strange AI behavior (not where they should be). This is mostly self correcting within 24 hours and the settlers do respawn (guards are temporarily essential because they're unique references connected to quest scripts) but it can lead to some unevenness in NPC population during certain points of the day. They may also "Phase" in and out of existence at the top of the stairs at the begining of a package that sends them down.
Craterside is always unlocked now.
If you use console/mods to give yourself the dream crusher perk after completing the guide, moira will fire herself and become unhireable. This is not a bug itself but can cause unpredictable behavior in CS and Megaton. You end up with a bigger discount at CS with this mod, so best to just skip it anyway.
Some options in the Workbench and Lab dialogue topics may not function correctly. The physical items in the lab will function normally. This is intermittent and will hopefully be corrected soon. Note that while this bypasses CRAFT activation (going straight to the workbench menu), it should not conflict.
The AI package that has vendors follow you around their shops is global and cannot be conditioned to "turn off" when Moira is following you (more accurately, it is actually conditioned that way but the variables controlling the behavior connected to it cannot be turned off without removing Moira from the merchant factions). Bringing her into stores may cause her to act like you are in Craterside though she should not report theft (outside Megaton).
The rooftop deck is not fully navmeshed. (The Oasis deck expansion is totally un navmeshed and the main deck is really tight with just enough room for furniture and rail lean markers.) Moira will eat lunch on the roof once it is unlocked but it is not advised that you dismiss any mod added companions there if you don't want them popping up in Megaton exterior.
Moira may not enter the Washington Monument and will wait outside. This is likely either a conflict or a vanilla issue that impacts various mod added companions and I am not sure if it can be fixed. If you cannot get her to follow you inside, the only way to get her Monument interior dialogue is through moving her using console.
Despite the large amount of vanilla dialogue and the awesomeness that is Adobe Audition, there are still some voice files that may "sound edited." These are usually "say once" lines.
If Penny was automatically teleported to Megaton as soon as Moira agreed to adopt her with you, you will not be awarded the Family Man/Den Mother perk immediately. This is scripted to unlock if you don't have it the first time you give Penny caps as a daily gift. Removing all the other items on her list (Grognak, toy car, sugar bombs, nuka, any caps over 999,999) from your inventory will make sure that option comes up and unlock the perk at that point.
Penny will still use certain greetings and other dialogue topics that imply she is still in Lamplight. There is a terminal entry that (kinda) explains this as her "screwing with the mungos' heads."
The useable guides may not recognize the Comprehension perk though they should be seen as "Skill Books" by the game.
The trophy bobbleheads will not trigger the quest/bonuses. They can be picked up and dropped but they are very difficult to "redecorate" with as they do not havok settle (they float there like pencils in Oblivion). Basically, if you don't like bobbleheads you can remove them but if you do like them you should probably leave them where they are.
If you have already done the quest "Superhuman Gambit" when you adopt Penny, the playable version of the blaster is "hidden" behind the photo of The AntAgonizer and may be somewhat difficult to grab without TCL.
Basil cannot be hired back to follow you directly and will not engage in dialogue (though he still makes his greeting noises) if you have hired him to follow Moira. Dismissing him will allow you to have him follow you again. Will likely not be fixed.
The light switch in the employee area of the CC store will not change the physical light the first time you flick it. Just turn it on and off a couple times and it will fix it (hey, it's prewar tech, whaddaya want :) )
The giant bobblehead signs in both Megaton and the CC store can be picked up. Like the trophy bobbleheads, it will "float" if dropped and should only be removed if you don't want it there (or if you do want a giant floating boblehead somewhere else).
If you have a mod that causes the AfefuHostile variables to be wonky, you probably will not be able to complete the Arefu store quest without using console.
Using console to "un adopt" Penny may cause joseph to loose AI and remain "frozen in place" in Lamplight instead of moving to Megaton when a year passes.
There is a lean marker against the Nuka machine outside Craterside. Whle it is only enabled with the machine, NPCs sometimes still "lean on nothing" in that spot before the Nuka machine is enabled.
The enclave salvage upgrade to the CC store does not require you to have compleed Waters Of Life and unlocked the Enclave (it was just too many requirements for one quest). I figure they are mentioned before you meet them so they must be fighting somebody somewhere and it's immersion friendly enough.
Changed conditioning on Moira's vanilla dialogue. She will probably barter with you when you are in Underworld even though she would have no reason to. A journal entry about her getting along with Tulip really well somewhat explains this.
Like all "decorated" mannequins in the game, the ones in the CC shop window will drop all their accoutremants if bumped. The navmesh should keep NPCs away and some of the items may respawn, but be warned.
Cheats/Spoilers :
Variables that can be used on Moira in console:
AdventureSkill: Moira's mod XP (20 max but tracked beyond 20 for future use).
Romance: Moira's romance level (20 max but tracked beyond 20 for future use).
Lover: 1= Max Romance, 0= not max romance, -1= romance locked out.
LoverBlock: 1= Additional lock out variable for certain dialogues.
KnowsPenny: 1= Moira was with you when you rescued the kids from Paradise Falls.
PennyBlock: 1= You told Moira you don't want to adopt Penny, 0= You agreed to adopt Penny or have not talked to Moira about it yet.
IntroDone: 1= You completed Moira's initial dialogue after the quest "Craterside Enterprises."
VisitedRCLab: 1= you talked to her at RC Science Lab
VisitedPurity: 1= You talked to her in Purity�s control room (rotunda).
VisitedOasis: 1= Moira has access to Oasis Foliage.
Clicking Mr. Parsons in console and typing "set leocheat to 1" will force Uncle Leo to live in the new town even if you did not complete his quests... unless he's dead. This may cause a CTD if there are a lot of NPCs in the immediate area when you do this. You can immediately do all his dialogue at that point (not advised you attack him as doing this may cause a CTD).
Locations that have unique dialogue or trigger Moira's progressions:
(Note: Any points that are automatic (no dialogue) require Moira to be hired AND NOT SET AS RELAXING.)
Museum of Technology (any part) - player initiated dialogue:
+2 Adventure Skill, +2 Romance, +1 Moira INT, dialogue varies based on if you already got the satellite dish.
Project Purity (ROTUNDA) - player initiated dialogue:
+1 Adventure Skill, +1 romance (+2 if you take her there AFTER completing "The Waters of Life" and a variant dialogue). 25% reduction in drinking rads added to Moira's companion perk.
RobCo (any part) - player initiated dialogue:
+5 Sci and Repair, +1 Adventure Skill, +2 Romance
Rivet City Science Lab - player initiated dialogue:
+2 adventure skill, +5 Sci and Repair
Citadel (LAB) - player initiated dialogue:
+5 Sci and Repair, +1 Strength, +2 Adventure Skill, +2 Romance
Hubris Comics - player initiated dialogue
1 adventure skill, moira gets 3 grognaks, player gets 1
Vault 108 (any part) - player initiated dialogue:
Sets Moira's Melee skill to 30, 1 Adventure skill
Washington Monument- player initiated dialogue:
1 adventure skill, slight variation if you already did GNR quest or if it's active.
NOTE: FAILING the GNR quest (killing 3 Dog) may cause this topic to become stuck, requiring you to use the console command "closeallmenus" .
Underworld - Player initiated dialogue:
One in Carol's that rewards .5 adventure points and 1 romance point.
One in Chop Shop that rewards 1 adventure point and 10 med
Underworld - no dialogue :
Talking to winthrop about his travels - .25 adventure skill
Talking to Carol about her story - .25 adventure skill
Telling Carol you killed Gob - MINUS 10 romance
Telling Carol Gob is working at a bar in megaton ("happy" version)- .25 romance
Talking to Carol about being with Greta - .25 romance
Telling Patchwork to be careful - .25 romance
Getting Paradise Lost from Tulip - .5 adventure skill, Moira gets a copy too
Agatha-no dialogue:
+1 Adventure skill and +2 Romance for giving Agatha the violin for free.
Those!-no dialogue :
Moira receives an ant booster when you do. She will get a 1 point bonus to whichever attribute (strength/perception) is LOWER. If they are equal she gets whichever one you pick for yourself. (Direct ModAv, no perk added to Moira).
1 Adventure skill for completing the quest.
1 adventure skill and 1 romance for sending Brian to Rivet City
.5 adventure skill for sending Brian to Lamplight.
NEGATIVE 15 romance for selling Brian to Paradise Falls (-20 if you call him a dumbass).
Big Town-no dialogue :
Give Red caps back - +2 Romance
Teach BigTowners Guns - +25 guns, +1 adventure skill, +1 endurance
Set up mine field - +25 explosives, +1.5 adventure skill
Repair robots - +5 sci, + 10 repair, 1 adventure skill
Help them hide - +30 sneak, +1.5 adventure skill
Help them defend themselves - Moira gets +1 Strength
Head of State-no dialogue :
Slave victory - 2 adventure skill
Slaver victory - MINUS 5 romance
Stealing Independence - no dialogue:
Resetting Button - .25 adventure skill, 5 sci
Asking about Button's original function - .25 adventure skill
Button "stand down honorably" - 2 adventure skill, 2 romance
Button "do whatever" - 2 adventure skill, 1 romance
Button "you're a disgrace - 1 adventure skill, MINUS 1 romance (1.5 adv skill and -2 romance if you make the forgery and make him blow himself up)
Republic of Dave election - no dialogue:
Convince Rosie to run- 2 romance
Rosie or Bob "congratulations for winning" dialogue- 2 adventure skill
Trouble on the Homefront - no dialogue:
MINUS 3 romance for destroying the water chip and evacuating the vault (multiple dialogues trigger this so it is theoretically possible to get 0 for sneaking out without triggering any negative dialogues up to a perma lock level penalty depending on how evil you are about telling people).
"I understand" exile topic - 3 adv skill 2 romance
Talking the Overseer into retiring - 3 adv skill 2 romance for most options
Replicated Man - no dialogue:
Harkness stays/secret safe endings - 3 adventure skill 2 romance
Force remember "filthy android" - MINUS 5 romance
Citadel (everywhere) - no dialogue :
Most BOS history dialogues with NPCs - .25 adventure skill, some reward 5 SCI
"Sounds like changes are good" - .25 adventure skill, 1 romance
Telling Lyons about Vault 87 (non Broken Steel dialogue) - 1 adventure skill
Oasis - no dialogue :
Resolution dialogues from the elders if you did not kill Harold - .5 to 2 adventure skill 0 to 1 romance (depending on your dialogue choices).
Oasis trees and additional rooftop area unlocked at Craterside with ANY non hostile resolution (implying that you killed Harold because you wanted to ruin Oasis rather than because he asked you to would be hostile).
Being a jerk about killing harold ("welcome to the wasteland asshole," "i don't care at all," etc...) - MINUS 5 romance
Rivet City (misc) - no dialogue :
Give Angela Ant Pheromones - MINUS 1 romance
Ask Angela if men give her trouble- .5 romance points
Pinkerton's "hang out but don't break anything" dialogue - 1 adventure skill
Telling Mei Wong you'd never turn her in - .5 romance
Turning her in - MINUS 3 romance
Little Lamplight - no dialogue:
Any Fungus deal success - .5 adventure skill 5 barter
Most LL history/culture questions - .25 adventure skill
Rescue From Paradise-no dialogue :
1.5 adventure points for any dialogue that gets Penny to leave safely, 2 if you actually get Rory out alive. This also unlocks the "Penny and Moira already know each other" variable which alters future dialogue and journal entries.
Blood Ties-no dialogue :
Reassuring Lucy that Ian is probably alive - .5 romance
Telling her he is definitely safe - .5 romance
Holly CHA challenge - .5 romance
Briana Ladykiller Dialogue - MINUS 2 romance
Convincing Vance to help Arefu using any challenge - 1.5 adventure skill (10 medicine for MED/INT challenges)
The Survival Guide -part of quest stages, requirements are simply completing the chapters:
Begin chapter 2 - .5 adventure skill
Begin last chapter - 1 adventure skill
Finish guide - .5 adventure skill for "ok" 1 for "good" and 1.5 for "genius"
Asking her a personal question (vanilla top level dialogue) - .25 romance
(NOTE: these do not require Moira to be hireable and will be added to Moira before she unlocks as a companion UNLESS you did them before mod installation.)
The exact formula for the trade system is:
(1 + (modifier between 1 and 19)) * (modifier between 1 and 3)
or
(1+(1 to 19))*(1 to 3)
which works out to a total multiplier of 2-60
The modifiers are:
Upgrade 1 adds 1
Upgrade 2 adds 2
Upgrade 3 adds 3
Upgrade 4 adds 5
Moira training you in barter adds 2 (NOTE: THIS WILL NOT APPLY RETROACTIVELY IF YOU TRAINED BEFORE UPGRADING! Sorry, it isn't tracked in 1.0 so there isn't anything I can check against in your savegame data.)
Selling items on 7 days in the CC shop adds 1.
Selling items on 14 days in the CC shop adds 2.
Selling items on 30 days items in the CC shop adds 3.
These add up to the 1-19 range used in the first multiplier.
If your barter is under 50 this total is your overall total (multiplied by 1).
If your barter is 50-90 this total is multiplied by 2.
If your barter is over 90 this total is multiplied by 3.
This multiplier is applied to a game generated random value of 1 to 99 caps.
So the actual amount of caps is:
(random 1 to 99) * (non random 2 to 60)
To provide examples:
If you have done the first three upgrades to the CC store, have sold items in the store on 8 different days, and have a barter of 67 you would have a total multiplier of (1+(1+2+3+1))*2 so 8*2 or 16; that means you could get 16 to 1,584 caps per day as the game "rolls" the 1-99 and that's what gets multiplied by 16.
If you have fully maxed your multiplier you get a minimum of 60 caps per day and a maximum of 5,940 if you sold items today (hard cap of 1000 if you didn't).
If it is your first day and you have no upgrades whatsoever you get a minimum of 2* and a maximum of 198.
Note that "gaming the system" means selling a very few cheap items every day while "screwing up" means dumping tons of very high value items in one day. The idea is that you just put the stuff you want to unload and take your chances. Sometimes you get more than the items are worth, sometimes you get screwed a bit. The overall balance does tend to be towards more caps it seems. This can also essentially be a way to sell more items than your accessible merchants have caps to pay for before a respawn.
If dumping a ton of stuff, maybe spread it out over a few days, otherwise just roleplay it as "thats where you put crap you want your employee to sell for you."
(*It is theoretically possible to get a total multiplier of 1 but meeting the qualifications for getting to that stage of the quest will effectively guarantee at least a 2)
"Celebrity visits" target various interior and extrior locations in both Megaton proper and the new Megaton Towers annex area:
Reily, Donovan, Brick, and Butcher arrive on the 2nd of the month if you have completed (not failed) their quest and they are still alive.
Red, Kimba, and Pappy arrive on the 18th if you have completed their quest and they are still alive.
Amata will arrive on the 11th if you have met the conditions required to unlock the Vault 101 Outpost and souveneir shop (Christine Kendall's shop, not Mr. Brotch's or the refugee squat).
Alan and Brianna from the Family will be in Moriarty's from 8AM to 8AM on the 23rd of the month if you have opened the Arefu store (which also requires peacefully completing Blood Ties).
If 365 TOTAL game days have passed (GameDaysPassed >= 365), you have completed "Finding the Garden of Eden," and have adopted Penny, Joseph will arrive in Megaton permanently and follow a normal daily routine. He works a shift in Craterside and mostly follows Penny the rest of the time. He sleeps in a new bed in the Lab.
Wedding guest list (not all may actually show up):
The Stahls, Morairty, Nova, Gob, Doc Church, Sherrif Simms, Walter, Pritchard, Greeger, Jocelyn, and J.R. will attend no matter what (unless they're dead obviously).
Penny will stand in the "ringbearer" spot if you adopted her.
Dad, Dr. Li, Amata, and Fawkes will also attend depending on the current state of the main quests (and T.O.T.H.F. for Amata). Note that it is impossible to get Dad AND Fawkes without the use of console (on serious main quest stuff which I don't recommend) but Dr. Li can possibly be there with either Dad OR Fawkes.
Unlockable Trophies:
Museum of Technology Poster - Empty wall where the mounted Armored Vault Suit was - take Moira to the museum.
"Signed" Eden photo - Shelves behind Craterside merchant counter - Complete "Finding The Garden of Eden"
"Signed" Fawkes photo - Penny's shelves - Complete "Finding The Garden of Eden," Rescue Fawkes and adopt Penny.
Deathclaw in stasis pod with lighting effects - Lab near the workbench - Complete "Finding The Garden of Eden," have rank 2 of Animal Friend perk or have killed 25 creatures.
Eyebot in stasis pod with lighting effects -Lab near the workbench - Complete "Finding The Garden of Eden," have Robotics Expert perk or have killed 25 robots.
Mini GNR fountain - Lab Bookshelves - Complete GNR quest
AntAgonizer photo and comic books - Penny's shelves/lab desks - Complete "Superhuman Gambit" and adopt Penny
Liberty Prime "model" - Next to lab bookshelves and same height - complete main quest (does not require Broken Steel but is obviously pointless without it).
"Toy" Rocket - Penny's Shelves - Complete GNR and adopt Penny
Action Abe - Lab Bookshelves - Complete "Head of State"
Tranquility Lounger (currently "broken") - Lab Corner - Complete "Tranquility Lane"
Surgical table and light - Lab (replaces the big crates)- Train Moira in Medicine
Mini train car table with clean wood top - Lab (replaces couch table) - Go to Metro Central interior AND/OR unlock the map marker outside.
Easter Eggs:
Upgrading the Vault 77 suit into an armored version rewards a unique (non quest item) Pint Sized Slasher Mask with a unique effect.
The madam in the Evergreen Mills Bazaar is wearing (restored) Pink Power Armor. That should make things more interesting for you eh :)
The journal entries referencing "Larry" and the "RobCo Factory Unlock" label on Moira's PipBoy are references to the brilliant mod Quo Vagis by Belthan who graciously provided the mesh for Moira's RobCo armor.
The Atom Symbol on Moira's jumpsuit in the area which would generally contain a job title is in no way, shape, or form meant to be a reference to any popular electronics companies which offer repair services at some sort of bar.
The employees' names are puns AND references. Their first names are references to real life scientists J. Robert Oppenheimer and Jocelyn Bell Burnell and their last names are puns on merchant related terms (seller and mark off).
The employees' faces are available as presets when making a character/getting a face swap.
The base values of many mod added items (or sets thereof) are references to Pi, Prime numbers, "the numbers" from Lost, or some other nerdy number related thing.
Moira's Field Journal (blue static book) actually has "&PCName;" printed on the cover as a co author. That is the script used in GECK to get a terminal or message to show the player character's name in game.
The Robco Inc. logo on the power armor is from the real life company by that name.
Basil's name is a reference to the "Basil the Rat" episode of the show Fawlty Towers.
The name of the unique Rock It Launcher is a reference to the song "Rock N Me Baby" by Steve Miller Band.
One of the lab messages references the Rat God in Fallout 2.
The "Presidential Portrait" photo of Eden is "signed" for Moira by the President. The message is personalized and written in an OCR font. Moira would clearly love to meet Eden but she can't so you got her an autograph :) .
There is a photo of one of my characters (Professor Grigori Midnight) hidden under Moira's bed as a "signature."
The Instant Amazon Wonder Mash is a reference to Moira's tailor Ash; also to Wonder Woman.
The note title when you first unlock Moira's companion options is a reference to Wile E. Coyote. In all 3 shorts where he talks (yes there totally are 3) he refers to himself as "Wile E. Coyote, suuuuuuppppper genius."
The spelling error in the museum dialogue ("planet arium") if you take Moira there (having already finished the GNR quest) is a reference to South Park.
Various framed photos including some of my "Shots From The Wasteland" series and some in game "family photos" unlock as you progress. Many are located on the shelves above Penny's bed in Craterside.
"TXS-934" (imprinted on Moira's Power Armor) is a reference to Sealab 2021, Frisky Dingo, and Archer and is a running gag on all 70/30 shows as well as several other Adult Swim shows.
A "Used GECK" containing all mod added items is hidden in an impossible and well hidden but plainly visible area somewhere in Megaton (outside, not in one of the buildings). No spoilers on this one but it is not too impossible to find. Hint: You will see it without TCL but you won't be able to get there without it. Try looking at night. (Note: There are likely "overflow" items in the case and you may need to open and close it a few times to get everything. There are also non playable items in the case so you can easily get their id codes to add them to NPCs)
When the liquor deal with Moriarty is unlocked, bottles of various types are stashed around Megaton and the wasteland at large.
The (modified) "startup chime" on the autodoc may be familiar to people of a certain age and OS preference.
If you have over 1,000,000 caps, you will be able to give Penny 123,456 caps and will receive a funny response and 1000 karma.
The message title when unlocking the Oasis roof expansion is a reference to Mel Brooks' History of the World Part I.
The message title when you max Moira's adventure skill is a reference to the film/book "A Boy and His Dog."
Penny's "tiger" Bramhall (as well as several message, journal and effect titles) is a reference to Calvin and Hobbes. (John Bramhall was a critic of and correspondent with Thomas Hobbes). Something about "steampunk junk dealer/DIY scientist kid run amok in a city built around an atomic bomb" just screamed Bill Watterson to me. Though now that I type that, it looks more like Warren Ellis sooo...
Now Penny's tophat is called "Filthy Assistant's Hat" and has mismatched red/green tinting on the glasses in reference to the magnum opus Transmetropolitan.
Completing the quest "Superhuman Gambit" will also unlock a (static) copy of a "Grognak Special Edition" entitled "The Antagonizer in: The Court of The Arthropod Queen." This is a direct reference to my mod by that name and has the "comic book" mod image as it's cover (complete with $50 Hubris and Comics Code graphics ).
Basil is very slightly bigger in 2.0. He's grown since 1.0 :)
Reading the terminal entry about "The Merc" in the Craterside message board will now actually make the Craterside merc's in game name match the name he gives you. There is also now an Android component (non quest item) in his inventory :)
If he is alive, you have triggered all three of his random encounters, and you have never attacked him, Uncle Leo should take up residence in the new town area once you unlock it. He will patrol the streets and engage in normal behavior. He is also added to the new faction as a citizen.
If she is alive, Silver should move in to the new town and added to the faction as a merchant (no new dialogue :) ). She will sandbox in the exterior from 10AM to 2AM and will sleep/sandbox in the common house most other times.
Various citizens will spend certain evenings in the mayor's house/VIP common house/museum (the bus house). These include Silver, Mr. Parsons, Pritchard, Mr. Brotch, Christine Kendall, and Megaton Shopkeep. The cell is player owned and has a well rested bed.
Once you have bought all 6 new uniques from Greeger, there is actually a 7th one. A toy car that a kid sold him which supposedly makes you faster. It does. (+20 SpeedMult while carrying it).
The Hound will also take all blood packs from your inventory when it disappears for good.
The mini rooms inside the "stairs" between the two floors of the CC store contain a massive teddy bear surrounded by tiny ones and a huge teddy on a trike playing ckicken with one in a huge toy car. The rooms are only accessible via console (tcl).
The line about the RoT network in one of Greegers comm logs with president Eden is a reference to the real life ToR network which was originally created by the U.S. Military.
If you obtain the Nuka Cola Clear formula at any point, there will be a chance of Nuka Cola Clear appearing in the new Restored Nuka machines.
Greeger's intro dialogue references Fallout: Tactics. (Chicago Brotherhood and talking Deathclaws)
With a high enough perception(7), intelligence(7), and science(77) skill Greeger's terminal will have an additional submenu with several Lost references.
The name of the new wine is a reference to Sylom, who translated my Antagonizer mod into French.
The middle table in the Arefu store contains equipment that would be useful to a stereotypical vampire hunter including a unique sawed off shotgun called "The Slayer" referencing the Buffy universe.
The baseball themed shelf with the unique teddy bear "Ernie" is an homage to Ernie Banks. While carrying him your damage with baseball bats will be MULTIPLIED by 14.
There is a different intro topic with Christine Kendall (if she opens a store in Megaton) depending on if your romance level with Moira is UNDER 10
The various posible interiors in the last house in Megaton Towers contain unique water types. These include "Mostly Pure Water" and "Water Chip #XXX Water" among others and not all can be obtained in a single playthrough without using console or finding the "used GECK".
The Arefu guard's name is a reference to the Vampire film Night Watch.
Pritchard is named after Sarah Pritchard who was a unique and fascinating woman that fought as a confederate soldier AND as a famed and ruthless mercenary for the union. Seriously, look her up.
Charlie the Stash Gnome is a reference to the television show Lost and the SNL sketch invloving a pawn shop with items that all have a stash compartment... you know the one I mean :)
There is a holotape marked "Wasteland 4: New Boston" hidden under a toaster in the CC store player/NPC home. This is both a reference to the Wasteland series of games that inspired Fallout and the likely seting of Fallout 4 in The Commonwealth (which is in Boston).
One of Greeger's holovids is "Star Voyage III: The Search for Spock" as an homage to the late great Leonard Nemoy.
The two Vault 101 stores each also unlock a new item in the employee area of the Canterbury store.
Any book or holovid of an actual "real" work (unaltered title) would have existed based on the nature of the divergeance between the fallout universe and ours. (Technically some were made after 1945 but that's not a hard point of divergeace so I'm calling it canon :) )
Not exactly an easter egg but the Greeger character is somewhat based on me, I very often wear a Vault 101 or Enclave hoodie IRL. As a result, this mod is almost guaranteed to be the only one you'll play where a character adaptation needed to have lore friendly clothing REMOVED in order to make the character lore friendly :) Also... There's a unique Vault 101 Suit in the residential area of the CC store. It's the in game version of the real life replica of the in game vault 101 suit; how's THAT for "meta" ?
"Mr. Parsons" is an incredibly nerdy multi layered reference, if you figure it out, PM me for info on how to unlock a really cool in-mod secret reward! (you can also probably figure out the reward in GECK/FOEdit yourself cheater :) )
Planned:
Additional adoption options (and possibly a timed trigger for Joseph to follow Penny after an actual in game year passes).
Get married in the Church of Atom because how cool would a postapocalyptic wedding with an undetonated Atomic Bomb as the thing doing the "sanctifying" be?
More liquor distribution choices and a quest to distribute the guide and booze.
Alternate liquor quest/distro for Nova/Gob if they replace Colin. (Currently Moriarty must be alive to complete that quest).
Quests for employees (one or two marked "go fetch" quests and maybe a backstory mission).
Additional (possibly custom voiced) dialogue for the employees.
DLC expansion with new items, point tiers, quests and locations (probably focused mainly on PL & Zeta).
VR "house world" in the Lab lounger (probably Anchorage based, possibly with the Tranquility Lane imagespace)
Physical expansion of Craterside interior/exterior possibly with a "mutant vegetation crisis" quest.
Credit:
The meshes for the Armored RobCo Jumpsuit were generously provided by [url=http://www.nexusmods.com/games/users/268591/?tb=mods&pUp=1]belthan[/url]. While they were publicly posted on the Fallout Mod Authors' forum, you are kindly requested to obtain his permission before using them.
Textures for the RoBeart the teddy bear and Moira's name badge were provided by Ash.
[url=http://helpybear.com/]"Helpy Bear"[/url] (effect name for one of the teddy bears) is a real life review/tech advice blog run by a former colleague with the patience of a saint.
The logo on the back of the power armor is that of the real life [url=http://www.robco.com/component/option,com_frontpage/Itemid,1/lang,en/]Robco Inc.[/url], an industrial supplies company based in Quebec, Canada. Their logo is a registered trademark of Robco inc. and is used here in accordance with well established principles of fair use.
The Green Lantern Icon is a registered trademark of DC comics and is used in accordance with well established principles of fair use.
The atom logo is based on a stock Photoshop shape and is not in any way based on any actual trademarked logos so there's not even a need to point out that fair use would clearly apply... but I will anyway :)
[url=http://www.nexusmods.com/fallout3/mods/2396/?]Portable Personal Terminal[/url]'s object script was used as a reference in figuring out why my portable terminal wasn't activating (it was the way I originally checked against game time in the timer scripts). None of ITJunky's assets were used but thanks nonetheless.


