About this mod
This mod is simply an alternative method to reduce, or nearly remove the in-game's Vignette visual effect. It is done by using the ReShade tool, instead of having to use the Elden Mod Loader and the Anti-Cheat Disabler; which then forces players to play the game in Offline mode.
- Requirements
- Permissions and credits
- Changelogs
This is, technically, not even a "mod". You simply need to download ReShade, available here:
https://reshade.me/
HOW TO INSTALL RESHADE
Here is a brief guide:
1) Double left-click the ReShade executable after download to start it up.
2) Search for / find and select the game's executable in the list (or browse your computer manually to find it), in this case being named eldenring.exe (located where the game was installed; for example the Steam version, by default, would be located in [Your Drive Letter where Steam itself is installed]\Steam\steamapps\common\ELDEN RING\Game
3) Select the proper Rendering API type for the game, in this case select Microsoft DirectX 10/11/12.
4) Normally, now, you need to select which types of Shaders you want to use in the list. There's many, and a lot to cover when it comes to specific Shaders. However, for the general purpose of simply obtaining the Vignette Shader itself (for this 'mod' to work), simply select ALL the Shaders if you're not sure what you're doing. This makes no difference in the end as none of the Unused Shaders will load anyway (so having all of them, or just one, makes no difference if in the end you make ReShade load just the one you need in a list of hundreds). So to reiterate, for this step, just select all of them and install them all.
5) Now just let all the selected Shaders download and once it is finished, you're done with installing ReShade itself.
HOW TO USE / ACTIVATE RESHADE IN THE GAME
1) After you install ReShade, and start up the game for the first time with ReShade installed, you will have to let ReShade load all the Shaders first. This is a process that can take a moment. If the game seems to be unresponsive at first, that's most likely because of this important step. Let it load the Shaders first and just wait until it's all done.
2) After the loading of the Shaders is over, you can now open up ReShade's menu itself. While the game runs (in the main menu, or during gameplay), by default, you must press your Home key to activate ReShade's User Interface.
=======================================
NOTE: In the event that your Home key does not work, or does not open the ReShade interface, you have to fix that and provide a new default key (done outside of the game, in your Desktop, by accessing the ReShade.ini file and manually doing the changes).
Here is a brief guide on how to change the default key (guide taken from the ReShade forums):
- If you need to modify the default Home hotkey to toggle ReShade's interface on, without having access to it, you'll have to change it out-of-game.
- Navigate to your game's main directory (game's .exe location) and open ReShade.ini with any text editor.
- Locate KeyMenu=36,0,0 under the [INPUT] section, and change it to whatever value you desire.
- The KeyMenu line is composed of three numbers, of which each one is separated by a comma.
- The first number is the keycode value. The second one defines if ctrl needs to be hold or not (0=no, 1=yes). The last one has the same purpose of the previous one, but it indicates shift.
- Google "keycode" to find out keycode values.
References:
KeyMenu=36,0,0 - Home/Pos1 - Actual default keybind
KeyMenu=113,0,1 - Shift+F2 - Previous keybind
If, in your ReShade.ini file, there's no "KeyMenu=..." line, just manually add it by yourself.
=======================================
3) When you first open up ReShade's menu you normally have a list of all the installed Shaders (but they should all be unchecked). If they all appear out of alphabetical order you can simply use the Search feature near the top of the menu interface and type in "vignette" (without the quotes) to find it in the list. Once you find it, activate it, then adjust settings according to the descriptions of the main point as presented below.
USING RESHADE'S VIGNETTE SHADER TO REDUCE (OR NEARLY REMOVE) THE IN-GAME VIGNETTE EFFECT
I agree, using another Vignette effect to seemingly change another or 'get rid of' it seems counter-intuitive or contradicting; but believe me, it works (after all, the Vignette effect in the game is just a Shading effect as well, you only need to 'fight' against it a little bit to suddenly change it slightly or dramatically; depending on your tastes).
IMPORTANT NOTE
When you FIRST select / activate the Vignette effect, it will actually make the in-game Vignette effect worse (adding to it). This is NORMAL, because you didn't adjust anything yet. You will see the difference AFTER you start making adjustments to the values.
My values REDUCE the Vignette effect, but does not "remove" it entirely. This is by choice on my part, but you can further increase the reduction to such a point as to nearly remove it. However, keep in mind that going too extreme on some values can, and will actually make your overall game brightness exaggerated and very bright. You will have to find the 'right spot' for your taste, ultimately.
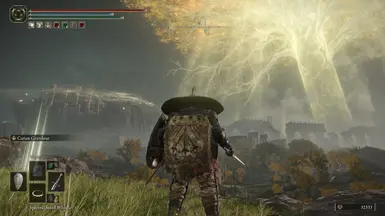
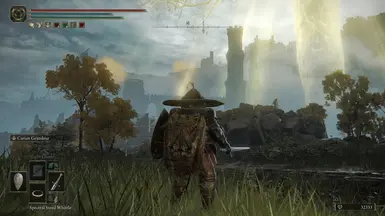
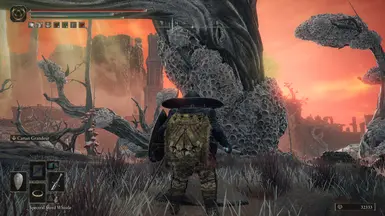
Here are my RECOMMENDED values to use, to achieve the same effect as my EXAMPLE preview screenshots.
Type: Original (default)
Ratio: 1.000 (default)
Radius: 2.200 (new)
Amount: 0.900 (new)
Slope: 2 (default)
Center (left and right values): Do Not Touch, Unnecessary.
Both the Radius and the Slope values are the most important ones to further reduce the Vignette effect. For example, if you would want to increase the reduction of the Vignette effect, then I recommend that you simply lower the value of the Radius first. I recommend a value of 2.200 in my example, but try it down to 2.100, or 2.000, etc.
Additionally, you can also (in combination with lowering the Radius) increase the value of Slope to 3, from its default value of 2 in order to balance out your changes done to the Radius value (increasing Slope 'adds' a bit of Vignette, and setting it back at 2 would reduce it).
The Slope value, by default, is already set at 2; but to my preferences I set it at 3 as it still keeps a little bit of Vignette as to not nearly remove the whole effect altogether (however, I left it at its default of 2 in the Preset I provided to show more of an Anti-Vignette change for a better first impression). But this is just my preference. It's up to you to find your own preferred values in the end.
USING MY RESHADE PRESETS
Only use ONE Preset at a time.
I provided you guys with two Presets to download:
1) The 'main' Preset only has the Vignette (reduction) effect, nothing else.
2) The 'optional' Preset has the same Vignette (reduction) effect, in addition with a few other extra shaders I use myself.
To use my Preset:
- Extract the contained Elden.ini file from the archive.
- Place it where the game is installed (also, where ReShade itself should be located after installation).
- When the game runs, open the ReShade menu, look at the top where you should see a long horizontal bar.
- Left-click that horizontal bar to reveal a drop-down list of files you can select.
- In this list ReShade should automatically detect the presence of .ini files, if any available (Presets).
- My Elden.ini file should be present in the list.
- Select my Elden.ini file in the list, and at this point it should be the currently in-use Preset.
To make sure that it works, scroll down the list of shaders and see if the Vignette shader effect is actually checked on (activated).
You can also navigate to the Settings tab at the top to choose a Toggle Effect key (a key you would press to Toggle On or Off any ReShade effects) and try and Toggle my Preset On and Off to see if there's any difference. If there is (and there should be), then it works!
CONCLUSION & CREDITS
This is it, you're done! You now reduced, or nearly removed the in-game Vignette effect by using ReShade, and staying Online.
Do note, however, that my preview pictures were taken with a few other ReShade effects activated; however they have nothing to do with screen brightness, lightning or shadows (which do not, in the end, affect the previews shown in the pictures; only doing the changes to the Vignette shader values as presented here will achieve exactly the purpose of reducing the in-game's Vignette effect).
Hope it helps all my fellow Tarnished to have a clearer vision of the Lands Between!
** My Thanks to Crosire for making ReShade! **


