


0 of 0

About this mod
Since there's plenty of Berserk mods, but nobody provided this, here it is.
- Permissions and credits
- Changelogs
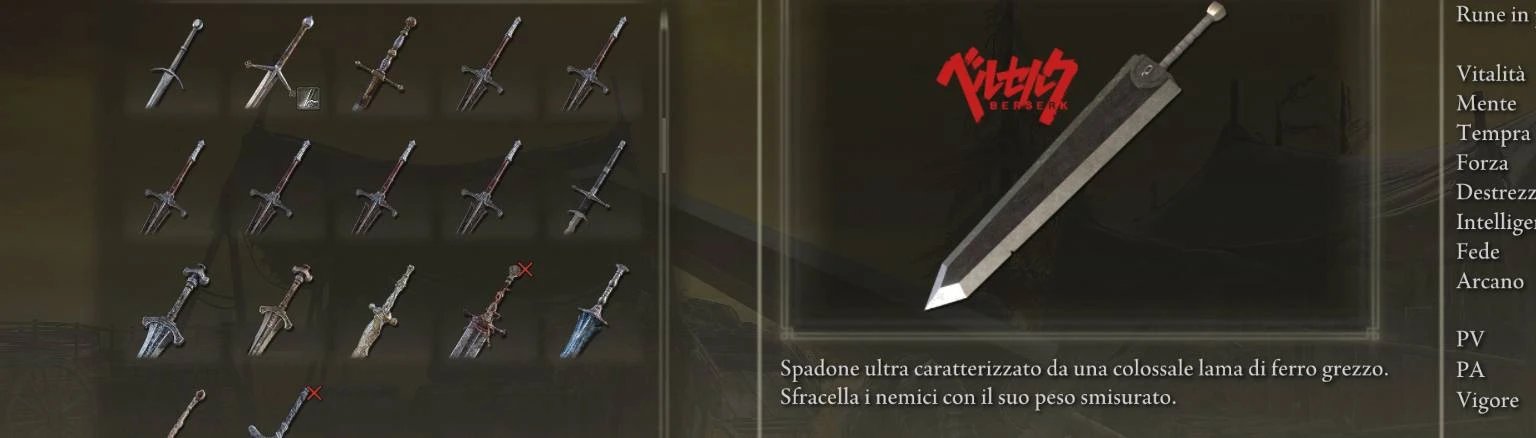
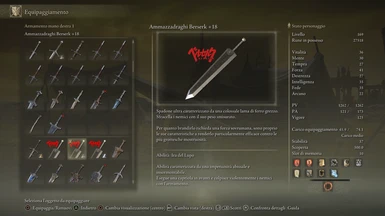
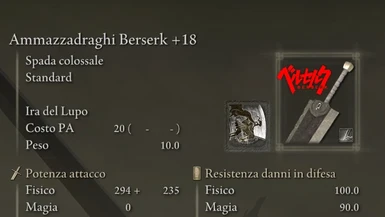
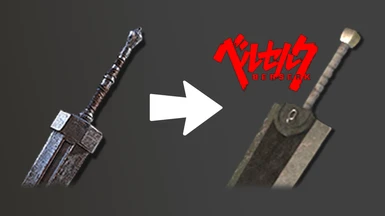
This mod replaces the weapon icon for the "Greatsword" (file wp_a_612 in game\parts) with the Berserk's "Dragonslayer".
I've done this primarly for me, but thinked that someone else could enjoy it.
--
UPDATE:
Added Gideon UI texture deployer installation sistem version.
(details below)
This mod it's made in two parts:
The DDS file is where the smaller icon is stored, you can find it in 01_common.tpf.dcx.
(the one in the the menus and hud)
The TPF file is where the bigger icon is stored, you can find it in 00_solo.tpfbdt.
(the one that appears switching to the menu with the full appereance of the weapon and the description of it)
But if you don't have any mod that alters the menu folder you're good to go with the plug'n'play version of this mod stored in the main files.
--
To install and use mods with the UXM Selective Unpacker, you need to first extract my mod files to your desired location. Then, place the contents from the "menu" folder of this mod inside the folder of the same name created by UXM. Lastly, ensure that you Patch the game using UXM.
Mod Engine 2 [RECOMMENDED]
Make sure you have a "menu" folder within the "mod" folder of Mod Engine 2 - if not, just create one yourself. Extract this mod to your desired location and place the contents of "menu" within the folder of the same name located in the "mod" folder, then launch Elden Ring with the batch file “launchmod_eldenring.bat”
--
Note about the DDS file in optional files:
If you have other mods that alter 01_common.tpf.dcx in the menu\hi folder you need to use Yabber in order to merge my file with yours:
Note about the TPF file in optional files:
Since the file that stores the image for the bigger icon (the one that appears switching to the menu with the description of the weapon) is huge, or maybe you want to merge it because you have others mod that alters the file "00_solo.tpfbdt", I have proceeded to provide only the file that I have edited, it's TPF file and below is a video guide done by ZLOHORT about how to inject it without downloading the whole mod.
(The procedure in the video is for injecting loading screens tpf's, but since my edited file is stored in the same folder, the guide would be the same)
Here's that guide on GDrive:
https://drive.google.com/file/d/1xZWv9baBaqrjIIaJPv1igFBzSPpx2PeG/view?usp=sharing
Inject the tpf that I provided (instead of the 24 ones taked from a loading screen mod) in the 00_Solo folder of yours that will appear following this guide.
I've done this primarly for me, but thinked that someone else could enjoy it.
- Added a version without the red Berserk logo.
--
UPDATE:
Added Gideon UI texture deployer installation sistem version.
(details below)
AngrySpaceGuy uploaded a video on his youtube channel where showcases some berserk themed mods, if you want to see this icon in use take a look at it:
This mod it's made in two parts:
The DDS file is where the smaller icon is stored, you can find it in 01_common.tpf.dcx.
(the one in the the menus and hud)
The TPF file is where the bigger icon is stored, you can find it in 00_solo.tpfbdt.
(the one that appears switching to the menu with the full appereance of the weapon and the description of it)
But if you don't have any mod that alters the menu folder you're good to go with the plug'n'play version of this mod stored in the main files.
--
Installation
UXM Selective UnpackerTo install and use mods with the UXM Selective Unpacker, you need to first extract my mod files to your desired location. Then, place the contents from the "menu" folder of this mod inside the folder of the same name created by UXM. Lastly, ensure that you Patch the game using UXM.
Mod Engine 2 [RECOMMENDED]
Make sure you have a "menu" folder within the "mod" folder of Mod Engine 2 - if not, just create one yourself. Extract this mod to your desired location and place the contents of "menu" within the folder of the same name located in the "mod" folder, then launch Elden Ring with the batch file “launchmod_eldenring.bat”
Installation - Gideon version
For players who use mods to alter their UI/HUD like Elden Ring Reforged, PS5 PS4 Controller UI, etc.
For players who use mods to alter their UI/HUD like Elden Ring Reforged, PS5 PS4 Controller UI, etc.
- With Gideon, you can avail of the UI texture deployer program, which will take care of merging modded files for you.
- Before you proceed with Gideon, please make sure your computer has .NET 6 Desktop Runtime installed. If not, kindly take a few minutes to install it.
- Before merging this mod with yours, ensure that the mod you want to merge with mine has been installed beforehand. To do so, check its respective mod page for instructions.
- Download the Gideon version of this mod, and don't forget to extract its contents once it finishes downloading.
- From the chosen folder of the Gideon version you will need to move its content and "Setup UI Images ..." into the "mod" folder (Mod Engine 2) or directly into the game directory (UXM).
- Use the "Setup UI Images ..." shortcut provided to launch Gideon. Gideon will take care of the rest and you should have no problems with merging your mods. Please read all the instructions carefully displayed by Gideon to make sure everything goes as expected. If there are any issues, then follow the advice given within those instructions. Ultimately, you should now be able to experience the game with your merged mods!
- NOTE: Installing various UI/HUD editing mods does not require prior merging, but it may work better if you choose to merge them first. It is suggested to merge first before installing the mods if multiple UI/HUD editing mods are being used. Installing and combining Gideon mods with any other mod is easy; all you need to do is make sure that the folder with the modded content and Gideon's shortcut are present in the same mod's directory. This will not overwrite the other mods.
--
Note about the DDS file in optional files:
If you have other mods that alter 01_common.tpf.dcx in the menu\hi folder you need to use Yabber in order to merge my file with yours:
- Unpack the game via UXM
- Unpack your 01_common.tpf.dcx with Yabber
- In the unpacked 01_common.tpf.dcx search for SB_Icon_03.dds and replace it with the one in my mod
- Repack the folder 01_common.tpf.dcx using again Yabber and then follow one of the installation guides above.
Note about the TPF file in optional files:
Since the file that stores the image for the bigger icon (the one that appears switching to the menu with the description of the weapon) is huge, or maybe you want to merge it because you have others mod that alters the file "00_solo.tpfbdt", I have proceeded to provide only the file that I have edited, it's TPF file and below is a video guide done by ZLOHORT about how to inject it without downloading the whole mod.
(The procedure in the video is for injecting loading screens tpf's, but since my edited file is stored in the same folder, the guide would be the same)
Here's that guide on GDrive:
https://drive.google.com/file/d/1xZWv9baBaqrjIIaJPv1igFBzSPpx2PeG/view?usp=sharing
Inject the tpf that I provided (instead of the 24 ones taked from a loading screen mod) in the 00_Solo folder of yours that will appear following this guide.