


0 of 0
About this mod
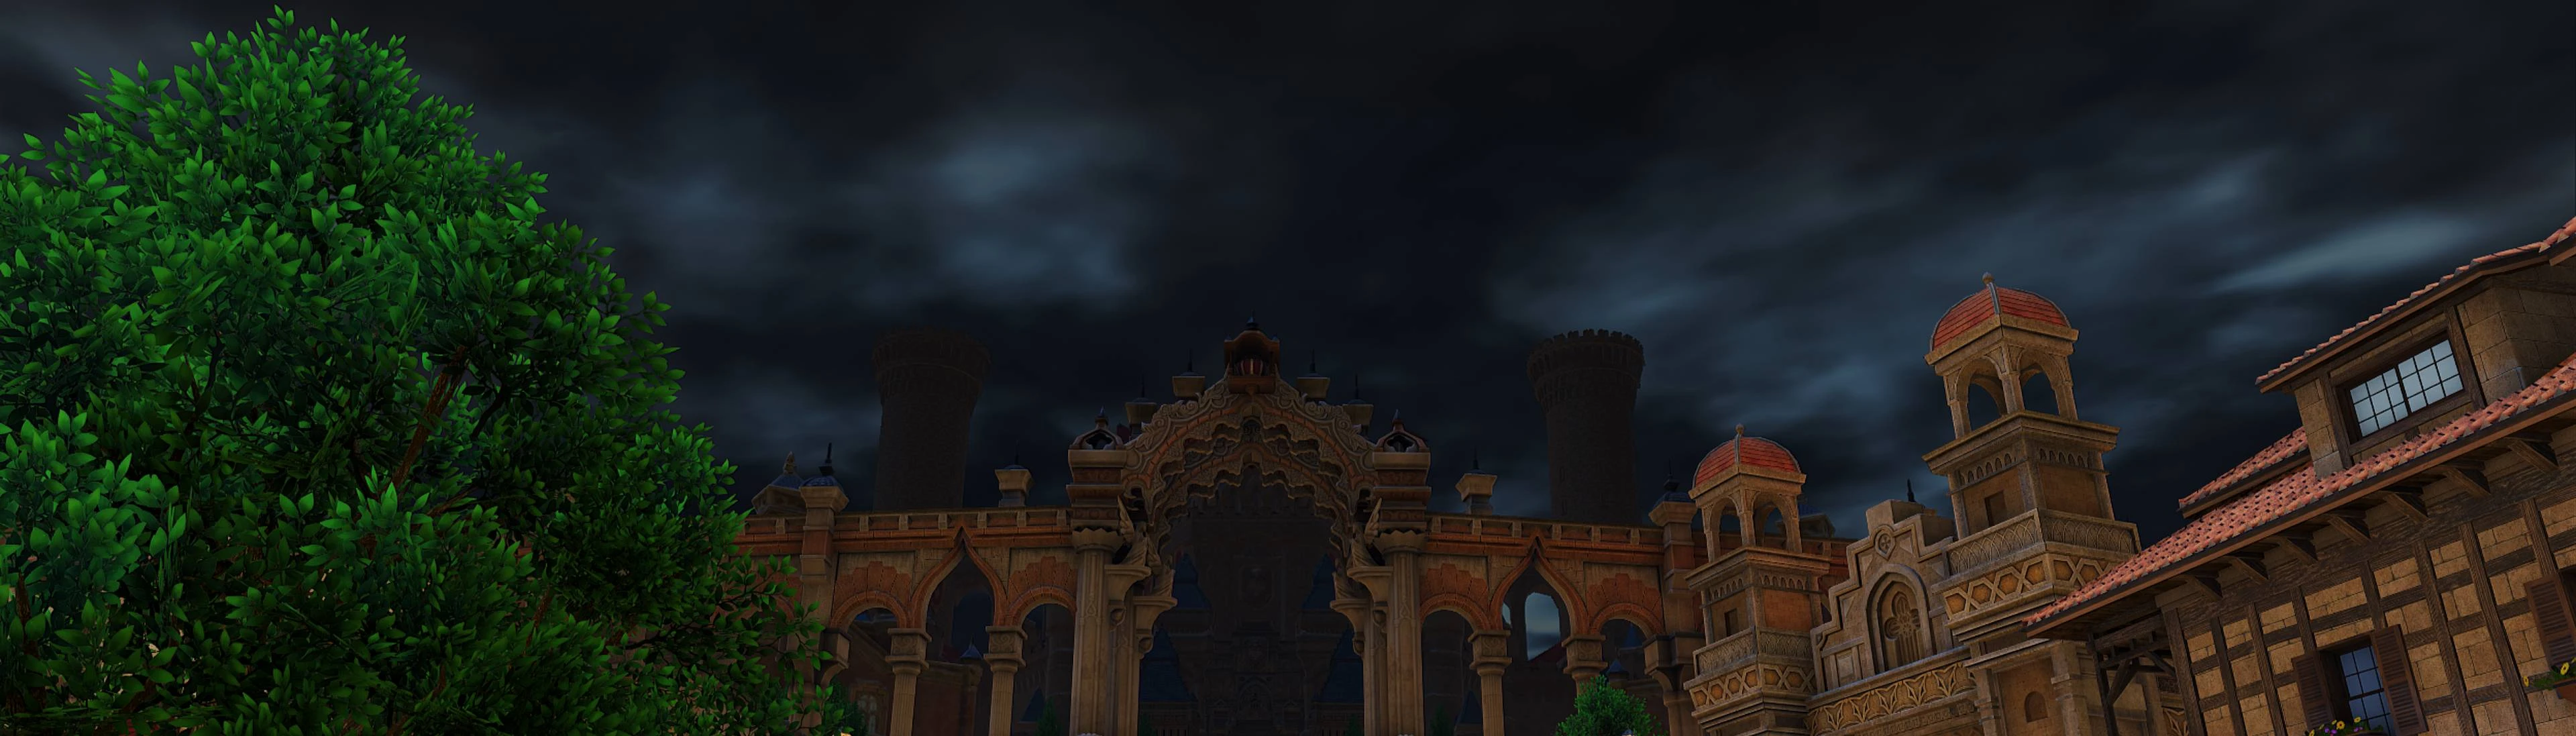
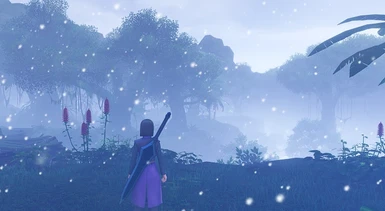
This mod is made to revamp and bring more variety to the weather present throughout the game. Weathers Revamp expands the weathers in each location. Tired of it being sunny all the time? If so, this mod is for you!
- Permissions and credits
This mod reassesses and redefines the weather identities all throughout the world of Erdrea, to bring a new collection of weathers to every area.
This project is intended to bring a variety of weathers together. Each area's weather identities will [mostly] remain the same. I want to stay true to the game as much as I can, but also expand and add some visual depth.
Many areas have different weathers; however, only one type is usually accessible during gameplay --- Sunny (sometimes rain). Other weather types are either unused or reserved only for cutscenes and events. My goal is to make all of these weathers accessible during gameplay.
Cutscenes should mostly remain the same.
If you see any errors, please let me know.
How to install:
1. Navigate to the game's paks folder: '...\DRAGON QUEST XI S\Game\Content\Paks'
2. Unzip the folder and its contents there.
3. Play and have fun!
Updates:
[16.09] Added support for Weather Cows. Currently English only. Download the patch. The Patch is not compatible with any other text altering mods in the file 'DT_TextDataGame'. Please request a compatibility patch for use with other mods.
Also, if anyone has any ideas on what the Y-Zones are, please let me know.
Changelist, thus far:
FieldsSpoiler:Show
[F01] Heliodor Region
- Map: Sunny, Middle Winds
- Sunny (100% -> 62%)
- Cloudy (0% -> 5%)
- Light Rain (0% -> 14%)
- Rain (0% -> 14%)
- Thunderstorm (0% -> 5%)
- Calm Winds (0% -> 29%)
- Weak Winds (38% -> 21%)
- Middle Winds (63% -> 36%)
- Strong Winds (0% -> 14%)
[F02] Heliodorian Foothills
- Map: Sunny, Middle Winds
- Sunny (82% -> 55%)
- Fog (18% -> 12%)
- Light Rain (0% -> 8%)
- Rain (0% -> 8%)
- Thunderstorm (0% -> 17%)
- Calm Winds (0% -> 33%)
- Weak Winds (40% -> 27%)
- Middle Winds (60% -> 40%)
[F03] The Manglegrove
- Map: Sunny, Weak Winds
- Sunny (67%)
- Fog (0% -> 5%)
- Light Rain (0% -> 4%)
- Rain (33% -> 21%)
- Thunderstorm (0% -> 3%)
- Calm Winds (0% -> 29%)
- Weak Winds (90% -> 63%)
- Middle Winds (10% -> 8%)
[F04] The Emerald Coast
- Map: Sunny, Weak Winds
- Sunny (91% -> 68%)
- Cloudy (0% -> 6%)
- Heavy Fog (0% -> 6%)
- Light Rain (0% -> 6%)
- Rain (9% -> 8%)
- Thunderstorm (0% -> 6%)
- Calm Winds (0% -> 6%)
- Weak Winds (100% -> 82%)
- Middle Winds (0% -> 6%)
- Strong Winds (0% -> 6%)
[F05] The Hotto Steppe
- Map: Sunny, Middle Winds
- Clear and Sunny (0% -> 8%)
- Sunny (100% -> 68%)
- Cloudy (0% -> 8%)
- Heavy Fog (0% -> 8%)
- Light Rain (0% -> 8%)
- Calm Winds (0% -> 8%)
- Weak Winds (0% -> 8%)
- Middle Winds (66%)
- Strong Winds (34% -> 18%)
[F06] Gallopolis Region
- Map: Sunny, Middle Winds
- Clear and Sunny (0% -> 9%)
- Sunny (100% -> 75%)
- Heavy Fog (0% -> 8%)
- Light Rain (0% -> 8%)
- Calm Winds (0% -> 8%)
- Weak Winds (<1% -> 8%)
- Middle Winds (70% -> 62%)
- Strong Winds (30% -> 22%)
[F07] Laguna di Gondolia
- Map: Sunny, Weak Winds
- Sunny (59% -> 46%)
- Cloudy (0% -> 4%)
- Fog (0% -> 6%)
- Rain (41% -> 34%)
- Heavy Rain (0% -> 6%)
- Thunderstorm (0% -> 4%)
- Weak Winds (80% -> 84%)
- Middle Winds (20% -> 16%)
[F08] Zwaardsrust Region
- Map: Sunny, Weak Winds
- Sunny (92% -> 62%)
- Cloudy (0% -> 11%)
- Rain (8% -> 16%)
- Thunderstorm (0% -> 11%)
- Weak Winds (57% -> 49%)
- Middle Winds (43% -> 51%)
[F10] Dundrasil Region
- Map: Sunny, Weak Winds
- Clear and Sunny (0% -> 19%)
- Sunny (70% -> 47%)
- Cloudy (0% -> 9%)
- Rain (5% -> 6%)
- Heavy Rain (0% -> 3%)
- Thunderstorm (0% -> 16%)
- Calm Winds (0% -> 31%)
- Weak Winds (100% -> 69%)
[F11] Costa Valor
- Map: Sunny, Weak Winds
- Sunny (100% -> 50%)
- Cloudy (0% -> 6%)
- Fog (0% -> 6%)
- Rain (0% -> 6%)
- Heavy Rain (0% -> 6%)
- Thunderstorm (0% -> 25%)
- Weak Winds (100%)
[F13] The Champs Sauvage
- Map: Sunny, Weak Winds
- Clear and Sunny (0% -> 5%)
- Sunny (84% -> 72%)
- Cloudy (0% -> 5%)
- Fog (8% -> 7%)
- Light Rain (0% -> 5%)
- Rain (8% -> 6%)
- Weak Winds (100%)
[F15] Sniflheim Region
- Map: Sunny, Middle Winds -> Clear and Sunny, Calm Winds
- Clear and Sunny (0% -> 44%)
- Sunny (69% -> 34%)
- Snow (31% -> 22%)
- Calm Winds (0% -> 56%)
- Middle Winds (100% -> 44%)
[F16] The Snaerfelt
- Map: Sunny, Middle Winds
- Clear and Sunny (0% -> 7%)
- Sunny (52% -> 36%)
- Cloudy (0% -> 9%)
- Heavy Fog (0% -> 7%)
- Snow (48% -> 24%)
- Snowstorm (0% -> 17%)
- Middle Winds (95% -> 78%)
- Strong Winds (5% -> 22%)
[F18] The First Forest
- Map: Sunny, Weak Winds
- (No Weather)
[F19] Mount Pang Lai
- Map: Sunny, Weak Winds
- Sunny (100% -> 65%)
- Cloudy (0% -> 5%)
- Fog (0% -> 5%)
- HeavyFog (0% -> 5%)
- Light Rain (0% -> 5%)
- Rain (0% -> 5%)
- Snow (0% -> 5%)
- Snowstorm (0% -> 5%)
- Weak Winds (71%)
- Middle Winds (29%)
[F20] The Arborian Highlands
- Map: Sunny, Weak Winds + Cloudy, Calm Winds
- Clear and Sunny (0% -> 10%)
- Sunny (100% -> 47%)
- Cloudy (0% -> 20%)
- Light Rain (0% -> 7%)
- Rain (0% -> 10%)
- Thunderstorm (0% -> 7%)
- Calm Winds (0% -> 60%)
- Middle Winds (100% -> 40%)
[F51] The Manglegrove Whale Way Station
- Map: Sunny, Middle Winds -> Rain, Middle Winds
- (No Weather)
[F52] Gallopolis Whale Way Station
- Map: Sunny, Middle Winds
- (No Weather)
[F53] Laguna di Gondolia Whale Way Station
- Map: Sunny, Middle Winds -> Light Rain, Middle Winds
- (No Weather)
[F54] The First Forest Whale Way Station
- Map: Sunny, Weak Winds
- (No Weather)
[F55] The Lost Land
- Map: Sunny, Weak Winds -> Clear and Sunny, Calm Winds
- Clear and Sunny (0% -> 60%)
- Sunny (0% -> 20%)
- Cloudy (0% -> 10%)
- Light Rain (0% -> 10%)
- Calm Winds (0% -> 65%)
- Weak Winds (0% -> 35%)
[F56] Zwaardsrust Whale Way Station
- Map: Sunny, Weak Winds -> Cloudy, Weak Winds
- (No Weather)
[F57] Mount Huji Whale Way Station
- Map: Sunny, Middle Winds -> Heavy Fog, Middle Winds
- (No Weather)
[F58] The Hotto Steppe Whale Way Station
- Map: Sunny, Middle Winds
- (No Weather)
[F59] The Champs Sauvage Whale Way Station
- Map: Sunny, Weak Winds -> Cloudy, Weak Winds
- (No Weather)
[F60] Sniflheim Whale Way Station
- Map: Snow, Middle Winds
- (No Weather)
[F77] Insula Incognita
- Map: Sunny, Middle Winds
- (No Weather)
[F78] Insula Borealis
- Map: Sunny, Weak Winds
- (No Weather)
[F79] Insula Orientalis
- Map: Sunny, Weak Winds -> Light Rain, Weak Winds
- (No Weather)
[F80] Insula Occidentallis
- Map: Sunny, Weak Winds
- (No Weather)
[F81] Insula Australis
- Map: Sunny, Weak Winds
- (No Weather)
[F82] Insula Algarum
- Map: Sunny, Weak Winds -> Fog, Weak Winds
- (No Weather)
[F83] Insula Centralis
- Map: Sunny, Weak Winds
- (No Weather)
[F91] The Ocean
- Map: Sunny, Strong Winds -> Sunny, Weak Winds
- Sunny (33%)
- Cloudy (0% -> 17%)
- Rain (33% -> 17%)
- Heavy Rain (0% -> 8%)
- Thunderstorm (0% -> 8%)
- Snow (33% -> 17%)
- Calm Winds (0% -> 8%)
- Weak (33% -> 42%)
- Middle (33% -> 17%)
- Strong (33%)
[F93] The Sky
- Map: Sunny, Calm Winds -> Clear and Sunny, Calm Winds
- Clear and Sunny (0% -> 50%)
- Sunny (0% -> 20%)
- Cloudy (0% -> 20%)
- Light Rain (0% -> 20%)
- Thunderstorm (0% -> 20%)
- Snowstorm (0% -> 20%)
- Calm Winds (0% -> 100%)
TownsSpoiler:Show
[M01] Cobblestone
- Map: Sunny, Weak Winds + Sunny, Middle Winds -> Sunny, Strong Winds + Sunny, Calm Winds
- Clear and Sunny (0% -> 25%)
- Sunny (100% -> 58%)
- Rain (0% -> 17%)
- Calm Winds (50%)
- Strong Winds (50%)
[M02] Heliodor
- Map: Sunny, Weak Winds
- (No Weather)
[M03] Hotto
- Map: Sunny, Middle Winds
- (No Weather)
[M04] Gondolia
- Map: Sunny, Weak Winds
- (No Weather)
[M06] Octagonia
- Map: Sunny, Calm Winds
- (No Weather)
[M07] Puerto Valor
- Map: Sunny, Weak Winds
- (No Weather)
[M08] Lonalulu
- Map: Sunny, Middle Winds
- (No Weather)
[M09] Nautica
- Map: Sunny, Calm Winds
- (No Weather)
[M11] Phnom Nonh
- Map: Sunny, Weak Winds
- (No Weather)
[M12] Angri-La
- Map: Sunny, Weak Winds
- (No Weather)
[M13] Arboria
- Map: Sunny, Weak Winds -> Sunny, Calm Winds
- Clear Sunny (0% -> 14%)
- Sunny (100% -> 50%)
- Cloudy (0% -> 6%)
- Light Rain (0% -> 6%)
- Rain (0% -> 8%)
- Thunderstorm (0% -> 16%)
- Calm Winds (100%)
[M14] The Haven's Above
- Map: Sunny, Middle Winds
- (No Weather)
CastlesSpoiler:Show
[C01] Heliodor
- Map: Sunny, Weak Winds + Sunny, Calm Winds -> Sunny, Calm Winds + Clear and Sunny, Calm Winds
- Clear and Sunny (0% -> 10%)
- Sunny (100% -> 50%)
- Cloudy (0% -> 20%)
- Fog (0% -> 5%)
- Heavy Fog (0% -> 5%)
- Light Rain (0% -> 5%)
- Thunderstorm (0% -> 5%)
- Calm Winds (100%)
[C02] Gallopolis
- Map: Sunny, Weak Winds + Sunny, Calm Winds
- Clear and Sunny (0% -> 18%)
- Sunny (100% -> 66%)
- Cloudy (0% -> 8%)
- Heavy Fog (0% -> 8%)
- Calm Winds (0% -> 50%)
- Weak Winds (100% -> 50%)
[C04] Sniflheim
- Map: Snow, Weak Winds + Sunny, Calm Winds -> Snow, Weak Winds + Heavy Fog, Calm Winds
- Sunny (100% -> 21%)
- Cloudy (0% -> 10%)
- Heavy Fog (0% -> 22%)
- Snow (0% -> 29%)
- Snowstorm (0% -> 18%)
- Calm Winds (50% -> 61%)
- Weak Winds (50% -> 21%)
- Strong Winds (0% -> 18%)
[C05] Dundrasil
- Map: Sunny, Calm Winds
- Sunny (100% -> 34%)
- Cloudy (0% -> 11%)
- Heavy Rain (0% -> 22%)
- Thunderstorm (0% -> 33%)
- Calm Winds (100% -> 67%)
- Weak Winds (0% -> 33%)
DungeonsSpoiler:Show
[D01] Cobblestone Tor
- Map: Sunny, Weak Winds
- Clear and Sunny (0% -> 13%)
- Sunny (100% -> 50%)
- Cloudy (0% -> 6%)
- Heavy Fog (0% -> 13%)
- Rain (0% -> 13%)
- Thunderstorm (0% -> 6%)
- Calm Winds (0% -> 25%)
- Weak Winds (100% -> 75%)
[D02] Heliodor Sewers
- Map: Sunny, Calm Winds -> Clear and Sunny, Calm Winds + Sunny, Calm Winds
- Clear and Sunny (0% -> 38%)
- Sunny (100% -> 38%)
- Cloudy (0% -> 24%)
- Calm Winds (0% -> 50%)
- Weak Winds (100% -> 50%)
[D03] The Kingsbarrow
- Map: Sunny, Weak Winds
- (No Weather)
[D04] The Cryptic Crypt
- Map: Sunny, Calm Winds
- (No Weather)
[D05] Grotta della Fonte
- Map: Sunny, Weak Winds -> Light Rain, Weak Winds
- (No Weather)
[D07] Caverns Under Octagonia
- Map: Sunny, Calm Winds
- (No Weather)
[D08] The Eerie Eyrie
- Map: Sunny, Middle Winds
- (No Weather)
[D09] The Other Side
- (No Map)
- (No Weather)
[D11] The Hekswood
- Map: Snow, Middle Winds
- Sunny (50% -> 27%)
- Snow (50% -> 37%)
- Snowstorm (0% -> 36%)
- Calm Winds (0% -> 23%)
- Weak Winds (50% -> 20%)
- Middle Winds (50% -> 40%)
- Strong Winds (0% -> 17%)
[D12] The Royal Library
- Map: Sunny, Calm Winds
- (No Weather)
[D14] Gyldenhal
- Map: Sunny, Calm Winds
- (No Weather)
[D15] The Battleground
- Map: Sunny, Middle Winds -> Light Rain, Middle Winds
- (No Weather)
[D16] Mount Huji
- Map: Sunny, Middle Winds
- (No Weather)
[D17] Fortress of Fear
- Map: Cloudy, Calm Winds -> Snow, Calm Winds
- Clear and Sunny (0% -> 10%)
- Sunny (100% -> 50%)
- Cloudy (0% -> 10%)
- Fog (0% -> 10%)
- Heavy Fog (0% -> 10%)
- Snow (0% -> 10%)
- Calm Winds (100%)
[D20] The Rock of Wrong
- Map: Sunny, Calm Winds
- Clear and Sunny (0% -> 10%)
- Sunny (100% -> 50%)
- Cloudy (0% -> 10%)
- Fog (0% -> 10%)
- Heavy Fog (0% -> 10%)
- Thunderstorm (0% -> 10%)
- Calm Winds (100%)
[D90] Drustan's Labyrinth
- Map: Sunny, Calm Winds
- (No Weather)
Special ZonesSpoiler:Show
[S01] Heliodor Dungeons
- Map: Sunny, Calm Winds
- (No Weather)
[S07] Ruins of Dundrasil
- Map: Sunny, Weak Winds -> Sunny, Weak Winds + Clear and Sunny, Weak Winds
- Clear and Sunny (0% -> 20%)
- Sunny (100% -> 40%)
- Rain (0% -> 30%)
- Thunderstorm (0% -> 10%)
- Calm Winds (50% -> 60%)
- Weak Winds (50% -> 40%)
[S09] The Strand
- Map: Sunny, Calm
- Clear and Sunny (0% -> 17%)
- Sunny (0% -> 49%)
- Cloudy (0% -> 17%)
- Heavy Fog (0% -> 17%)
- Calm Winds (0% -> 49%)
- Weak Winds (0% -> 17%)
- Middle Winds (0% -> 17%)
- Strong Winds (0% -> 17%)
[S10] Saikiki Beach
- Map: Sunny, Middle Winds
- (No Weather)
[S11] L'Acadamie
- Map: Sunny, Weak Winds
- (No Weather)
[S14] The World Tree
- Map: Sunny, Weak Winds
- (No Weather)
[S17] Summit Shrine
- Map: Snow, Strong
- Sunny (0% -> 23%)
- Cloudy (0% -> 13%)
- Heavy Fog (0% -> 13%)
- Snow (100% -> 38%)
- Snowstorm (0% -> 13%)
- Calm Winds (0% -> 25%)
- Weak Winds (0% -> 25%)
- Middle Winds (0% -> 12%)
- Strong Winds (100% -> 38%)
[S18] Grandmaster Pang's Void
- Map: Sunny, Calm -> Cloudy, Calm
- Sunny (100%)
- Calm Winds (100%)
[S19] Dundrasil Dungeons
- Map: Sunny, Calm Winds
- (No Weather)
[S22] Luminary's Landing
- Map: Sunny, Middle Winds
- (No Weather)
[S25] The Crucible
- Map: Cloudy, Middle Winds
- Cloudy (100% -> 70%)
- Thunderstorm (0% -> 30%)
- Weak Winds (100% -> 60%)
- Middle Winds (0% -> 20%)
- Strong Winds (0% -> 20%)
[S26] Tower of Lost Time
- Map: Sunny, Calm Winds
- (No Weather)
[S27] Seer's Sanctuary
- Map: Sunny, Strong Winds
- (No Weather)
[S28] Gallopolis Racetrack
- Map: Sunny, Weak Winds
- (No Weather)
[S30] Seer's White Void
- Map: Sunny, Calm Winds
- (No Weather)
[S31] Puerto Valor Casino
- (No Map)
- (No Weather)
[S35] Limboo
- Map: Sunny, Calm Winds -> Cloudy, Calm Winds
- Sunny (100%)
- Calm Winds (100%)
[S36] White Void
- Map: Sunny, Calm Winds
- (No Weather)
Y ZonesSpoiler:Show
[Y01-Y37]
???? : Need more information.
WellsSpoiler:Show
[Ido] Dundrasil Region Well
- Map: Sunny, Calm
- (No Weather)
World MapsSpoiler:Show
[Z01] The World (Act 1)
[Z02] The World (Act 2)
[Z91] The Ocean
EventsSpoiler:Show
(WIP)
[A030] Adventures with Erik
- [F03] The Manglegrove
- *Removed forced Sunny after Yggdrasil's vision until bridge is restored.
[A110] The Truth of Tragedy
- [S07] Dundrasil
[A150] The Sad Tale of the Sighing Siren
- [M08] Lonalulu
- [S10] The Strand
[A170] A C-C-Cold Kingdom
- [121] Catching Krystalinda
- [C04] Sniflheim
- [D11] The Hekswood
[S022] In Search of Hope
- [F07] Laguna di Gondolia
[B010] How the Mighty Are Sunken
- [050] The Smallest Spark of Hope
[B020] Hope Rekindled
- [M01] Last Bastion
- [F01] Heliodor Region
[B060] The Scourge of the Seven Seas
- [F91] The Ocean
[B080] Dreams of Despair
- [C05] Dundrasil
[B100] The Dragon's Lament
- [D16] Mount Huji
[B120] Onward and Upward
- [F20] The Arobrian Highlands
- [M13] Arboria
[C010] Making Up for Lost Time
- [C01] Heliodor
[C270] A Special Moment Atop the Tor
- [D01] Cobblestone Tor
Spoiler tags work now. Yay!