Your custom Hawkes in the Chargen, now with no manual editing or .mop required.
Permissions and credits
Credits and distribution permission
Other user's assetsAll the assets in this file belong to the author, or are from free-to-use modder's resources
Upload permissionYou are not allowed to upload this file to other sites under any circumstances
Modification permissionYou are allowed to modify my files and release bug fixes or improve on the features so long as you credit me as the original creator
Conversion permissionYou can convert this file to work with other games as long as you credit me as the creator of the file
Asset use permissionYou are allowed to use the assets in this file without permission as long as you credit me
Asset use permission in mods/files that are being soldYou are not allowed to use assets from this file in any mods/files that are being sold, for money, on Steam Workshop or other platforms
Asset use permission in mods/files that earn donation pointsYou must get permission to earn Donation Points for your mods if they use my assets
Author notes
Please don't reupload this tutorial to any forum or website. Just link it!
File credits
Pixel Sagas' Inquisition font BioWare & EA Me, for actually making myself sit down and type out a tutorial
Donation Points system
This mod is not opted-in to receive Donation Points
I originally this posted last year to an old Tumblr blog that's now defunct, and I figured this would fare better on Nexus—as well as being SEO friendly, permanent, and more visible than just a single post. I've also made significant updates!
Are you tired of seeing the default Hawkes in the class selection and in Varric's intro instead of your own?
Do you like long-winded tutorials that appear complicated but are actually really simple?
If you said yes to any of the above, then this is the tutorial for you!
Summary
This is a nifty "hack" that tricks the game into thinking that a custom .mor file is a .mop file—key word here is think. Unfortunately, you cannot convert a .mor into a .mop (although it's possible the other way around.)
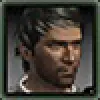
However, while your .mor cannot be edited in-game, all data—hairstyle, skintone, face shape, etc.—is completely intact and even the savegame icons generate perfectly (see below.)
Really, it's just a small trick to make customized Hawkes a little more accessible.
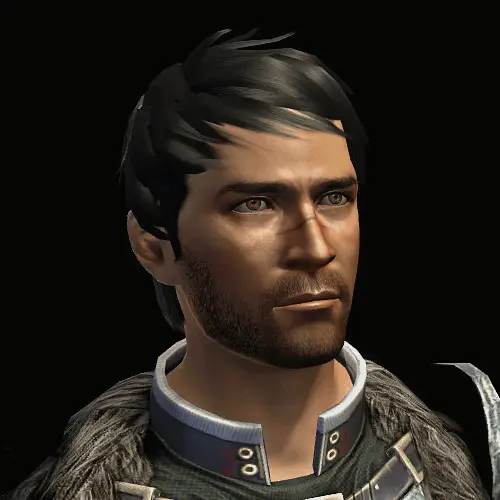
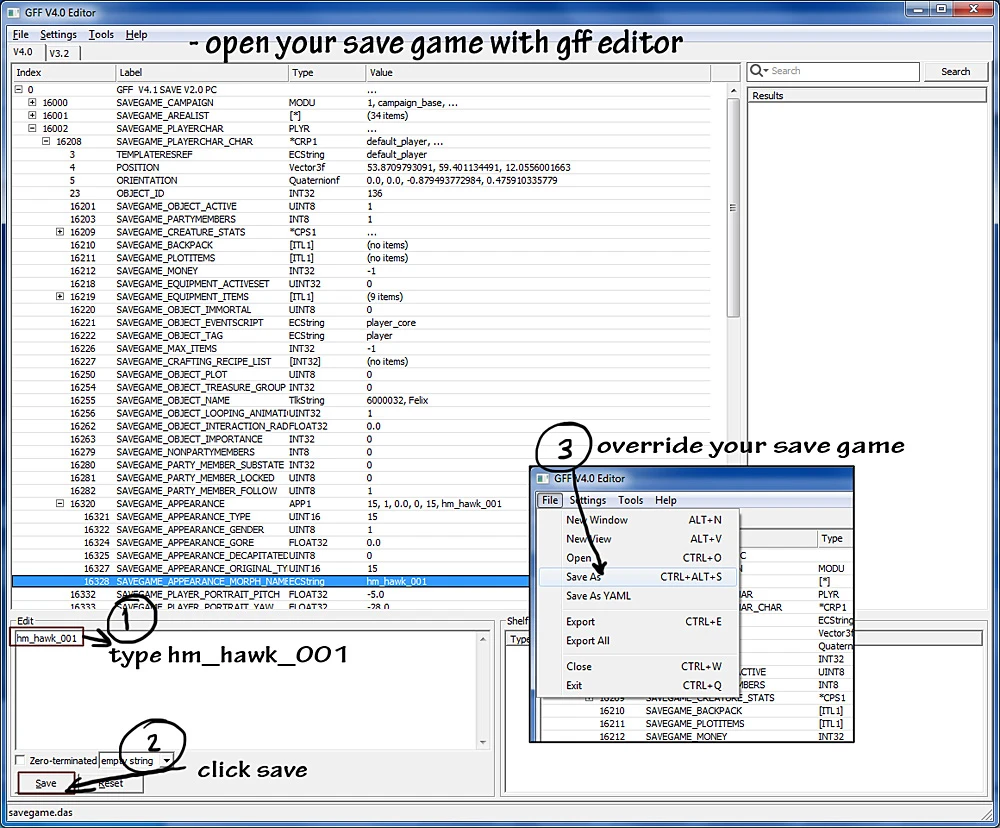
I’ve made a few edits out of game using the pyGFF editor, like adding a nose scar and changing the eye color from blue to the default amber.
When you're pleased with your .mor and are ready to get it into the game, rename the file to "hm_iconicmale.mor" or "hf_iconicfemale.mor" depending on your Hawke's gender.
The "hm" stands for human male, and the "hf" stands for human female. While that sounds like common sense, it's very important to make sure you did this step correctly!
Convert the "hm_iconicmale.mor" into an .erf file and place it into "...\packages\core\override\patch."
If you do not have a patch folder in your override, make it. I don't know why, but this pushes the game to definitely recognize it. Maybe something to do with a higher file hierarchy? Who knows. As long as it works!
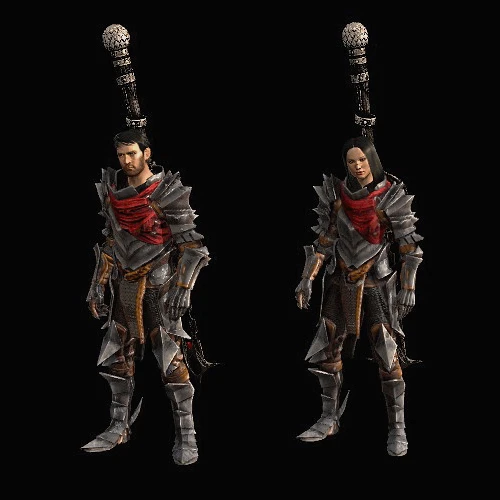
Open up the game, start a new savegame, and...there he is, alongside my custom Marian and featuring my mod of the Legacy DLC's Hawke's Key. What shameless promo?
Your Hawke will now show up in the class selection and exaggerated intro, but to get him or her into the Chargen, there's just a few more steps.
Exit the game without selecting a class.
Now place an intro skipper (see "Things You'll Need" above) into your override folder so you can skip right to the Chargen. This is completely optional but highly recommended; if you want to play out the intro to get to the Chargen, be my guest!
Open up your chargenmorphcfg.xml, and under the "Human Male" or "Human Female" categories, put <resource name=""/> right before </human_male> or </human_female> lines.
Now re-open the game, start a new savegame, select any class, and if you have an intro skipper, you'll be sent immediately to the Chargen. Select the last preset, and voilà! Your custom Hawke as a fake .mop.
Like I said previously, changing any values within Chargen will not work; even selecting a new hairstyle will cause the entire head morph to disappear completely.
Basically, as long as you have edited the "hm/f_iconicfe/male.mor" and have a blank Chargen line in, it’ll tell the game, uh oh, better use the default iconic .mor. And if that's been user replaced, the rest is history.
I've used this method for many, many playthroughs, and it's totally viable. No need to worry about suddenly walking around with a glitched Hawke as long as you follow these steps correctly.
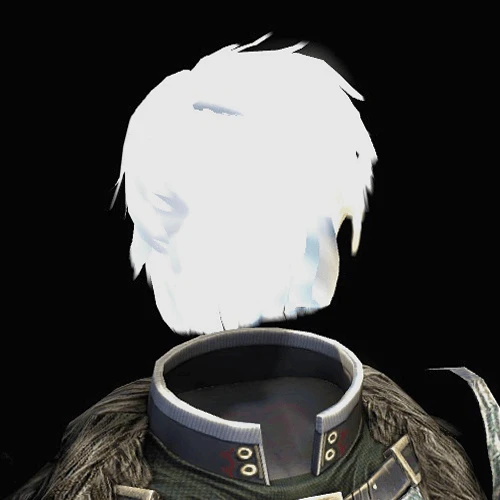
However, a word of warning: this method works perfectly in the starting Chargen, but for some odd reason, it absolutely refuses to cooperate with the Mirror at the Black Emporium.
If you try to use the mirror anytime mid-game, you’ll just get the previously seen Headless Horseman Hawke (say that three times fast.) The solution at that point is to use the Face Replacer, reload a save, or edit it manually just as before. But the entire tutorial is about avoiding that, so...
TL;DR don't use that damn mirror unless you really want to run around with white hair and no face. Seriously, it'll freak Merrill out.
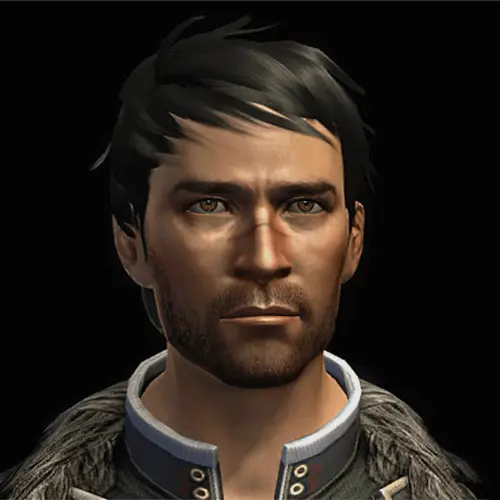
Oh! And before I forget, yes, your Hawke's portrait is 100% editable and appears correctly.
I didn't change the background or move him around in my test, but trust me. All the options are there!
I hope my rambling this tutorial is beneficial to someone; well, I actually hope that it makes sense. I haven't made many tutorials in the past (but want to make more for DA2), so if I've confused someone along the way, please don't hesitate to leave a message or comment. I'm more than happy to help!


