


0 of 0


About this mod
Restores several removed graphical effects from the game using the command console (such as Moving Helmet HUD, Player Shadow, Lens Flares, etc), along with a ReShade to improve the anti-aliasing and image color/clarity overall. Also enables the weapon wheel to pop and slow down time right when pressing the key, rather than a few seconds after.
- Requirements
- Permissions and credits
- Changelogs
Restored Graphical Effects/ReShade With RT/Speed Up Weapon Wheel Transition
I am spin1490 btw (lol)
Check Out The Doom Eternal/2016 Modding Discord For More Mods And To Help Development!
https://discord.gg/W9t4nZa
What This Mod Does: Restores several removed graphical effects from the game using the command console (such as Moving Helmet HUD, Player Shadow, Lens Flares, etc), along with a ReShade to improve the anti-aliasing and image color/clarity overall. Also enables the weapon wheel to pop and slow down time right when pressing the key, rather than a few seconds after.I am spin1490 btw (lol)
Check Out The Doom Eternal/2016 Modding Discord For More Mods And To Help Development!
https://discord.gg/W9t4nZa
1/30/2021 - There is an issue with the Moving HUD in the newest update where the player's hands and weapons are displayed over the HUD. It appears to be due to a change in the way the HUD and/or player is hardcoded into the game with respect to the camera and DOES NOT APPEAR TO BE ABLE TO BE FIXED. Similarly, the lense flares appear to have been completely removed from the game. I will keep them on here for posterity.
1/9/2021 - Updated the install method and added a new version of the Moving HUD Fix Low Warning Signs files to tweak the placement. Looking into fixing the 3D hud command showing behind the player weapon and lense flares not working.
5/27/2020 - Added a file to fix the placement of the LOW HEALTH and LOW AMMO warning signs when enabling the Moving HUD with hud_drawPerspective 1. If you prefer how they look at the bottom of the screen (without this fix) then do not download it.
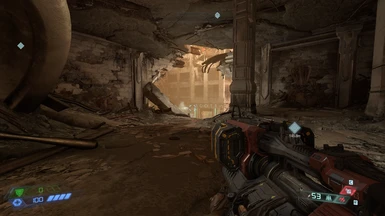
Graphical Effects (Some Examples): Shows it Off first (Game Default) and then On
Enable Moving HUD That Is Lined Up With Helmet:
There is an issue with this in the newest update where the player's hands and weapons are displayed over the HUD. It appears to be due to a change in the way the HUD and/or player is hardcoded into the game with respect to the camera and DOES NOT APPEAR TO BE ABLE TO BE FIXED. I will keep this on here for posterity.
Enable Anamorphic Lens Flares On Bright Objects (Bullets, Demon Energy Attacks, Demon Eyes, etc):
This appears to have been completely removed from the game's code and no longer functions. Keeping on here for posterity.
Enable Player Shadow (Including Self-Shadowing):
Enable A Small Cloud Of Dust To Kick-Up When Landing From A Jump:
Disable In-Game Blurry Anti-Aliasing And Use ReShade For A Clearer Picture With Better Anti-Aliasing:
I toggle between it being Off (At the start) and then switching it on.
Install And Customization Instructions (Including Weapon Wheel):
1. Follow all the install instructions here first to install the updated mod loader: https://www.nexusmods.com/doometernal/mods/19
2.Navigate to your Doom Eternal Base Folder
- - Note: This should be Steam\steamapps\common\DOOMEternal\base
3. Download the BASE cfg files.zip, extract it, and place the "custom.cfg" and "candidate.cfg" files into the base folder, replacing the ones that are already there
4. Open custom.cfg (Notepad++ recommended) and paste the command line for the effect you want into the file below the wait "300" line and save it
(I provide an example further below)
5. Choose the graphical effects you want from this list and customize them to your liking:
Disable anti-aliasing, as the games implementation of AA is TSAA, which puts heavy blurring and ghosting on translucent effects like particles, fire, smoke, etc, along with blurring the image in general:
r_antialiasing 0 NOT RECOMMENDED ANYMORE, Use the new anti-aliasing fix below
Fix anti-aliasing TAA so it keeps the temporal stability while not blurring/ghosting the image and transparency effects like particles and fire, RECOMMENDED (especially for my Particles 9000 mod):
r_TAATransparentsK 1 - This stops transparency effects like fire and particles from being affected by the TAA anti-aliasing (fixes ghosting on them)
r_TAABlendRatio 0.325 - This directly controls how much temporal stability the image has. The game default is 0.03, setting it higher lessens the blurring/ghosting on the image due to TAA but introduces more temporal instability. Recommended values are as follows:
0.1 for greatest temporal stability, but gives the most blurring/ghosting (still better than the game default)
0.21 for still-high temporal stability, still gives moderate blurring/ghosting
0.325 (my preferred) for medium-high temporal stability, completely eliminates ghosting/blurring
r_TAANumSubSamples 3 - This affects how much of an anti-aliasing effect is applied. Game default is 32.
Recommended values are as follows:
3 (my preferred) for a good combination of anti-aliasing and image clarity
4 for more anti-aliasing, but can introduce flickering of the image. Only recommended to use in combination with a value of 0.1 or 0.21 for r_TAABlendRatio above
Change the sharpness:
r_sharpening - This allows you to change the sharpening beyond what the game allows with the graphics setting
Change the film grain:
r_filmgrainratio - This allows you to change the film grain value beyond what the games allows with the graphics setting
Enable a dust cloud after landing from a jump:
p_showFootstepParticles 1
Enable a moving HUD that is lined up with helmet (issue with player model as stated above):
hud_drawPerspective 1
hud_drawPerspectiveAngle 19 - This controls how much of an angle the HUD is at. Game default is 25. I recommend sticking between 15 and 30.
- Download the Moving HUD Rune Fix file and put it in your "Mods" folder to fix the rune placement when enabled
- Added a file to fix the placement of the LOW HEALTH and LOW AMMO warning signs when enabling the Moving HUD with hud_drawPerspective 1. If you prefer how they look at the bottom of the screen (without this fix) then do not download it.
- Added an optional file to enable the Demon HUD in Battlemode to shake the same way the Slayer's HUD does in singleplayer when using hud_drawPerspective 1
- - Note: This does not work for the Mancubus and Revenant, it just makes their HUDs disappear for some reason.
When playing as them, disable it by pressing ~ (top right of keyboard), pasting hud_drawPerspective 0 in the console, pressing enter, and pressing ~ again to close the console before using them. You can re-enable it by following the same process, but with hud_drawPerspective 1
Enable the weapon wheel to pop up and slow time instantly:
weapon_OpenWeaponWheelDelay 0
weapon_SelectLastWeaponDelay 0
weaponWheel_slowTimeDelayMS 0
weaponWheel_slowTimeScale 0.05 - This controls how much time is slowed when the weapon wheel is open. The game default is 0.14, I have slowed it down by a bit more than half because I felt this was still too fast.
Enable anamorphic lens flare on bright objects (no longer working as stated above):
r_cineLensflaresEnabled 1
r_cineLensflaresAnamorphicIntensity 0.85 - This control how bright the flare is. Game default is 0.95, I have lowered it a bit.
r_cineLensflaresBlurMode 0
r_cineLensflaresAnamorphicWidth 0.125 - This controls how wide the lens flare is. Game default is 1.5, I have lowered it a bit.
r_cineLensflaresDirtRatio 0 - This adds simulated "dirt" to the screen when a bright light pops up. I think it looks bad so I disabled it, but you can set it anywhere from 0 to 1 to (0.55 for example) adjust the strength.
r_cineLensflaresGhostIntensity 0 - This adds random bits of light on the screen for bright objects. I think it looks bad so I disabled it, but you can set it anywhere from 0 to 1 (0.55 for example) to adjust the strength.
r_cineLensflaresHaloIntensity 0 - This adds a lens halo effect around bright objects. I think it looks bad so I disabled it, but you can set it anywhere from 0 to 1 (0.55 for example) to adjust the strength.
Enhance texture resolution and sharpness from a distance (very dramatic effect), 5 FPS loss:
r_textureLodBias -2 - Default is 0. Greatly increases the texture detail and sharpness of objects. All textures will now properly interact with light when farther away from the player (reflections, sun shimmers, specular, etc), fine textures such as cracks, trees, grass, metal grating, and other small lines and indents in materials (including player weapons) will be much more visible.
This can also be set to -1 for only a 1-2 fps loss, the effect will just be less pronounced at farther distances.
- - Note: Recommend turning down sharpness to avoid over-sharpening textures with this effect. I use 10 in game.
Enable player shadow (including self shadow):
g_showPlayerShadow 1
Set player shadow quality to max (no performance loss):
r_shadowPlayerLOD 0
Change the thickness of the fog in-game:
r_lightScatteringFarPlane - Default is 100. Lower it to help make the map more visible. Note, as you lower it, far light sources will stop casting light shafts, as there is not enough fog, and the light sources that stop casting shafts will move closer as you lower this value. For example, lets say there are 2 street lamps, one is 50 feet away from you and one is 100 feet away from you. At default (100), both lamps cast light shafts. At 75, the street lamp 100 feet away stops casting light shafts, but the one 50 feet away is still casting light shafts. At 50, both lamps stop casting light shafts. It's a trade off, removing fog makes the map clearer but increasingly stops light shafts from working.
Change the size of the damage numbers in Battlemode:
hud_advDamageNumberScaleNearDistance 5f - Default is 15f. I have lowered it as I thought they were too big.
Remove the damage numbers in Battlemode:
hud_damageNumberHideRender 1
Increase the quality of cloud textures in the sky:
r_cloudsQuality - Increase the quality of the cloud textures in the sky. Default is 0 for low. 1 = medium, 2 = high, 3 = very high. Big performance loss. An additional 10 FPS lost for every setting, so 3 loses roughly 30 FPS. 2 and 1 are not really worth it, as they provide little change with a big FPS loss. If your PC is strong enough, use 3. Go big or go home lol.
Greatly increases the distance at which dynamic marks (like bullet holes and blood) are visible. Minimal performance loss:
r_decalDynamicDistanceFadeStart 1200
Greatly increases the distance at which light sources are rendered and can influence objects (appropriate to their intensity). Minimal performance loss:
r_lightDistanceFadeMultiplier 10
Greatly increases the distance at which soft shadows are rendered on objects, so they don't fade out close to you. Minimal performance loss:
r_shadowLODProjectionSizeFactor 0.23 - Default is 0.08. Do not recommend going above 0.23 as it will make some shadows stop rendering all-together, and the effect seems to max out at 0.23 anyway. Had it set to 1 before, which was bad.
Increase the resolution of shadows cast by the sun, makes environmental shadows more realistic and the fade between low and high quality shadows less jarring. Roughly 10 FPS cost:
r_shadowatlastilesize 3072 - Can increase this up to 4096 for even more detailed shadows, but expect more of a performance hit
Force the game to dynamically cast shadows for all static objects and the environment, rather than use the pre-made shadow maps. Enables many more environmental objects to cast better shadows, but HUGE performance hit. Up to 50 FPS depending on the scene:
- - Note: Can cause terrible stuttering in levels. Use at your own risk. If stuttering occurs, disable the effect and reload the level.
r_shadowUseStaticGeometry 0
Never remove or fade out environmental details. Big visual impact with minimal performance loss:
r_decalFadeCulling 0
Force the game to always load the highest quality version of the assets, regardless of distance from them. Moderate visual impact, 3 to 7 FPS loss depending on the scene:
r_lodforce 0
Increase the quality of light scattered by fog. Minimal performance loss:
r_lightScatteringQuality 2
Greatly increase the distance at which effects like explosions and particles are rendered. Minimal performance loss:
g_fxDistanceCullingDistance 1000
Tone down the colors of the ammo, health, and armor drops farther than what the game allows you to:
r_pickupItemsSaturation 0.35 - Setting this to 0 in the game's menu options is the same as setting this value to 0.5. I have lowered it even further, as I felt the color of the drops was still too bright even with the game's built-in lowest setting.
Tone down the colors of the game, good for making the bright spots of lights less saturated and more realistic:
r_desaturate 0.05 - This is a percent. So setting it to 0.05 desaturates the game by 0.5%. Going all the way to 1 removes all color. I would not recommend going past 0.15
Game image compression quality. Default is 75%, this makes it 100%:
image_BCCompressionQuality 0
Game screenshot quality. Default is 75%, this makes it 100%:
image_screenshotQuality 100
Quality of radial blur. Default is Medium, this makes it Ultra:
r_blurRadialQuality 3
Quality of decal anisotropic filtering. Default is Medium, this makes it Ultra:
r_decalFilteringQuality 4
Quality of flares. Default is 75%, this makes it 100%:
r_flaresQuality 0
Make the shadows on the environment cast by the sun much more realistic (5 to 10 fps loss):
r_shadowNumAccurateSunSlices 2 - Can set this to 3 for even better sun shadow coverage, but expect another 10 to 12 FPS loss.
Skip the long intro videos when first starting the game:
+com_skipIntroVideo 1
You must paste this into the Steam Launch Options for it to work, not the .cfg.
Here is a guide, its easy: https://support.steampowered.com/kb_article.php?ref=1040-JWMT-2947
Increase the quality of the bloom. Default is 50%, this makes it 100%:
+r_fftBloomQuality 0
You must paste this into the Steam Launch Options for it to work, not the .cfg .
Here is a guide, its easy: https://support.steampowered.com/kb_article.php?ref=1040-JWMT-2947
Additionally, if you want to keep gore around longer like in the KEEP THE DEAD mod, you can also add its code to the end of all this too:
ai_death_FadeDelay 12000
g_breakablefloorsplatfromceiling 1
g_goresplatterdecaltime 200
destructible_alwaysallocate 1
destructible_performancereduction 0
sync_removeChainsawGoreTimeInSeconds 320
decal_maxdecalgroupingradius 8.81
decal_maxdecalsinradius 25
decal_drawgroup 1
r_decalLifetimeMultiplier 11
+r_woundManagerMaxVerts 8096 - You must paste this into the Steam Launch Options for it to work, not the .cfg
Here is a guide, its easy: https://support.steampowered.com/kb_article.php?ref=1040-JWMT-2947
Here is an example of what you would be seeing if you wanted to use most of what I have provided and include the KEEP THE DEAD mod's code too (this is what I use, along with the codes that must be entered into the Steam launch settings and entered manually at start):
cheatcodes_ignore_save_game_rules "1"
wait "300"
ai_death_FadeDelay 12000
g_breakablefloorsplatfromceiling 1
g_goresplatterdecaltime 200
destructible_alwaysallocate 1
destructible_performancereduction 0
sync_removeChainsawGoreTimeInSeconds 320
decal_maxdecalgroupingradius 8.81
decal_maxdecalsinradius 25
decal_drawgroup 1
r_decalLifetimeMultiplier 11
r_TAATransparentsK 1
r_TAABlendRatio 0.325
r_TAANumSubSamples 3
p_showFootstepParticles 1
hud_drawPerspective 1
hud_drawPerspectiveAngle 19
weapon_OpenWeaponWheelDelay 0
weapon_SelectLastWeaponDelay 0
weaponWheel_slowTimeDelayMS 0
weaponWheel_slowTimeScale 0.05
r_cineLensflaresEnabled 1
r_cineLensflaresAnamorphicIntensity 0.85
r_cineLensflaresBlurMode 0
r_cineLensflaresAnamorphicWidth 0.125
r_cineLensflaresDirtRatio 0
r_cineLensflaresGhostIntensity 0
r_cineLensflaresHaloIntensity 0
r_textureLodBias -2
r_shadowPlayerLOD 0
hud_advDamageNumberScaleNearDistance 10f
r_decalDynamicDistanceFadeStart 1200
r_lightDistanceFadeMultiplier 10
r_shadowLODProjectionSizeFactor 0.23
r_shadowatlastilesize 3072
r_decalFadeCulling 0
r_lodforce 0
r_lightScatteringQuality 2
g_fxDistanceCullingDistance 1000
r_pickupItemsSaturation 0.35
image_BCCompressionQuality 0
image_screenshotQuality 100
r_blurRadialQuality 3
r_decalFilteringQuality 4
r_flaresQuality 0
r_shadowNumAccurateSunSlices 2
g_breakableduration 70000
This setup (which is what I use) causes a roughly 10 FPS loss
6/7/8. Start the game however you normally would. I recommend making a back-up of your new DOOMEternalConfig.cfg as the game has a tendency of resetting it.
If you want to edit these effects in real-time in the game so you can see how they change/work, do the following:
A. Load into a map
B. Press the ~ key on your keyboard (top left of the keyboard normally). You should see a command console pop down where you can type something
C. Type or paste the command you want to edit. For example, if I wanted to change how much the weapon wheel slows time, I would type
weaponWheel_slowTimeScale 0.22 (replace 0.22 with whatever value you want to test)
D. Hit enter and the change should immediately work
E. Once you find a value that you like, go back to the DOOMEternalConfig.cfg, change the value of the effect you want, and save the file. Now the effect will always use that new value that you like.
The following is to enable ReShade to get better anti-aliasing and improve the image color/clarity (roughly 10 FPS loss):
My goal with the ReShade was to mostly keep the game's original style while providing more variance between the lights and darks in the image, thereby making it clearer.
9. Download ReShade: https://reshade.me/
10. Launch the installer
11. Click Enable/Disable Reshade in Vulkan globally. The installer should restart with that box now checked.
12. Click "Click here to select a game and manage its Reshade installation"
13. Give Reshade a few seconds to work, then choose Doom Eternal once it pops up
- - Note: if you do not see it, click "Browse" and go to where Doom Eternal is installed, then select DOOMEternalx64vk.exe
14. Go through the installation, making sure to check and download all the effects when they pop up.
15. Download my Reshade configuration
- - Note: This is based on the Carmack's Eternal ReShade preset by Vanguard1776 (https://www.nexusmods.com/doometernal/mods/4)
I include tweaked values for Pascal Glitcher's Ray-Tracing plugin to enable much better shadows.
You can find info on/buy the plug-in here (additional 30 to 40 fps loss for Ray Tracing): https://www.patreon.com/mcflypg
16. Extract the file
17. Navigate to your Doom Eternal install folder (the same place DOOMEternalx64vk.exe is)
18. Paste the files you extracted (Hell On Hell 2.0- NikkMann.ini and the reshade-shaders) into the install folder
- - Note: Merge with the existing reshade-shaders folder that's already there if it asks you to.
19. Launch your game and press the 'Home' key to go through the tutorial
20. Once you are done with the tutorial, restart your game
21. Press 'Home' to open Reshade again
22. Click on the drop down bar near the top and select my preset. It should now automatically activate whenever you start the game.
- - Note: The effects you should see in order are: RTGlobalIllumination, SMAA, ContrastAdaptiveSharpen, DPX, and Curves (with RTGlobal Illumination disabled). Do NOT change the load order, as it has been adjusted to minimize conflicts and possible artifacting/temporal destabilization.
If the cost of the base ReShade is too much for you system, you can disable SMAA and ContrastAdaptiveSharpen by un-ticking the boxes next to them. This will bring back roughly 7 FPS. You will have slightly reduced image clarity, but the color correction from the ReShade will still be applied. This will make the cost of the ReShade only 2-3 FPS.
To enable Ray-Tracing, after you have bought and installed the plug-in, just tick the box next to RTGlobalIllumination.
If the game is too dark when you enable the ReShade, go into the games video options menu and turn the Gamma setting up 1 or 2 notches.
Use this ReShade along with the the r_desaturate 0.05 command for more realistic coloring/saturation, and the anti-aliasing fixes above for a much clearer image.
Check out my other mods:
PARTICLES 9000 - Adds and bolsters particle effects on player weapons and explosions: https://www.nexusmods.com/doometernal/mods/12
KEEP THE DEAD - Keeps all enemy corpses, blood pools, and guts for much longer. Made in collaboration with Knightmare077:
https://www.nexusmods.com/doometernal/mods/1
DeLighter - Makes enemy and weapon lighting much more realistic:
https://www.nexusmods.com/doometernal/mods/5
Remove Red Screen Color And LOW HEALTH Text When At Low Health:
https://www.nexusmods.com/doometernal/mods/13?tab=description
Change Multiplayer Hit/Damage Sound - Battlemode hit sounds don't use the sound selected in the audio menu. This fixes that:
https://www.nexusmods.com/doometernal/mods/20
Rip And Tear